
Hardware Reference Guide HP ProOne 400 G1 All-in-One
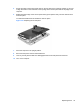
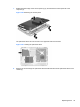


7. Rotate the bottom edge of the access panel up (2), and then lift the access panel off of the
computer (3).
Figure 2-42 Removing the access panel
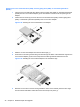
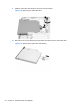
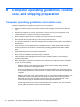
The optical disc drive can now be seen in the upper left side of the chassis.
Figure 2-43 Locating the optical disc drive
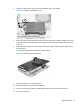
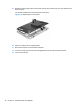
8. Remove the screw through the optical disc drive bracket that secures the optical disc drive to the
chassis (1).
Replacing drives 39