Getting Help
The information in this document is subject to change without notice. Hewlett-Packard® Company makes no warranty of any kind with regard to this material, including, but not limited to, the implied warranties of merchantability and fitness for a particular purpose. HP shall not be liable for errors contained herein or for incidental or consequential damages in connection with the furnishing, performance, or use of this material.
Contents Chapter 1 Finding Information and Solving Problems ..............................................1 Chapter 2 Troubleshooting.........................9 Where to Go for Help...........................................................................................2 Answering Machine..............................................................................................13 Getting Help from the HP Support Center............................................... 3 CD-ROM.........................
Chapter 3 Upgrading and Servicing Your Computer ............................................... 27 Connecting External Components ............................................................28 Removing the Computer Covers and Other Components ...........35 Replacing the Battery.........................................................................................41 Adding Memory...................................................................................................42 Installing Add-in Cards....
1 Finding Information and Solving Problems Chapter 1 covers the following topics: • Where to go for help • Getting help from the HP Support Center • Using system tools • Getting help from the Internet • Restoring your software • Calling HP support Chapter 1 • Finding Information and Solving Problems 1
Where to Go for Help Hewlett-Packard offers a number of support solutions for HP Pavilion PC owners, and this guide describes each of these options. • Personal Guide If you are having trouble with Microsoft® Windows®, try running the tutorials in Personal Guide. See “Learning About the Windows Desktop” in the Getting Started guide. You can also use the Windows Help system by choosing the Help option on the Start menu.
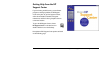
Getting Help from the HP Support Center If you are having trouble learning a new software program or solving a problem, the HP Support Center is the place to go. Your support contacts, online documentation, tutorials, and system maintenance tools have been grouped in this one convenient location. To go to the HP Support Center, choose HP Support Center on the Start menu or double-click the icon on the desktop. Descriptions of HP Support Center options are listed on the following page.
HP Support Center Options Software Help Each software package shipped with your computer is listed here, along with its manual (if there is one), online Help, and a support phone number. Hardware Help Information on hardware components (such as your keyboard) is located here. HP Pavilion Library Online manuals are found here. Software manuals (also found under Software Help) are found here as well.
HP Utilities in the HP Support Center Virus Protection If your system is infected with a virus, it can display any number of symptoms. When in doubt, run this utility, especially if you download software from the Internet or use shareware. HP Pavilion Recovery CDs Before you got your computer, HP did a backup of your entire system. The backup CDs are included with your system in case you need to restore any software that was originally on your computer.
Restoring Your Software If your software accidentally gets erased or corrupted, you can reinstall the software. You may need to reinstall all the software on your hard disk or just certain applications. These two recovery methods are: • System Recovery – Performs a full recovery with or without completely reformatting your hard disk. It reinstalls all application programs included with your HP Pavilion PC. • Application Recovery – Allows you to select the applications or drivers to be recovered.
3 When the Recovery Options screen appears, choose Recover. 4 In the Select a Recovery Option screen, do one of the following: • Click the Format & Recover button to erase your hard disk and reinstall the original HP Pavilion PC software. • Click the Recover Only button to reinstall the original software without erasing the hard disk. 5 Click Yes to proceed. 6 When the recovery is complete, remove the System Recovery CD. 7 Click OK to restart the computer.
8 Repeat steps 5—7 until you have recovered all the desired applications and drivers. 9 When you are finished restoring applications, remove the Application Recovery CD, and click Restart to restart the computer. Warning: Do not skip this last step! You must restart the computer when you are finished recovering applications. 8 Getting Help Calling HP Support If you need further support or your computer is completely nonfunctional, call the HP Customer Care Center.
2 Troubleshooting Chapter 2 covers the following topics: • Solving general computer problems • Solving problems with specific components • Solving Windows desktop problems Chapter 2 • Troubleshooting 9
General Problems My computer won’t turn on at all. • When you press the On button on the front of your computer, the following events should happen: 1 The keyboard indicator lights should flash. 2 The light next to the 3.5-inch disk drive should flash. 3 You should hear the hard disk spin or the diskette drive make a noise. 4 You should hear one beep; one beep indicates that your computer is operating properly.
1 Press the On button to turn off the computer. A “General Protection Fault” error occurred. 2 Wait a few seconds, and turn the computer This error usually occurs when a program has corrupted your random access memory (RAM) resources. In some circumstances, you can close the message box and continue working. However, the environment may be unstable, causing additional errors to occur. If this happens, you can recover as follows: back on.
A “Non-System Disk” error occurred. If you have a diskette in the drive, remove the diskette, and then press any key to continue. I need more space on my hard disk. • Run a hard disk space check to find out exactly how much space you have. See “Using System Tools” on page 4. • You can defragment your hard disk. That is, you can rearrange your current files so that they are packed in together and any little storage spaces between them are removed to make empty space on the hard disk. Results will vary.
I think my computer has a virus. A virus check is run automatically when you start the computer. However, you can run a more thorough check by using your system tools. See “Using System Tools” on page 4. Note: New types of viruses are invented all the time. Be sure to get regular updates of your virus scanning software from the software manufacturer so that you will be able to check for these new viruses. Answering Machine The computer’s answering machine never answers the phone.
The computer’s answering machine grabs calls before I can answer the phone. • Increase the number of rings before Intel Connect automatically answers: 1 From the Intel Connect main window, click Setup. 2 Click Ringing. 3 Enter a higher number in the Auto-answer ring count box. • Make sure that the DND (Do Not Disturb) button is not lit on the Intel Connect main window. If it is, click the DND button to disable the Do Not Disturb feature. I can’t hear messages as they are left.
I can’t hear phone messages when I play them back. CD-ROM Make the following adjustments: The message “System Error: Unable to read drive” appears when I try to run a CD program. • Make sure that the mute feature is not on. Press the keyboard Mute button until Mute Off appears on the screen. • Make sure that the CD is placed into the drive with the label side up. • Turn up the Volume knob on the keyboard. • Adjust the Sound Mixer volume: 1 Double-click the Volume icon on the taskbar.
Display My display doesn’t work, even though the computer appears to work. • Make sure that the power cord is securely plugged into the display. • Make sure that the display is turned on – it has its own power button. • Make sure that your power cord is plugged into a grounded three-prong outlet. Check to see whether the outlet works by plugging another item (such as a lamp) into the outlet. (If the light on the front of the display is lit, it is getting power. Try the next item on this list.
The message “Invalid phone number” appears when I use the Address Book. You need to include the area code in the Properties Description in the Address Book Manager window. Incoming faxes are not picked up automatically. 1 Click Setup on the Intel Connect main window. 2 Click Answering. 3 Choose either Answer as a voice mail system or The message “Check error log” appears in the status window. Make the following adjustments: 1 Click Setup on the Intel Connect main window. 2 Click Error Log.
The Address Book dials the person’s business phone instead of the home phone (and vice versa). In the Address Book window: 1 Click Other Number. 2 Choose Home Phone or Business Phone. Keyboard My keyboard doesn’t work, even though the computer and display seem to work. • If the PC beeps repeatedly or if nothing happens when you press keys, it’s possible that the keyboard is connected improperly. Make sure that the keyboard is connected to the keyboard port, not the mouse port.
When I push one of the special buttons (such as Internet) on the keyboard, nothing happens. 9 Select an application from the list, or click The button may be disabled. To reconfigure the button: 10 Click OK. 1 Click Start on the taskbar. Mouse 2 Select Settings. 3 Click Control Panel. 4 Double-click the Keyboard icon in Control Panel. 5 Click the Keyboard Manager tab. 6 Make sure the Enable Multimedia Buttons and Onscreen Display checkbox is selected. Browse to find an application yourself.
• Make sure that you are in the Windows desktop, not MS-DOS. (The MS-DOS interface is a plain screen with a prompt that looks like this: C:\>) If you are in MS-DOS, type EXIT and press the Enter key. • It’s possible that your system has crashed. Try rebooting your computer by pressing the On button, waiting a few seconds, and turning the computer back on. • Does the pointer move on the screen when you move your mouse? If not, try this: 1 Remove the mouse ball by unscrewing the bottom of the mouse.
• Make sure that you have the speakers connected properly. • The Volume knob affects all sound on your computer, but each input can be turned up or down individually by adjusting the sound/mixer settings. To adjust these settings, double-click the Volume icon on the taskbar. • Your audio system may be muted. Press the Mute button on the keyboard. If the message Mute Off appears, you just turned off the mute feature; your system should now produce sound.
The volume is either too loud or too soft. • Turn the Volume knob on the keyboard. • To set the sound on the phone only, double-click the Volume icon on the taskbar, choose the phone, and drag the volume bar upward or downward. Windows Desktop I’m having trouble understanding the Windows desktop. • You have Windows desktop tutorials on your computer. To access them: I can’t hear the other person clearly or at all. • Turn the Volume knob on the keyboard clockwise.
• The Pavilion Library in HP Support Center has online books that cover the Windows desktop. To view these books: 1 Double-click the HP Support Center icon on the desktop. 2 Click HP Pavilion Library. 3 Click Online Books. • The printed Microsoft book Introducing Microsoft Windows is included with your computer. My program window disappeared. Sometimes, when operating a program, you accidentally click outside the program work surface and switch to another program.
3 Turn off the Internet Explorer Channel Bar option. 4 Click OK. The icon titles on my desktop and in my folders are underlined. When an icon’s descriptive text is underlined, singleclick mode is active. • To remove the underlining, but leave single-click mode active: 1 Click Start on the taskbar. 2 Choose Settings and then Folder Options. 3 Click Custom and choose Settings. 4 Choose the Underline icon titles only when I point at them option. 5 Close the dialog boxes.
When I try to select a file name in My Computer or Windows Explorer, the document opens. The same is true for icons on my desktop. • You may have accidentally double-clicked the item instead of clicking it once. • Single-click mode may be active on your computer. To turn off single-click mode: 1 Click Start on the taskbar. 2 Choose Settings and then Folder Options. 3 Click Custom and choose Settings. My desktop has a toolbar that belongs in the taskbar.
26 Getting Help
3 Upgrading and Servicing Your Computer Chapter 3 covers the following topics: • Connecting external components • Removing computer covers and other components • Replacing the battery • Adding memory • Installing add-in cards • Adding drives • Replacing computer covers and other components • Using the BIOS Setup program Chapter 3 • Upgrading and Servicing Your Computer 27
Connecting External Components Mouse Keyboard Universal Serial Bus (USB) Serial Printer Display Composite Video Output S-Video Output Joystick Getting Help S-VIDEO OUT Headphone Speaker LINE 28 VIDEO OUT PHONE Phone Line SERIAL This illustration points out all the connections on the back of your computer. You may need to refer to this drawing in case you ever move your computer and need to reconnect the components, or if you purchase new accessories.
Connecting to a Stereo System Your computer can be connected to your stereo system for games or multimedia applications. First, you’ll need a cable that has a 3.5mm stereo plug on one end and two RCA plugs on the other end. (You can buy such a cable at most consumer electronics stores.) Then, connect any unused line-level input connector on the stereo system to the line output on the audio card (see illustration).
Creating Audio Files 3 Start your sound recording software, either Using your computer and sound-recording software, you can record from a CD or your stereo system and create a file on your hard disk. Microsoft Sound Recorder or Media Rack. To start the program: 1 If you want to record from your stereo system, • Choose Programs, Accessories, and then Entertainment. connect the stereo to the audio Line In at the back of your computer. 2 Go to Control Panel, and choose the Multimedia applet.
Connecting to a Television Set If your TV has either an S-video or a composite video connector, you can connect your PC to your television so that you can view your computer image on your TV (to watch DVD movies if you have a DVD drive, play games, and so forth). Determine which type of connector your TV has, and then refer to the appropriate drawing on the following pages. To view your computer image on your TV: 1 Turn off your computer. 2 Connect the TV and computer as shown on pages 32 and 33.
Connecting the PC to Your TV (Composite Connection) TELEVISION BACK PANEL ON YOUR COMPUTER Composite Video Out VIDEO OUT S-VID EO OUT Video In VIDEO L VIDEO L R T VIDEO INPU AUX MONITOR OUT TV OUT AUDIO AUDIO R UT VIDEO OUTP R ERTE TO CONV VHF/UHF IN T OU Audio Line In (L) 32 Getting Help Audio Line In (R) Audio Out Note: The cables shown are not provided with your system. You can purchase these cables at an electronics or computer store.
Connecting the PC to Your TV (S-Video Connection) TELEVISION BACK PANEL ON YOUR COMPUTER S-Video Out S-Video In VIDEO L AUDIO R T VIDEO INPU AUX VIDEO L MONITOR VIDEO OUT S-VID EO OUT OUT TV OUT AUDIO R UT VIDEO OUTP R ERTE TO CONV VHF/UHF Note: The cables shown are not provided with your system. You can purchase these cables at an electronics or computer store. The audio and video jacks on your TV may be in different locations than the ones shown in the illustration.
Connecting a Digital Camera Digital cameras are simple to connect, disconnect, and reconnect on your HP Pavilion PC. A Digital Camera Port is conveniently located right on the front of your computer. Digital Camera Port Note: Your system does not include a digital camera; it must be purchased separately. Note: The Digital Camera Port is a standard serial port to which any serial device can connect.
Removing the Computer Covers and Other Components Warning: The HP Pavilion PC is heavy; be sure to use ergonomically correct lifting procedures when moving the computer. Avertissement : L’ordinateur HP Pavilion est lourd ; Avertissement : Les décharges électrostatiques peuvent endommager les unités de disque, cartes d’expansion et autres composants.
Before You Begin Be sure to read the items below before you attempt to upgrade or service your computer. • These procedures assume familiarity with the general terminology associated with personal computers and with the safety practices and regulatory compliance required for using and modifying electronic equipment. • Set up an equipment log to record the system model and serial numbers, all installed options, and other information about the system.
Removing the Back Panel You will need to remove the back panel before you can access the inside of your computer or remove any of the other covers. To remove the back panel: B A C 1 Use a #2 Phillips screwdriver to remove the two screws on the back panel (A). 2 Grasping the back panel at (B) and (C), remove the back panel by lifting up and out.
Removing the Right Side Panel You’ll need to remove the right side panel in order to add memory, insert add-in cards, or change the battery. To remove the right side panel: 1 Make sure the back panel is removed. 2 Supporting the front edge of the panel, grasp the rear edge of the panel and pull toward the back of the computer. 3 Lift the side panel upward and out.
Removing the Left Side Panel The left side panel must be removed before installing new drives. To remove the left side panel: H 1 Use a #2 Phillips screwdriver to remove the two screws that fasten the left side panel to the back panel (H). 2 Supporting the front edge of the left side panel, grasp the rear edge of the panel and pull toward the back of the computer. H 3 Lift the left side panel upward and out.
Removing the Fan You may need to remove the fan to access removable components from the motherboard, to add a card in the top expansion slot, or to replace the fan. Note: The back panel and right side panel must be removed before beginning this procedure. 1 With one hand below the fan for support, gently pull the release mechanism on the top of the fan (AA). 2 Slide the fan toward you approximately .5-inch. 3 Remove the fan from the frame and place out of the way.
Replacing the Battery To replace the battery: A lithium battery on the motherboard provides backup power for the computer’s timekeeping capability. The battery has an estimated life expectancy of seven years. 1 Turn off the computer and all peripherals. When the battery starts to weaken, the date and time may be incorrect. If the battery fails, replace it with a CR2032 lithium battery (3 volt, 220mAH rating) or an equivalent battery.
10 Replace the right panel (see “Replacing the Right Side Panel” on page 56). 11 Replace the back panel (see “Replacing the Back Panel” on page 57). 12 Reconnect the power cord. 13 Reconnect the modem cable. Adding Memory Your motherboard contains two or three 168-pin DIMM sockets, depending on which model you have. A DIMM is a dual inline memory module. You can install these types of DIMMs in your system: • 16 MB • 32 MB 14 Turn on the computer.
All installed memory modules must be 168-pin unbuffered SDRAM (synchronous dynamic random access memory) DIMMs, and compliant with the Intel “PC SDRAM Unbuffered DIMM Specification Revision 1.0.” This specification covers both 66-MHz and 100-MHz SDRAM DIMMs. Refer to your HP Pavilion PC technical specifications on the HP online System Guide to determine whether 66-MHz or 100-MHz memory is required.
9 Holding the new DIMM by its edges only, remove it from its antistatic packaging. A DIMM has two small notches on the lower edge that fit into raised bumps in the DIMM socket. 10 Hold the DIMM perpendicular to the socket, aligning the notches with the bumps. 11 Push straight down on top of the DIMM until it is fully seated in the socket. The retaining clips on the ends of the socket will automatically lock into position when the DIMM is fully inserted.
Removing a DIMM To remove a DIMM: 7 Push down on the two retaining clips on the ends of the DIMM socket until the DIMM pops out of the socket. 1 Turn off the computer and all peripherals. 2 Disconnect the modem cable. 3 Disconnect the power cord. 4 Remove the back panel (see “Removing the Back Panel” on page 37). 5 Remove the right side panel (see “Removing the Right Side Panel” on page 38). 6 Lay the computer gently on its left side. Warning: Do not pull the DIMM out of the socket.
Installing Add-in Cards At some point, you may add an ISA or PCI card to your computer to accommodate a new component, such as a scanner, or you may want to upgrade an existing card. You will need a #2 Phillips screwdriver and a medium flat-blade screwdriver. You will also need any software (for example, drivers) supplied with the card. 46 Getting Help Warning: Do not overload the system by installing add-in cards that draw excessive current.
To add or replace an add-in card: 1 Install any drivers supplied by the card manufacturer. 2 Turn off the computer and all peripherals. 3 Disconnect the modem cable. 4 Disconnect the power cord. 5 Remove the back panel (see “Removing the Back Panel” on page 37). 6 Remove the right side panel (see “Removing the Right Side Panel” on page 38). A 7 If necessary, remove the fan (see “Removing the Fan” on page 40). 8 Remove the two screws (A) in the metal retaining plate.
9 Remove the retaining plate and put it aside. 10 If replacing a card, disconnect any cables attached to the card. Then, holding the card by its metal bracket and the far top corner of the card, carefully pull the card straight out of the slot. Continue with step 15. Note: If you’re adding a new card in a previously unused slot, you will need to remove the expansion slot cover as described in the following steps. 11 Remove any add-in boards that are next to the expansion slot cover you want to remove.
13 Insert the screwdriver into the area above the top edge of the expansion slot cover (C) and press down.
14 Reach inside the frame and remove the expansion slot cover (D). Warning: The expansion slot cover may have sharp edges. Avertissement : Faites attention aux bords aigus du couvercle de la fente d’expansion. 15 Insert the new card in the slot and push straight back. Make sure the card is properly seated. 16 Replace the retaining plate. 17 Reinstall the two screws in the metal retaining plate. 18 If necessary, replace the fan (see “Replacing the Fan” on page 54).
19 Replace the right side panel (see “Replacing the Right Side Panel” on page 56). 20 Replace the back panel (see “Replacing the Back Panel” on page 57). 21 Reconnect the power cord. 22 Reconnect the modem cable. 23 Turn on your computer. What Is Plug and Play? “Plug and Play” describes the ability to add and remove add-in cards, memory, and peripherals without any special procedures (like resetting jumpers and testing for system conflicts).
Adding Drives To install a 5.25-inch drive in bay 2: Your HP Pavilion PC has three drive bays: 1 Remove the back panel (see “Removing the Back • The top bay (bay 1) contains a DVD or CD-ROM drive. • Bay 2 is empty; it can accommodate a 5.25-inch drive. • Bay 3 contains the Digital Camera Port; it can also accommodate an internal 3.5-inch drive (such as a hard drive). Note: If the Digital Camera Port is removed, bay 3 can accommodate a 5.25-inch removable-media drive.
8 Attach the IDE ribbon cable to the back side of the drive and to the motherboard. 9 Replace the left side panel (see “Replacing the Left Side Panel” on page 55). 10 Replace the right side panel (see “Replacing the Right Side Panel” on page 56). 11 Replace the back panel (see “Replacing the Back Panel” on page 57). To install an internal 3.5-inch drive in bay 3: 1 Remove the back panel (see “Removing the Back Panel” on page 37).
Replacing Computer Covers and Other Components After you have finished changing the battery, adding memory, installing add-in cards, or adding drives, you will need to replace the computer cover(s) and other components you have removed. Replacing the Fan Note: The back panel and right side panel must be removed before beginning this procedure. 1 Align the four fan latches to the perforations in the frame (BB). 2 Slide the fan forward until the release mechanism snaps into place.
Replacing the Left Side Panel Note: The back and right side panels must be removed before beginning this procedure. To replace the left side panel: 1 Carefully lay the computer on its right side. H 2 Aligning the bottom latches of the left side panel to the frame, place the side panel flat against the frame. 3 At the back edge, push the left side panel toward H the front panel until it snaps in place. 4 Check the latches at the back edge of the right side panel to ensure that they are engaged.
Replacing the Right Side Panel Note: The back panel must be removed before beginning this procedure. To replace the right side panel: 1 Carefully lay the computer on its left side. G 2 Aligning the bottom latches (F) of the side panel to the frame, place the side panel flat against the frame. F 3 At the back edge, push the right side panel F toward the front panel until it snaps in place. 4 Check the latches at the back edge of the right F side panel (G) to ensure they are engaged.
Replacing the Back Panel To replace the back panel: 1 Align the bottom latches of the panel to the frame (C) and tilt forward. A 2 Press the top of the back panel to snap it into place. 3 Use a #2 Phillips screwdriver to replace the two screws on the back panel (A). 4 Reconnect the power connections. A 5 Reconnect the telecommunications links, networks, and modems.
Using the BIOS Setup Program The system BIOS (Basic Input Output System) on your computer has a built-in setup program that lets you control the special features of your computer. Configuration information stored in the BIOS includes the type of peripherals installed, the startup sequence of the computer, and control for power management. The battery maintains this information when the system is turned off.
Main Set up and modify basic options such as time, date, disk drives, and hard drives. Check the amount of system memory and extended memory here. Advanced Modify advanced features such as Plug and Play and memory settings. Configure your peripherals and check your CPU type and speed here.
5 To disable Auto Suspend, choose Disable. Or To enable Auto Suspend, choose Customized. To set the amount of time before your PC suspends automatically, choose the Auto Suspend Timeout option, press Enter, and then select a time (such as 10 minutes). 6 Press the F10 key on the keyboard to save the setting, then press Enter.
Index A add-in cards, installing, 46 adding memory, 42 Address Book problems, 17, 18 answering machine problems, 13 Application Recovery program, 7 applications. See software audio files, creating, 30 Auto Suspend feature, 59 B battery, replacing, 41 bays.
G K P General Protection Fault error, 11 keyboard problems, 18 H M hard dsk, utilities for, 4 hardware help, 4 help Windows Help, 2 HP At Home Web site, 5, 51, 59 HP Customer Care Center, 8 HP Pavilion Recovery CDs, 5, 6 HP Support Center, 3 Media Rack, 30 memory adding, 42 troubleshooting, 11 messages Check error log, 17 General Protection Fault error, 11 Invalid phone number message, 17 Non-System Disk error, 12 System Error Unable to read drive, 15 Microsoft Sound Recorder, 30 monitor problems.
replacing components, 54 resetting computer, 10 restoring software, 6 S single-click mode, turning off, 24 software help for, 4 restoring, 6 sound adjusting, 14 recording, 30 troubleshooting, 20 speakerphone problems, 21 startup problems, 10 stereo system, connecting computer to, 29 support.
5967-6539