Computer Setup (F10) Utility Guide Business Desktops Document Part Number: 361206-002 September 2004 This guide provides instructions on how to use Computer Setup. This tool is used to reconfigure and modify computer default settings when new hardware is installed and for maintenance purposes.
© Copyright 2004 Hewlett-Packard Development Company, L.P. The information contained herein is subject to change without notice. Microsoft and Windows are trademarks of Microsoft Corporation in the U.S. and other countries. The only warranties for HP products and services are set forth in the express warranty statements accompanying such products and services. Nothing herein should be construed as constituting an additional warranty.
Contents Computer Setup (F10) Utility Computer Setup (F10) Utilities . . . . . . . . . . . . . . . . . . . . . . . . . . . . . . . . . . . . . . . . . . . . . 1 Using Computer Setup (F10) Utilities . . . . . . . . . . . . . . . . . . . . . . . . . . . . . . . . . . . . 3 File . . . . . . . . . . . . . . . . . . . . . . . . . . . . . . . . . . . . . . . . . . . . . . . . . . . . . . . . . . . . . . . 4 System Information . . . . . . . . . . . . . . . . . . . . . . . . . . . . . . . . . . . . . . . . . . . .
Contents Save Master Boot Record. . . . . . . . . . . . . . . . . . . . . . . . . . . . . . . . . . . . . . . . . . Restore Master Boot Record . . . . . . . . . . . . . . . . . . . . . . . . . . . . . . . . . . . . . . . Power . . . . . . . . . . . . . . . . . . . . . . . . . . . . . . . . . . . . . . . . . . . . . . . . . . . . . . . . . . . . OS Power Management . . . . . . . . . . . . . . . . . . . . . . . . . . . . . . . . . . . . . . . . . . . Hardware Power Management . . . . . . . . . . . . . . . .
Computer Setup (F10) Utility Computer Setup (F10) Utilities Use Computer Setup (F10) Utility to do the following: ■ Change factory default settings. ■ Set the system date and time. ■ Set, view, change, or verify the system configuration, including settings for processor, graphics, memory, audio, storage, communications, and input devices. ■ Modify the boot order of bootable devices such as hard drives, diskette drives, optical drives, or USB flash media devices.
Computer Setup (F10) Utility 2 ■ Enable the power-on password prompt during system restarts (warm boots) as well as during power-on. ■ Establish a setup password that controls access to Computer Setup (F10) Utility and the settings described in this section. ■ To secure integrated I/O functionality, including the serial, USB, or parallel ports, audio, or embedded NIC, so that they cannot be used until they are unsecured. ■ Enable or disable Master Boot Record (MBR) Security.
Computer Setup (F10) Utility Using Computer Setup (F10) Utilities Computer Setup can be accessed only by turning the computer on or restarting the system. To access the Computer Setup Utilities menu, complete the following steps: 1. Turn on or restart the computer. If you are in Microsoft Windows, click Start > Shut Down > Restart. 2. As soon as the computer is turned on, press and hold the F10 key until you enter Computer Setup. Press Enter to bypass the title screen, if necessary.
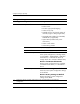
Computer Setup (F10) Utility Computer Setup Heading Option Description File System Information Lists: • Product name • Processor type/speed/stepping • Cache size (L1/L2) • Installed memory size/speed, number of channels (single or dual) (if applicable) • Integrated MAC address for embedded, enabled NIC (if applicable) • System ROM (includes family name and version) • Chassis serial number • Asset tracking number About Displays copyright notice.
Computer Setup (F10) Utility Computer Setup (Continued) Heading Option Description File (continued) Apply Defaults and Exit Applies the currently selected default settings and clears any established passwords. Ignore Changes and Exit Exits Computer Setup without applying or saving any changes. Save Changes and Exit Saves changes to system configuration or default settings and exits Computer Setup. Device Configuration Lists all installed BIOS-controlled storage devices.
Computer Setup (F10) Utility Computer Setup (Continued) Heading Option Description Storage (continued) Device Configuration (continued) Drive Type (continued) Emulation Options (continued) Legacy Diskette No emulation options available. IDE CD-ROM No emulation options available. ATAPI LS-120 None (treated as Other). Diskette (treated as diskette drive). Default Values IDE/SATA Multisector Transfers (ATA disks only) Specifies how many sectors are transferred per multi-sector PIO operation.
Computer Setup (F10) Utility Computer Setup (Continued) Heading Option Description Storage (continued) Device Configuration (continued) Translation Mode (ATA disks only) Lets you select the translation mode to be used for the device. This enables the BIOS to access disks partitioned and formatted on other systems and may be necessary for users of older versions of UNIX (e.g., SCO UNIX version 3.2). Options are Automatic, Bit-Shift, LBA Assisted, User, and None.
Computer Setup (F10) Utility Computer Setup (Continued) Heading Option Description Storage (continued) Storage Options (continued) Legacy Diskette Write Enables/disables ability to write data to legacy diskettes. ✎ After saving changes to Removable Media Write, the computer will restart. Turn the computer off, then on, manually. BIOS DMA Data Transfers Allows you to control how BIOS disk I/O requests are serviced.
Computer Setup (F10) Utility Computer Setup (Continued) Heading Option Description Storage (continued) Storage Options (continued) SATA Emulation Allows you to choose how the SATA controller and devices are accessed by the operating system. “Separate IDE Controller” is the default option. Up to 4 SATA and 2 PATA devices may be accessed in this mode. The SATA and PATA controllers appear as two separate IDE controllers. Use this option with Microsoft Windows 2000 and Windows XP.
Computer Setup (F10) Utility Computer Setup (Continued) Heading Option Description Storage (continued) Storage Options (continued) Secondary SATA Controller DPS Self-Test Allows you to execute self-tests on ATA hard drives capable of performing the Drive Protection System (DPS) self-tests. Allows you to enable or disable the Secondary SATA controller. This feature is supported on select models only.
Computer Setup (F10) Utility Computer Setup (Continued) Heading Option Description Storage (continued) Boot Order Allows you to: • Specify the order in which attached devices (such as a USB flash media device, diskette drive, hard drive, optical drive, or network interface card) are checked for a bootable operating system image. Each device on the list may be individually excluded from or included for consideration as a bootable operating system source. • Specify the order of attached hard drives.
Computer Setup (F10) Utility Computer Setup (Continued) Heading Option Description Security Setup Password Allows you to set and enable setup (administrator) password. ✎ If the setup password is set, it is required to change Computer Setup options, flash the ROM, and make changes to certain plug and play settings under Windows. See the Troubleshooting Guide on the Documentation CD for more information. Power-On Password Allows you to set and enable power-on password.
Computer Setup (F10) Utility Computer Setup (Continued) Heading Option Description Security (continued) Embedded Security Allows you to: • Enable/disable the Embedded Security device. • Reset the device to Factory Settings. This feature is supported on select models only. See the Desktop Management Guide on the Documentation CD for more information.
Computer Setup (F10) Utility Computer Setup (Continued) Heading Option Description Security (continued) System IDs Allows you to set: • Asset tag (18-byte identifier) and ownership Tag (80-byte identifier displayed during POST). See the Desktop Management Guide on the Documentation CD for more information. • Chassis serial number or Universal Unique Identifier (UUID) number. The UUID can only be updated if the current chassis serial number is invalid.
Computer Setup (F10) Utility Computer Setup (Continued) Heading Option Description Security (continued) Data Execution Prevention Enable/Disable Data Execution Prevention Mode helps prevent OS security breaches. ✎ Master Boot Record Security This selection is in effect only if the processor and operating system being used comprehend and utilize Data Execution Prevention Mode. Allows you to enable or disable Master Boot Record (MBR) Security.
Computer Setup (F10) Utility Computer Setup (Continued) Heading Option Description Security (continued) Save Master Boot Record Saves a backup copy of the Master Boot Record of the current bootable disk. Restore Master Boot Record ✎ Only appears if MBR Security is enabled. ✎ Only appears if all of the following conditions are true: • MBR Security is enabled. Restores the backup Master Boot Record to the current bootable disk. • A backup copy of the MBR has been previously saved.
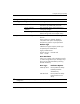
Computer Setup (F10) Utility Computer Setup (Continued) Heading Option Description Power OS Power Management • Runtime Power Management Enable/Disable. Allows certain operating systems to reduce processor voltage and frequency when the current software load does not require the full capabilites of the processor. • Idle Power Savings - Extended/Normal. Allows certain operating systems to decrease the processors power consumption when the processor is idle.
Computer Setup (F10) Utility Computer Setup (Continued) Heading Option Description Advanced* Power-On Options Allows you to set: *For advanced users only. • POST mode (QuickBoot, FullBoot, or FullBoot every 1–30 days). • POST messages (enable/disable). • F9 prompt (enable/disable). Enabling this feature will display the text “F9 = Boot Menu” during POST. Disabling this feature prevents the text from being displayed.
Computer Setup (F10) Utility Computer Setup (Continued) Heading Option Description Advanced* (continued) Power-On Options (continued) Allows you to set: *For advanced users only. • Option ROM prompt (enable/disable) Enabling this feature will cause the system to display a message before loading options ROMs. (This feature is supported on select models only.) • Remote wakeup boot source (remote server/local hard drive).
Computer Setup (F10) Utility Computer Setup (Continued) Heading Option Description Advanced* (continued) Power-On Options (continued) Allows you to set: *For advanced users only. • I/O APIC Mode (enable/disable). Enabling this feature will allow Microsoft Windows Operating Systems to run optimally. This feature must be disabled for certain non-Microsoft Operating Systems to work properly. • ACPI/USB Buffers @ Top of Memory (enable/disable).
Computer Setup (F10) Utility Computer Setup (Continued) Heading Option Advanced* (continued) PCI Devices *For advanced users only. Description • Lists currently installed PCI devices and their IRQ settings. • Allows you to reconfigure IRQ settings for these devices or to disable them entirely. These settings have no effect under an APIC-based operating system. Bus Options On select models, allows you to enable or disable: • PCI SERR# Generation.
Computer Setup (F10) Utility Computer Setup (Continued) Heading Option Description Advanced* (continued) Device Options Allows you to set: *For advanced users only. • Printer mode (bi-directional, EPP & ECP, output only). • Num Lock state at power-on (off/on). • S5 Wake on LAN (enable/disable). • To disable Wake on LAN during the off state (S5), use the arrow (left and right) keys to select the Advanced > Device Options menu and set the S5 Wake on Lan feature to “Disable.
Computer Setup (F10) Utility Computer Setup (Continued) Heading Option Description Advanced* (continued) Device Options (continued) Allows you to set: *For advanced users only. • Unique Sleep State Blink Patterns. Allows you to choose an LED blink pattern that uniquely identifies each sleep state. • Integrated Video (enable/disable) Allows you to use integrated video and PCI Up Solution video at the same time (available on select models only).
Computer Setup (F10) Utility Computer Setup (Continued) Heading ✎ 24 Option Description PCI VGA Configuration Displayed only if there are multiple PCI video adapters in the system. Allows you to specify which VGA controller will be the “boot” or primary VGA controller. Support for specific Computer Setup options may vary depending on the hardware configuration. www.hp.
Computer Setup (F10) Utility Recovering the Configuration Settings There are two ways to recover the Configuration Settings established in the Computer Setup (F10) Utility. Method One: Flash ROM CMOS Archive and Restore Feature—Using Power Switch Override F10 Computer Setup CMOS Configuration Settings are stored in Non-Volatile RAM (NVRAM). Each time the computer starts, the system ROM saves a copy of NVRAM (including CMOS, passwords, and other system variables) in the flash ROM.
Computer Setup (F10) Utility Method Two: Save to Removable Media and Restore from Removable Media This method of recovery requires that you first perform the Save to Removable Media command with the Computer Setup (F10) Utility before Restore is needed. (See “Save to Removable Media” on page 4 in the Computer Setup options table.