CPQ-311245-001.book Page 1 Thursday, March 27, 2003 10:17 PM 6 Multimedia Contents Adjusting Volume . . . . . . . . . . . . . . . . . . . . . . . . . . . . . . Using the Internal Speakers . . . . . . . . . . . . . . . . . . . . . . . Connecting an Audio Device . . . . . . . . . . . . . . . . . . . . . . Connecting an S-Video Device . . . . . . . . . . . . . . . . . . . . Connecting the Audio . . . . . . . . . . . . . . . . . . . . . . . . Connecting the Video . . . . . . . . . . . . . . . . . . . . . . . .
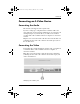
CPQ-311245-001.book Page 2 Thursday, March 27, 2003 10:17 PM Multimedia Adjusting Volume Volume can be adjusted by using the audio buttons on the notebook or by using operating system or application volume control software. The mute button overrides all software volume settings. To adjust volume using the audio buttons: ■ To increase volume, press the increase volume button 1. ■ To decrease volume, press the decrease volume button 2. ■ To mute or restore volume, press the mute button 3.
CPQ-311245-001.book Page 3 Thursday, March 27, 2003 10:17 PM Multimedia Using the Internal Speakers The internal speakers play sound in stereo from applications, the operating system, games, drive media, the Internet, and other sources. If an external device, such as a headset, is connected to the audio-out jack, the internal speakers are disabled.
CPQ-311245-001.book Page 4 Thursday, March 27, 2003 10:17 PM Multimedia Connecting an Audio Device Å WARNING: To reduce the risk of personal injury, adjust the volume before putting on headphones or a headset. Ä CAUTION: To prevent possible damage to an external device, do not plug a monaural (single sound channel) plug into the audio-out jack. The notebook has 2 audio jacks: ■ The microphone jack 1 connects an optional monaural or stereo microphone.
CPQ-311245-001.book Page 5 Thursday, March 27, 2003 10:17 PM Multimedia Connecting an S-Video Device Connecting the Audio The S-Video jack supports video signals only. If you are setting up a configuration that combines audio and video functions, such as playing a DVD movie on your notebook and displaying it on your television, you will need a standard 3.5-mm audio cable available from most computer or electronics retailers. Plug the stereo end of the audio cable into the notebook audio-out jack.
CPQ-311245-001.book Page 6 Thursday, March 27, 2003 10:17 PM Multimedia Turning a Video Device On and Off To turn on a video device that is connected to the notebook, start or restart the notebook. Or, repeatedly press the Fn+F4 hotkeys to switch the image. Pressing the Fn+F4 hotkeys switches the image among the notebook display, any connected displays, and simultaneous display on the notebook and all connected displays. ■ Switching the image to a connected video device turns on the video device.
CPQ-311245-001.book Page 7 Thursday, March 27, 2003 10:17 PM Multimedia Using Multimedia Software Using Windows Media Player Use Windows Media Player primarily for playing audio CDs. Although video CDs can be played using Windows Media Player, InterVideo WinDVD provides higher quality playback. To open Windows Media Player, insert a CD into the optical drive, then close the tray. Wait several seconds. If Windows Media Player does not open, select Start > All Programs > Windows Media Player.
CPQ-311245-001.book Page 8 Thursday, March 27, 2003 10:17 PM Multimedia ❏ If the Microsoft Windows XP AppPicker window is not displayed, select Start > All Programs > InterVideo WinDVD > InterVideo WinDVD. 3. Follow the instructions on the screen. Managing DVD Region Settings Most DVDs that contain copyrighted files also contain region codes. The region codes help protect copyrights internationally.
CPQ-311245-001.book Page 9 Thursday, March 27, 2003 10:17 PM Multimedia Using Easy CD Creator Easy CD Creator is a data transfer utility that enables you to create or duplicate optical drive media. The utility is installed on select models and can be used with any CD or DVD supported by any optical drive in the system. When Easy CD Creator is installed, a “Burn CD & DVDs with Roxio” icon is displayed at Start > All Programs > Start Menu.
CPQ-311245-001.book Page 10 Thursday, March 27, 2003 10:17 PM Multimedia Preparing to Use Easy CD Creator Ä■ CAUTION: To prevent loss of work and damage to a CD or DVD: ■ ■ ■ Before writing to a CD or DVD, connect the notebook to a reliable external power source. Do not write to a CD or DVD while the notebook is running on battery power. Before writing to a CD or DVD, close all open applications (including screen savers and antivirus software) except Easy CD Creator Basic.
CPQ-311245-001.book Page 11 Thursday, March 27, 2003 10:17 PM Multimedia Formatting Recording Media You can purchase optical drive media that either are or are not formatted for DirectCD. ■ To use DirectCD, use a CD or DVD formatted for DirectCD. ■ To use Easy CD Creator or CD Copier, do not use a CD or DVD formatted for DirectCD. To erase DirectCD formatting from a CD or DVD so the CD or DVD can be used with Easy CD Creator or CD Copier: 1. Insert the CD or DVD into the optical drive. 2.
CPQ-311245-001.book Page 12 Thursday, March 27, 2003 10:17 PM Multimedia ■ Auto Insert Notification settings are selected through the operating system. ■ To select Disk-at-once settings: 1.Select Start > All Programs > Roxio Easy CD Creator 5 > Applications > CD Copier. 2. Select the Advanced tab. 3. Clear the Disk-at-Once check box. 4. Select the Set as Default button. ■ To select Track-at-once settings: 1. Select Start > All Programs > Roxio Easy CD Creator 5. 2.
CPQ-311245-001.book Page 1 Thursday, March 27, 2003 10:17 PM 7 Communications Contents Modem . . . . . . . . . . . . . . . . . . . . . . . . . . . . . . . . . . . . . . . 7–2 Connecting the Modem . . . . . . . . . . . . . . . . . . . . . . . 7–3 Using the Modem While Traveling Internationally . . . . . . . . . . . . . . . . . . . . . . . . . . . . . . 7–6 Accessing Communication Software. . . . . . . . . . . . . 7–9 Finding AT Command Information. . . . . . . . . . . . . . 7–9 Network . . . . . . . . . . .
CPQ-311245-001.book Page 2 Thursday, March 27, 2003 10:17 PM Communications Modem All notebook models include an RJ-11 telephone jack, and some models ship with a preinstalled modem. A modem cable with RJ-11 connectors at each end is included with select models. You need a modem cable to connect a modem. If your model did not include a modem cable, a modem cable can be purchased from most computer or electronics retailers.
CPQ-311245-001.book Page 3 Thursday, March 27, 2003 10:17 PM Communications Connecting the Modem Selecting Connectors A modem must be connected to an analog telephone line. Å WARNING: To reduce the risk of electric shock, fire, or damage to the equipment, do not plug a telephone cable into the RJ-45 network jack. Ä CAUTION: Jacks for digital PBX systems may resemble RJ-11 telephone jacks, but are not compatible with the modem.
CPQ-311245-001.book Page 4 Thursday, March 27, 2003 10:17 PM Communications Connecting a Modem to an RJ-11 Jack To connect a modem to an analog telephone line that has an RJ-11 telephone jack: 1. Identify the RJ-11 1 jack on the notebook. 2. If your modem cable has noise suppression circuitry 2, which prevents interference with TV and radio reception, orient the circuitry end of the cable toward the notebook. 3.
CPQ-311245-001.book Page 5 Thursday, March 27, 2003 10:17 PM Communications Connecting a Modem with an Adapter To connect a modem to an analog telephone line that does not have an RJ-11 telephone jack: 1. Identify the RJ-11 jack 1 on the notebook. 2. If the modem cable has noise suppression circuitry 2, which prevents interference with TV and radio reception, orient the circuitry end of the cable toward the notebook. 3.
CPQ-311245-001.book Page 6 Thursday, March 27, 2003 10:17 PM Communications Using the Modem While Traveling Internationally An internal modem is configured to function in, and meet the operating standards of, the country in which you purchased the notebook. To use an internal modem in other countries, you must add country-specific modem configurations.
CPQ-311245-001.book Page 7 Thursday, March 27, 2003 10:17 PM Communications 4. Select a country or region for the new location from the Country/Region list. If you select a country or region that is not supported by the modem, the country configuration defaults to USA or UK. 5. Select the OK button > OK button. Solving Travel Connection Problems If you experience connection problems while using a modem outside the country in which you purchased the notebook, the following suggestions may be helpful.
CPQ-311245-001.book Page 8 Thursday, March 27, 2003 10:17 PM Communications Check the Telephone Number Dial the telephone number on the telephone, verify that the remote modem is answering, then hang up. Check the Dial Tone If a modem receives a dial tone it does not recognize, the modem will not dial and will display a No Dial Tone error message. ■ To set the modem to ignore all dial tones before dialing: 1.Select Start > Control Panel > Network and Internet Connections category. 2.
CPQ-311245-001.book Page 9 Thursday, March 27, 2003 10:17 PM Communications 7. Select your modem > Properties button > Modem tab. 8. Clear the Wait For Dial Tone Before Dialing check box. 9. Select the OK button > OK button. Accessing Communication Software To access preinstalled modem software, including software for terminal emulation and data transfer, select Start > All Programs > Accessories > Communications, then select an application, wizard, or utility.
CPQ-311245-001.book Page 10 Thursday, March 27, 2003 10:17 PM Communications Network All notebook models ship with an RJ-45 network jack. A network cable with RJ-45 connectors at each end is included with select models. The notebook can be connected to a network whether or not the internal modem is connected to a telephone line. If your notebook is connected to a network, you may want to confer with your network administrator before changing network settings.
CPQ-311245-001.book Page 11 Thursday, March 27, 2003 10:17 PM Communications Connecting the Network Cable A network cable has an 8-pin RJ-45 network connector at each end and may contain noise suppression circuitry, which prevents interference with TV and radio reception. To connect the cable: 1. Identify the RJ-45 network jack 1 on the notebook. 2. Orient the end of a network cable with noise suppression circuitry 2 toward the notebook. 3. Plug the network cable into the notebook RJ-45 network jack 3. 4.
CPQ-311245-001.book Page 12 Thursday, March 27, 2003 10:17 PM Communications Turning a Network Connection Off and On To conserve power, turn off a network connection you are not using. ■ To turn off a network connection, log off the network, then disconnect the network cable. ■ To turn on a network connection, connect the network cable, then log on to the network.
CPQ-311245-001.book Page 13 Thursday, March 27, 2003 10:17 PM Communications Infrared The notebook is IrDA-compliant and can communicate with another infrared-equipped device that is also IrDA-compliant. The IrDA connection speed standard is 4 megabits per second (Mbps). The infrared port supports low-speed connections up to 115 kilobits per second (Kbps) as well as high-speed connections up to 4 Mbps.
CPQ-311245-001.book Page 14 Thursday, March 27, 2003 10:17 PM Communications Setting Up an Infrared Transmission For information about using infrared software and enabling or disabling infrared ports, refer to the operating system Help files and to the documentation included with the external infrared device.