
- Hewlett-Packard Switch User Manual


Table Of Contents
- HP ProCurve 2520 Switches Management and Configuration Guide
- Front Cover
- Title Page
- Copyright, Notices, & Publication Data
- Contents
- Feature Index
- 1.Getting Started
- 2.Selecting a Management Interface
- 3.Using the Menu Interface
- 4.Using the Command Line Interface (CLI)
- 5.Using the ProCurve Web Browser Interface
- 6.Switch Memory and Configuration
- 7.Interface Access and System Information
- 8.Configuring IP Addressing
- 9.Time Protocols
- 10.Port Status and Configuration
- Contents
- Overview
- Viewing Port Status and Configuring Port Parameters
- Menu: Port Status and Configuration
- CLI: Viewing Port Status and Configuring Port Parameters
- Customizing the Show Interfaces Command
- Viewing Port Utilization Statistics
- Viewing Transceiver Status
- Enabling or Disabling Ports and Configuring Port Mode
- Enabling or Disabling Flow Control
- Configuring a Broadcast Limit on the Switch
- Configuring ProCurve Auto-MDIX
- Web: Viewing Port Status and Configuring Port Parameters
- Using Friendly (Optional) Port Names
- 11.Power Over Ethernet (PoE) Operation
- 12.Port Trunking
- Contents
- Overview
- Port Trunk Features and Operation
- Trunk Configuration Methods
- Menu: Viewing and Configuring a Static Trunk Group
- CLI: Viewing and Configuring Port Trunk Groups
- Web: Viewing Existing Port Trunk Groups
- Trunk Group Operation Using LACP
- Trunk Group Operation Using the “Trunk” Option
- How the Switch Lists Trunk Data
- Outbound Traffic Distribution Across Trunked Links
- 13.Configuring for Network Management Applications
- Contents
- Using SNMP Tools To Manage the Switch
- LLDP (Link-Layer Discovery Protocol)
- Terminology
- General LLDP Operation
- Packet Boundaries in a Network Topology
- Configuration Options
- Options for Reading LLDP Information Collected by the Switch
- LLDP and LLDP-MED Standards Compatibility
- LLDP Operating Rules
- Configuring LLDP Operation
- LLDP-MED (Media-Endpoint-Discovery)
- Displaying Advertisement Data
- LLDP Operating Notes
- LLDP and CDP Data Management
- A.File Transfers
- B.Monitoring and Analyzing Switch Operation
- Contents
- Overview
- Status and Counters Data
- Menu Access To Status and Counters
- General System Information
- Task Monitor—Collecting Processor Data
- Switch Management Address Information
- Port Status
- Viewing Port and Trunk Group Statistics and Flow Control Status
- Viewing the Switch’s MAC Address Tables
- Spanning Tree Protocol (MSTP) Information
- Internet Group Management Protocol (IGMP) Status
- VLAN Information
- Web Browser Interface Status Information
- Interface Monitoring Features
- Locating a Device
- C.Troubleshooting
- Contents
- Overview
- Troubleshooting Approaches
- Browser or Telnet Access Problems
- Unusual Network Activity
- General Problems
- 802.1Q Prioritization Problems
- IGMP-Related Problems
- LACP-Related Problems
- Port-Based Access Control (802.1X)-Related Problems
- QoS-Related Problems
- Radius-Related Problems
- Spanning-Tree Protocol (MSTP) and Fast-Uplink Problems
- SSH-Related Problems
- TACACS-Related Problems
- TimeP, SNTP, or Gateway Problems
- VLAN-Related Problems
- Fan Failure
- Using the Event Log for Troubleshooting Switch Problems
- Debug/Syslog Operation
- Debug/Syslog Messaging
- Debug/Syslog Destination Devices
- Debug/Syslog Configuration Commands
- Configuring Debug/Syslog Operation
- Debug Command
- Logging Command
- Adding a Description for a Syslog Server
- Adding a Priority Description
- Configuring the Severity Level for Event Log Messages Sent to a Syslog Server
- Operating Notes for Debug and Syslog
- Diagnostic Tools
- Viewing Switch Configuration and Operation
- Restoring the Factory-Default Configuration
- Restoring a Flash Image
- DNS Resolver
- D.MAC Address Management
- E.Daylight Savings Time on ProCurve Switches
- F.Power-Saving Features
- Index
- Notices & Publication Data
Switch Memory and Configuration
Using the Menu and Web Browser Interfaces To Implement Configuration Changes
Menu: Implementing Configuration Changes
You can use the menu interface to simultaneously save and implement a subset
of switch configuration changes without having to reboot the switch. That is,
when you save a configuration change in the menu interface, you simultane-
ously change both the running-config file and the startup-config file.
Note The only exception to this operation are two VLAN-related parameter changes
that require a reboot—described under “Rebooting To Activate Configuration
Changes” on page 6-11.
Using Save and Cancel in the Menu Interface
For any configuration screen in the menu interface, the Save command:
1. Implements the changes in the running-config file
2. Saves your changes to the startup-config file
If you decide not to save and implement the changes in the screen, select
Cancel to discard them and continue switch operation with the current oper-
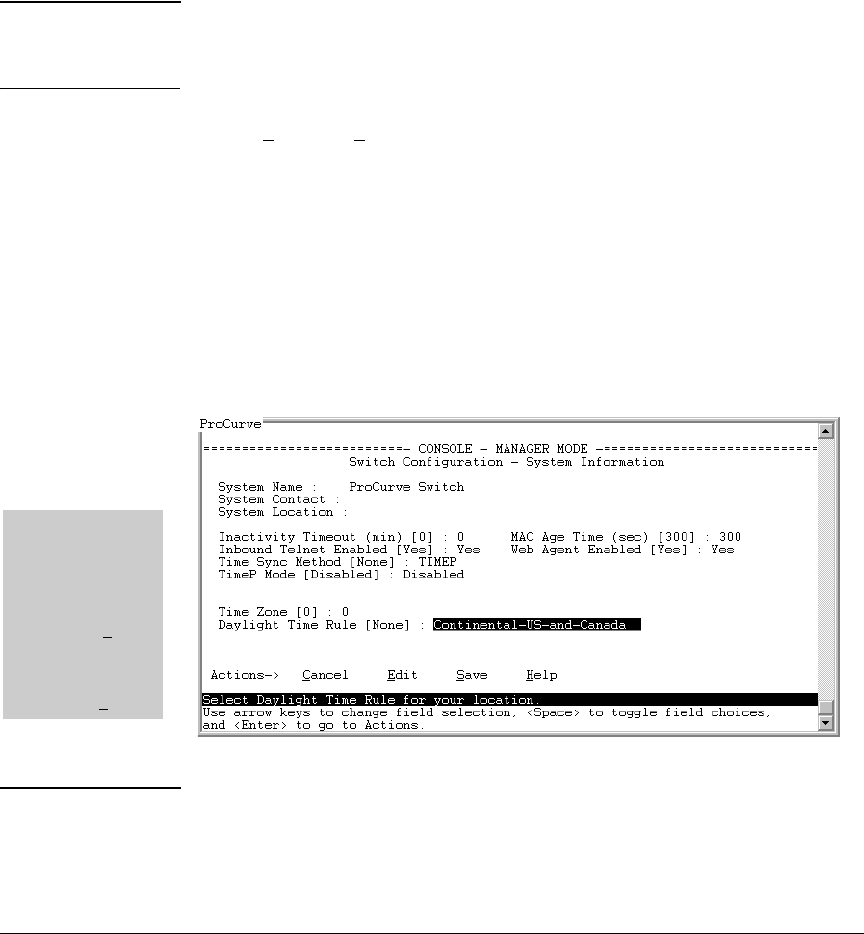
ation. For example, suppose you have made the changes shown below in the
System Information screen:
To save and
implement the
changes for all
parameters in this
screen, press the
[Enter] key, then
press [S] (for S
ave).
To cancel all
changes, press the
[Enter] key, then
press [C] (for C
ancel)
Figure 6-4. Example of Pending Configuration Changes You Can Save or Cancel
Note If you reconfigure a parameter in the CLI and then go to the menu interface
without executing a write memory command, those changes are stored only in
the running configuration (even if you execute a Save operation in the menu
interface). If you then execute a switch boot command in the menu interface,
6-10