HP Workstations xw series Setup and Troubleshooting Guide
Copyright Information Warranty Trademark Credits © 2007-2009 Copyright Hewlett-Packard Development Company, L.P. Hewlett-Packard Company shall not be liable for technical or editorial errors or omissions contained herein or for incidental or consequential damages in connection with the furnishing, performance, or use of this material.
Table of contents 1 Locating HP resources Product information .............................................................................................................................. 2 Product support .................................................................................................................................... 3 Product documentation ........................................................................................................................ 4 Product diagnostics .....
Restoring Windows XP Professional .................................................................................................. 22 Creating RestorePlus! media ............................................................................................. 22 Creating HP Backup and Recovery (HPBR) media ........................................................... 23 Restoring the operating system .........................................................................................
Diagnostic lights and audible (beep) codes ....................................................................... 42 Calling technical support .................................................................................................................... 46 Locating warranty information ............................................................................................................
vi ENWW
1 Locating HP resources This section provides information on the following HP resources for your workstation: Topics Product information on page 2 ● HP Cool Tools ● Regulatory information ● Accessories ● System board ● Serial number and Certificate of Authenticity labels ● Linux Product support on page 3 ● Additional information ● Technical support ● Business Support Center ● IT Resource Center ● HP Service Center ● HP Business and IT Services ● Warranty information Product docume
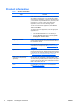
Product information Table 1-1 Product information Topic HP Cool Tools Location Most HP Microsoft Windows workstations are preloaded with additional software that is not automatically installed during first boot. Additionally, a number of valuable tools on your workstation are preinstalled that may enhance system performance. To access or learn more about these applications, choose one of the following options: To learn more about these applications, click HP Cool Tools—Learn More.
Product support Table 1-2 Product support Topic Additional information Location For online access to technical support information and tools, see http://www.hp.com/go/workstationsupport. Support resources include Web-based troubleshooting tools, technical knowledge databases, driver and patch downloads, online communities, and proactive notification services.
Product documentation Table 1-3 Product documentation Topic Location HP user documentation, white papers, and third-party documentation For the latest online documentation, seehttp://www.hp.com/ support/workstation_manuals. These include this Setup and Troubleshooting Guide and the Service and Technical Reference Guide.
Product diagnostics Table 1-4 Product diagnostics Topic ENWW Location Diagnostics tools The HP Vision Field Diagnostics utility can be downloaded from the HP Web site. To use this utility, refer to the appropriate section of the workstation Service and Technical Reference Guide.
Product updates Table 1-5 Product updates Topic Software, BIOS, and driver updates Location See http://www.hp.com/go/workstationsupport to verify that you have the latest drivers for the workstation. To locate the current workstation BIOS on your Microsoft Windows workstation, select Start>Help and Support>Pick a Task>Use Tools to view...>Tools>My Computer Information>View general system information....
2 Setting up the Hardware This chapter provides information on setting up of the workstation hardware. Quick setup WARNING! To reduce the risk of electric shock or damage to your equipment: — Do not disable the power cord grounding plug. The grounding plug is an important safety feature. — Plug the power cord in a grounded (earthed) outlet that is easily accessible at all times. NOTE: Your workstation might not have PS/2 mouse and keyboard connectors as shown in Figure 2–1.
To rapidly set up your workstation hardware, complete the following steps: 1. After unpacking your HP Workstation, locate an accessible workspace to set up the system and connect the mouse, keyboard, and power cables to your workstation. Connect the power cable from the workstation to a power outlet. 2.
● Never restrict the incoming or outgoing airflow of the computer by blocking any vents or air intakes. Figure 2-2 Workstation ventilation Each HP Workstation has two unique serial number labels (1) and a Certificate of Authentication (COA) label (2) (for Windows®-preinstalled systems only) as shown in Figure 2–2. In general, the serial number labels can be found on the top panel or on the side of the unit and at the rear of the unit.
Front panel components Figure 2–3 is for reference only, and shows examples of different workstation series. Your HP workstation might look different. Figure 2-3 Workstation series front panel examples xw4000 Series xw6000 Series xw8000/xw9000 Series Table 2-1 Front panel component examples* Item * 10 Symbol Description Item Symbol Description 1 Optical drive 6 Headphone connector 2 5.25-inch drive bay 7 USB 2.
Rear panel components Figure 2–4 is for reference only and show examples of rear panel connectors that might be located on your workstation. Your HP workstation has some combination of these connectors, depending upon workstation model and configuration.
Table 2-2 Rear panel connector and control description (continued) Item Symbol 7 Description Item RJ-45 network connector 16 Symbol Description SAS Connector NOTE: Might not be available on all workstations. 8 Parallel connector * 17 NOTE: Might not be available on all workstations. 9 DMS–59 high density graphics connector NOTE: Might not be available on all workstations.
5 Access panel key NOTE: 6 Not all workstations models have the key lock. PCI expansion slot access openings (each slot opening typically covered with blank filler panel when not use). Product recycling HP encourages customers to recycle used electronic hardware, HP original print cartridges, and rechargeable batteries. For information about recycling HP components or products, see http://www.hp.com/go/recycle.
3 Setting up the operating system This chapter provides setup and update information for the workstation operating system. It includes these topics: Topics Setting up the Microsoft operating system on page 15 Setting up Red Hat Enterprise Linux on page 16 Setting up Novell SLED on page 17 Updating the workstation on page 17 This chapter also includes information on how to determine that you have the latest BIOS, drivers, and software updates installed on the workstation.
Setting up the Microsoft operating system NOTE: If you ordered a downgrade from Windows Vista to Windows XP Professional operating system, your system will be preinstalled with Windows XP Professional operating system. With this configuration, you will receive recovery media for Windows Vista operating system only.
Setting up Red Hat Enterprise Linux HP offers an HP Installer Kit for Linux (HPIKL) to supplement Red Hat box sets and help HP Linux customers customize their system image. The HPIKL contains the HP driver CD and device drivers to successfully setup up the Red Hat Enterprise Linux (RHEL) operating system, The HP Installer Kit for Linux CDs are currently available for download at http://www.hp.com/support/workstation_swdrivers.
Installing and customizing Red Hat-enabled workstations Linux-enabled workstations require the HP Installer Kit and the purchase of a Red Hat Enterprise Linux box set. The Installer kit includes the HP CDs necessary to complete the installation of all versions of the Red Hat Enterprise Linux box set that have been qualified to work on an HP workstation. To use the drivers in the HP Installer kit for Linux other than RHEL, you must manually extract the drivers from the HP Driver CD and install them.
Determining current BIOS To determine the current BIOS of the workstation during system power up: 1. Wait for F10=setup to appear on the lower right corner of the screen. 2. Press F10 to enter the F10 Setup utility. The F10 Setup utility displays the workstation BIOS version under File > System Information. 3. 18 Note the workstation BIOS version so that you can compare it with the BIOS versions that appear on the HP website.
Upgrading BIOS To find and download the latest available BIOS, which includes the latest enhancements: 1. Go to http://www.hp.com/go/workstationsupport. 2. Select Download Drivers and Software from the left menu column under Tasks. 3. Follow the instructions to locate the latest BIOS available for the workstation. 4. If the BIOS on the Web site is the same as the version on your system, no further action is required. 5.
4 Restoring the operating system This chapter describes how to restore the Windows or Linux operating system. It includes these topics: Topics Restore methods on page 20 Ordering backup software on page 21 Restoring Windows Vista on page 21 Restoring Windows XP Professional on page 22 Restoring Novell SLED on page 24 Restore methods The Windows Business Vista operating system can be reinstalled using the HP RestorePlus! process.
Ordering backup software If you cannot create system recovery CDs or DVDs, you can order a recovery disk set from the HP support center. To obtain the support center telephone number for your region seehttp://www.hp.com/ support/contactHP. Restoring Windows Vista This section describes how to restore Windows Vista. Ordering the RestorePlus! media If you ordered restore media with your workstation, the media is included with your workstation components.
Restoring Windows XP Professional This section describes how to restore the Windows XP Professional operating system. NOTE: The workstation must have a CD or DVD writer installed to create the media set. Creating RestorePlus! media The RestorePlus! kit can be created using the files contained on the hard drive. To create the restore media: 1. Boot the workstation. 2. During boot up, an HP Backup and Recovery Manager screen is displayed prompting you to create Recovery CDs or DVDs. Select Now. 3.
Creating HP Backup and Recovery (HPBR) media NOTE: HPBR is only supported on Windows XP systems. For details, refer to the documentation on the Supplemental Software - HP Backup and Recovery CD included with the workstation. The documentation can be accessed during installation. The Initial Recovery Point can be burned to optical media and used to recover a system. This section describes making the media. NOTE: The workstation must have a CD or DVD writer to create the media set.
Restoring the operating system CAUTION: Before you restore the operating system, back up your data. When you run RestorePlus! from media, the process deletes all information on the primary hard drive, including all partitions. If you run RestorePlus! from the recovery partition, only the root (C:) partition is affected. Using RestorePlus! To restore with RestorePlus!: 1. Boot the workstation from the RestorePlus! DVD.
NOTE: Make copies of the ISO recovery images on CD as backup files in case your workstation experiences a hard drive failure.
5 Troubleshooting This chapter provides information on: ● Self-troubleshooting with HP Insight Diagnostics ● HP troubleshooting resources and tools ● Power-On Self Test (POST) error messages ● Basic troubleshooting tables ● Calling technical support Self-troubleshooting with HP Vision Field Diagnostics Hewlett-Packard Vision Field Diagnostics is a diagnostic tool that can be used by the end user or technical support personnel to view information about the hardware configuration of the computer an
● True End2End diagnostics – same diagnostics modules used in factory ● Easy to obtain ◦ Download from Web ◦ USB key bootable or CD bootable ◦ Included with restore media It is expected that these Vision diagnostics will be run on supported products when attempting to troubleshoot system issues.
Downloading and accessing HP Vision Field Diagnostics Follow these steps to download the HP Vision Field Diagnostics utility from the HP Web site to a DVD or USB, and then use it to perform diagnostics on the workstation: 1. Go to http://www.hp.com. 2. Select the Support & Drivers link. 3. Select the Download driver and software radio button. 4. Enter your product number in the text box, and then press Enter. 5. Select your operating system. 6. Select the Diagnostic link. 7.
Accessing HP Vision Field Diagnostics on the workstation The following procedures describe how to access the HP Vision Field Diagnostics utilities that are included in the workstation software. Creating and using a bootable USB key This section describes how to use a USB key to access the HP Vision Field Diagnostics. NOTE: Using a USB key is the most convenient method to access the HP Vision Field Diagnostics. 1. In the C:\VisionDiagnostics\ directory, double-click on VisionDiagUSB.exe.
User interface The HP Vision Field Diagnostics application provides six major functions, accessible through Tabs. These functions are: ● Survey — Your current system hardware information. ● Test — List all diagnostics available for your system. Tests are started there. ● Status — This screen shows progress and status of currently running diagnostics. ● History — All past diagnostics runs and status are listed there. ● Errors — All past diagnostics failures are listed there.
ENWW ● Miscellaneous — List any devices or data that doesn't belong to any other Category. ● Processors - Shows system processors. ● Storage — Shows mass storage devices such as floppy drives, optical drives, SATA, SAS hard disk drives and controllers, as well as any RAID arrays. ● System — Shows information about motherboard devices such as fans and cables.
Test tab The Test tab lists all available diagnostics. The lists have been tailored according to your system configuration. Individual test may be selected or unselected. The following Test Modes exist: ● Quick — This test selection was picked to perform quickly while covering your entire hardware. Test parameters cannot be modified. ● Complete — This test selection offers all available tests and may take a long time to complete. Test parameters cannot be modified.
ENWW 5. Click the Start Test button to start the testing. The Status tab, which allows you to monitor the progress of the tests, is automatically displayed during the testing process. When the tests are complete, the Status tab shows whether the devices passed or failed. 6. If errors are found, go to the Errors tab to display detailed information and recommended actions.
Status tab The Status tab shows the overall progress and status of the test scenario as well as the progress and status of each test. The color coded status are black, blue, green, red, and orange.
● The Recommended Repair will give a recommended action that should be performed to resolve the failed hardware. ● The Warranty ID is a unique error code associated with the specific error on your computer. When contacting the HP Support Center for assistance with a hardware failure, please be prepared to provide the Warranty ID. ● The Clear Errors button will clear the contents of the Error Log.
Saving and printing information in HP Vision Field Diagnostics You can save the information displayed in the HP Vision Field Diagnostics Survey, History and Errors tabs to a diskette or a USB flash drive. You can not save to the hard drive. The system will automatically create an html file that has the same appearance as the information displayed on the screen. 1. Insert a diskette or USB flash drive if running HP Vision Field Diagnostics from CD. 2.
E-support Online access and support resources include Web-based troubleshooting tools, technical knowledge databases, driver and patch downloads, online communities, and product change notification services. The following Web sites are also available to you: ● http://www.hp.com—Provides useful product information. ● http://www.hp.com/support/workstation_manuals—Provides the latest online documentation. ● http://www.hp.
3. Under Resources for (for example, HP Workstation xw6000), select See more… 4. Under Self-Help resources: in the center of the window, choose the desired action and appropriate information in the scroll list to view the index. Product Change Notifications Product Change Notifications (PCNs) are proactive notifications for product changes occurring within a 30-60 day window of the effective date of the change in the manufacturing process.
● If you are working on a network, plug another workstation with a different cable into the network connection. There might be a problem with the network plug or cable. ● If you recently added new hardware, remove the hardware and verify if the workstation functions properly. ● If you recently installed new software, uninstall the software and verify if the workstation functions properly. ● If the screen is blank, plug the monitor into a different video port on the workstation if one is available.
General problems You might be able to easily resolve the general problems described in this section. If a problem persists and you are unable to resolve it yourself or if you feel uncomfortable about performing the operation, contact an HP customer care center, or contact an authorized dealer or reseller. For a list of support telephone numbers for your region, visit http://www.hp.com/support, select your region, and click Contact HP in the upper-left corner.
Table 5-1 General installation problems (continued) Problem Cause System does not power on System unable to power on and the LEDs on the front of with power applied. the workstation are not blinking. Solution CAUTION: Internal components might be powered even when the system is off. To prevent damage, disconnect the workstation power cord before you remove a component. To resolve this problem, choose one of the following: A. Press and hold the power button for less than 4 seconds.
Table 5-2 Hardware installation problems Problem Probable Cause Device is not seated or connected properly. Recommended Solution Ensure that the device is properly and securely connected and that pins in the connector are not bent down. Cables of new external device are loose or power cables are unplugged. A new device is not recognized as part of the system. Workstation will not start. Workstation will not shut down. Power switch of new external device is not turned on.
Table 5-3 Diagnostic lights and audible codes Activity Possible cause Green Power LED On. No beeps. Workstation on. Green Power LED blinks every two seconds.** No beeps. Workstation in Suspend to RAM mode (select models only) or normal Suspend mode. Green Power LED is off.** No beeps. Workstation in Suspend to Disk or “Hibernate” mode. Green Power LED blinks three times, once per second.** No beeps Workstation in Suspend to RAM mode (select models only) or normal Suspend mode.
Table 5-3 Diagnostic lights and audible codes (continued) Activity Possible cause Recommended action NOTE: Memory connector pin configurations vary, and can have either a 4–pin, 6–pin, or 8–pin configuration, depending on workstation series and model. 2. Check if a device is causing the problem by removing all attached devices (such as hard, diskette, or optical drives, and expansion cards.) Power on the system.
Table 5-3 Diagnostic lights and audible codes (continued) Activity Red Power LED blinks eight times, once every second, followed by a two-second pause. Eight beeps. Possible cause Invalid ROM based on bad checksum. Recommended action CAUTION: Internal components might be powered even when the system is off. To prevent damage, disconnect the workstation power cord before you remove a component. 1. Clear CMOS.
Calling technical support At times you might encounter an issue that requires technical support. When you call technical support: ● Have your workstation readily accessible. ● Write down the workstation serial numbers, product numbers, model names, and model numbers and have them in front of you. ● Note any applicable error messages. ● Note any add-on options. ● Note the operating system. ● Note any third-party hardware or software.