
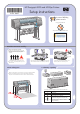
HP Designjet 4000 Printer Series - Setup instructions


1
2
3
4
5
6
5
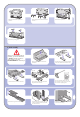
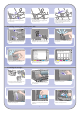
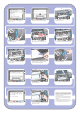
Locate the bin components.
Fix one screw to the inside of the stand’s left
leg.
Do not fully fit the screw.
Lift the supporting framework of the bin into
position in front of the printer.
Fix one screw to the inside of the stand’s right leg.
Fix the top arms of the bin to the two screws that
you have just fitted.
Do not fully fit the screw.
Fix the lower arms of the bin to the stand using
one screw for each leg.
Now tighten the two top screws.
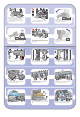
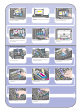
Clip all six loops to the frame of the bin. Locate the
loops with rear extensions in positions 2, 4, and 6.
5 Bin assembly
Secure all six loops to the frame, using two clips
on each loop.
Fit all three mobile stoppers to the three loops
indicated above.
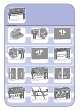
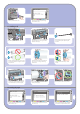
Remove the spindle lock foam piece.
Then replace the spindle.