
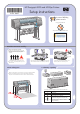
HP Designjet 4000 Printer Series - Setup instructions


8
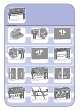
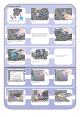
Close the printer window.
Open the printhead cleaner door.
Wait until you see this front panel message.
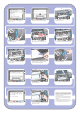
Insert the printhead cleaner into the slot of the
correct color.
Press the printhead cleaner door, which is on the
right side of the printer.
Push the printhead cleaner in and down until
it clicks into place.
Insert the other seven printhead cleaners into the
correct slots.
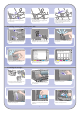
10 Installing printhead cleaners
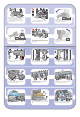
If “Reseat” is displayed on the front panel, check
that the protective tape has been removed. Then
try reseating the printhead more firmly. If the
problem persists, refer to the Using Your Printer
CD.
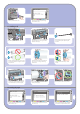
Please wait while the printer checks the
printheads (~1 minute).
Close the carriage assembly cover.
Make sure the latch engages correctly.
Make sure the printheads are correctly seated.
When all the printheads are installed, the front
panel prompts, “Close printhead cover and
window”.
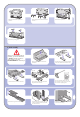
Remove the blue protective cap and the clear
protective tape from the printhead.
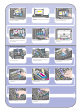
9 Installing printheads
Lower all the printheads vertically into their correct
positions.
Seat the printheads slowly and carefully.