use use hp color LaserJet 3700 hp embedded web server hp color LaserJet 4650
hp embedded web server user guide
Copyright Trademark Credits © 2003 Copyright Hewlett-Packard Development Company, L.P. Microsoft® and Windows® are U.S. registered trademarks of Microsoft Corp. Reproduction, adaptation or translation without prior written permission is prohibited, except as allowed under the copyright laws. Netscape is a U.S. trademark of Netscape Communications Corporation. The information contained herein is subject to change without notice.
Contents 1 Overview What is an embedded Web server?. . . . . . . . . . . . . . . . . . . . . . . . . . . . . . .1 Features . . . . . . . . . . . . . . . . . . . . . . . . . . . . . . . . . . . . . . . . . . . . . . . . .1 Additional features with a permanent storage device. . . . . . . . . . . . . . .2 HP Web Jetadmin and the HP Embedded Web Server . . . . . . . . . . . . .2 System requirements . . . . . . . . . . . . . . . . . . . . . . . . . . . . . . . . . . . . . . . . . .
iv Contents ENWW
1 Overview What is an embedded Web server? A Web server provides an environment in which Web programs can run, much in the same way that an operating system, such as Microsoft® Windows®, provides an environment in which programs can run on your computer. A Web browser, such as Microsoft Internet Explorer or Netscape Navigator, can show output from a Web server.
Additional features with a permanent storage device If you have a permanent storage device installed in your product, such as a hard disk or flash disk, you can view, set up, and retain additional information. ● Alerts. Set up four different destination lists, with up to 20 recipients on each of the four lists. (Without the permanent storage device, you can send alerts to only four e-mail addresses.) ● Other Links. Add up to five additional links to the websites of your choice.
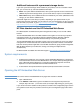
Navigating through the HP Embedded Web Server The HP Embedded Web Server has pages that can be used to view product information and change configuration options. You can gain access to these pages by clicking one of the tabs (Information, Settings, and Networking) and then clicking one of the menus on the navigation bar that is located on the left side of the screen. The following illustration and table provide information about the EWS screens.
Callout EWS screen Description feature 3 Menus 4 Other Links Different on each tab hp instant support Order Supplies Product Support 5 Page content Different on each menu More information Click a tab to show the menus. Connect to a set of Web resources that help solve problems and describe what additional services are available for your HP product. Use the Internet to order genuine HP supplies for your HP product. Use specific product help from HP’s website to solve a problem.
2 Viewing Product Status from the Information Pages The Information pages are for informational purposes only; you cannot configure the printer from these pages. To configure the printer through the EWS, “Configuring the Product from the Settings Pages” on page 17.
Device Status Use the Device Status page to view the current status of the product. The following illustration and table describe how to use this page. 1 2 3 4 5 6 Callout Area on the page 1 2 EWS tabs and menus Device status Information or capability provided by the area For more information, see “Navigating through the HP Embedded Web Server” on page 3. Shows the product’s status (the same as what appears on the control-panel display).
Configuration Page Use the Configuration page to view current product settings, help troubleshoot printer problems, and verify the installation of optional accessories, such as dual inline memory modules (DIMMs) or paper-handling devices. The following illustration and table describe how to use this page. 1 2 3 4 5 6 Note: See the table on the following page for information about the callouts.
Callout Area on the page 1 EWS tabs and menus 2 Device Information 3 Installed Personalities and Options 4 Memory 5 Security 6 Paper Trays and Options 8 Viewing Product Status from the Information Pages Information or capability provided by the area For more information, see “Navigating through the HP Embedded Web Server” on page 3. Lists the serial number, page counts, and other information for the product.
Supplies Status The Supplies Status page shows more detailed supplies information and provides part numbers for genuine HP supplies. (It is helpful to have the part numbers available when ordering supplies.) The following illustration and table describe how to use this page. 1 3 4 2 Callout Area on the page 1 2 ENWW Information or capability provided by the area EWS tabs and menus For more information, see “Navigating through the HP Embedded Web Server” on page 3.
Callout Area on the page Information or capability provided by the area Cartridge/Image Drum If available, lists the percent of life remaining and the estimated number Information of pages remaining before the supply is empty; the total number of pages that have been processed with the supply; the supply serial number and HP part number; and an indication of whether or not the supply has reached the low status.
Usage Page The Usage page gives a page count for each size of media that has passed through the printer, shows the different paper types that were used, and shows the average percentage of toner coverage per page for each color. The following illustration and table describe how to use this page. 1 2 3 Note: See the table on the following page for information about the callouts.
Callout Area on the page 1 EWS tabs and menus 2 Usage Totals (equivalent) 3 Print Modes & Paper Path Usage (actual) Coverage 4 Information or capability provided by the area For more information, see “Navigating through the HP Embedded Web Server” on page 3. Indicates the types of pages that have been printed, the number of single-sided pages that have been printed, the number of duplexed pages that have been printed, and the total number of pages that have been printed.
Control Panel For products that have a control panel, the Control Panel page shows the product control panel display as if you were standing at the product. Because this view shows the product status, it can help you troubleshoot problems with the product.
Print You can use this page to print one file at a time from a product that supports the HP embedded Web server. This feature is especially useful if you are a mobile user, because you do not have to install the product’s printer driver in order to print—you can print anywhere at any time. Note This page only appears if it has been enabled on the Security page by your system administrator.
3 Configuring the Product from the Settings Pages Use the pages on the Settings tab to configure the product from your computer. The following are the Settings pages: Note ENWW ● Configure Device (page 18) ● Email Server (page 20) ● Alerts (page 22) ● AutoSend (page 29) ● Security (page 30) ● Edit Other Links (page 31) ● Device Information (page 32) ● Language (page 33) ● Time Services (page 34) Some products do not support all of these pages.
Configure Device You can use the Configure Device page to print information product pages and configure the product remotely. The following illustration, table, and example procedure describe how to use this page. The following example shows the Information menu options. Note If your product has a control-panel display, these menus are similar to the menus that are available at your product control panel. Some of the product control panel menus are not available from the embedded Web server.
Callout Area on the page 3 Plus sign 4 Menu subentries Information or capability provided by the area Click the plus sign( ) next to a menu, or click the menu itself, to see the submenus or subentries. Gain access to product information or to configure the product. Using the menus on the Configure Device page This procedure is provided only as an example. Other menu items can be set in a similar manner.
Email Server Use the Email Server page to configure e-mail settings for outgoing and incoming mail, which allows you to configure product alerts. The following illustration, table, and procedures describe how to use this page. 1 2 3 4 Callout Area on the page 1 2 3 4 Information or capability provided by the area EWS tabs and menus For more information, see “Navigating through the HP Embedded Web Server” on page 3.
Configuring outgoing e-mail It is only necessary to configure outgoing e-mail if you intend to use the Alerts or AutoSend feature. 1 Gather the following information. (Your organization’s network or e-mail administrator typically provides the information that is required to configure outgoing mail.) • The Internet protocol (IP) address of the simple mail transfer protocol (SMTP) mail server on your network. The EWS uses the SMTP Server IP address to relay e-mail messages to other computers.
Alerts From the Alerts page, you can set up the product to send problem and status alerts to anyone through e-mail messages. More than one individual can receive alerts, with each person receiving only specific alerts. For example, an administrative assistant might be responsible for ordering print cartridges or fixing jams, and could receive advanced warning on cartridge-low situations or be alerted to a jam situation.
1 2 3 4 5 6 Callout Area on the page 1 EWS tabs and menus 2 Destination list summary For more information, see “Navigating through the HP Embedded Web Server” on page 3. Lists the current selections for each destination. Edit button Click to make changes to the destination or destination list. 4 Test button Click to send a test alert to the destination or destination list. 5 Delete button Click to delete the destination or destination list.
Using the Alerts page with a product This section contains information about these alerts features: ● “To configure Alerts” on page 24 ● “To test the configuration of a destination” on page 27 ● “To delete destinations and destination lists” on page 28 To configure Alerts With a permanent storage device installed, you can set up four different lists, with up to 20 recipients on each list. Without a permanent storage device, you have room for only four e-mail addresses.
If a permanent storage device is not installed, the window that appears looks similar to the following illustration. ENWW 2 For products with permanent storage devices installed, type a name for the List Name, such as Service or Supplies. (If you do not have a permanent storage device, continue to step 3.) 3 Type the e-mail addresses for people who you want to receive alerts. In large environments, system administrators can route e-mail addresses to list servers or URLs for expanded alerts.
The threshold value for Supplies is a percentage, 0 percent through 20 percent, that represents the amount of supply that remains. For example, if you set the threshold value for the “Cartridge Low (Order)” alert at 15 percent, the product sends e-mail alert message(s) when 15 percent of the print-cartridge life remains. The threshold value for service and for the paper path is a user-specified number of minutes.
To test the configuration of a destination 1 Click the Test button next to the destination that you want to test. The following window appears. (This illustration shows the screen from a system that does not have a permanent storage device installed. If a permanent storage device is installed, more than one destination can be tested from this window.) ENWW 2 If you have a permanent storage device installed, select the destinations that you want to test.
To delete destinations and destination lists ● You can delete a destination or destination list by clicking the Delete button next to the destination or destination list that you want to delete. Click OK to confirm the deletion. Sending e-mail commands to the product Another method for receiving information pages is by requesting them from the product.
AutoSend Use the AutoSend page to send device configuration and supplies usage information periodically to Hewlett-Packard. This feature enables you to have a relationship with Hewlett-Packard that is designed to provide you with services that include but are not limited to proactive cartridge replacement, pay-per-page contracts, support agreements, and usage tracking. The following illustration, table, and procedure describe how to use this page.
Security The following illustration and table describe how to use this page. 1 2 3 4 Callout Area on the page 1 EWS tabs and menus 2 Set Password 3 Print Page 4 Display On Device Status Page 30 Configuring the Product from the Settings Pages Information or capability provided by the area For more information, see “Navigating through the HP Embedded Web Server” on page 3. Set a password to control who can cancel jobs remotely or gain access to the Settings pages.
Edit Other Links Use the Edit Other Links page to add or customize up to five links to the websites of your choice (see the following note). These links appear on the left navigational bar throughout the embedded Web server pages. Three permanent links (hp instant support, Order Supplies, and Product Support) have already been established. The following illustration, table, and procedures describe how to use this page.
Adding a Link 1 Under Add Link, type the URL and the name as you would like them to appear in the embedded Web server pages. 2 Click Add Link. Removing a Link 1 Under User-defined Links, select the link or links that you would like to remove. 2 Click Remove Selected Link. Device Information Use the Device Information page to name the product and assign an asset number to it. You can add the name of the primary contact for information about the product.
Language Use the Language page to select the language in which the embedded Web server pages appear. The following illustration and table describe how to use this page. 1 2 3 4 CAUTION Selecting View Pages in Printer Language or Select a Language changes the language for everyone who uses the embedded Web server.
Time Services Use the Time Services page to update the product time, configure time servers and the port on the network, and specify the frequency with which the product synchronizes with the time service. The following illustration and table describe how to use this page.
4 Managing Network Operation from the Networking Pages Overview Use the Networking pages to configure and manage your printer on your network. The appearance and features of the Networking pages will differ, depending on the model and version of your HP Jetdirect print server. The following screen is similar to what you might see when you click Networking. From the left navigational bar, click the Networking menu for the page that you want to view.
Depending on your HP Jetdirect print server model and operating version, the following are some tasks that you can perform from the Networking pages: ● Change network configuration settings for various types of network connections. ● Enable or disable printing protocols. ● Set up a support contact and support URLs. ● Set up a password to control who can remotely access the Networking pages.
5 Using the Other Links as a resource The Other Links area contains three permanent links that provide quick access to product-specific information, such as interactive troubleshooting and ordering information for HP genuine supplies. Note ENWW You can use the Edit Other Links page on the Settings tab to add or customize up to five links to the websites of your choice.
hp instant support Hewlett-Packard offers hp instant support, an internet-based support system that collects diagnostic information from your product and matches it with HP’s information database. At hp instant support, you can find intelligent solutions that help you resolve problems quickly and easily. How hp instant support works Information is gathered from your product and securely transmitted to Hewlett-Packard when you click hp instant support.
Product Support The Product Support link connects you to a Web page that brings together a comprehensive menu of support resources that business people need. From this Web page, you can accomplish these tasks and more: ● Find a list of HP products at one site: desktops, workstations, servers, storage devices, printer, scanners, digital imaging, and mobile devices. ● Obtain technical support.
40 Using the Other Links as a resource ENWW
Index A F accessing embedded Web server 2 accessories, verifying installed 7 alerts configuring 24 deleting destination lists 28 destination lists, testing 27 e-mailing information pages 28 features 2, 22 incoming e-mail configuration 21 outgoing mail configuration 21 asset number 12 AutoSend 29 FAQs 39 features 1 firewalls 2 flash disks, features available with 2 B browser, required 2 buttons, control panel 6 G Go button 30 group product management 2 H hard disks, features available with 2 help insta
O online help instant support 31, 38 product support 39 opening embedded Web server 2 ordering hard disks 2 supplies 31, 38 Other Links area 37 outgoing mail configuration 21 username 30 W Web browser, required 2 Web Jetadmin 2 websites, support instant 31, 38 product 39 P page counts 11 Paper Handling menu 18 paper usage 11 password 30 PCL documents 14 phone support 39 POP3 configuration 21 print cartridge ordering 31, 38 status 9 usage information 11 Print page 14 PRN files 14 product support 39 PS fil
© 2003 Hewlett-Packard Development Company, L.P. www.hp.