
User's Manual

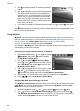

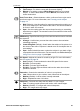


Table Of Contents
- Contents
- Getting started
- Taking pictures and recording video clips
- Reviewing images and video clips
- Using the Design Gallery Menu
- Transferring and printing images
- Using HP Photosmart Express
- Using the Setup Menu
- Troubleshooting
- Product support
- Managing batteries
- Specifications
- Index

3. To specify that a setting return to its default when you turn off the camera or to specify
that the camera start in My Mode each time you turn on the camera:
a.
Use
to scroll to the setting.
b. Use
to either remove the check mark next to a setting or switch the Start in
My Mode setting to Yes.
4. Repeat Step 3 for each setting you want to change.
5.
Press
to return to the My Mode Capture Menu.
6.
To exit the My Mode Capture Menu, press
.
Using the Capture Menu
The Capture Menu allows you to adjust camera settings that affect the characteristics
of the images and video clips you capture.
1.
While in Live View, press
to display the Capture Menu.
2.
Use
to highlight a menu option, then press to display the menu option’s
sub-menu.
3.
Use
to highlight a setting, then press .
4.
Press
to exit the Capture Menu.
For on-camera information about an option, use
to highlight Help... in the option's
sub-menu, then press
.
Shooting Modes—For selecting a shooting mode. For information about
shooting modes and another way to select them, see Using the shooting
modes on page 19.
Self-Timer—For capturing images or recording video after a delay interval
you specify (see Using the Self-Timer settings on page 26).
● Off (Default)—Disables Self-Timer.
● On—For taking one delayed shot or video clip.
● 2 Shots—For taking two delayed shots or one video clip.
For On and 2 shots, you can specify a delay interval of 2, 5, 10, 20, or 30
seconds.
Red-Eye Removal—For automatically removing red eyes when flash is set
to Auto or Flash On and the camera detects red eyes. For information about
red eyes, see Red eye on page 19.
On, Off (Default)
Exposure Compensation—Overrides the camera’s automatic exposure
setting. For more information, see Exposure Compensation on page 27.
● To make the images you are about to capture brighter, press
to increase
the value.
● To make the images you are about to capture darker, press
to decrease
the value.
HP Photosmart R967 Digital Camera 23