
Software RAID in Linux Workstations
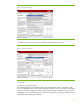
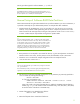

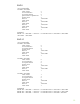
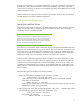
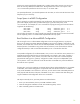
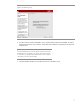
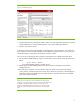
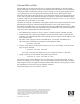

Figure 9. Disk Partitioning Setup
6. Create a RAID device by selecting the “RAID” option in the main partitioning menu, then choosing
“Create a RAID Device” from the “RAID Options” screen, and configuring as desired.
7. Continue with setup as normal.
At this point, finish with the initial installation and configuration of your workstation. You should now
have a partition that will be made bootable on each hard disk in the RAID array. You can verify your
current disk setup by running the df command in a terminal window.
You can now mirror the original /boot partition to the partitions you created on the other drives.
8. For each other bootable partition, copy the contents of the /boot partition to the new partition as
follows:
cp ña /boot/* /boot1/
If your other bootable partition is named /boot1.
9. Repeat step 8 for each bootable partition until each hard drive in the RAID array has been
configured as such.
10. The final step is to edit the /etc/fstab file to allow the system to boot without the original
/boot partition. Comment out the line with the /boot partition by inserting a # at the beginning
of that line in the file. The system will now be able to boot to any of the other drives in the RAID
array if the first disk should fail.
Tip:
While you do not need to have /boot mounted for the system to boot
normally, you will need to mount it if you are running a kernel update. After
the update is complete, repeat these steps to mirror the new /boot
partition to the bootable partitions on the other drives. After this is done,
the /boot partition can safely be removed from the /etc/fstab file
again.
18