
Hardware Reference Guide - dc7700 CMT


Table Of Contents
- Product Features
- Hardware Upgrades
- Serviceability Features
- Warnings and Cautions
- Unlocking the Smart Cover Lock
- Removing the Computer Access Panel
- Replacing the Computer Access Panel
- Removing the Front Bezel
- Replacing the Front Bezel
- Removing Bezel Blanks
- Installing Additional Memory
- Removing or Installing an Expansion Card
- Drive Positions
- Removing a Drive from a Drive Bay
- Installing Additional Drives
- Changing from a Minitower to a Desktop Configuration
- Changing from a Desktop to a MinitowerConfiguration
- Specifications
- Battery Replacement
- External Security Devices
- Electrostatic Discharge
- Computer Operating Guidelines, Routine Care and Shipping Preparation
- Index
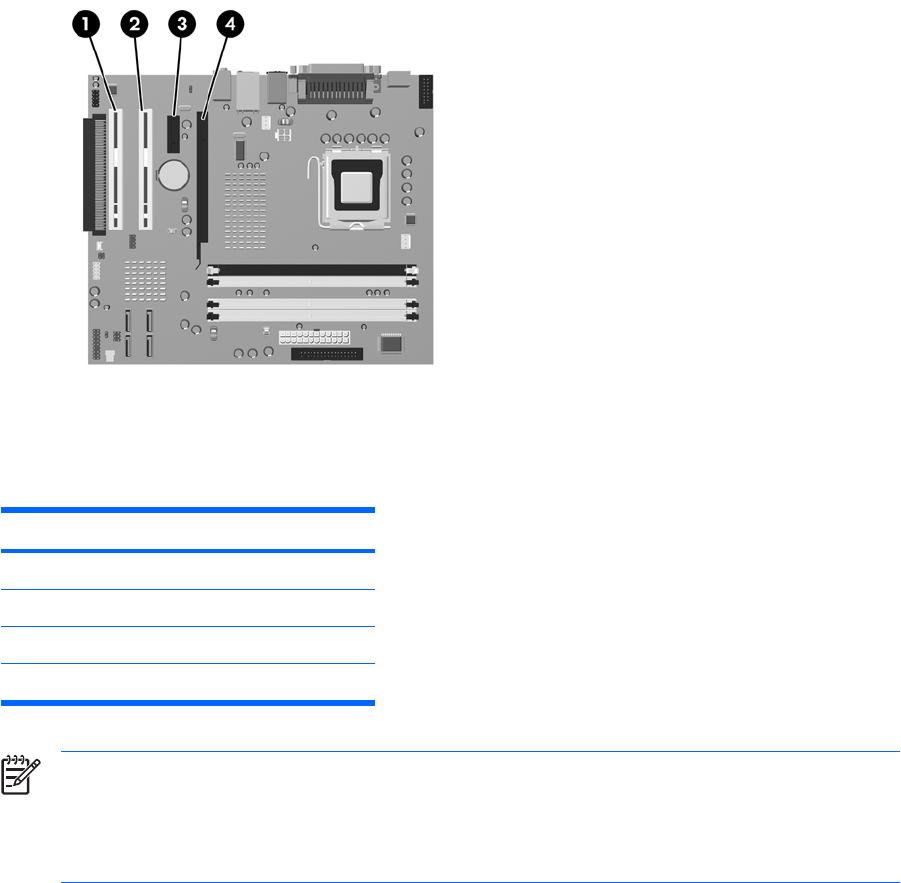
Removing or Installing an Expansion Card
The computer has two standard full-height PCI expansion slots that can accommodate an expansion
card up to 34 cm (13.4 inches) in length. The computer also has one PCI Express x1 expansion slot
and one PCI Express x16 expansion slot.
Figure 2-9 Expansion Slot Locations
Item Description
1 PCI expansion slot
2 PCI expansion slot
3 PCI Express x1 expansion slot
4 PCI Express x16 expansion slot
NOTE Some models include an optional PCI extender that adds two PCI expansion slots to the
board for a total of four PCI expansion slots.
You can install a PCI Express x1, x4, x8, or x16 expansion card in the PCI Express x16 expansion
slot.
To remove, replace, or add an expansion card:
1. Remove/disengage any security devices that prohibit opening the computer.
2. Remove all removable media, such as diskettes or compact discs, from the computer.
3. Turn off the computer properly through the operating system, then turn off any external devices.
4. Disconnect the power cord from the power outlet and disconnect any external devices.
ENWW Removing or Installing an Expansion Card 21