
Hardware Reference Guide - dc7700 CMT


Table Of Contents
- Product Features
- Hardware Upgrades
- Serviceability Features
- Warnings and Cautions
- Unlocking the Smart Cover Lock
- Removing the Computer Access Panel
- Replacing the Computer Access Panel
- Removing the Front Bezel
- Replacing the Front Bezel
- Removing Bezel Blanks
- Installing Additional Memory
- Removing or Installing an Expansion Card
- Drive Positions
- Removing a Drive from a Drive Bay
- Installing Additional Drives
- Changing from a Minitower to a Desktop Configuration
- Changing from a Desktop to a MinitowerConfiguration
- Specifications
- Battery Replacement
- External Security Devices
- Electrostatic Discharge
- Computer Operating Guidelines, Routine Care and Shipping Preparation
- Index
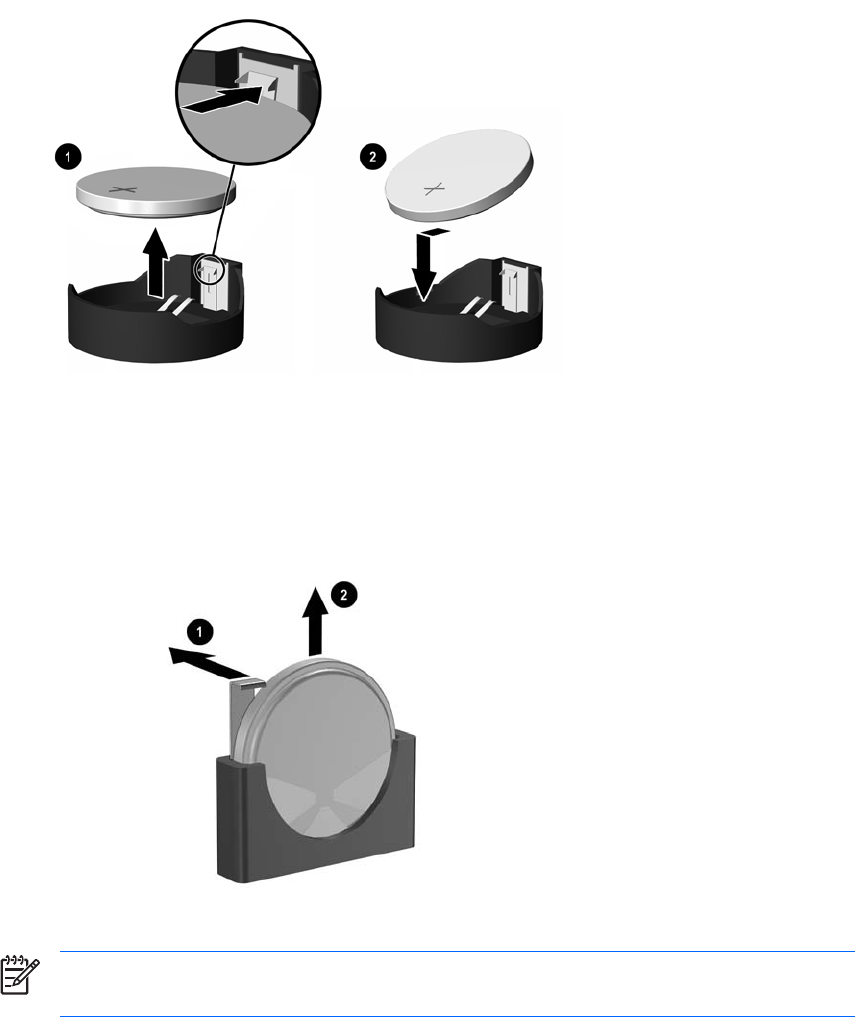
b. To insert the new battery, slide one edge of the replacement battery under the holder’s lip with
the positive side up. Push the other edge down until the clamp snaps over the other edge of
the battery (2).
Figure B-2 Removing and Replacing a Coin Cell Battery (Type 2)
Type 3
a. Pull back on the clip (1) that is holding the battery in place, and remove the battery (2).
b. Insert the new battery and position the clip back into place.
Figure B-3 Removing a Coin Cell Battery (Type 3)
NOTE After the battery has been replaced, use the following steps to complete this
procedure.
8. Replace the computer access panel.
9. Plug in the computer and turn on power to the computer.
10. Reset the date and time, your passwords, and any special system setups using Computer Setup.
Refer to the Computer Setup (F10) Utility Guide on the Documentation and Diagnostics CD.
11. Lock any security devices that were disengaged when the computer access panel was removed.
ENWW 45