
Installing SATA Drivers on HP Notebook PCs - White Paper


3
2) Obtain the SATA Device ID as described in the section “How to Obtain SATA Device
IDs” of this document and insert them where [SATA Device ID] is seen below. Add
the following section to your c:\sysprep\sysprep.inf file:
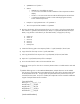
[SysprepMassStorage]
[SATA Device ID] = %systemdrive%\drivers\sata\iaahci.inf ; [optional description]
[SATA Device ID]= %systemdrive%\drivers\sata\iastor.inf ; [optional description]
Please note that each line to be added starts with PCI\. These lines are continued over to
a second row in this paper due to space limitations. In addition, the text displayed after
the semicolon (;) is an example of optional text that can be used to identify which SATA
Device ID is being inserted. This is entirely optional text which can be modified or
completely removed at the customer’s discretion.
3) Add or edit the following section of sysprep.inf to add the SATA drivers to the PnP
drivers path.
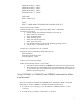
[Unattended]
OemSkipEula=Yes
OemPnPDriversPath=drivers\sata;<your driver list will come here>
ConfirmHardware=No
OverwriteOemFilesOnupgrade=No
DriverSigningPolicy = Ignore
oempreinstall=yes
updateInstalledDrivers=Yes
4)
At this point, the Windows installation is ready for deployment. Run Sysprep on the updated
OS, capture an image, and deploy the image to systems using SATA hardware set to the
default AHCI SATA Native mode.
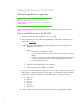
Adding SATA drivers to RIS Installation Points
Where these guidelines are applicable
IMPORTANT:
Follow the installation instructions in the order provided. Failure to
complete these steps in the proper order can result in an unsuccessful or
unstable installation.
This section provides guidelines for customers who need to add SATA support to a Remote Installation
Service distribution point.
Steps to add SATA drivers to the distribution point
1) Download and save the "Intel Matrix Storage Manager" softpaq that is available for your
platform at
www.hp.com.