Hitachi Universal Replicator™ for z/OS User Guide HP XP12000 Disk Array HP XP10000 Disk Array HP 200 Storage Virtualization System nl nl Abstract This document describes and provides instructions for using XP Continuous Access Journal for Mainframe software to configure and perform operations on the HP XP disk array.
© Copyright 2007, 2011 Hewlett-Packard Development Company, L.P. Confidential computer software. Valid license from HP required for possession, use or copying. Consistent with FAR 12.211 and 12.212, Commercial Computer Software, Computer Software Documentation, and Technical Data for Commercial Items are licensed to the U.S. Government under vendor's standard commercial license. The information contained herein is subject to change without notice.
Contents 1 Overview of Universal Replicator for z/OS....................................................8 Hitachi Universal Replicator for z/OS (URz).................................................................................8 Hitachi ShadowImage for z/OS and HP StorageWorks XP Business Copy Software..........................9 Hitachi TrueCopy for z/OS and HP StorageWorks XP Continuous Access Software...........................9 2 Overview of Universal Replicator for Mainframe Operations..............
Requirements and Restrictions for URz.......................................................................................40 Disk Track Format...............................................................................................................40 One-to-One Volume Copy Operations..................................................................................40 Duplicate VOLSER (Volume Serial Number)...........................................................................
Recovering from Failures in the Primary Site......................................................................82 Recovering from Failures in the Primary Site .....................................................................84 Changing to 3DC Multi-target Configuration after Recovering from Primary Site Failures.........85 Transferring Business Tasks from TCz Secondary Site to the Primary Site...............................
Saving Monitoring Data in Text Files.......................................................................................161 8 Viewing History of Data Volume Pair Operations........................................162 History Window...................................................................................................................162 Saving Operation History into a Text File.................................................................................
B Recovering a Pinned Track.......................................................................199 Recovering a Pinned Track on a Data Volume...........................................................................199 Recovering a Pinned Track on a Journal Volume........................................................................199 C Checking Service Information Messages (SIMs)..........................................200 D Acronyms and Abbreviations...............................................
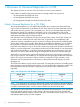
1 Overview of Universal Replicator for z/OS This chapter provides an overview of the XP Continuous Access Journal software.
Once hardware connectivity between the XP disk arrays is established, URz operations can be performed from the remote console PC and/or from the z/OS system software for maximum usability. The HP StorageWorks XP Remote Web Console software displays detailed URz information and allows you to configure and perform URz operations. XP disk array XP Remote Web Console software communicates with the SVP of XP disk array subsystem via defined TCP/IP connections.
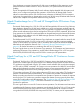
2 Overview of Universal Replicator for Mainframe Operations URz provides a RAID storage-based hardware solution for disaster recovery which enables fast and accurate system recovery. Once URz operations are established, duplicate copies of data are automatically maintained for backup and disaster recovery purposes. During normal URz operations, the primary data volumes remain online to all hosts and continue to process both read and write I/O operations.
Figure 1 URz Components for Fibre Channel Connection URz Components URz operations involve the XP disk arrays at the primary and secondary sites, the physical communications paths between these storage systems, and the XPURz remote console software. URz copies the original online data at the primary site to the offline backup volumes at the secondary site via the dedicated Fibre Channel remote copy connections using a journal volume.
Figure 3 Connection Configuration of Plural Secondary Storage Systems This URz components describes: • XP storage system • Logical DKC • Main and remote control units (primary storage systems and secondary storage systems) • Journal group • Data volume pair • Journal volume • Remote copy connections • Initiator ports and RCU target ports • XP disk array URz remote console software • Host I/O time stamping function • Error reporting communications (ERC) XP Storage Systems URz operation
Main and Remote Control Units The main control unit (primary storage system) and remote control unit (secondary storage system) control URz operations: • The primary storage system is the control unit in the primary storage system which controls the primary data volume of the URz pairs and master journal volume. The XP Remote Web Console remote console PC must be LAN-attached to the primary storage system.
Data Volume Pair URz performs remote copy operations for data volume pairs created by the user. Each URz pair consists of one primary data volume and one secondary data volume which can be located in different storage systems. The URz primary data volumes are the primary volumes (LDEVs) which contain the original data, and the URz secondary data volumes are the secondary volumes (LDEVs) which contain the backup or duplicate data.
Journal volumes in the same journal group can be of different capacity. A master journal volume and the corresponding restore journal volume can be of different capacity. A journal volume consists of two areas: one area is used for storing journal data, and the other area is used for storing metadata for remote copy. • RAID configuration: Journal volumes support all RAID configurations that are supported by XP. Journal volumes also support all physical volumes that are supported by XP disk array.
You can use XP Remote Web Console computers to delete journal volumes. Cautions: ◦ If you delete a mainframe journal volume from a journal group where a data volume pair has ever been registered, the deleted volume (LDEV) will be blocked. To reuse the volume as a data volume, you must format the volume by using Virtual LVI/LUN (VLL). Unless you format the volume, data in the volume will not be guaranteed.
Channel interface (single-mode long wave) connections are used, two switches are required for distances greater than 10 km (6.2 miles), and distances up to 30 km (18.6 miles) are supported. See Setting up Remote Copy Connections for further information on installing and configuring the FC remote copy connections. The URz remote copy configuration between primary storage system and secondary storage system has the following requirements: URz supports 1-to-1 remote copy connection in one journal group pair.
should also be installed on the host processor at the secondary site, so that time-stamps can be used when copying data in the reverse direction. If the system at the primary and/or secondary site consists of several CPU complexes, a SYSPLEX timer is required to provide a common time reference for the I/O time-stamping function.
Initial Copy Operations Initial copy operations synchronize data in the primary data volume and data in the secondary data volume. Initial copy operations are performed independently from host I/Os. Initial copy operations are performed when you create a data volume pair or when you resynchronize a suspended pair.
the secondary data volume belongs to. The secondary storage system will restore the update journals to the secondary data volumes in the order write I/Os are made, so that the secondary data volumes will be updated just like the primary data volumes are updated. Read and Write I/O Operations When a primary storage system receives a read I/O for a URz primary data volume, the primary storage system performs the read from the primary data volume.
and/or the pair is not suspended, the secondary storage system rejects all read and write I/Os to a URz secondary data volume. Difference Management The differential data (updated by write I/Os during split or suspension) between the primary data volume and the secondary data volume is stored in each track bitmap.
URz processing continues uninterrupted if the SVP reboots or even if the SVP fails. Copying Journals to the Secondary Storage System When a primary subsystem receives a read journal command from a secondary subsystem, the primary subsystem sends the journal data to the secondary subsystem. The secondary subsystem’s initiator ports act as host processor channels and issue special I/O operations, called remote I/Os (RIOs), to the primary subsystem.
Figure 5 Selecting and Settling Journal at the Secondary Subsystem The secondary subsystem settles and restores the journal data to the secondary data volume as follows: • Journal data stored in the cache The journal data is copied to the corresponding cached track and promoted to formal data. • Journal data stored in the restore journal volume The journal data is read from the restore journal volume to cache.
Timer Type Option The timer type option allows you to specify the method applied by the primary storage system to acquire the time-stamp information for each journal data. The following timer types are available for selection: • System. When the System timer option is selected, the primary storage system acquires the time-stamp information for each journal data as follows. When a URz pair is established, the primary storage system reports state-change-interrupt (SCI) to all hosts.
URz pair will be restored quickly by the delta resync operation, you will not need to wait for a long time before you can use the URz data volumes again. Delta resync operation consists of the two processes; one is the process for the preparation before the failure occurs, the other is the process for the recovery after the failure occurs.
Figure 6 Delta Resync Setting in 3DC Multi-target Configuration (Before Failure Occurs) As shown in Figure 6 (page 26) a URz pair created with the delta resync option is defined as a pair but no copy operation is performed (Hold status). Actual copy operation will not be performed until when the failure occurs and delta resync operation is performed. There are several requirements to create a URz pair for delta resync operation, such as you need to specify the unused mirror ID.
NOTE: The URz pair needs to be in Hold status to form the delta resync operation when the failure occurs. However, the URz pair status may be changed to Hlde for example when the cache memory or shared memory error occurs in TCz Synchronous secondary site, or when no journal cannot be obtained in TCz Synchronous secondary site because of the failure in the master journal volume or occurrence of the pinned track.
Figure 7 Delta Resync Setting in 3DC Multi-target Configuration (After Failure Occurred) In Figure 7 (page 28), because a failure occurs in the primary site A, Business Continuity Manager is used to change the former TCz Synchronous secondary site to the primary site B. If you perform delta resync operation in this situation, the URz pair for delta resync operation in “Delta Resync Setting in 3DC Multi-target Configuration (Before Failure Occurs)” (page 26) will be synchronized and usable.
In delta resync operation, the status of the URz pair will not change to Pending Duplex but Duplex. This is because delta resync operation copies only the really necessary data by journal copying. Compared to the usual way which copies the whole data in the primary data volume, delta resync operation requires shorter time for the recovery of the URz pair after a failure occurs.
the status of the secondary data volume to suspended, and the primary storage system detects the pair suspension (if the path status is normal) and changes the primary data volume status to suspended. When you release a pair from the primary storage system, the primary storage system changes the status of the primary data volume and secondary data volume (if the path status is normal) to simplex.
NOTE: SIMs are not reported to the host by default. To report SIMs to the host, change the default setting by using the Optional Operation window. For more information, see “Enabling or Disabling SIM Reporting” (page 172). • URz Pair Status The URz Suspending and Deleting (release) transitional states occur when a request to change URz pair status has been accepted, but the change to the requested status (suspended, or simplex) is not yet complete. These states are not reported to the host.
Table 4 URz Data Volume Pair Status (continued) Pair Status Description Duplex This data volume pair is synchronized. Updates to the primary data volume are duplicated on the secondary data volume. Suspended (see Suspend Types for suspend types) • When the primary storage system detects a URz suspension condition (see Suspension Condition), the primary storage system changes the primary data volume status and secondary data volume status (if possible) to suspended.
Table 4 URz Data Volume Pair Status (continued) Pair Status Hold Description The pair is prepared for delta resync operation. When the status of primary data volume is Hold, the write data for the TCz Synchronous R-VOL is stored in the master journal volume. Only the delta resync operation, releasing operation, or changing pair option operation are allowed on the pairs in Hold status. Hlde An error occurred on the pair in Hold status.
Table 5 Suspend Types Suspend Type Applies to Description Secondary data volume by operator Primary data volume, secondary data volume The user suspended the pair from the primary storage system or secondary storage system using the secondary data volume option. By MCU Secondary data volume The secondary storage system received a request from the primary storage system to suspend the volume pair.
URz Suspension Condition URz operations also involve suspension conditions related to asynchronous operations. Both the primary storage system and secondary storage system can detect URz suspension conditions and suspend URz pairs. Table 7 (page 35) describes the URz suspension conditions and indicates which CU detects the condition and which pairs are suspended. See General Troubleshooting for troubleshooting information for URz suspension conditions.
status, add DKC, and delete DKC. “SAID Values for the PATH LINK Parameter (FRONT CL1)” (page 36) and “SAID Values for the PATH LINK Parameter (REAR CL2)” (page 37) explain the XP disk array system adapter ID(SAID) values. For further information and instructions on Business Continuity Manager, see the HP StorageWorks XP for Business Continuity Manager Software User's Guide.
Table 8 SAID Values for the PATH LINK Parameter (FRONT CL1) (continued) Package Location Port SAID Package Location Port CL5-H X'0047' CL5-R CL7-H X'0067' CL7-R SAID Package Location Port SAID X'004F' CLD-M X'006F' CLF-M Package Location Port SAID X'00CB' CLD-D X'00C3' X'00EB' CLF-D X'00E3' Port SAID Table 9 SAID Values for the PATH LINK Parameter (REAR CL2) Package Location Port SAID Package Location Port SAID 2Q CL2-A X'0010' 2T CL2-J X'0018' (Basic) CL4-A X'0030
Table 9 SAID Values for the PATH LINK Parameter (REAR CL2) (continued) Package Location Port SAID Package Location Port CL6-H X'0057' CL6-R CL8-H X'0077' CL8-R SAID Package Location Port SAID Package Location Port SAID X'005F' CLE-M X'00DB' CLE-D X'00D3' X'007F' CLG-M X'00FB' CLG-D X'00F3' Command Device To use Business Continuity Manager, you must set the command device for it separately from the command device for an open system.
3 Requirements and Restrictions for Universal Replicator z/OS Operations This chapter describes URz operations involving the XP disk array primary and secondary storage systems, the remote copy connections between the primary/secondary storage systems, and the host(s) at the primary and secondary sites, as well as the licensed URz remote console software.
For further information on XP Remote Web Console operations, see the HP StorageWorks XP Remote Web Console user guide for XP12000/XP10000 Disk Arrays and SVS 200, or contact your HP account team. NOTE: Administrator or URz write access to the XP Remote Web Console Java applet program is required to perform URz operations.
NOTE: URz does not support operations in which one primary data volume is copied to more than one secondary data volume, or more than one primary data volume is copied to one secondary data volume. Because URz operates on volumes rather than on files, multivolume files require special attention.
Notes: • The CU emulation type 3990-6, 3990-6E, 2105, or 2107 is required for SMS I/O time stamping of URz journals. If one of these CU emulation types is used, volumes of the 3380 emulation type must not be used. • The CU emulation type H-65A2 is used for the HITAC M series and supports all types of M series volumes. Table 11 (page 42) lists the volumes and the volume capacity that can be used for the URz data volume and journal volume.
CAUTION: Volumes containing a VMA (volume management area) cannot be used as journal volumes. For detailed information about a VMA, see the HP StorageWorks LUN Security XP Extension user guide. Table 12 (page 43) explains emulation types and the capacity of volumes that can form pairs. For details on the maximum number of pairs, see Journal Group. Table 12 Specifications of Volumes That Can Form Pairs Item Support specifications Emulation type Same emulation type. Volume capacity The same capacity.
the number of pairs is applied to both the primary storage system and the secondary storage system. • The number of the required bitmap areas: The number of bitmap areas to be used by all data volumes that form pairs can be calculated out of the number of cylinders. If one pair of extended shared memories is used, the number of bitmap areas that can be used in a disk subsystem is 11,605.
Table 15 Maximum Number of Pairs According to Each Emulation Type, When Pairs Are Created Without Use of VLL Volume (continued) Emulation Type Number of Cylinders Number of Bitmap Areas Maximum Number of Pairs Maximum Number of Pairs (Added Shared Memory: 1 pair) (Added Shared Memory: 2 pairs) 3390-1 1,113 1 11,605 16,384 3390-2 2,226 1 11,605 16,384 3390-3 3,339 1 11,605 16,384 3390-9 10,017 2 5,802 14,335 3390-L 32,760 5 2,321 5,734 3390-M 65,520 9 1,289 3,185 H6586-G 1,
journal group with two or more restore journal groups. Each pair relationship in a journal group is called "Mirror." Mirror ID identifies two or more mirrors that one journal group has. The same Mirror ID of the journal group is applied to the data volume pair. See“Combining URz with TCz Synchronous (3DC Cascading Configuration)” (page 74).
URz does not allow the secondary data volume to be online (except while the pair is split). If the secondary data volume is online, the URz add pair operation will fail. WARNING! If the URz secondary data volumes are physically attached to the same host server(s) as the URz primary data volumes, the following problem can occur: • When a URz pair is released, the old secondary data volume is usually offline.
km in length and up to two switches are required for distances greater than 0.5 km. If you use single-mode long wave optical fiber cables, fibre cables up to 30 km in length and up to two switches are required for distances greater than 10 km. URz operations can be performed at distances of up to 30 km (18.6 miles) using standard single-mode long wave support. For further distance, the channel extender connections are required. URz operations can be performed at distances of up to 30 km (18.
The remote copy connection between primary storage system and secondary storage system provides three different configurations: • Direct connection (see “Direct Remote Copy Connections” (page 49)), ◦ Switch connection (see “Switch Remote Copy Connection” (page 49)), ◦ Extender connection (see “Extender Remote Copy Connection” (page 49)). * To set ports, use LUN Manager and set port topology to: Fabric off, FC-AL.
To operate the URz software, PC for the XP Remote Web Console is required. For further information on HP XP Remote Web Console operations, see the HP StorageWorks XP Remote Web Console user guide for XP12000/XP10000 Disk Arrays and SVS 200, or contact your HP account team. Planning of Journal Volumes This section contains an explanation of how to plan your Journal Volumes.
Figure 12 Data Transfer Speed with URz (Data Transfer Speed of Journal Volumes) As illustrated in Figure 12 (page 51), the data transfer speed (that is, the speed for reading and writing) of journal volumes in the master journal group must exceed the amount of temporary increase in data to be transferred.
Journal Volume Capacity In Figure 13 (page 52), the size of the shaded area indicates the amount of journal data to be stored in journal volumes as a result of temporary increase in data transferred. If a temporary communication path failure occurs between the primary storage system and the secondary storage system, journal transfers between the primary storage system and the secondary storage system will stop temporarily.
If you do not want to reverse the primary data volume and the secondary data volume, you will be able to cope with a temporary increase in data transfers and a communication path failure between the primary storage system and the secondary storage system, if the master journal volume satisfies conditions mentioned earlier. Therefore, the data transfer speed and the volume capacity required for restore journal volumes are smaller than those required for master journal volumes.
Configuring the Primary and Secondary Storage Systems After you have installed the URz hardware and software, you can configure the primary storage systems and secondary storage systems for URz operations. To configure the primary storage systems and secondary storage systems for URz operations: 1. 2. Identify the volumes that will become the URz data volumes and journal volumes in primary storage system and secondary storage system.
Figure 15 Using More Than One Primary and Secondary Subsystem for Remote Copy When primary hosts write data to primary data volumes, the hosts add time stamp to the data. Secondary subsystems check time stamps and then restore data to data volumes in chronological order (older data are restored earlier), so that data update sequence is maintained.
Basic Behavior This section explains the basic behavior of URz under the following conditions: • There are two primary subsystems and two secondary subsystems. • The status of all the URz pairs that use journal groups in the extended consistency group is Duplex. • The primary host issues write requests to URz primary data volumes. The following figure illustrates a URz operation when the above conditions are satisfied.
Hardware Configuration (When More Than One Primary and Secondary Storage System are Used) This section explains hardware configuration when more than one primary and secondary subsystem are used. It is recommended that Business Continuity Manager is installed on the host in the primary and secondary sites. XP Remote Web Console PCs must be installed in both of these sites. Also, disk subsystem settings must be made so that Business Continuity Manager can be used.
Table 18 Specifications of Extended Consistency Groups Item Specifications The number of extended consistency groups that can be created Up to four per one storage system The number of journal groups that can be registered in one extended consistency group Up to 16 The following list explains configuration of extended consistency groups (that is, primary and secondary EXCTGs). Take this information into consideration when configuring extended consistency groups.
2 and 3 and secondary subsystems 2 and 3. If you restore data volume pairs in journal group 1, the supervisor DKC will execute arbitration processing on journal groups 1 and 3. NOTE: When you collectively split data volumes pairs in a specific journal group in an extended consistency group, you cannot use the REVERSE option of the Business Continuity Manager YKSUSPND command.
2. ◦ In Journal group 3, the latest time stamp is 15:03. ◦ In Journal group 4, the latest time stamp is 15:04. URz searches for the oldest time stamp from the ones identified in step 1 and restores data up to that time to the secondary volumes. In the example shown in Figure 18 (page 60), the oldest time stamp is 15:00. URz restores all data that have a time stamp 15:00 or earlier to the secondary data volumes. ◦ For Journal group 1, URz restores all data up to 15:00.
◦ – The consistency time of Journal group 3 is 14:03. – The consistency time of Journal group 4 is 14:04. The consistency time of a data volume pair is the latest time stamp of the data that has been restored when the pair becomes suspended.
Figure 19 An Example of Connections among Secondary Subsystems Based on the example in Figure 19 (page 62), the subsections below explain configuration of paths and ports, and creation of remote command devices. Configuring paths and Ports to Establish Connections among Secondary Storage Systems To establish connections among secondary subsystems, you must configure external ports on the subsystem that should be used as the supervisor DKC.
The consistency of data update sequence will be maintained if a failure occurs in a primary storage system, but the consistency will not be maintained if a failure occurs in a secondary storage system. For example, in the case described in Figure 20 (page 63), if a failure occurs in the primary storage system 1 at 10:00 a.m., journal groups 1 to 3 will be suspended due to the failure, and the data written from the host before 10:00 a.m.
Combining URz with Other Data Management Operations This chapter explains how to combine Universal Replicator with other data management operations.
Table 19 Whether Non-URz Volumes Can Be Used as URz Volumes (continued) Functions and Volumes Source volume (when volume migration is in progress) Can the Volumes be Used as Can the Volumes be Used as Can the Volumes be Used as Primary Data Volumes? Secondary Data Volumes? Journal Volumes? Yes Yes NOTE: Volume migration stops when the source volume is used as a primary data volume. NOTE: Volume migration stops when the source volume is used as a secondary data volume.
Table 19 Whether Non-URz Volumes Can Be Used as URz Volumes (continued) Functions and Volumes Can the Volumes be Used as Can the Volumes be Used as Can the Volumes be Used as Primary Data Volumes? Secondary Data Volumes? Journal Volumes? HP Cache LUN XP Volume on which Cache LUN XP settings are made Yes Yes Yes Yes Yes Yes Yes Yes Yes Compatible PAV Compatible PAV Virtual LVI Virtual LVI volume Note*1: You cannot use the volume as a data volume of the URz pair for delta resync operation.
Table 20 Host Pair Status Reporting for URz/SIz Shared Volumes Number of Number of SIz URz pairs T-VOLs Pair status reported by XP disk array 0 0 Simplex 0 1 SIz pair status 0 2 or more SIz pair status for the pair whose S-VOL has the lowest LDEV ID 1 0 URz pair status 1 1 URz pair status 1 2 or more URz pair status Table 21 Data Currency of a Shared URz/SIz Volume SIz pair status URz pair status Pending Duplex Duplex Split-Pending Split Resync Suspended Pending Duplex Not curren
Figure 22 Shared URz Secondary Data Volume and SIz S-VOL CAUTION: If you use a URz secondary data volume as an SIz S-VOL as shown in Figure 22 (page 68), the write operation to the URz primary data volume takes time. Especially, when the SIz pair is in the V-Split status, the write operation to the URz primary data volume may takes extra time according to the time for copying process of the SIz pair.
Figure 24 SIz T-VOL in Split Status Functioning as URz Primary Data Volume If a failure occurs and the SIz S-VOL is damaged in “SIz T-VOL in Split Status Functioning as URz Primary Data Volume” (page 69), take the following steps to copy data from the URz secondary data volume to the SIz S-VOL so that data can be restored to the SIz S-VOL: 1. 2. 3. 4. 5. 6. 7. 8. 9.
Figure 26 Restoring a SIz S-VOL - Step 2 Figure 27 Restoring a SIz S-VOL - Step 3 Figure 28 Restoring a SIz S-VOL - Step 4 Figure 29 Restoring a SIz S-VOL - Step 5 70 Requirements and Restrictions for Universal Replicator z/OS Operations
Figure 30 Restoring a SIz S-VOL - Step 6 Figure 31 Restoring a SIz S-VOL - Step 7 Figure 32 Restoring a SIz S-VOL - Step 8 Figure 33 Restoring a SIz S-VOL - Step 9 Combining URz with Other Data Management Operations 71
Using At-Time Split Function When Combining URz with ShadowImage for z/OS When URz secondary data volume (S-VOL) is specified as S-VOL of SIz pair, you can specify the time of backup copy operation for URz by using the At-Time Split function of the Business Continuity Manager. This backup copy operation is called the split operation. The time when split operation is executed is called the split time.
• Make sure that all of the URz S-VOLs are paired with SIz volumes. Also, all of the SIz pairs in conjunction with URz S-VOLs must belong to the same ShadowImage for z/OS consistency group. If all the URz S-VOLs are not paired with SIz volumes, or if SIz pairs in conjunction with URz S-VOL belong to different ShadowImage for z/OS consistency groups, consistent backup copy operations cannot be executed.
consistency group, pairs can be deleted. If you delete the following pairs, the specified split time will be deleted: ◦ Delete all the SIz pairs belonging to the ShadowImage for z/OS consistency group. ◦ Delete all the URz pairs belonging to the URz restore journal group. Combining URz with TCz Synchronous (3DC Cascading Configuration) The XP storage system provides the function to combine URz and TCz Synchronous.
reported to the primary site, and then the fact that I/O has been finished will be reported to the host. Also, data in the URz primary data volume (that is, TCz Synchronous R-VOL) will be stored as journal data into the master journal volume in the intermediate site. Sequence numbers, which indicates the order that data will be written, will be added to these journal data.
• ◦ The XP storage system must have a URz master journal volume. ◦ Storage system settings must be made so that Business Continuity Manager can be used. For detailed information about settings required for using volumes in a remote site, see the HP StorageWorks XP for Business Continuity Manager Software User's Guide. Remote site ◦ The XP storage system must have URz installed. ◦ The XP storage system must have a URz secondary data volume.
When a disaster or failure occurs, the above procedure enables you to resume your business tasks by using TCz Synchronous M-VOLs in the intermediate site. The TCz Synchronous M-VOLs in the intermediate site will contain the same data that are stored in the TCz Synchronous M-VOLs in the primary (main) site. For detailed information about copy status in Business Continuity Manager, see the HP StorageWorks XP for Business Continuity Manager Software User's Guide.
3DC multi-target configuration provides solution for disaster recovery and business continuity. Even when a disaster or failure occurs at two sites at the same time, you can restart your business tasks by using data in the remaining secondary site.
will also be written to the URz secondary data volume, asynchronously with writing from the host. Update sequence consistency will be maintained with the URz secondary data volume. Since writing from the URz primary volume to the URz secondary volume is performed asynchronously with writing from the host to the primary volume, this configuration can prevent delay in response to the host even if the URz primary site and the URz secondary site are far from each other.
• ◦ The XP storage system must have a URz master journal volume ◦ If you use Business Continuity Manager, you need to make settings on the storage system. See the HP StorageWorks XP for Business Continuity Manager Software User's Guide for information about settings required for volume operations in remote sites. XP storage system in the TCz Synchronous secondary site: ◦ The XP storage system must have TCz Synchronous installed. ◦ The XP storage system must have URz installed.
NOTE: If you delete the TCz Synchronous pair that is created in step 2, the URz pair created in step 6 will be deleted as well. In addition, if you delete the URz pair created in step 4, the secondary data volume of the URz pair created in step 6 will be deleted. In this case, you can only perform deleting operation on the remaining primary data volume.
When either of the above-mentioned requirements is not fulfilled, usually an error occurs and delta resync operation will fail.
NOTE: a. b. YKRESYNC is a command for re-establishing a copy pair. If reversing of the copy direction fails (as illustrated in the upper-right picture in Figure 38 (page 83)), create a URz pair. Ensure that the primary data volume of the pair is a volume in the TCz Synchronous secondary site, and that the secondary data volume of the pair is a volume in URz secondary site. To create this URz pair, use Business Continuity Manager to execute YKMAKE command on the journal group corresponding to the pair.
Recovering from Failures in the Primary Site If a disaster or failure occurs only in the primary site in 3DC multi-target system, you can use secondary volume in the TCz Synchronous secondary site to enable the secondary site to take over your business tasks. After transferring your business tasks to the secondary site, you need to remove the failure from the primary site, so that you will be able to transfer your business tasks back to the primary site.
NOTE: In order to transfer business tasks back to the primary site, remove failures in the primary site and other locations, and then follow the instructions in “Transferring Business Tasks from TCz Secondary Site to the Primary Site” (page 88).
Figure 40 Changing into 3DC Multi-target Configuration After Recovering from Primary Site Failures Transferring Business Tasks from TCz Secondary Site to the Primary Site If you follow the operation procedure in “Recovering from Failures in the Primary Site and the TCz Synchronous Secondary Site” (page 90) the system will be changed to 3DC cascading configuration, you can transfer your business tasks back to the primary site after removing failures from the primary site and other locations.
NOTE: YKRESYNC is a command for re-establishing a pair. Figure 41 Transferring Business Tasks from TCz Secondary Site to the Primary Site (in 3DC Cascading Configuration) Transferring Business Tasks from TCz Secondary Site to the Primary Site (in 3DC Multi-target Configuration) If you remove failures from the primary site and other locations and then the system is changed to 3DC multi-target configuration, you can transfer your business tasks back to the primary site.
When the pair is created, the system configuration returns to the original 3DC multi-target configuration. NOTE: YKMAKE is a command for establishing a pair.
Table 23 Changes of URz Pair Status by Delta Resync Operation (When Business Tasks are Transferred from TCz Secondary Site to the Primary Site) URz Pair Pair Status before Delta Resync Operation Primary Data Volume Secondary Data Volume Pair Status after Delta Resync Operation Primary Data Volume Secondary Data Volume URz pair between TCz Hold Synchronous primary site and URz secondary site Hold Duplex or Pending Duplex Duplex or Pending Duplex URz pair between TCz Duplex or Synchronous Suspend sec
Figure 43 Transferring Business Tasks from the TCz Secondary Site to the Primary Site (When Delta Resync Operation is Performed in 3DC Multi-target Configuration) Recovering from Failures in the Primary Site and the TCz Synchronous Secondary Site If a disaster or failure occurs in both the primary site and the TCz Synchronous secondary site in a 3DC multi-target configuration, you can resume your business tasks by using the secondary volume in the URz secondary site.
Figure 44 Recovering from Failures in the Primary Site and the TCz Synchronous Secondary Site Transferring Business Tasks from the URz Secondary Site to the Primary Site If you follow the instructions in “Recovering from Failures in the Primary Site and the TCz Synchronous Secondary Site” (page 90) and then remove failures from the primary site and the TCz Synchronous secondary site, you can transfer your business tasks back to the primary site.
NOTE: YKMAKE is a command for creating a pair.
4 Configuring Disk Storage Systems and Logical Paths To introduce Universal Replicator for Mainframe (henceforth abbreviated as URz) into your system and configure your system for remote copy operations, you must consider which data should be copied from which storage system to which storage system. The storage system containing data to be copied to another storage system is referred to as the primary storage system.
To display the DKC Operation window, do either of the following: • If Universal Replicator for Mainframe has not been started: 1. Use your Web browser to display the storage device list. In the storage device list, select the storage system to log in. Enter a user name and the password, and then click OK. The XP Remote Web Console main window is displayed. 2. On the XP Remote Web Console main panel, select the URz icon. URz starts. 3. Select the Journal Operation tab.
If you select Port, the DKC Operation window displays information about ports on the local storage system.
Figure 47 Remote Storage System Information in the DKC Operation Window • Tree: Lists the remote storage systems at each of the LDKCs of the local storage systems. The following information appears to the right of the icon of the remote storage system: • controller ID of a remote storage system (The model name of the remote storage system) ◦ serial number of the remote storage system ◦ path group ID The LDKC#01 cannot be used in this version.
NOTE: The controller ID for an XP storage system is 4. ◦ S/N(LDKC) displays the five-digit serial number and the LDKC number of the remote storage system. ◦ Path Gr. ID displays the path group ID. All the path group IDs are displayed as Default. ◦ M-R Path indicates the channel type of the logical paths between the local storage system and the remote storage system. This column always displays Fibre. ◦ Status indicates whether logical paths fail.
Displaying Information about Ports on the Local Storage System To display information about ports on the local storage system in the DKC Operation window: 1. In the Display box, select Port. The tree displays a list of channel adapters and port attributes (“Logical Paths Information in the DKC Operation Window” (page 97)). 2. Do either of the following in the tree: • Select Subsystem. The list displays all the ports on the local storage system. • Select a channel adapter.
◦ PCB Mode displays the mode of the port. The mode is either Standard, High or MIX. ◦ Error Code displays an error code. Configuring Port Attributes The administrator at both the primary site and the secondary site must configure ports on the primary storage system and the secondary storage system in the following ways: • The administrator at the primary site must configure target ports, initiator ports, and RCU target ports on the primary storage system.
If initiator ports and RCU target ports are not configured on both primary and remote storage systems, the following problems will occur and remote copy operations will not be performed: • The administrator at the primary site will be unable to create any pair of a primary data volume and a secondary data volume. • The secondary storage system will be unable to read data from journal volumes in the primary storage system.
Associating the Primary and the Remote Storage Systems and Configuring Logical Paths (Add DKC) The Add DKC window (see Figure 50 (page 102)) allows you to associate the primary storage system and the secondary storage system, and also allows you to establish logical paths between the two storage systems. Logical paths are used to connect the primary and secondary storage systems. Both the primary storage system and the secondary storage system use logical paths to communicate with each other.
12. See the Preview list to check the settings that you have made. • To modify a setting, select and right-click the setting from the Preview list and then select Modify. A window appears and allows you to modify the setting. • To cancel a setting, select and right-click the setting in the Preview list and then select Cancel. 13. Select Apply to apply the settings that you have made. If an error occurs, the rightmost column of the Preview list displays the error code.
• M-R Path: allows you to specify logical paths from initiator ports on the local storage system to RCU target ports on the remote storage system. • Port: displays a list of initiator ports on the local storage system. Select an initiator port from this drop-down list. • Pair-Port: displays a list of all ports on the remote storage system. Select an RCU target port on the remote storage system from this drop-down list. NOTE: When specifying a port, you can use the keyboard to enter the port number.
Figure 51 DKC Option Window The DKC Option window displays the following: • The Minimum Paths option specifies the minimum number of paths required for each remote storage system connected to the local storage system (default =1). NOTE: • You cannot change the Minimum Paths for the current version. The I/O missing interrupt handler (RIO MIH) Time setting specifies the RIO MIH timer value, which is the wait time until data transfer from the local storage system to the remote storage system is complete.
9. See the Preview list to check the settings that you have made. • To modify a setting, select and right-click the setting from the Preview list and then select Modify. A window appears and allows you to modify the setting. • To cancel a setting, select and right-click the setting in the Preview list and then select Cancel. 10. Select Apply to apply the settings that you have made. If an error occurs, the rightmost column of the Preview list displays the error code.
4. 5. 6. Do either of the following: • In the tree, select a remote storage system. • In the list, select and right-click a remote storage system and then select Edit Path(s) from the pop-up menu. The list displays information about logical paths. In the list, select the logical path(s) that you want to delete. Right-click the list and then select Delete Path from the pop-up menu. A confirmation message appears. 7. 8. 9. Select OK to close the message.
Figure 53 DKC Status Window The DKC Status window displays the following: • List: ◦ No.: displays serial numbers used for rows in the list ◦ Path Status: indicates status of a logical path (For details, see Table 25 (page 107)) ◦ Port: indicates a port on the local storage system ◦ Pair-Port: indicates a port on the remote storage system. • S/N: indicates the serial number and LDKC number of the remote storage system.
Table 25 Logical Path Status (continued) Status Initialization Failed Remarks An error occurred with initialization of connection between the local and the remote storage system. The probable causes are: No cable is connected to the local storage system. No cable is connected to the remote storage system. No cable is connected to the network device that comes between the local and the remote storage system.
12. See the Preview list to check the settings that you have made. • The Preview list displays the specified remote storage system(s). One row indicates one remote storage system. • To cancel removal of the relationship, select and right-click remote storage system in the Preview list and then select Cancel. 13. Select Apply to remove the relationship.
5 Using Journal Groups To introduce URz in your system and configure your system for remote copy operations, the primary site administrator and the secondary site administrator must configure journal groups, as well as ports and logical paths. Also, these administrators must register journal volumes in journal groups. During URz remote copy operations, data in primary data volumes are copied via journal volumes to secondary data volumes.
NOTE: 2. For detailed instructions on this step, see XP Remote Web Console user's guide. Click Go, Universal Replicator for Mainframe and then Journal Operation on the menu bar of the XP Remote Web Console main window. URz starts and the Journal Operation window is displayed. 3. • Select the EXCTG Operation tab. The EXCTG Operation window is displayed.
1. Select the Journal Operation tab. The Journal Operation window is displayed.
in. NOTE: The tree displays journal groups used with URz, and does not display journal groups used with UR (Universal Replicator). ◦ Journal Groups: This item is located at the top of the tree. When you select this item, the upper-right list displays journal groups in the local storage system. ◦ Registered: When you select this item, the upper-right list displays journal groups in which journal volumes are registered. When you double-click this item, LDKCs are displayed in the tree.
If this check box is selected, the list below this check box displays journal groups numbered 00 to FF. CAUTION: to FF. • You cannot perform the following operations onto journal groups numbered 10 ◦ Registering journal volumes in journal groups ◦ Deleting journal volumes from journal groups ◦ Changing journal group options ◦ Restoring mirrors Upper-right list: If a master journal group or a restore journal group is selected in the tree, the upper-right list displays a list of mirrors.
◦ Status: Indicates the status of a journal group in the local storage system. Initial A journal group in initial status. Journal volumes are registered in this journal group, but no data volumes (primary data volumes nor secondary data volumes) are registered in this journal group. When you create a URz volume pair, data volumes will be registered in a journal group. The status of the journal group will change to Active. Active Either of the following: Initial copy is in progress.
◦ Controller ID: Indicates the controller ID (model name that indicates the model) of the remote storage system. This column is blank if the attribute of the journal group is neither Master nor Restore. NOTE: ◦ The controller ID for an XP storage system is 4. Path Gr. ID: Displays path group IDs, which are used to identify path groups (that is, groups of logical paths). Up to eight logical paths can be registered in one path group.
◦ Preview: The number to the left of the slash (/) indicates the number of items displayed in the Preview list. The number to the right of the slash indicates the maximum number of items that can be displayed in the Preview list. For example, if Preview 010/256 is displayed, you can add another 246 items to the Preview list. • Apply: Applies settings in the Preview list to the storage systems. • Cancel: Cancels settings in the Preview list.
3. In the tree of the Journal Operation window, do either of the following: • To register new volumes to a journal group in which journal groups are already registered, select the journal group from below Registered. CAUTION: You can register volumes only when the attribute of the journal group is Initial or when the status of the journal group is Active, or Stop, Hold, or Hold(Failure). • 4. 5.
9. See the Preview list to check the settings that you have made. • To add volumes to register, select and right-click a volume in the Preview list and then select Modify. A window appears and allows you to add volumes. • To cancel registering a volume, select and right-click the volume and then select Cancel. • If necessary, you can repeat steps 3 – 9 beginning on page to add volumes to other journal groups. 10. Select Apply to register journal volumes.
◦ CLPR: Indicates the number and the name of the CLPR where the journal volume belongs. ◦ Operation: Displays one of the following information: Blank This column usually displays a blank. Add Indicates a volume to be added to a journal group Delete Indicates a volume to be deleted from a journal group • Add: Use this button when you register volumes in a journal groups. When registering volumes, you select the volumes from Free Volumes and then select Add to add the volumes to JNL Volumes.
• PG/CU change: The following radio buttons enable you to switch information in the Free Volumes list: ◦ PG: Use this radio button if you want the Free Volumes list to display volumes belonging to a parity group. If you select this radio button, specify a parity group number in the text boxes to the right, and then select the Show button, Free Volumes will display volumes in the specified parity group (see “The Free Volumes List and the PG Button in the Edit JNL” (page 121)). ◦ PG(Ext.
• Current: Indicates the number and the capacity of journal volumes that currently exist in the journal group. NOTE: If the number of journal volumes is 0, the capacity does not display. • Total: Estimates the number and the capacity of journal volumes after addition or deletion, and then displays the estimated number and the capacity. • Set: Applies the settings in the window to the Journal Operation window (Journal Operation Window). • Cancel: Cancels the settings.
8. 9. See the Preview list to check the volumes that you want to delete. • To add volumes to delete, select and right-click a volume in the Preview list and then select Modify. A window appears and allows you to specify volumes to delete. • To cancel deleting a volume, select and right-click the volume and then select Cancel. • If necessary, you can repeat steps 3–8 beginning 3 to specify volumes that should be deleted from other journal groups. Select Apply to delete journal volumes.
The JNL Group Detail window displays the following information: • JNL Group(LDKC): Indicates the number of a journal group and the LDKC number. The LDKC number is enclosed in the parentheses following the serial number. • Attribute: Indicates the attribute of the journal group. When one journal group uses multiple mirror IDs, Attribute indicates the attribute of the data volume in the journal group whose mirror ID is not Hold or Hold(Failure). Initial A journal group in initial status.
• Use of Cache: Indicates whether to store journal data in the restore journal group into the cache. ◦ Use: Journal data will be stored into the cache. When there is insufficient space in the cache, journal data will also be stored into the journal volume. ◦ Not Use: Journal data will not be stored into the cache. CAUTION: This setting does not take effect on master journal groups.
• ◦ Capacity: Indicates the capacity of a journal volume. The unit is cylinders if the volume is a mainframe volume. The unit is gigabytes if the volume is an open-systems volume. ◦ Emulation: Indicates the emulation type of a journal volume. ◦ CLPR: Indicates the number and the name of the CLPR where the journal volume belongs. Mirrors: Displays a list of mirrors. ◦ Mirror ID: indicates a mirror ID. This column is blank if the attribute of the journal group is neither Master nor Restore.
◦ Hold(Failure) An error occurred with the URz pair for delta resync operation. Blank Neither journal volumes nor data volumes are registered in this journal group. S/N(LDKC): Indicates the serial number and the LDKC number of the remote storage system. This column is blank if the attribute of the journal group is neither Master nor Restore. ◦ Pair JNLG: Indicates the number of a journal group in the remote storage system.
4. In the Change JNL Option window (“Change JNL Option Window” (page 128)), select Set. CAUTION: If the status of the journal group is Active, or if the status of the master journal group is Hold, you can change only the Line of Speed option. If two or more journal groups were selected in step 3, and want to make some options in the Change JNL Options window unchanged, then you must specify blank for the options. If you specify blank for an option, the option value will remain unchanged.
• High: The speed of the initial copy activity is faster than Low and Medium. To specify High, ensure that update I/Os (that is, write requests from hosts to primary data volumes) will not occur. If update I/Os occur, data volume pairs may become split (suspended). : The secondary storage system administrator cannot specify this option. • Unit of Path Watch Time: Allows you to specify the unit of path watch time. You can specify one of the following: minute, hour, or day.
is forwarded from the master journal group to the restore journal group, the two journal groups will have the same Path Watch Time value. ◦ Yes: The Path Watch Time value will be forwarded to the restore journal group. ◦ No: The Path Watch Time value will not be forwarded to the restore journal group. No is the default. ◦ Blank: The current setting of Forward Path Watch Time will remain unchanged. CAUTION: This option cannot be specified in the secondary site.
Notes: ◦ Ensure that the same timer type is specified in both the primary and the secondary sites. ◦ If At-Time Split function is used when URz and SIz are used in conjunction, the Timer Type cannot be changed. ◦ You can only specify None if the journal group belongs to an extended consistency group. • Set: Applies the settings in the window to the Journal Operation window (Journal Operation Window). • Cancel: Cancels the settings.
The list displays a list of mirrors. One row in the list represents one mirror. 4. 5. 6. 7. 8. 9. Locate mirrors that are in Active status. From the mirrors, select and right-click the mirror(s) that you want to split. From the pop-up menu, select JNL Groups and Suspend Pair. In the Suspend Pair window (“Suspend Pair Window” (page 132)), specify parameters and then select Set. See the Preview list to check the mirrors that you want to split.
Restoring a Mirror (Resuming a Copy Operation) A mirror is a combination of a master journal group and a restore journal group. If you split a mirror, the copying of data from the master journal group to the restore journal group will be suspended. To restart the copying of data, you need to restore the mirror. As for mirror in Hold status, you need to restore the mirror in order to restart the copying of data. To restore a mirror, follow the procedure below.
1. Ensure that the XP Remote Web Console main window is in Modify mode. For detailed information about how to do this, refer to XP Remote Web Console user’s guide. 2. 3. Ensure that the Journal Operation window is displayed. Do either of the following: • In the tree, select a master journal group ( ) or a restore journal group ( ) from below Registered.
6 Performing URz Pair Operations To perform remote copy operations with URz, you must create pairs of a primary data volume and a secondary data volume. A primary data volume is a data volume to be copied. A secondary data volume is a data volume that is the copy destination for a primary data volume. To manipulate pairs of these data volumes, use the Pair Operation window of URz. This manual sometimes uses the term "volume pair" when referring to a pair of a primary data volume and a secondary data volume.
To display the Pair Operation window, do either of the following: • If Universal Replicator has not been started: 1. Use your Web browser to display the storage device list. In the storage device list, select the storage system to log in. Enter a user name and the password, and then click OK. The XP Remote Web Console main window is displayed. NOTE: 2. For detailed instructions on this step, see XP Remote Web Console user’s guide.
• ◦ Previous: The list can display up to 1,024 volume pairs simultaneously. If the number of volume pairs exceeds 1,024, you can use the Previous and Next buttons to display the remaining volume pairs in the list. The Previous button displays the previous 1,024 volume pairs in the list. ◦ Next: The list can display up to 1,024 volume pairs simultaneously. If the number of volume pairs exceeds 1,024, you can use the Previous and Next buttons to display the remaining volume pairs in the list.
Suspend Suspending Deleting ◦ ◦ The pair has been split. The primary data volume and the secondary data volume are not synchronized. The primary data volume and the secondary data volume are not synchronized. This pair is in transition from the Pending or Duplex status to the Suspend status. The primary data volume and the secondary data volume are not synchronized. This pair is in transition from the Pending, Duplex, or Suspend status to the Simplex status.
NOTE: If a volume is an external volume, the symbol "#" appears after the LDEV number. For detailed information about external volumes, see the XP External Storage Software user’s guide. ◦ Pair JNLG: Indicates the journal group number for the remote storage system. This column is blank if the volume in the local storage system is neither a primary data volume nor a secondary data volume. ◦ ◦ Err Lv.: Indicates the range of pair split on error.
shows the amount of time that has been needed from step 1 to the completion of the creating pair operation. • Used Volume: Indicates the size of used volumes, and also indicates the licensed capacity. For example, if 12.34 (15.0) (TB) is displayed, the licensed capacity for URz is 15.0 terabytes, and 12.34 terabytes of volumes are used. NOTE: If the licensed capacity is unlimited, the sized of used volume is not displayed. • Total Pairs: Indicates the current total number of data volume pairs.
Filtering Information in the List in the Pair Operation Window The Display Filter window (“Display Filter Window” (page 141)) enables you to filter information in the list in the Pair Operation window. The list will display only the volumes that satisfy certain conditions. To filter information in the list in the Pair Operation window: 1. 2. 3. In the Pair Operation window (“Pair Operation Window” (page 136)), select Display Filter.
• CLPR: Allows you to select the CLPR to be displayed. If you select ALL, all CLPRs will be displayed in the list. • Internal/External VOL: Allows you to specify whether internal volumes or external volumes will be displayed in the list. If you select ALL, all the internal and external volumes will be displayed in the list. • Status: Allows you to specify pair statuses. The volumes of the specified statues will be displayed in the list. • Sub Status: Allows you to specify consistency status.
1. 2. If necessary, follow the instructions in Filtering Information in the List in the Pair Operation Window. In the Pair Operation window (“Pair Operation Window” (page 136)), click Export. A message appears and asks if you want to save volume pair information in a file. 3. Select OK to close the message. A window appears and prompts you to save a file. 4. Enter the name of the file and then select Save. A message appears when URz finishes saving the file. 5. Select OK to close the message.
8. 9. 10. 11. 12. 13. Use the Mirror drop-down lists to specify the following items sequentially: • Master journal group • Mirror ID • Restore journal group Do one of the following to make settings on the initial copy operation: • Select Entire if you want to start the initial copy operation immediately after the pair is created. • Select None if you do not want to start the initial copy operation immediately after the pair is created.
The Add Pair window displays the following information: • P-VOL: Indicates a primary data volume. The numbers are the LDKC number, the CU number and the LDEV number of the primary data volume. Notes: • ◦ P-VOL displays only one primary data volume even when two or more primary data volumes are selected in the Pair Operation window. P-VOL only displays the primary data volume that has the smallest volume number. ◦ If a volume is an external volume, the symbol "#" appears after the LDEV number.
NOTE: If you select and right-click more than one volume in the Preview list and then select Modify, the Add Pair window appears and the Select Other S-VOL(s) drop-down list displays No Change. To change the setting with this drop-down list, select another item from the drop-down list. • Mirror: Assigns a master journal group to the primary data volume, assigns a restore journal group to the secondary data volume, and also assigns a mirror ID to the volume pair.
(2) The number of mirrors to be added by the Add Pair window (3) The number of mirrors for volumes in the Preview list in the Pair Operation window. • Set: Applies the settings to the Preview list in the Pair Operation window (“Pair Operation Window” (page 136)). • Cancel: Discards the settings. Displaying Detailed Information about a Pair of Data Volumes The Detailed Information window allows you to view detailed information about a pair of data volumes.
The Detailed Information window displays the following information: • Status: Indicates the status of the pair. If the pair is split (or suspended), Status also displays the suspend type. If the pair is waiting for initial copy, Status also displays the word (Queuing). • Sync.: If the volume in the local storage system is a primary data volume, Sync. displays progress of an initial copy operation. If the volume in the local storage system is a secondary data volume, Sync.
• S/N(CTRL ID) : displays the five-digit serial number and the controller ID of the secondary storage system. The controller ID is enclosed by parentheses. • Initial Copy Priority: Indicates priority (scheduling order) of the initial copy operations. The value can be within the range of 1 to 256 (disabled when the status becomes Duplex). • CFW: Indicates whether to copy cache-fast-write data to the secondary data volume. The default is Only P-VOL .
• Refresh: Updates the pair status information. • Close: Closes the Detailed Information window. Changing Options for a Data Volume Pair The Change Pair Option window allows you to change options for a pair of data volumes. To change the pair options, follow the procedure below. Only the administrator of the primary storage system can perform the following operation. The administrator of the secondary storage system cannot perform the following operation: 1.
When the Change Pair Option window appears, the window displays the current option value. • CFW: Allows you to specify whether to copy cache-fast-write data to the secondary data volume. ◦ Only P-VOL: Does not copy cache-fast-write data to the secondary data volume. ◦ Copy to S-VOL: Copies cache-fast-write data to the secondary data volume. When the Change Pair Option window appears, the window displays the current option value.
Figure 68 Suspend Pair Window The Suspend Pair window displays the following information: • • S-VOL Write: Allows you to specify whether to permit hosts to write data to the secondary data volume. The default is Disable (that is, do not permit): ◦ Disable: Hosts cannot write data to the secondary data volume while the pair is split. ◦ Enable: Hosts can write data to the secondary data volume while the pair is split. This option is available only when the selected volume is a primary data volume.
Restoring a Pair of Data Volumes The Resume Pair window (“Resume Pair Window” (page 154)) allows you to restore a pair that has been split. In addition, the window allows you to recover a mirror and start data copying of URz pair in Hold status in order to perform delta resync operation. If the primary or secondary storage system is powered off and its backup batteries are fully discharged while pairs are suspended, the primary/secondary data volume bitmaps will not be retained.
NOTE: If an error occurs, the rightmost column of the Preview list displays the error code. To view detailed information about the error, right-click the error code and then select Error Detail. An error message appears and gives you detailed information about the error 11. In the list of the Pair Operations window, verify that the pair(s) has been restored successfully. If the pair has been restored successfully, the status of the pair is Pending or Duplex.
• • Resync Mode: Indicates the processing after recovery of the pairs. ◦ Normal: Split pair whose status is Suspend will be recovered. ◦ Delta: Delta resync operation will be performed. For information about the requirements to perform delta resync operation, see “Requirements for Performing Delta Resync Operation” (page 81). ◦ Return to standby: The status of pairs will be recovered from Hlde to Hold. Error Level: Allows you to specify the range used for splitting a pair when a failure occurs.
NOTE: If an error occurs, the rightmost column of the Preview list displays the error code. To view detailed information about the error, right-click the error code and then select Error Detail. An error message appears and gives you detailed information about the error. 10. In the list of the Pair Operations window, verify that the pair(s) has been released successfully. If the pair has been released, the status of the pair is Simplex.
To continue processing, do either of the following: • ◦ Ensure that the Range column displays Volume for all pairs in the same mirror. ◦ In the Preview list, select all but one pair in the same mirror, right click the selected pairs, and then select Delete. Delete Mode: Allows you to specify whether to release the pair(s) forcibly. When the status of the pair(s) to be released is Simplex, Suspending, or Deleting, the default setting is Force.
7 Monitoring Remote Copy Operations This chapter describes the Usage Monitoring window which enables you to collect I/O statistics for all volumes to be monitored on the connected storage system. Displaying the Usage Monitor Window The Usage Monitor window (see “Usage Monitor Window” (page 158)) displays the remote copy I/O statistics for all volumes to be monitored on the connected storage system, and displays the status of remote copy usage monitoring.
Starting and Stopping Usage Monitoring Starting and stopping usage monitoring can be set using Performance Monitor. For detail about starting and stopping usage monitoring, see Performance Monitor user’s guide. Displaying the Usage Monitor Graph When usage monitoring is running, the Usage Monitor window can display user-selected remote copy I/O statistics in real time. The usage monitor graph plots the user-selected I/O statistics (up to 65 data points) on an x-y graph. The x-axis displays time.
NOTE: To stop displaying the usage monitor graph, right-click the graph, and select Close. To stop displaying all graphs, select Close All. The usage monitor graph closes automatically in the following cases: • When you select another tab, • When you select another program product, • When you exit the XP Remote Web Console software.
Table 28 Remote Copy I/O Statistics (continued) Statistic Description R-JNL Average Transfer Rate The average transfer rate for journals in the secondary storage system. The unit is kilobytes per second. R-JNL Average RIO Response The remote I/O process time on the secondary storage system. The unit is milliseconds. M-JNL Data Used Rate Data usage rate for master journals. The unit is percent. Meta Data Used Rate Metadata usage rate for master journals. The unit is percent.
8 Viewing History of Data Volume Pair Operations The History Operation panel enables you to view history of operations for data volume pairs. For example, you can check the date and time when data volume pairs are created or deleted. You can also save operation history in a text file. History Window The History window (see “History Operation Window” (page 163)) display history of pf operations for data volume pairs.
To display the History window, do either of the following: • If Universal Replicator for Mainframe has not been started: 1. Use your Web browser to display the storage device list. In the storage device list, select the storage system to log in. Enter a user name and the password, and then click OK. The XP Remote Web Console main window is displayed. 2. Click Go, Universal Replicator for Mainframe and then History on the menu bar of the XP Remote Web Console main window.
When the updating process is in progress, the checking process automatically continues until the updating process finishes. The updating process is checked at ten-second intervals. • Last Update: Displays the date and time when operation history was last updated. • Export: Saves operation history in a CSV file. For detailed information, see Saving Operation History into a Text File. NOTE: You cannot save the history file while operation history is being updated.
Status Change by RCU(Suspend Pair Start): The status of the data volume pair was changed because an operation for splitting a pair started at the secondary storage system. Status Change by RCU(Suspend Pair Complete): The status of the data volume pair was changed because an operation for splitting a pair finished at the secondary storage system. Status Change by RCU(Suspend to Simplex; Delete Pair Start): An operation for releasing a pair has been started at the secondary storage system.
◦ EXCTG: The extended consistency group number. This column is blank if the volume does not belong to any extended consistency group. If the Business Continuity Manager YKMAKE command was used to create a pair, this column may not display the extended consistency group number. ◦ Copy Time: The time taken for the operation (from the start of the operation to the end). Displayed only for Add Pair Complete and Resume Pair Complete operations.
Start 2007/02/22 09:56:46 002:33:44 18 Complete (1) (2) (3) 01 (4) 02:02 1D:FD Add Pair (5) (6) (7) (8) (1) Data and time when the operation finished. (2) Time taken for copying (from the start to the end of copying). This is displayed only when the operation (refer to (7)) is Add Pair Complete or Resume Pair Complete. (3) Journal group number. (4) Mirror ID. (5) Extended consistency group number. This column is blank if the volume does not belong to any extended consistency group.
9 Performing Optional Operations The optional Operations window allows you to configure options. Displaying the Optional Operation Window The Optional Operation window (see “Optional Operation Window” (page 170)) allows you to set options.
1. Use your Web browser to display the storage device list. In the storage device list, select the storage system to log in. Enter a user name and the password, and then click OK. The XP Remote Web Console main window is displayed. 2. Click Go, Universal Replicator for Mainframe and then Optional Operation on the menu bar of the XP Remote Web Console main window. URz starts and the Optional Operation window is displayed.
1. Select the Optional Operation tab to display the Optional Operation window. Figure 74 Optional Operation Window • Tree: allows you to select Subsystem, or LDKC. • The Clear SIM button: allows you to clear all URz SIMs (service information messages) and UR SIMs from the connected storage system • List: displays storage system option settings • Preview List: When you change settings in the Optional Operation window, the Preview list displays the changes.
• Click File, Refresh on the menu bar of the XP Remote Web Console main window. • Select the Apply button. • Select modify mode when you are in view mode. Configuring Storage System Options The Optional Operations window allows you to change storage system option settings To change the option settings of the storage system: 1. Ensure that the XP Remote Web Console main window is in Modify mode. For detailed information about how to do this, see XP Remote Web Console user's guide. 2. 3.
Figure 76 System Option Panel • Maximum Initial Copy Activities: Specifies the number volumes that can be copied concurrently during an initial copy and resynchronization operations operations. A value within the range of 1 to 128 can be specified. The default setting is 64 volumes. Maximum Initial Copy Activities can impact the performance of the primary storage system, depending on the amount of I/O activity and the number of pairs being registered at the same time.
3. Select LDKC in the tree. The list shows you whether each CU can report SIMs (see “Enabling or Disabling SIM Reporting” (page 172)). The default setting is Not Report. 4. 5. Do either of the following to change setting on whether CUs can report SIMs: • To change the setting for all CUs, right-click LDKC in the tree, and then select Change SIM Report from the pop-up menu.
10 Using Extended Consistency Groups Displaying the EXCTG Operation Panel To make settings on extended consistency groups, use the EXCTG Operation window. To display the EXCTG Operation window, do either of the following: • If Universal Replicator for Mainframe has not been started: 1. Use your Web browser to display the storage device list. In the storage device list, select the storage system to log in. Enter a user name and the password, and then click OK.
Figure 79 Tree of the EXCTG Operation Window • Tree: Lists extended consistency groups. ◦ Registered: When you select this item, the upper-right list displays extended consistency groups in which journal groups are registered. When you double-click this item, the tree displays LDKCs. When you select an LDKC in the tree, information about the extended consistency groups belonging to the LDKC appears in the upper-right list.
• Preview: Displays detailed information about operations that will occur when you click Apply. ◦ List: When you change settings in the window, the changes will be displayed in the Preview list before the changes are applied to storage systems. The changes will be applied when you select Apply. ◦ Operation: Indicates the current operation.
• EXCTG: Indicates an extended consistency group number and an LDKC number that is enclosed by parentheses. This number is a two-digit hexadecimal number. • Attribute: Indicates the attribute of an extended consistency group. An extended consistency group in primary site (primary EXCTG). An extended consistency group in secondary site (secondary EXCTG) This column displays the word changing when all journal groups in an extended consistency group are being registered.
Figure 81 Storage Systems in the EXCTG Operation Window • S/N(LDKC): Indicates the serial number of a storage system and LDKC number that is enclosed by parentheses. • Controller ID: Indicates the controller ID of a storage system and the model name of a storage system that is enclosed by parentheses. • Num. of JNLG: Indicates the number of journal groups in an storage system in the extended consistency group. • JNLG: Indicates journal group numbers.
If a journal group is in Active status and you want to know whether any data volume pair in this journal group is split, you must log in to the storage system containing the journal group, and then display the Journal Operation window to check the status of the journal group.
6. Select one from the DKCs (DKC-1 to DKC-4). Notes: • The word "DKC" represents a storage system. • To register journal groups of the supervisor DKC, move on to step 11 after this step. 7. Enter the serial number of the storage system. If the serial number is already displayed and unchangeable, you do not need to enter it. 8. Enter the LDKC number. If the LDKC number is already displayed and unchangeable, you do not need to enter it. 9. Select the control ID. 10.
The Add JNL Group window displays the following information: • JNLG of the local DKC is used in check box ON: Allows you to specify whether to register journal groups of the supervisor DKC by selecting the check box of far left of DKCs (DKC-1 to DKC-4). The check box is selected on DKC-1 by default. Clear this check box if you do not want to register journal groups of the supervisor DKC. • DKC-1 to DKC-4: Represent four storage systems.
Removing Journal Groups from an Extended Consistency Group The EXCTG Operation window allows you to remove journal groups from an extended consistency group. To remove journal groups from an extended consistency group, follow the procedure below. To perform this operation, you must be logged in to the supervisor DKC: 1. Ensure that the XP Remote Web Console main window is in Modify mode. For detailed information about how to do this, see XP Remote Web Console user’s guide. 2. 3. 4. 5.
NOTE: To cancel removal of a journal group, select and right-click the journal group and then select Cancel. 6. Select Apply to remove the journal group(s). Notes: • • If an error occurs, the rightmost column of the Preview list displays the error code. To view detailed information about the error, right-click the error code and then select Error Detail. An error message appears and gives you detailed information about the error.
11 Disaster Recovery Operations The type of disaster and the status of the URz volume pairs will determine the best approach for disaster recovery. Unfortunately, some disasters are not so “orderly” and involve intermittent or gradual failures occurring over a longer period of time. The user should anticipate and plan for all types of failures and disasters. The major steps in preparing for disaster recovery are: 1. 2. 3. 4.
Switching Operations to the Secondary Site If a disaster or failure occurs at the primary site, the first disaster recovery activity is to use Business Continuity Manager to switch your operations to the remote backup site. The basic procedures for switching operations to the remote backup site are as follows: If you need to perform an IPL of the secondary host system, delete SIMs and then perform the IPL before following the procedure below.
3. 4. 5. 6. 7. At the primary site, locate primary data volumes whose pair status is not Simplex, and then locate corresponding secondary data volumes whose pair status is Simplex. If such volume pairs are found, issue a request for releasing the pairs to the primary data volumes. At the primary site, locate data volume pairs whose pair status is Simplex, and then use Business Continuity Manager to execute YKRECVER on the secondary data volume (YKRECVER is a command for releasing a pair).
7. 8. Execute the YKSUSPND REVERSE command on the restore journal group (which were originally master journal group); YKSUSPND is a Business Continuity Manager command and REVERSE is an option. Wait until suspension completes. After suspension completes, execute the Business Continuity Manager YKRESYNC REVERSE command on the restore journal group (which were originally master journal group).
12 Troubleshooting Troubleshooting in General The user is responsible for the operation and normal maintenance of XP Remote Web Console computers. For troubleshooting information on XP Remote Web Console, see the XP Remote Web Console user's guide. Here are some guidelines for troubleshooting the XP Remote Web Console computer: • Check the cabling and the LAN. Verify that both the computer and LAN cabling are firmly attached. • Reboot the computer. Close any programs that are not responding.
Table 29 General Troubleshooting Information for Universal Replicator for Mainframe (continued) Error Corrective Action A URz error message is displayed on your XP Remote Web Console computer. Remove the error cause, and then retry the URz operation. There is a problem with the XP Remote Web Console computer or the URz software. Make sure that the problem is not with the computer, LAN hardware or software. Restart the computer and retry connecting to the storage system.
Table 30 Troubleshooting Problems with Status of Logical Paths (continued) Path Status Serial Number Mismatch Description Corrective Action The serial number (S/N) of the remote storage system does not match the specified serial number (S/N). Make sure that you entered the correct remote storage system S/N and path parameters (for example, local storage system port, remote storage system port, and controller ID). After that, delete the failed path.
Table 30 Troubleshooting Problems with Status of Logical Paths (continued) Path Status Logical Blockade Description Corrective Action A failure occurs at a local storage system port. Repair the port status on the local storage system. A failure occurs at a remote storage system port. Repair the port status on the remote storage system.
Table 31 Troubleshooting Suspended URz Pairs (continued) Suspend Type Applies to Secondary Primary Data data Volume volume Failure Description The primary storage system detected an error during communication with the secondary storage system, or detected an I/O error during update copy. Corrective Action Check the path status on the DKC Status window (see “General Troubleshooting Information for Universal Replicator for Mainframe” (page 188)).
Table 32 Resolving URz Pair Suspension Classification Causes of Suspension SIM Recovery procedure Primary storage system hardware or secondary storage system hardware Hardware redundancy has been lost due to some DC0x According to SIM, remove the hardware blockade condition. As a result, one of the following DC1x blockade or failure. could not complete: primary-secondary storage DC2x Restore the failed volume pairs (Resume system communication, journal creation, copy Pair).
13 Support and Other Resources Related Documentation HP XP disk array: • HP StorageWorks XP LUN Configuration and Security Manager User Guide for XP12000/XP10000 Disk Arrays and SVS 200: LUN Manager and Volume Manager • HP StorageWorks XP Remote Web Console user guide for XP12000/XP10000 Disk Arrays and SVS 200 • HP StorageWorks XP for Business Continuity Manager Software User's Guide • HP StorageWorks XP Data Shredder user guide for XP12000/XP10000 and XP1024/XP128 Disk Arrays • HP StorageWorks XP
• http://www.hp.com/support/manuals • http://www.hp.com/storage/spock Documentation Feedback HP welcomes your feedback. To make comments and suggestions about product documentation, send a message to storagedocsFeedback@hp.com. All submissions become the property of HP.
A Managing Power for Storage Systems and Network Relay Devices This appendix explains power management for storage system s and network relay devices during remote copy operations. In particular, this appendix discusses the following topics: • What happens when power is removed from storage systems or network relay devices due to some unexpected reason (see the next section).
If more than one primary and secondary storage systems are used with extended consistency groups, you must split all data volume pairs in the extended consistency groups before powering off the primary storage systems. When powering off the primary storage systems, you must power off the supervisor DKC first, and then the subordinate DKCs. CAUTION: If you want to power off the primary storage system, contact your HP account team and ask them to power off the storage system.
When You Power Off the Primary and Secondary Storage Systems at the Same Time If you want to power off the primary and secondary storage systems at the same time, the primary storage system must be powered off before the secondary storage system is powered off. If you want to power on the primary and secondary storage systems again, the secondary storage system must be powered on before the primary storage system is powered on.
B Recovering a Pinned Track If a hardware failure occurs when the storage system is in operation, some data in the cache memory of the storage system may not be written to disk drives and may remain in the cache memory. Data that remains in cache memory due to such a reason is referred to as "pinned track".
C Checking Service Information Messages (SIMs) The HP XP storage system reports a service information message (SIM) to the host when it is necessary to notify the user of a possible service requirement for the storage system. The SIMs are classified according to severity for reporting and logging purposes: service, moderate, serious, or acute. The SVP reports all SIMs related to URz operations, and all SIMs are stored on the SVP for use by HP Data Systems personnel.
Table 33 Typical SIM Showing Reference Code and SIM Type (continued) Reference Code Severity 22 DC DC DC DC DC DC Description 23 0X 1X 2X 4X 5X 6X XP reports SIM SIM to host? Generated by Serious A volume being used by primary data volume has been Yes, suspended. repeatedly. Path recovery is impossible. Primary storage system SIM Log Serious A volume being used by primary data volume has been Yes, suspended. repeatedly. A failure has been detected in the primary storage system.
D Acronyms and Abbreviations Table 34 Acronyms and Abbreviations CU control unit ESCON Enterprise System Connection (IBM trademark for optical channels) I/O input/output IBM International Business Machines Corporation LAN local-area network LCP local control port LED light-emitting diode LUN logical unit (also called device emulation or device type) Mb/s megabits per second MCU main control unit NVS nonvolatile storage PC personal computer system PCB printed circuit board PSUE pai
Index C consistency status, 33 D database recovery, 184 disaster recovery file/DB recovery, 184 preparing for, 184 switching to the remote site, 185 documentation HP website, 194 providing feedback, 195 duplex (pair status), 32 E ERC, 18, 184 error reporting communications, 18, 184 time-stamp, 17 timer type (group option), 24 U URz components, 11 V VOLSER changing secondary data volume, 20 requirements, 41 W websites HP, 194 HP Subscriber's Choice for Business, 194 product manuals, 194 F file recover