
HP DesignJet Z2600 Z5600 PostScript Printer - User guide

If you are printing to a single sheet, you must ensure that the image can actually t onto the sheet, otherwise the
image will be clipped.
Change the treatment of overlapping lines
NOTE: This topic applies only when printing an HP-GL/2 job.
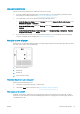
The merge option controls the overlapping lines in an image. There are two settings:
●
O: where the lines cross, only the color of the top line is printed. This is the default setting.
●
On: where the lines cross, the colors of the two lines merge.
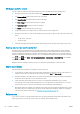
To turn merge on, go to the front panel and press , then , then Setup > Printing preferences > HP-GL/2
options
> Enable merge. You can set the merge option from your software in some applications. Settings in your
software override the front-panel settings.
Preview a print
Previewing a print on the screen allows you to check the layout of the print before printing, which may help you
to avoid wasting paper and ink on a bad print.
●
To preview a print under Windows, you have the following options:
–
Use your application's print preview option.
–
Check the Show preview before printing option, which you can nd in the driver's Paper/Quality tab
and Features tab. This preview is provided by the Embedded Web Server and will appear in a Web
browser window.
●
To preview a print under Mac OS X, you have the following options:
–
Use your application's print preview option.
–
There is no Preview button at the bottom of the Print dialog box in the latest versions of Mac OS X. A
print preview is always shown at the upper left of the Print dialog box for most applications.
–
Click Pause in the job queue window, send the job to print, and select Add to Printer. Then double-click
the job in the job queue window.
–
Choose the HP Print Preview option from the PDF menu at the bottom of the Print dialog box. The
print preview is displayed by a separate HP Print Preview application.
●
To preview a print using the Embedded Web Server, select Basic settings > Hold for preview.
Print a draft
You can specify fast draft-quality printing in the following ways:
●
In the Windows driver dialog: go to the Paper/Quality tab and look at the Print Quality section. Move the
print-quality slider to the extreme left ('Speed').
●
In the Mac OS X Print dialog: go to the Paper/Quality panel and move the print-quality slider to the extreme
left ('Speed').
●
On the Embedded Web Server's Submit Job page: select Basic settings > Print quality > Standard options >
Speed.
●
Using the front panel: press , then , then Setup > Printing preferences > Print quality > Select
quality level
> Fast.
58 Chapter 7 Printing ENWW