
HP Color LaserJet Pro MFP M278-M281-Getting Started Guide


9
Wired (Ethernet) network connection (optional)
• Verify that the printer is attached to the correct network port using a
cable of the correct length.
• Verify the lights next to the network port are lit.
• Verify the print driver is installed on the computer.
• Test the network connection by pinging the network:
Windows
Click Start > Run. Type cmd, and press Enter. Type ping,
type a space, type the printer IP address, and then press Enter.
Example IP address: 192.168.0.1. To nd the printer IP, see “Find the
printer IP address.”
OS X
Open the Network Utility, and type the IP address in the ping pane. Press
Enter. Example IP address: 192.168.0.1. To nd the printer IP, see “Find
the printer IP address.”
• If the window displays round-trip times, the network is working.
• If the ping does not work, try restarting the printer and recheck all of the
connection steps.
Wireless network connection
(wireless models)
• Verify that the network cable is not connected. The printer cannot
connect to a wireless network when a network cable is connected.
• Verify that the printer and wireless router are turned on and have power.
Also make sure the wireless switch is turned on.
• Verify that the printer is within the range of the wireless network. For
most networks, the printer must be within 30 m (100 ft) of the wireless
access point (wireless router).
• Verify the print driver is installed on the computer.
• Verify that the computer and printer connect to the same wireless
network.
• For Mac, verify that the wireless router supports Bonjour.
• Restart the wireless router.
Fax troubleshooting (fax models only)
Verify the physical connection
• Verify that the phone cord is connected to the fax
port on the back
of the printer and to the wall jack.
• For an extension phone or other additional device, verify the phone
cord is connected to the telephone
port on the back of the printer
and to the device.
• If outgoing phone calls fail because no dial tone is detected or the line
is busy, connect to a dierent phone line.
• For Fax over IP service, reduce the Fax Speed, and turn o Error
Correction Mode from the Fax Settings menu on the printer control
panel.
Verify the printer fax settings
• To use a voice-mail service from the phone company or service
provider, make sure that the printer Rings to Answer setting is set to
be fewer rings than the telephone answering machine.
• If multiple phone numbers are assigned to the same physical phone
line and the line is shared by multiple devices, make sure that the
printer is set to the correct distinctive ring setting. Use a setting in
which the printer answers faxes and ignores other ring types.
• Conguring the Fax Speed setting to Medium (V.17) or Slow (V.29) can
also improve your ability to send a fax.
Troubleshooting
User guide
The user guide includes printer usage and troubleshooting information. It is
available on the printer CD and on the Web:
1. Go to www.hp.com/support/ljM278MFP
2. Select the printer if prompted to, and then click User Guides.
For Windows, the user guide is copied to the computer during the
recommended software installation.
Check for rmware updates
1. Go to www.hp.com/support/ljM278MFP
2. Select the printer if prompted to, and then click Software and Drivers.
3. Select the operating system, and click the Next button.
4. Select Firmware, and click the Download button.
Control panel help
Touch the Help button on the printer control panel to access help topics.
Additional support resources
For HP’s all-inclusive help for the printer, go to:
www.hp.com/support/ljM278MFP
• Solve problems
• Find advanced conguration instructions
• Download software updates
• Join support forums
• Find warranty and regulatory information
• Access mobile printing resources
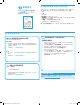
Use the HP Scan software on your computer to start a scan job at the printer.
Windows
Open HP Printer Assistant, select Scan, and then select Scan a Document
or Photo.
OS X
Go to the Applications folder and open HP Easy Scan.
Use the scan feature
9.
T6B80-90902_ZENITH_GSG_ZHCN_EN.indd 9 3/1/2017 8:12:32 PM