Intel Unite® Solution Enterprise Deployment Guide May 2017
Legal Disclaimers & Copyrights All information provided here is subject to change without notice. Contact your Intel representative to obtain the latest Intel product specifications and roadmaps. Intel technologies’ features and benefits depend on system configuration and may require enabled hardware, software or service activation. Performance varies depending on system configuration. No computer system can be absolutely secure. Check with your system manufacturer or retailer or learn more at intel.com.
Table of Contents 1 Introduction ............................................................................................................................................................................. 6 1.1 1.2 1.3 2 Intel Unite Solution Requirements .......................................................................................................................... 8 2.1 2.2 2.3 2.4 3 4.3 4.4 5.2 5.3 5.4 5.5 5.6 Client Pre-Installation......................................................
8.2 8.3 8.4 8.5 8.6 8.7 9 8.1.2 Log In with an existing account ......................................................................................37 The Admin Portal Home Page .................................................................................................................38 8.2.1 Navigation bar .............................................................................................................................38 8.2.2 Icon/ links nomenclature ...............................
12.6 Caution Area: The user may see longer-than-usual connect times, or periodic slow screen updates. ....................................................................................................................................64 12.7 Caution Area: Slowness on the PIN Server ..................................................................................64 12.8 Mac Client troubleshooting ...............................................................................................................
1 Introduction Intel Unite® software powers secure, connected meeting spaces that simplify collaboration. It was designed to connect everyone in a meeting, quickly and easily. The Intel Unite solution is a simple and instant collaboration solution available today and a foundation for added capabilities and innovation in the future. This document can be used to install the Intel Unite software in enterprise mode, learn more about features and assist with troubleshooting. 1.
1.3 What’s new in the Intel Unite Solution To help you identify what has been added to the solution, the following table summarizes the features added since version 1.0. v 2.0 v 3.0 v 3.0 MR iOS Support to Present v 3.
2 Intel Unite Solution Requirements 2.1 Enterprise Server Requirements 2.2 Hub Requirements 2.3 Microsoft Windows* Server 2008 or greater Microsoft Internet Information Services with SSL enabled This will require a SHA2 based web server certificate with an internal or public root of trust SMTP email server configured under Microsoft Internet Information Services Microsoft SQL Server 2008 R2 or greater Recommended latest patch level Microsoft .NET* 4.
2.4 IT Considerations and Network Requirements Hub and Client installation should be managed using your IT department’s established process for software distribution. To ensure reliability, it is strongly recommended that the Hub uses a wired network connection. This will prevent wireless bandwidth saturation, especially in congested areas. Another consideration is that you will need to allow the Intel Unite software to accept incoming connections.
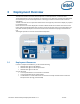
3 Deployment Overview The Intel Unite solution consists of three components – an Enterprise Server, a Hub and a Client. The Enterprise Server is the first component you will need to set up. When the Hub and Client applications are launched, they will use the Enterprise Server to exchange connection information and receive PIN assignments. The Hub is the Intel Core vPro processor-based mini PC that is typically connected to a display or projector in a conference room.
4 Enterprise Server Installation 4.1 Enterprise Server Overview The Enterprise Server Installer includes the Database, PIN server, Admin web portal, and Client download page. The Enterprise Server contains 4 components: 1) Microsoft SQL database: maintains all status information for the Intel Unite solution infrastructure. 2) Web Service: a standardized messaging service that communicates with the database and the Hubs and Clients.
4.2.1 Email Server Settings. Make sure you have installed and enabled ASP.NET 4.5. Ensure SSL is enabled in IIS (https sites should work). NOTE: This may require you to work with your IT department to install a SHA-2 certificate with a valid root of trust. Make sure you have administrative access to MS SQL via Windows authentication or SQL authentication, see section on Microsoft SQL Server Install. Add a DNS Service record to enable automatic lookup of the Enterprise Server.
4.3 Enterprise Server Installation Once you have verified all the steps in the previous section (Enterprise Server Pre-Installation), continue with the Intel Unite software installers (this process needs to be run on the server that hosts the IIS environment). Locate the Intel Unite Server.mui.msi file and double-click to install on the target server(s). The installation wizard provides the option to install these components: a Database, Web Service, Client Download page, and Administration Portal.
Click Next to continue to the Custom Setup window for feature selection. Expand the Database feature and select one of the Database features Will be installed on local hard drive or Entire feature will be installed on local hard drive. This will create the Database in the SQL server provided in the previous step. Click Next to verify feature selection and begin the installation by clicking on Install. Click Finish to complete the setup. You have now installed the Enterprise Server.
Optional: If you want to verify that the UniteServer database has been created by using SQL Management Studio Open SQL Management Studio on your server and connect to the SQL server. Expand Databases on the left side pane and make sure UniteServer Database has been created.
4.4 Uninstalling the Intel Unite Application If you need to uninstall the application, you also need to delete the UniteServer database and the UniteServiceUser login created previously to avoid conflict within the application. Before you do this, ensure you have created a backup of your database. 1. 2. Launch the installer Intel Unite Server.mui. Click on Remove, and on Next to continue. 3.
5 Hub Installation 5.1 Hub Pre-Installation The Intel Unite application needs an exemption in the Hub firewall to check in and communicate with the Enterprise Server, since the Hub needs to be able to locate and check in with the Enterprise Server. When you run the Hub installer, it will prompt you for server connection details and give you the option of bypassing the manual lookup (named Specify Server in the install process) in favor of retrieving information from the DNS Service Record.
5.2 Hub Installation Locate the installer folder and run the installer for the Hub: Intel Unite Hub.mui.msi Click Next to continue. Click Next after you check the box I accept the terms in the License Agreement. Choose Enterprise and click Next. Intel Unite® Solution Enterprise Deployment Guide v3.1.
In this window you must specify the PIN server connection settings; your choices are: Automatically Find Server: This is the recommended choice (default). Specify Server: In this step you need to know the hostname for Enterprise Server o Enter the hostname of the PIN Server. o Enter the certificate public key if you have checked I know the certificate public key. Select your choice and click on Next.
Once the installation has ended, you will see the Completed the Intel Unite® Software Setup Wizard window. Click on Finish to end the installation process. When you launch the application for the first time, you will see the Intel Unite® application Privacy Statement. The Intel Unite® application Privacy Statement function is used to collect anonymous usage data. Intel is always looking to improve its products and would like to collect data to continue to improve the product.
5.3 Hub Configuration The configuration options for Hubs running Intel Unite software can be modified via the Admin Portal. The Admin Portal contains a default profile with default configuration settings that are applied to all Hubs that are checking in with the Enterprise Server. The configuration options are pushed to the Hubs after a connection from the Hub to the Enterprise Server is established.
5.6.1 Plugin Installation Notes Each plugin is installed by default, in the plugin directory within the installation directory [Program Files(x86) \Intel\Intel Unite\Hub\Plugins\PluginName (Plugin.dll)]. Plugins are enumerated at the start of the application. If a new plugin is added, the application will need to be restarted.
5.6.3 Adding the Certificate Hash to a Plugin on the Admin Web Portal Go to the Admin Web Portal, under Groups, select the profile where you want to enable the plugin. On the Profile window, click on Add Profile Property and enter the following: Use the value saved on the notepad or text file described in the previous section. Ensure it is the correct value (no spaces) Key: PluginCertificateHash_XXX o XXX is the name of the plugin for which the hash is being added e.g.
You can select if you want to enable or disable the plugin by switching from true to false or vice versa. Keep in mind that key values ensure the validity of the plugin. Click on the Edit link to change the value to True and Save it. The plugin settings have now been enabled. Intel Unite® Solution Enterprise Deployment Guide v3.1.
6 Client Installation 6.1 Client Pre-Installation A Client needs to be able to locate and check in with the Enterprise Server. The Intel Unite application needs an exemption in the client firewall to check in and communicate with the Enterprise Server. When you run the client installer, it will prompt you for server connection details and give you the option of bypassing the manual lookup (named Specify Server in the install process) in favor of retrieving information from the DNS Service Record.
Check the box I accept the terms in the License Agreement and then click Next. Select Enterprise and click Next In this window you must specify the PIN server connection settings. Your choices are: Automatically Find Server: This is the most convenient choice (default). Specify Server: In this step you need to know the hostname for the Enterprise Server. o Enter the certificate public key: this option will be enabled when you select Specify Server.
The Destination Folder window will open up with the default folder where Intel Unite application is installed on Client, you can change the destination folder if you wish, otherwise keep the default location. You can go back to review your settings or click on Install to continue. Once the installation has ended, you will see the Completed the Intel Unite® Software Setup Wizard window, click on Finish. Intel Unite® Solution Enterprise Deployment Guide v3.1.
The following Connect to a screen window appears: To connect to the Hub, enter the PIN number shown on the monitor or screen, by default the PIN changes every five minutes. Please refer to the Intel Unite® Solution User Guide to learn about features and user information. Intel Unite® Solution Enterprise Deployment Guide v3.1.
6.3 macOS Client Installation Locate the file Intel Unite macOS X,X.dmg and download the software on your Mac Client. Double click the file to extract the application. You will be prompted to accept an End User License Agreement. Click Agree to continue. When extracted, drag and drop it to the Applications folder. Go to the Applications folder and locate the application, click on it to launch it.
You can also change to which Enterprise Server the application will connect to. Click on the gear icon at the right lower corner of the Connect Screen to access Settings. Two tabs will be available: General: You can enter the Name, Email and Avatar of the user. You can also select if this client machine will connect to the Enterprise Server automatically (default) or by entering a defined path to the Server.
6.5 Android Client Installation On your Android device, go to the Google app store and download the Intel Unite software for your Client. Once the app has been downloaded, open the app. Click on the gear icon at the right upper corner to access Settings and enter the information requested. On Settings enter your Screen Name and Server information.
6.6 Chrome OS Client Installation On your Chromebook device, go to the Google app store and download the Intel Unite software for your Client. Once the app has been downloaded, open the app. Click on the gear icon at the right upper corner to access Settings and enter the information requested. On Settings enter your Screen Name, Email, Server information.
7 Advanced Installation 7.1 Scripted Installers This section provides information to run the installers silently, without any menus or windows appearing. In this way, property parameters will be passed to the installer via command line. To run the silent installers, open the command prompt and use the following command line: msiexec /i "PATH_TO_CLIENT_MSI" PARAMETER=VALUE PARAMETER=VALUE … /qn /l* “PATH_TO_LOG” The /i flags the specified MSI for installation.
7.2 Client and Hub Installation Parameters Description PINSERVERLOOKUPTYPE = “Lookup” or “Manual” defaults to Lookup Specifies how the application will find the PIN server. Lookup will utilize the DNS service record, while Manual requires the input of the parameters PINSERVER. PINSERVER = “{hostname}” The host name of the server to connect to. CERTKEYCHECKED = “1” or “0” Defaults to 0 This parameter is optional.
HKEY_CURRENT_USER\software\Intel\Unite\ ActivePresenter [1 = client is presenting 0 = no client is presenting] Hub HKEY_CURRENT_USER\software\Intel\Unite\PinPadWindows (DWORD) [1 = the application is ready to enter a PIN 0 = otherwise] Client HKEY_CURRENT_USER\software\Intel\Unite\GuestAccess\SSID Reference: GUEST ACCESS Plugin Guide Setting a default value will decrease security in Guest Access Hub HKEY_CURRENT_USER\software\Intel\Unite\GuestAccess\PSK Reference: GUEST ACCESS Plugin Guide Setting
HKEY_LOCAL_MACHINE\software\Intel\Unite\WindowedMode (DWORD) [1 =the user wants the hub to launch in windowed mode (with minimize, maximize and exit buttons) 0 = otherwise] Hub HKEY_LOCAL_MACHINE\software\Intel\Unite\AllowInsecureCertificates (DWORD) [1 = certificate algorithm check should be skipped 0 = the enterprise certificate is forced to use a SHA2 certificate] Both HKEY_LOCAL_MACHINE\software\Intel\Unite\ShowOnlyInOneMonitor (DWORD) [This key only works if windowed mode is set to 1.
8 Admin Portal Guide The Admin Portal is the administrator web portal for the Intel Unite application which will let you view and manage the devices on which the Intel Unite application is installed. It is one of the components installed on the Enterprise Server during the installation, along with the PIN service and Web Server. (See section on Enterprise Server Installation). The Admin Portal need not be on the same server as the database, as long as it has access to the database.
8.1.1 Register an Account To register an account, make sure you are logged out of the Admin Portal. 8.1.2 Click on the Register link at the top right of the navigation bar. Fill in the form with the desired email address and password and click Register. Alternatively, you can add/register users through the Management tab once you have logged into the Admin Portal.
8.2 The Admin Portal Home Page The home page contains a welcome message and provides a quick overview of all active Systems - Clients and Hubs - that have checked in with the server. The table displays the name of each System, the Profile assigned to each system, the ON or OFF Status, and the last check-in date and time. The entries of the table can be filtered using the search box with multiple keywords and each keyword will search through all the columns.
8.2.2 Icon/ links nomenclature Through the Admin Portal, you will consistently see the following icons or links: Edit View Details View Devices Delete Dialog box containing information about a specific value By placing the cursor over the icon you will be able to see the information pertaining to the respective item. 8.3 Devices page The Devices page contains all devices currently in the database. You can select a specific device and View, Edit, Update or Remove accordingly.
Edit link- Clicking on the Edit link will allow you to edit the device profile and assign the device to a specific group Delete link- Clicking on the Delete link will remove the device from the admin Portal, you will get a confirmation message before the device is removed. Alternatively, you can select on the left column, one or multiple devices and click on the button Remove selected devices. Intel Unite® Solution Enterprise Deployment Guide v3.1.
8.4 Groups page The Groups page gives you two options in the menu: Device Group and Profiles. 8.4.1 Groups > Device Group Device Group provides a way for you to group devices together for monitoring, functionality, or convenience. You can have devices with the same or different profile assigned to a group. This page lets you create, view, edit and delete the groups and entries for each group. You can create a new group by clicking on Create Group and providing the name of the group.
8.4.2 Groups > Profiles This page allows you to create, view, delete and edit the profiles. It is similar in layout and function to Device Group but contains profiles. The difference between Profiles and Groups is that Profiles contain the configuration options for devices. Devices may only belong to one profile, while they can belong to many device groups. The Profiles page displays the Profile Name and Description of each profile available in the Server.
Default Keys and Values: Please note that each key has a dialog box next to the key, by placing the cursor on the dialog box, you should be able to see the values and/or information about each key, providing the information you need before you edit the key, see the two examples below: You can also refer to the table provided on Profile Configuration for detailed keys and corresponding values. Intel Unite® Solution Enterprise Deployment Guide v3.1.
8.5 Management page The Management page drops down into several sub-pages: Server Properties: the interface for viewing and modifying server keys and values. Users: you may add, remove or manually edit any account on this page. Roles: will allow you to create new roles, update existing ones, assign users to roles, and edit permissions for user management.
WarningThreshold: used to determine the threshold of when a device is considered to be inactive, in minutes, with a default value of 60 minutes. By clicking on the Edit link, you can update the keys accordingly. 8.5.2 Management > Users The Users page will display a list of all users registered on the Admin Portal, if their account has been locked out, and their roles. You can also update this information by clicking on the Edit link.
8.5.3 Management > Roles This page shows the roles that are currently defined, which are Admin and Default. You can add new roles and edit current ones. Roles alone do not regulate access to the portal, instead, the actions on the portal are restricted to roles (e.g. creating a user), which are associated with a set of users. To view the activities and permissions assigned to each role, click on the gear icon on the right column, the Permissions window will be displayed.
Click on Add Moderator to manually enter the Name and Email of the Moderator, click on Save when finished. The mode for the Moderator functionality needs to be set on the profile of the Hub, so you can have a mixed environment on your systems, continue following the next steps: Go to the Groups page and select Profiles, click on Create Profile, when the window opens, enter the name and the description of the Profile you want.
Moderator Description and Values: 01- 2- Unmanaged: Default mode, no Moderators in meetings/sessions, all participants have equal rights to view and present, previous Intel Unite software versions (to v3.1) used this mode. Self Promote: The meeting/session is unmanaged until someone promotes themselves to be the Moderator. In this case, only the Moderator can assign another participant to be the Moderator. The Moderator can also assign who presents during the session.
When the window opens, select the Profile created for the Moderator in the Profile section, and the Group where this belongs - if any - and Save it. Once you have filled out the list of the Moderators, any of these can be deleted by selecting them (blue box) and by clicking on Delete. To send the Moderator a URL to join the meeting/session as Moderators, select their name and click on Send Token. 8.5.4.
o o o o 8.5.5 Open notepad and create the URI: intelunite://localhost/SetModerationToken?Token= Open Intel Unite On Windows devices: Open Explorer, copy/paste the full URI and hit Enter On Mac devices: Open Safari, copy/paste the full URI and hit Enter Management > Reserved PIN This page shows you two sections, the Reserved and the Not Reserved list of the systems were the PIN displayed during the meeting/sessions is static or not.
8.5.6 Management > Telemetry This page shows telemetry data collected by the Admin Portal, in order to view these data, the Telemetry plugin for the Intel Unite® Solution has to be installed. The Telemetry plugin allows IT Administrators to collect usage information about the Intel Unite application and the client devices connected to each Hub. The IT Administrator will be able to view information such as the number of connections in each room, connections by day, average time used per connection, etc.
8.6 Schedule Meeting page The Schedule Meeting page, is a feature that will create a meeting URL for meeting/session participants who are not able to install or use the existing Intel Unite plugin for Microsoft Office. Any participant will be able to view this page. Just click on the Generate New Meeting button to create the URL and send it to the users that will participate in the meeting or session. 8.7 Other Configuration Options for the Admin Portal 8.7.
Display PIN Size Display PIN Transparency File Blocked Extensions, displayed as Blocked File Extensions File Max Size displayed as Max File Size Full Screen Room Mode Full Screen Room Mode Background Color Full Screen Room Mode Background Image Stretch Full Screen Room Mode Background URL Full Screen Room Mode Instructions Full Screen Room Mode Pin Color Full Screen Room Mode Show Pin remote view, they will see an image indicating that this functionality is not available True = Disables remote view
Full Screen Room Mode Text Color Color of the text displayed on Hub String Full Screen Room Mode Text Font Name of font for instructions Lock out the following: Ctrl-Esc, AltTab, Charms bar, Windows keys and Alt-F4 in Hub If set to True Hub lock out is enabled.
8.7.3 Email Server Settings The Admin Portal defines the SMTP server in web.config xml file that is created when the Intel Unite application is installed on the server. Depending on where your SMTP server is configured, mailSettings have to be modified in the web.config xml file so that “host” points to your SMTP server. (By default, the Web.config xml file is located in C:\Program Files (x86)\Intel\Intel Unite\PinServer.).
9 OS and PC Security Controls 9.1.1 Minimum Security Standards (MSS) It is recommended that all devices running the Intel Unite application are met with your default organization MSS standards, have an agent installed for patching, and an antivirus / IPS / IDS and other necessary control as per the MSS specification (McAfee suite for Anti Malware, IPS, IDS was tested for compatibility). 9.1.
10 Maintenance Your organization and IT administrator will decide a regular maintenance program. The following maintenance tasks are recommended: 10.1 Nightly reboot It is recommended to reboot the Hubs on a daily base (preferably at night time) and prior to this reboot, run maintenance tasks such as: wiping cached temp files and initiating the standard patching procedure. 10.
11 Intel Unite Solution for macOS 11.1 Background The Intel Unite software for macOS is packaged as a primary app package and can leverage IT specific preferences values. In this manner, the app supports a multitude of common deployments from general Mac management software and techniques, to manual installation and setting of preferences. 11.2 General Connection Workflow By default, the app will use DNS Auto Discovery (e.g. DNS SRV records) to determine the proper Enterprise Server to connect to.
If you wish to "pin" the Client application to your Enterprise Server, regardless of whether auto discovery is being used, you can do so by setting the “Public Key String” on each Client.
12 Troubleshooting 12.1 The Admin Portal page cannot be reached after installing the Intel Unite application on the server Workaround/Solution: Make sure the necessary roles and features for Web Server have been added to the server. Add Roles and Features to the server using Server manager o Server Roles: Web Server Include Management Tools o Add .NET Framework 3.5 features o Add .NET Framework 4 features ASP .
o 12.3 Verify that you can view a default profile in the xml file as shown below. This indicates that the PIN service can access the database and successfully retrieve data. Error when launching Hub application A pop up window indicates the error ID. Based on the ID, the nature of the error can be determined. 12.3.1 Platform check fails with error ID333333 This error indicates that the Hub passed a platform check, but the code-signing certificate couldn’t be validated.
Verify the authentication modes used during MS SQL installation. To change login/authentication type go to Microsoft SQL Management Studio and connect to the SQL server, right click on the SQL server and select Properties. Select Security page and make sure SQL Server and Windows authentication mode is selected if SQL authentication is selected when installing Intel Unite application on the server. If you still see the error, reset the password for the UniteServiceUser.
12.4.2 No Servers listed. Trying DNS service record: _uniteservice._tcp Workaround/Solution: This could happen if the Hub cannot find the DNS record. As a debug step, open the command line window and run the nslookup command. Make sure that the Hub can ping the server on which DNS service is running and a DNS service record has been created for the Intel Unite solution.
12.6 Caution Area: The user may see longer-than-usual connect times, or periodic slow screen updates. Root Cause: This is a bug with some wireless access points when U-APSD (Unscheduled Automatic Power Save Delivery) is enabled. Refer to http://www.intel.com/support/wireless/wlan/sb/CS-034875.htm. Workaround: This can potentially be solved with an update to the firmware of the wireless access point.
If a user defines a DNS server but does not specify any Search Domains, when the MAC tries to perform an Auto Discovery there is no DNS domain suffix to search through. If there's no DNS Search Domains defined, the Intel Unite application can't add them to either Auto Discovery or even the "static" entry of uniteservice. So unless Auto Discovery works on _uniteservice._tcp, the Client won’t be able to find the Enterprise Server.
12.10 Error 2147217900: failed to execute SQL string. This error is generated when the Intel Unite server installer is run and the Unite database already exists but the server name is blank. Workaround/Solution: The installer throws an error if the Database already exists in the cluster. To resolve this error, delete the database, make sure you have DBAdmin rights and re-run the installer. 12.
Appendix A. Enterprise Server Preparation Enabling IIS For Windows 2008: In Windows Server 2008, you would need to download the update for .NET Framework 4.5 (https://www.microsoft.com/en-us/download/details.aspx?id=40779) Click Start, point to Administrative Tools and then click Server Manager. In Roles Summary, click Add Roles. Use the Add Roles Wizard to add the Web Server (IIS) role (check this box). Click Next until you have the Select Role Services window.
Once the role is created, under the Roles menu, go to Web Server (IIS) - on the right side of the panel, go to Internet Information Services (IIS) Manager and select your server in the left Connections pane. Reference: Windows Server Library link Installing IIS on Windows Server 2008 Note: The latest version of Intel Unite solution only accepts SHA-2 certificates or greater.
In Features, add the following features for IIS (as they are not default options): o .NET Framework 3.5 Features o ASP.NET 4.5 o WCF Services o HTTP Activation (Add features that are required for HTTP activation when prompted) and click Next. Note: .NET 3.5 might give an error during installation. Provide an alternate source path if the target computer does not have access to Windows Update. Click on Specify an alternate source path link to specify the path to the \sources\sxs folder on the installation
Click Next to continue and click Install on the next window to install the selected roles and features. Once the role is created, under the Roles menu, go to Web Server Role (IIS) - on the right side of the panel, go to Internet Information Services (IIS) Manager and select your server in the left Connections pane. Note: The latest version of the Intel Unite solution only accepts SHA-2 certificates or greater.
Microsoft SQL Server Install The Enterprise Server requires MS SQL to run, minimum requirements are version 2008 R2 or higher. You can install a new, dedicated SQL server if you wish to run a “test environment” and get comfortable with the application, however, it is not required. The Intel Unite application will create its own database, data tables and indexes in your existing database without interfering with other tables or existing data.
Select Use Microsoft Update to check for updates (recommended) to check for updates and click Next. On the next window, the setup will look for Product Updates and install the necessary updates. To continue, click Next. SQL setup checks for potential failures and requirements to be met before the installation. Click Next to continue. Select SQL Server Feature Installation and click Next. Intel Unite® Solution Enterprise Deployment Guide v3.1.
Under the Feature Selection, select Database Engine Services, Management tools- Complete and click Next. Specify the name and instance ID for the SQL server and click Next. Specify the service accounts for each service and click Next to continue. Intel Unite® Solution Enterprise Deployment Guide v3.1.
Select Mixed Mode Authentication (which includes SQL server and Windows authentication), specify the SQL Server administrators and click Next. Verify the features to be installed and click on Install. Close the dialog box after the installation is complete. Intel Unite® Solution Enterprise Deployment Guide v3.1.
Creating a DNS service record The Hub or Clients will locate the Enterprise Server using DNS service during an automatic lookup for the Enterprise Server. You may also use the manual lookup but it is highly recommended that you use DNS. If you plan on providing the Enterprise Server hostname manually during Hub and Client installation, you can skip this section. When a DNS service record is used, the Hub or Client will look for the service named _uniteservice.
Appendix B. Example of ServerConfig.xml The ServerConfig.xml file gets created during the installation of hub and client components of the Intel Unite software. The default location of the xml file is C:\Program Files (x86)\Intel\Intel Unite\Hub or C:\Program Files (x86)\Intel\Intel Unite\Client for Hub and Client respectively.
Appendix C. Intel Unite Solution - Security Overview Intel Unite Software - Security Flow This section briefly describes the security aspects of Intel Unite application. Security aspects of the connection are discussed for the following four steps: 1. PIN assignment 2. PIN lookup 3. Connection initiation 4.
Step 1: PIN Assignment The image below shows how PINs are assigned. All network communication during this process is SSL encrypted over a web service (TCP 443). In addition to receiving PINs, the Hub and Client also register their connection information and a public key to the server. The public key is used during connection to validate that each component is communicating with the intended target. Note: PIN assignment for Client (with Intel vPro technology) and Hub follow the same flow.
Step 2: PIN Lookup The image below shows how PINs are resolved by the Enterprise Server. All network communication during the PIN lookup processes is SSL encrypted over a web service (TCP 443). When a user enters a PIN of the target in the Client, the Client sends the PIN to the Enterprise Server to obtain the connection information. On a successful lookup, the Enterprise Server returns the valid connection information of the target.
Step 3: Connection Initiation The image below shows how a connection is initiated. The Client initiates a TCP peer-to-peer connection with the target (a Hub or a Client with Intel vPro technology running the Intel Unite software), and starts an SSL handshake. The certificate provided by the target is hashed and compared against the hash the Client received during step 2. This type of validation prevents attacks and also prevents situations where IP addresses of DHCP Clients may change.
Step 4: Connection Approval The image below shows how the connection is established between the client and the target, which could be a Hub or a Client (with Intel vPro technology) running the Intel Unite software. Once the target verifies the PIN and Client certificate, it accepts the connection and a connection is established between the client and the target. Intel Unite® Solution Enterprise Deployment Guide v3.1.
Appendix D. Intel Unite Solution – Load Balancer This section briefly describes how to work around the PIN back off behind load balancer/proxy. If you are behind a load balancer, you will want to make sure the SQL stored procedure dbo.spGetPinBackoffTime always returns a 0. Steps: Alter the stored procedure dbo.spGetPinBackoffTime. You can comment out everything and just use “select 0” at the end. Execute the script.