HP FlexFabric Virtual Switch 5900v Installation Guide Part number: 5998-4544 Document version: 6W102-20140421
Legal and notice information © Copyright 2014 Hewlett-Packard Development Company, L.P. No part of this documentation may be reproduced or transmitted in any form or by any means without prior written consent of Hewlett-Packard Development Company, L.P. The information contained herein is subject to change without notice.
Contents Overview ······································································································································································ 1 Benefits ··············································································································································································· 1 Architecture ·····························································································································
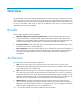
Overview The HP FlexFabric Virtual Switch 5900v (HP 5900v) provides virtual switching in virtualized environments such as data centers. The virtual switch runs on top of the VMware vSphere Enterprise Plus Edition, and works seamlessly with the vCenter Server and VMware ESXi hosts (physical servers that run ESXi). You can use the HP 5900v virtual switch in place of the VMware virtual switch to provide enhanced distributed virtual switching capabilities.
Table 1 HP 5900v components Role Product name Product code Licensing requirements VCE HP FlexFabric Virtual Switch Orchestration Software for 5900v VMware ESX E-LTU JG815AAE One license per VCE VFE HP FlexFabric Virtual Switch 5900v for VMware ESX 5.
Preparing for installation Before you install the virtual switch, do the following: • Make sure the physical servers and network environment meet the requirements for installing the virtual switch. • Complete VMware virtualization environment deployment. • Complete network policy configurations on the VMware vCenter Server and IMC. • Prepare information required for VCE installation.
NOTE: To ensure correct operation of the VCE, the OVF template defines the reserved resources for the VCE, including: • CPU—8000 MHz • Memory—4096 MB For more information about reserved resources, see the VMware vSphere Client documentation. VCE HA requirements You can use the vSphere HA feature to implement VCE high availability (HA). To enable VCE HA, make sure the following requirements are met: • Two ESXi hosts are available, and both of them meet the VCE operation requirements.
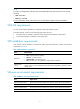
HP IMC requirements Table 6 HP IMC requirements Item Requirement Version V7 E0202 or later. Component to install VAN Connection Manager (VCM), V7 E0202 or later. NOTE: The applicable HP IMC version might vary with the HP 5900v version. For more information about the software compatibility, see the HP 5900v release notes. Network environment requirements Make sure the network environment meets the following requirements: • All physical severs and VMs can communicate at Layer 2.
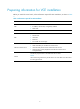
Preparing information for VCE installation Before you install the virtual switch, collect information required for VCE installation, as shown in Table 7. Table 7 Information required for VCE installation Item Parameters VCE • Name. • IP address, subnet mask, and gateway address. • DNS name. ESXi host IP address. IP address. IMC • • • • • • • • • IP address. VMware vCenter Server Subnet mask. Username. Password. Port number for remote login. HTTP and HTTPS port numbers for remote access.
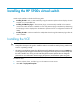
Installing the HP 5900v virtual switch Virtual switch installation includes the following tasks: • Installing the VCE—VCE is a VM installed by using the VMware vSphere Client to deploy the OVF template on a pre-specified host. • Installing the VMware plug-in—The VMware plug-in is automatically installed on the VMware vCenter Server after the VCE is installed.
Figure 1 Opening the Deploy OVF Template wizard The Deploy OVF Template wizard appears. 3. On the Source page, click Browse to select or enter the OVF file path, and then click Next.
Figure 2 Specifying the OVF file location NOTE: You can copy the OVF file and the vmdk file to the same path in a network shared folder for remote installation. 4. On the OVF Template Details page, verify OVF template information. If OVF template information is correct, click Next.
Figure 3 OVF template details 5. On the End User License Agreement page, read the Agreement details. Click Accept and then Next.
Figure 4 End User License Agreement 6. On the Name and Location page, specify a name for the VCE and location of the data center to install the VCE for the deployed template, and then click Next. { { The default name for the VCE is HP 5900v. You can change the name as required. The VCE name is also used as the hostname of the virtual switch. The VCE name must be unique in the selected data center. For more information about VCE naming conventions, see the online help.
Figure 5 Specifying a name and data center for the VCE 7. On the Host/Cluster page, specify an ESXi host to install the VCE. If the ESXi host to install the VCE is in a cluster, do the following: a. Select the cluster name and click Next. b. Select the host and click Next.
Figure 6 Specifying the host or cluster to install the VCE 8. On the Storage page, select a destination storage for the VCE files, and then click Next. NOTE: • Make sure the destination DataStore for the VCE has more than 20 GB of free space. • To enable VCE HA based on vSphere HA, you must select a networked storage as the destination storage for the VCE files. For information about storages, see online help.
Figure 7 Selecting a destination storage for the VCE files 9. On the Disk Format page, select the disk format for storing the VCE virtual disks as required and click Next. Thick Provision Lazy Zeroed is the default disk.
Figure 8 Selecting the format to store the VCE virtual disks NOTE: For information about how to select the disk format to store VCE virtual disks, see online help. 10. On the Properties page, configure properties for the virtual switch. The VCE must work with HP IMC and VMware vCenter Server. The property information is used for establishing connections with HP IMC and VMware vCenter Server. IMPORTANT: Make sure the information you provide is correct.
IMPORTANT: Make sure the IP address of the VCE is not prone to change. To change the VCE's IP address after VCE installation, you must remove all configurations on the VCE and remove the plug-in. Figure 9 Entering VCE configuration information b. In the IMC Configuration area, enter the following configuration information for the IMC server: − IP address. − Port number for remote login. − Operator. − Password.
Figure 10 Entering IMC configuration information c. In the vCenter Server Configuration area, enter the following information for the vCenter Server: − IP address. − HTTP port number (80 by default). − HTTPS port number (443 by default). − Username and password of an admin-level user account.
Figure 11 Entering vCenter Server configuration information NOTE: The vCenter Server uses the HTTP and HTTPS port numbers for communication. The HTTP and HTTPS port numbers configured in the vCenter Server Configuration area must be consistent with the ones that you configured for the vCenter Server installation. d. In the Plug-in Configuration area, specify a name for the plug-in. This document takes HP 5900v as the example plug-in name.
Figure 12 Specifying a name for the plug-in 11. Click Next after you enter all property information. 12. On the Ready to Complete page, verify the configuration information. { Select the Power on after deployment option if you want to start the VCE immediately after it is deployed. { To modify an incorrect setting, click Back to go back to the specific page. { If all information is correct, click Finish.
Figure 13 Confirming the configuration information After you click Finish, the system displays the VCE deployment process dialog box. 13. Close the VCE deployment process dialog box when the deployment is finished. Figure 14 Deploying the VCE NOTE: The VCE's admin account username and default password are both admin. HP strongly recommends that you change the password immediately after you complete VCE installation. To change the password, log in to the Ubuntu system.
Verifying the VMware plug-in installation 1. On the VMware vSphere Client, select the newly-installed VCE HP 5900v from the left navigation tree. Then select Power on the virtual machine in the Basic Tasks area to start the VCE. NOTE: HP 5900v is the name that you specified for the VCE, as shown in Figure 5. Figure 15 Powering on the VCE 2. Restart the VMware vSphere Client, and then log in to the vCenter Server. 3.
Figure 16 Verifying the plug-in installation Installing a VFE 1. Log in to the VMware vSphere Client and click the HP VDS HP 5900v tab. For information about identifying the HP VDS HP 5900v tab, see "Verifying the VMware plug-in installation." 2. In the VFE (Virtual Forwarding Engine) area, click VFE Configuration. Figure 17 Configuring the VFE 3. Verify that no VFEs have been installed on the ESXi host. You can install only one VFE on an ESXi host.
Figure 18 Installing the VFE NOTE: You can select multiple hosts and then click Install to install VFEs in batches. The installation will continue for a period of time, depending on the number of hosts. Do not shift to other configuration pages during the installation to avoid installation interruption.
Configuring vSphere HA for VCE You can use the vSphere HA feature to implement VCE high availability. The vSphere HA feature enables a standby VCE to take over immediately after the active VCE fails. NOTE: Only one license is required because only one VCE is operating at a time. Configuration prerequisites Before configuring vSphere HA, perform the following tasks: • Complete HP 5900v installation. • Prepare an ESXi host to act as the standby host.
Figure 19 Creating a cluster 2. Enter the cluster name. This guide uses cluster as the example cluster name. Keep the default configurations for other items and click the Next buttons until the cluster creation is complete.
Figure 20 Specifying the cluster name 3. Right-click the newly created cluster and select Add Host from the short-cut menu. Figure 21 Adding a host 4. On the Specify Connection Settings page, enter the IP address, username, and password for the ESXi host on which the VCE resides. Keep default configurations for other items and click the Next buttons until the ESXi host is added to the cluster.
Figure 22 Entering ESXi host information 5. Repeat the preceding steps to add the standby ESXi host to the cluster. 6. Right-click the cluster name and select Edit Settings from the short-cut menu.
7. On the cluster Settings page, click Cluster Features and select Turn On vSphere HA and Turn On vSphere DRS. Figure 24 Configuring Cluster Features 8. Click vSphere HA and select Enable Host Monitoring.
Figure 25 Configuring vSphere HA 9. Click VM Monitoring and select VM Monitoring Only from the VM Monitoring list.
Figure 26 Configuring VM Monitoring 10. Verify the HA configuration. Click the VCE name HP 5900v and click the Summary tab. Verify that the vSphere HA Protection status is marked as shown in Figure 27.
Accessing the virtual switch The virtual switch functions are configured through the VMware plug-in. After the virtual switch is installed, you can access the virtual switch configuration interface through the VMware vSphere Client. 1. Log in to the VMware vSphere Client. 2. Click DataCenter on which the virtual switch resides in the left navigation tree. 3. Click the HP VDS HP 5900v tab. On the tab, you can configure the virtual switch.
Installing the licenses Before installing the licenses, make sure the virtual switch has been installed. Obtaining the license files Before you attempt to obtain license files for the virtual switch: • Obtain the product number and serial number of the virtual switch. • Create a My Networking account at http://hp.com/networking/mynetworking/. • Obtain the order number of the virtual switch and the email address associated with the order number.
Figure 30 License Installation page Applying for VCE and VFE license files You must obtain license files for both the VCE and VFEs. Applying for the VCE license file 1. Enter http://hp.com/networking/mynetworking/ in the browser address bar. The HP Passport sign-in page appears. 2. Enter the My Networking username and password. 3. Select My licenses after login. 4. Enter the virtual switch order number in the Order Number or Registration ID* field, and then click Next.
The VCE and VFE license files will be sent to this email address. Figure 32 Entering the email address associated with the order number 6. Select the VCE product code JG815AA. Figure 33 Selecting the VCE product code 7. Enter 1 in the Redeem column, and then click Next. Figure 34 Entering the number of VCE license to install 8. Enter the Base serial number, and then click Next. For information about the Base serial number, click the Help me find my Base serial number link.
Figure 35 Entering the Base serial number 9. Read the License agreement, select I accept all of the above terms, and then click Finish. Figure 36 License agreement The license center will send the license file to the email address you have provided when it finishes generating the file. To identify the status of license file generation and download the file, see "Downloading the license files." 10.
Figure 37 Confirmation Applying for the VFE license file 1. Click Register more for this order, as shown in Figure 37. 2. Select the VFE product code JG814AA4, enter the number of licenses you want to install, and then click Next. Figure 38 Selecting the VFE product code NOTE: You can install a maximum of 64 VFE licenses for each HP 5900v virtual switch. 3. Enter the Base serial number and click Next. For information about the Base serial number, click the Help me find my Base serial number link.
Figure 39 Entering the Base serial number 4. Read the License agreement, select I accept all of the above terms, and then click Finish. The license center will send the license file to the email address you have provided when it finishes generating the file. To download the file, see "Downloading the license files." Downloading the license files 1. On the My Licenses page, select View licenses from the left navigation tree.
2. Download the VCE and VFE license files from the email address you provided, or by clicking the Download license link on the page in Figure 42. Figure 42 Downloading licenses Installing the licenses After you obtain the VCE and VFE license files, install the licenses through the HP FlexFabric Virtual Switch Orchestration Software for 5900v. You can activate the VCE and VFEs by installing only the VFE license file, which contains both VCE and VFE license information. 1.
Figure 43 License File Uploading The system displays Activation succeeded when the VCE license installation is completed. Delivering the licenses Delivering the VCE license One VCE license is required for a VCE-installed ESXi host. After the VCE license is uploaded and activated, the VCE license is delivered to the VCE-installed ESXi host. Delivering the VFE licenses One VFE license is required for each physical CPU on a VFE-installed ESXi host.
Figure 44 VFE Configuration page 3. Select the VFE-installed ESXi host and click License. Figure 45 Licensing the VFE-installed ESXi host 4. Verify the licensing status of the VFE-installed ESXi host. After the VFE licenses are delivered to the VFE-installed ESXi host, Licensing Status of the host changes to Licensed.
Removing the virtual switch To remove the virtual switch completely: 1. Remove the VFE. 2. On the VMware plug-in, remove the VDS that has been created. 3. Remove the VMware plug-in. 4. Remove the VCE. Preparing for the removal Before you remove one virtual switch: • Back up data, and move the network and VM services to another virtual switch. • Before you remove a VFE, make sure the distributed port on the ESXi host connecting to the virtual switch has been removed.
Figure 47 Removing a host from the VDS 6. Access the HP VDS HP 5900v tab. For more information, see "Accessing the virtual switch". 7. In the Virtual Distributed Switch area, click the box that appears. 8. In the VFE (Virtual Forwarding Engine) area, click VFE Configuration. 9. Select the host that contains the VFE, and then click Uninstall. icon for the VDS and click OK in the dialogue Figure 48 Selecting the VFE to remove 10. Click OK to remove the VFE.
To remove the VMware plug-in: 1. Enter http://IP:8080 in the browser address bar, where IP represents the IP address or domain name of the VCE. The login page of the HP FlexFabric Virtual Switch Orchestration Software for 5900v appears. 2. On the login page, enter the username and password. Figure 49 Login page of the HP FlexFabric Virtual Switch Orchestration Software for 5900v 3. On the Global Configuration page, click Uninstall for the Plug-in option in the vCenter Server area.
Removing the VCE You can remove the VCE only after the VFEs and VMware plug-in are removed. Because the VCE is installed as a VM, the procedures for removing the VCE and a VM are similar. To remove the VCE: 1. On the VMware vSphere Client, select Hosts and Clusters in the top navigation bar. Figure 51 Selecting Hosts and Clusters 2. From the left navigation tree, select HP 5900v.
Figure 52 Selecting the VCE 3. In the Basic Tasks area, click Shut down the virtual machine. Figure 53 Powering off the VCE 4. After the VCE is powered off, right-click HP 5900v from the left navigation tree and select Delete from Disk from the short-cut menu. The VCE is removed.
Figure 54 VCE Removing the VCE 46
Upgrading the virtual switch This release can be used either for the first installation or for software upgrade. For the first installation, see HP FlexFabric Virtual Switch 5900v Installation Guide. Strictly perform the following procedures to upgrade software. Software upgrade is not supported when the VFE is transmitting traffic. To upgrade the VFE, migrate all VMs from the corresponding VDS first. Upgrading software 1. Upload the system software image 5900v-XXX.tar.
Figure 56 Decompressing the system software image 4. Enter the upgrade directory, and execute the ./upgrade.sh command to upgrade the VCE. After upgrade, the VM to which the VCE belongs automatically reboots.
5. Log out of the vSphere Client and the HP 5900v Global Configuration page, and log in again. 6. Enter the VFE configuration page. Figure 58 Enter the VFE configuration page 7. Select the corresponding host and click Install to upgrade the VFE. Figure 59 Upgrading the VFE Performing software rollback If software upgrade fails and you need to roll back to the last version, perform the following steps: 1. Enter the rollback directory and execute the ./rollback.sh command.
Figure 60 Version rollback 2. Log out of the vSphere Client and the HP 5900v Global Configuration page, and log in again. Then, software rollback is completed.