
Owner manual

86 HP VMA SAN Gateway User’s Guide AM456-9026A
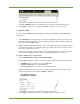
Setting SNMP Trap Sinks
A trap sink defines a host and a community string pair. When a trap event occurs the SNMP agent
sends out a trap to each host in the trap sink list using the community string. This section shows you
how to configure a trap sink list, by removing, enabling, disabling, and adding SNMP servers
(hosts) to be included in the list.
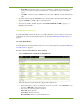
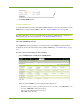
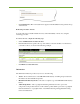
The SNMP Trap Sinks panel lists configured SNMP servers, their type-version (type of security
implemented as related to the version of SNMP), if SNMP management is enabled or not, and the
community configuration. For more information on the available SNMP traps, see Available Traps
on page 234.
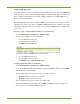
To remove, enable, or disable SNMP trap sink servers, do the following:
1. Select Administration > Notification > SNMP Settings.
2. To remove an SNMP server, do the following:
a. Go to the SNMP Trap Sinks panel.
b. Select the SNMP server from the list.
c. Click Remove Selected Server.
3. To enable or disable an SNMP server, do the following:
a. Go to the SNMP Trap Sinks panel.
b. select the SNMP server from the list.
c. Click Enable Server or Disable Able Server.
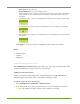
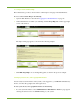
To add new SNMP Trap Sinks, do the following:
1. Select Administration > Notification > SNMP Settings.
2. Go to the SNMP Trap Sinks panel and under Add New SNMP Trap Sinks, enter the SNMP
Server IP address in the text field.
3. From the Type-Version drop-down list, choose one of the following:
• Trap-v1:
Implements community-based security
• Trap-v2: Implements party-based security
4. From the Enable Server drop-down list, choose Yes or No.
5. From the Community drop-down list, choose Public or Private. For more information on
these options, see Configuring SNMP on page 85.