
HP Notebook Reference Guide - Windows 7 and Windows Vista
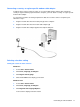
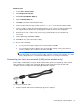

Table Of Contents
- Introduction
- Networking (select models only)
- Multimedia
- Power management
- Shutting down the computer
- Setting power options
- Using Power Assistant (select models only)
- Using battery power
- Finding additional battery information
- Using Battery Check
- Displaying the remaining battery charge
- Maximizing battery discharge time
- Managing low battery levels
- Conserving battery power
- Storing a battery
- Disposing of a used battery
- Replacing the battery
- Using external AC power
- Switching between graphics modes (select models only)
- External cards and devices
- Using Media Card Reader cards (select models only)
- Using PC Cards (select models only)
- Using ExpressCards (select models only)
- Using smart cards (select models only)
- Using a USB device
- Using 1394 devices (select models only)
- Using an eSATA device (select models only)
- Using a serial device (select models only)
- Using optional external devices
- Drives
- Security
- Protecting the computer
- Using passwords
- Using antivirus software
- Using firewall software
- Installing critical security updates
- Using HP ProtectTools Security Manager (select models only)
- Installing an optional security cable
- Using the fingerprint reader (select models only)
- Maintenance
- Computer Setup (BIOS) and System Diagnostics
- MultiBoot
- Management
- Traveling with the computer
- Troubleshooting resources
- Electrostatic Discharge
- Index

Adjusting the volume
Depending on your computer model, you can adjust the volume using the following:
● Volume buttons
● Volume hotkeys (specific keys pressed in combination with the fn key)
● Volume keys
WARNING! To reduce the risk of personal injury, adjust the volume before putting on headphones,
earbuds, or a headset. For additional safety information, refer to the Regulatory, Safety and
Environmental Notices.
NOTE: Volume can also be controlled through the operating system and some programs.
NOTE: Refer to the Getting Started guide for information on what type of volume controls your
computer has.
Checking audio functions on the computer
NOTE: For best results when recording, speak directly into the microphone and record sound in a
setting free of background noise.
Windows 7
To check the audio functions on your computer, follow these steps:
1. Select Start > Control Panel > Hardware and Sound > Sound.
2. When the Sound window opens, click the Sounds tab. Under Program Events, select any sound
event, such as a beep or alarm, and click the Test button.
You should hear sound through the speakers or through connected headphones.
To check the recording functions on your computer, follow these steps:
1. Select Start > All Programs > Accessories > Sound Recorder.
2. Click Start Recording and speak into the microphone. Save the file to your desktop.
3. Open a multimedia program and play back the sound.
To confirm or change the audio settings on your computer, select Start > Control Panel > Hardware
and Sound > Sound.
Windows Vista
To check the audio functions on your computer, follow these steps:
1. Select Start > Control Panel > Hardware and Sound > Sound.
2. When the Sound window opens, click the Sounds tab. Under Program, select any sound event,
such as a beep or alarm, and click the Test button.
You should hear sound through the speakers or through connected headphones.
16 Chapter 3 Multimedia