
HP Notebook Reference Guide - Windows 7 and Windows Vista


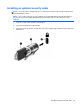

Table Of Contents
- Introduction
- Networking (select models only)
- Multimedia
- Power management
- Shutting down the computer
- Setting power options
- Using Power Assistant (select models only)
- Using battery power
- Finding additional battery information
- Using Battery Check
- Displaying the remaining battery charge
- Maximizing battery discharge time
- Managing low battery levels
- Conserving battery power
- Storing a battery
- Disposing of a used battery
- Replacing the battery
- Using external AC power
- Switching between graphics modes (select models only)
- External cards and devices
- Using Media Card Reader cards (select models only)
- Using PC Cards (select models only)
- Using ExpressCards (select models only)
- Using smart cards (select models only)
- Using a USB device
- Using 1394 devices (select models only)
- Using an eSATA device (select models only)
- Using a serial device (select models only)
- Using optional external devices
- Drives
- Security
- Protecting the computer
- Using passwords
- Using antivirus software
- Using firewall software
- Installing critical security updates
- Using HP ProtectTools Security Manager (select models only)
- Installing an optional security cable
- Using the fingerprint reader (select models only)
- Maintenance
- Computer Setup (BIOS) and System Diagnostics
- MultiBoot
- Management
- Traveling with the computer
- Troubleshooting resources
- Electrostatic Discharge
- Index
Installing an optional security cable
NOTE: A security cable is designed to act as a deterrent, but it may not prevent the computer from
being mishandled or stolen.
NOTE: The security cable slot on your computer may look slightly different from the illustration in
this section. Refer to the Getting Started guide for the location of the security cable slot on your
computer.
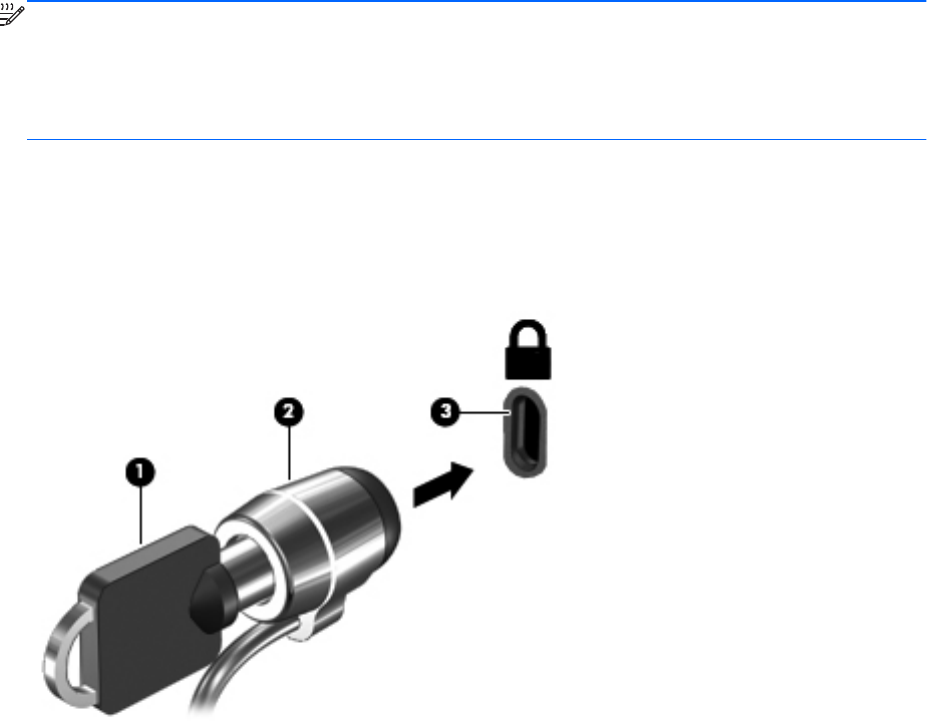
1. Loop the security cable around a secured object.
2. Insert the key (1) into the cable lock (2).
3. Insert the cable lock into the security cable slot on the computer (3), and then lock the cable lock
with the key.
Installing an optional security cable 67