
HP ProBook Notebook PC User Guide - Windows XP
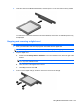
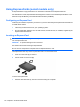

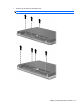
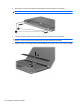
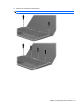
Table Of Contents
- Features
- Wireless, modem, and local area network
- Pointing devices and keyboard
- Using pointing devices
- Using the keyboard
- Using hotkeys
- Displaying system information
- Initiating Sleep
- Decreasing screen brightness
- Increasing screen brightness
- Switching the screen image
- Opening the default e-mail application
- Opening the default Web browser
- Muting speaker sound
- Decreasing speaker sound
- Increasing speaker sound
- Playing the previous track or section of an audio CD or a DVD
- Playing, pausing, or resuming an audio CD or a DVD
- Playing the next track or section of an audio CD or a DVD
- Using hotkeys
- Using QuickLook
- Using QuickWeb
- Using the embedded numeric keypad
- Using an optional external numeric keypad
- Cleaning the TouchPad and keyboard
- Multimedia
- Multimedia features
- Multimedia software
- Audio
- Video
- Optical drive (select models only)
- Identifying the installed optical drive
- Using optical discs (CDs, DVDs, and BDs)
- Selecting the right disc (CDs, DVDs, and BDs)
- Playing a CD, DVD, or BD
- Configuring AutoPlay
- Changing DVD region settings
- Observing the copyright warning
- Copying a CD or DVD
- Creating (burning) a CD, DVD, or BD
- Removing an optical disc (CD, DVD, or BD)
- Troubleshooting
- The optical disc tray does not open for removal of a CD, DVD, or BD
- The computer does not detect the optical drive
- Preventing playback disruptions
- A disc does not play
- A disc does not play automatically
- A movie stops, skips, or plays erratically
- A movie is not visible on an external display
- The process of burning a disc does not begin, or it stops before completion
- A device driver must be reinstalled
- Webcam
- Power management
- Setting power options
- Using external AC power
- Using battery power
- Finding battery information in Help and Support
- Using Battery Check
- Displaying the remaining battery charge
- Inserting or removing the battery
- Charging a battery
- Maximizing battery discharge time
- Managing low battery levels
- Calibrating a battery
- Conserving battery power
- Storing a battery
- Disposing of a used battery
- Replacing the battery
- Testing an AC adapter
- Shutting down the computer
- Drives
- External devices
- External media cards
- Memory modules
- Security
- Protecting the computer
- Using passwords
- Using Computer Setup security features
- Using antivirus software
- Using firewall software
- Installing critical updates
- Using HP ProtectTools Security Manager (select models only)
- Installing a security cable
- Software updates
- Backup and recovery
- Computer Setup
- MultiBoot
- Management and printing
- Index
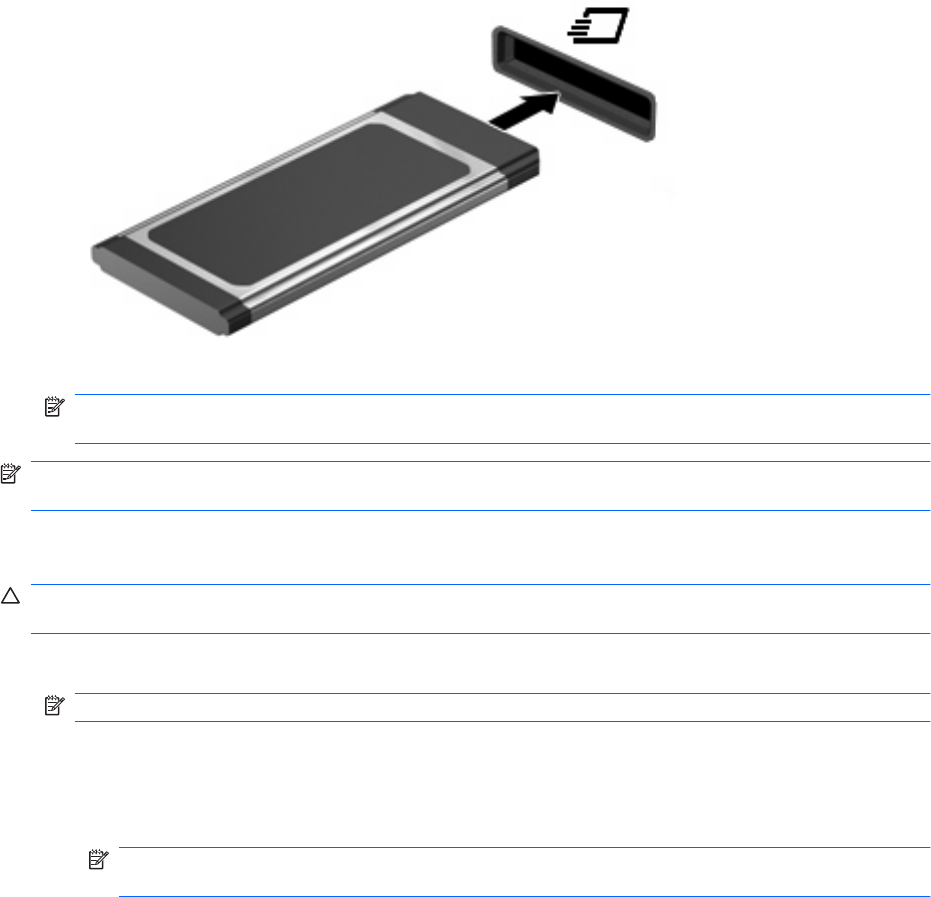
2. Insert the card into the ExpressCard slot, and then push in on the card until it is firmly seated.
You will hear a sound when the device has been detected, and a menu of options may be displayed.
NOTE: The first time you insert an ExpressCard, a message is displayed in the notification area
to let you know the device is recognized by the computer.
NOTE: An inserted ExpressCard uses power even when idle. To conserve power, stop or remove an
ExpressCard when it is not in use.
Stopping and removing an ExpressCard
CAUTION: To prevent loss of data or an unresponsive system, stop an ExpressCard before removing
it.
1. Save your information and close all programs associated with the ExpressCard.
NOTE: To stop a data transfer, click Cancel in the operating system Copying window.
2. Stop the ExpressCard:
a. Double-click the Safely Remove Hardware icon in the notification area, at the far right of the
taskbar.
NOTE: To display the Safely Remove Hardware icon, click the Show Hidden Icons icon
(< or <<) in the notification area.
b. Click the name of the ExpressCard in the list.
c. Click Stop, and then click OK.
3. Release and remove the ExpressCard:
a. Gently press in on the ExpressCard (1) to unlock it.
b. Pull the ExpressCard out of the slot (2).
Using ExpressCards (select models only) 111