
HP ProBook Notebook PC User Guide - Windows XP

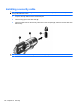

Table Of Contents
- Features
- Wireless, modem, and local area network
- Pointing devices and keyboard
- Using pointing devices
- Using the keyboard
- Using hotkeys
- Displaying system information
- Initiating Sleep
- Decreasing screen brightness
- Increasing screen brightness
- Switching the screen image
- Opening the default e-mail application
- Opening the default Web browser
- Muting speaker sound
- Decreasing speaker sound
- Increasing speaker sound
- Playing the previous track or section of an audio CD or a DVD
- Playing, pausing, or resuming an audio CD or a DVD
- Playing the next track or section of an audio CD or a DVD
- Using hotkeys
- Using QuickLook
- Using QuickWeb
- Using the embedded numeric keypad
- Using an optional external numeric keypad
- Cleaning the TouchPad and keyboard
- Multimedia
- Multimedia features
- Multimedia software
- Audio
- Video
- Optical drive (select models only)
- Identifying the installed optical drive
- Using optical discs (CDs, DVDs, and BDs)
- Selecting the right disc (CDs, DVDs, and BDs)
- Playing a CD, DVD, or BD
- Configuring AutoPlay
- Changing DVD region settings
- Observing the copyright warning
- Copying a CD or DVD
- Creating (burning) a CD, DVD, or BD
- Removing an optical disc (CD, DVD, or BD)
- Troubleshooting
- The optical disc tray does not open for removal of a CD, DVD, or BD
- The computer does not detect the optical drive
- Preventing playback disruptions
- A disc does not play
- A disc does not play automatically
- A movie stops, skips, or plays erratically
- A movie is not visible on an external display
- The process of burning a disc does not begin, or it stops before completion
- A device driver must be reinstalled
- Webcam
- Power management
- Setting power options
- Using external AC power
- Using battery power
- Finding battery information in Help and Support
- Using Battery Check
- Displaying the remaining battery charge
- Inserting or removing the battery
- Charging a battery
- Maximizing battery discharge time
- Managing low battery levels
- Calibrating a battery
- Conserving battery power
- Storing a battery
- Disposing of a used battery
- Replacing the battery
- Testing an AC adapter
- Shutting down the computer
- Drives
- External devices
- External media cards
- Memory modules
- Security
- Protecting the computer
- Using passwords
- Using Computer Setup security features
- Using antivirus software
- Using firewall software
- Installing critical updates
- Using HP ProtectTools Security Manager (select models only)
- Installing a security cable
- Software updates
- Backup and recovery
- Computer Setup
- MultiBoot
- Management and printing
- Index

11 Software updates
Updating software
Updated versions of the software provided with your computer are available either through the HP
Software Update utility or on the HP Web site.
The Software Update utility automatically checks for software updates from HP. The utility runs every
30 days and provides a list of support alerts, such as security enhancements, and optional software and
driver updates.
You can manually check for updates at any time by selecting Start > Help and Support > Update
Software & Drivers, and then follow the on-screen instructions.
Most software on the HP Web site is packaged in compressed files called SoftPaqs. Some BIOS updates
may be packaged in compressed files called ROMPaqs.
Some download packages contain a file named Readme.txt, which contains information regarding
installing and troubleshooting the file. (Readme.txt files included with ROMPaqs are provided in English
only.)
You can also access software updates by obtaining the Support Software disc (purchased separately).
This disc includes device drivers, BIOS updates, and utilities.
1. Open your Internet browser, and go to
http://www.hp.com/support.
2. Select your country or region.
3. Click the option for software and driver downloads, and then type your computer model number in
the product box.
4. Press enter.
5. Follow the on-screen instructions.
To update the software using a Support Software disc, follow these steps:
1. Insert the Support Software disc into the optical drive.
2. Follow the on-screen instructions.
Updating software 143