
HP ProBook Notebook PC User Guide - Windows XP
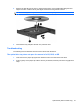
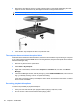
Table Of Contents
- Features
- Wireless, modem, and local area network
- Pointing devices and keyboard
- Using pointing devices
- Using the keyboard
- Using hotkeys
- Displaying system information
- Initiating Sleep
- Decreasing screen brightness
- Increasing screen brightness
- Switching the screen image
- Opening the default e-mail application
- Opening the default Web browser
- Muting speaker sound
- Decreasing speaker sound
- Increasing speaker sound
- Playing the previous track or section of an audio CD or a DVD
- Playing, pausing, or resuming an audio CD or a DVD
- Playing the next track or section of an audio CD or a DVD
- Using hotkeys
- Using QuickLook
- Using QuickWeb
- Using the embedded numeric keypad
- Using an optional external numeric keypad
- Cleaning the TouchPad and keyboard
- Multimedia
- Multimedia features
- Multimedia software
- Audio
- Video
- Optical drive (select models only)
- Identifying the installed optical drive
- Using optical discs (CDs, DVDs, and BDs)
- Selecting the right disc (CDs, DVDs, and BDs)
- Playing a CD, DVD, or BD
- Configuring AutoPlay
- Changing DVD region settings
- Observing the copyright warning
- Copying a CD or DVD
- Creating (burning) a CD, DVD, or BD
- Removing an optical disc (CD, DVD, or BD)
- Troubleshooting
- The optical disc tray does not open for removal of a CD, DVD, or BD
- The computer does not detect the optical drive
- Preventing playback disruptions
- A disc does not play
- A disc does not play automatically
- A movie stops, skips, or plays erratically
- A movie is not visible on an external display
- The process of burning a disc does not begin, or it stops before completion
- A device driver must be reinstalled
- Webcam
- Power management
- Setting power options
- Using external AC power
- Using battery power
- Finding battery information in Help and Support
- Using Battery Check
- Displaying the remaining battery charge
- Inserting or removing the battery
- Charging a battery
- Maximizing battery discharge time
- Managing low battery levels
- Calibrating a battery
- Conserving battery power
- Storing a battery
- Disposing of a used battery
- Replacing the battery
- Testing an AC adapter
- Shutting down the computer
- Drives
- External devices
- External media cards
- Memory modules
- Security
- Protecting the computer
- Using passwords
- Using Computer Setup security features
- Using antivirus software
- Using firewall software
- Installing critical updates
- Using HP ProtectTools Security Manager (select models only)
- Installing a security cable
- Software updates
- Backup and recovery
- Computer Setup
- MultiBoot
- Management and printing
- Index

3. Click the AutoPlay tab, and then select one of the available actions.
4. Click OK.
NOTE: For more information about AutoPlay, refer to Help and Support.
Changing DVD region settings
Most DVDs that contain copyrighted files also contain region codes. The region codes help protect
copyrights internationally.
You can play a DVD containing a region code only if the region code on the DVD matches the region
setting on your DVD drive.
CAUTION: The region settings on your DVD drive can be changed only 5 times.
The region setting you select the fifth time becomes the permanent region setting on the DVD drive.
The number of region changes remaining is displayed on the DVD Region tab.
To change settings through the operating system:
1. Select Start > My Computer.
2. Right-click in the window, and then select Properties > Hardware tab > Device Manager.
3. Click the "+" sign next to DVD/CD-ROM drives, right-click the DVD drive for which you want to
change region settings, and then click Properties.
4. Make the desired changes on the DVD Region tab.
5. Click OK.
Observing the copyright warning
It is a criminal offense, under applicable copyright laws, to make unauthorized copies of copyright-
protected material, including computer programs, films, broadcasts, and sound recordings. Do not use
this computer for such purposes.
Copying a CD or DVD
1. Select Start > All Programs > ArcSoft > Creator Business.
2. In the right pane, click Copy Disc.
3. Insert the disc you want to copy into the optical drive.
4. Click Copy at the bottom right of the screen.
Creator Business reads the source disc and copies the data to a temporary folder on your hard
drive.
5. When prompted, remove the source disc from the optical drive and insert a blank disc into the drive.
After the information is copied, the disc you created is ejected automatically.
Optical drive (select models only) 59