HP ProtectTools User Guide
© Copyright 2009 Hewlett-Packard Development Company, L.P. Bluetooth is a trademark owned by its proprietor and used by Hewlett-Packard Company under license. Java is a US trademark of Sun Microsystems, Inc. Microsoft and Windows are U.S. registered trademarks of Microsoft Corporation. The information contained herein is subject to change without notice. The only warranties for HP products and services are set forth in the express warranty statements accompanying such products and services.
Table of contents 1 Introduction to security HP ProtectTools features ..................................................................................................................... 2 Achieving key security objectives ......................................................................................................... 3 Protecting against targeted theft .......................................................................................... 3 Restricting access to sensitive data ...............
Applications tab .................................................................................................................................. 20 6 Management tools Updates and Messages ...................................................................................................................... 22 7 HP ProtectTools Security Manager Opening HP ProtectTools Security Manager .....................................................................................
Logging in after Drive Encryption is activated .................................................................... 39 Protect your data by encrypting your hard drive ................................................................ 40 Displaying encryption status .............................................................................................. 40 Advanced tasks ..................................................................................................................................
Adding a suggested signer's signature line ...................................... 54 Encrypting a Microsoft Office document ........................................................... 54 Removing encryption from a Microsoft Office document .................................. 55 Sending an encrypted Microsoft Office document ............................................ 55 Viewing a signed Microsoft Office document ....................................................
Viewing the log files ........................................................................................................... 71 11 Device Access Manager for HP ProtectTools (select models only) Setup Procedures ............................................................................................................................... 73 Opening Device Access Manager ..................................................................................... 73 Configuring device access ....................
viii
1 Introduction to security HP ProtectTools Security Manager software provides security features that help protect against unauthorized access to the computer, networks, and critical data. Administration of HP ProtectTools Security Manager is provided through the Administrative Console feature.
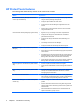
HP ProtectTools features The following table details the key features of HP ProtectTools modules. Module Key features HP ProtectTools Security Manager Administrative Console (for administrators) ● Set up and configure levels of security and security logon methods using the Security Manager Setup Wizard. ● Configure options hidden from basic users. ● Configure Device Access Manager configurations and user access. ● Add and remove HP ProtectTools users and view user status using administrator tools.
Achieving key security objectives The HP ProtectTools modules can work together to provide solutions for a variety of security issues, including the following key security objectives: ● Protecting against targeted theft ● Restricting access to sensitive data ● Preventing unauthorized access from internal or external locations ● Creating strong password policies Protecting against targeted theft An example of targeted theft would be the theft of a computer containing confidential data and customer in
● File Sanitizer allows secure deletion of data by shredding critical files and folders or bleaching the hard drive (writing over data that has been deleted but is still recoverable). ● DriveLock helps ensure that data cannot be accessed even if the hard drive is removed and installed into an unsecured system.
Additional security elements Assigning security roles In managing computer security (particularly for large organizations), one important practice is to divide responsibilities and rights among various types of administrators and users. NOTE: In a small organization or for individual use, these roles may all be held by the same person.
Creating a secure password When creating passwords, you must first follow any specifications that are set by the program. In general, however, consider the following guidelines to help you create strong passwords and reduce the chances of your password being compromised: ● Use passwords with more than 6 characters, preferably more than 8. ● Mix the case of letters throughout your password. ● Whenever possible, mix alphanumeric characters and include special characters and punctuation marks.
2 Getting started with the Setup Wizard The HP ProtectTools Setup Wizard guides you through setting up the most commonly used features of Security Manager. However, there is a wealth of additional functionality available through the HP ProtectTools Administrative Console. The same settings found in the wizard, as well as additional security features, can be configured through the console, which is accessed from the Windows® Start menu.
3. The Setup Wizard asks you to verify your identity. Type your Windows password or scan your fingerprints with the fingerprint reader, and then click Next. If neither a fingerprint reader nor a smart card is available, you are prompted to enter your Windows password. You must use this password in the future whenever authentication is required. If you have not yet created a Windows password, you are prompted to create one.
3 HP ProtectTools Security Manager Administrative Console Administration of HP ProtectTools Security Manager is provided through the Administrative Console. NOTE: Administration of HP ProtectTools requires administrator privileges.
Opening the Administrative Console For administrative tasks, such as setting system policies or configuring software, open the console as follows: ▲ Click Start, click All Programs, click HP, and then click HP ProtectTools Administrative Console. – or – In the left panel of the Security Manager dashboard, click Administration.
Using the Administrative Console The Security Manager Administrative Console is the central location for administering HP ProtectTools Security Manager. The console is composed of the following components: ● ● ● Tools—Displays the following categories for configuring security on your computer: ◦ Home—Allows you to select the security tasks to perform. ◦ System—Allows you to configure security features and authentication for users and devices.
4 Configuring your system The System group is accessed from the Tools menu panel on the left side of the HP ProtectTools Administrative Console screen. You can use the applications in this group to manage the policies and settings for the computer, its users, and its devices. The following applications are included in the System group: 12 ● Security—Manage features, authentication, and settings governing how users interact with this computer.
Setting up authentication for your computer Within the Authentication application, you can select which security features should be implemented on this computer, set policies governing access to the computer, and configure additional advanced settings. You can specify the credentials required to authenticate each class of user when logging into Windows or logging into Web sites and programs during a user session. To set up authentication on your computer: 1.
Settings You can allow one or more of the following security settings: ● Allow One Step logon—Allows users of this computer to skip Windows logon if authentication was performed at the BIOS or encrypted disk level. ● Allow HP SpareKey authentication for Windows logon—Allows users of this computer to use the HP SpareKey feature to log on to Windows despite any other authentication policy required by Security Manager. To edit the settings: 14 1. Click to enable or disable a specific setting. 2.
Managing users Within the Users application, you can monitor and manage this computer's HP ProtectTools users. All HP ProtectTools users are listed and verified against the policies set through Security Manager and whether or not they have registered the appropriate credentials enabling them to meet those policies. To manage users, select from the following settings: ● To add additional users, click Add. ● To delete a user, click the user, and then click Delete.
Specifying device settings Within the Device application, you can specify settings available for any built-in or attached security devices recognized by HP ProtectTools Security Manager. Fingerprints The Fingerprints page has three tabs: Enrollment, Sensitivity, and Advanced. Enrollment You can choose the minimum and maximum number of fingerprints that a user is allowed to enroll. You can also clear all of the data from the fingerprint reader.
3. For more convenience, click the slider to move it to the left, or for more accuracy, click the slider to move it to the right. ● Convenience—To make it easier for enrolled users to gain access in marginal situations, click the slider bar to move it to the Convenience position.
5 Configuring your applications The Applications group is accessed from the Security Applications menu panel on the left side of HP ProtectTools Administrative Console. You can use Settings to customize the behavior of currently installed HP ProtectTools Security Manager applications. To edit your application settings: 18 1. In the Tools menu, from the Applications group, click Settings. 2. Click to enable or disable a specific setting. 3. Click Apply to save the changes that you have made.
General tab The following settings are available on the General tab: ● Do not automatically launch the Setup Wizard for administrators—Select this option to prevent the wizard from automatically opening upon logon. ● Do not automatically launch the Getting Started wizard for users—Select this option to prevent user setup from automatically opening upon logon.
Applications tab The settings displayed here can change when new applications are added to Security Manager. The minimal settings shown by default are as follows: ● Applications status—Enables status to be displayed for all applications. ● Password Manager—Enables the Password Manager application for all users of the computer. ● Privacy Manager—Enables the Privacy Manager application for all users of the computer.
6 Management tools Additional applications may be available for adding new management tools to Security Manager. The administrator of this computer may disable this feature through the Settings application. To add additional management tools, click [+] Management tools.
Updates and Messages If an Internet connection is available, you can access the DigitalPersona Web site http://www.digitalpersona.com/ to check for new applications or to set up a schedule for automatic updates. 22 1. To request information about new applications and updates, select the check box for Keep me informed about new applications and updates. 2. To set up a schedule for automatic updates, select the number of days. 3. To check for updates, click Check Now.
7 HP ProtectTools Security Manager HP ProtectTools Security Manager allows you to significantly increase the security of your computer.
Opening HP ProtectTools Security Manager You can open HP ProtectTools Security Manager in any of the following ways: 24 ● Click Start, click All Programs, click HP, and then click HP ProtectTools Security Manager. ● Double-click the HP ProtectTools icon in the notification area, at the far right of the taskbar. ● Right-click the HP ProtectTools icon, and click Open HP ProtectTools Security Manager. ● Click the Security Manager ID Card gadget on the Windows Sidebar.
Using the Security Manager dashboard The Security Manager dashboard is the central location for easy access to Security Manager features, applications, and settings. ▲ To open the Security Manager dashboard, click Start, click All Programs, click HP, and then click HP ProtectTools Security Manager. The dashboard is composed of the following components: ● ID Card—Displays the Windows user name and a selected picture identifying the logged on user account.
Setup procedures Registering credentials You can use the My Identity page to register your various authentication methods, or credentials. After they have been registered, you can use these methods to log on to Security Manager. Enrolling your fingerprints If your computer has a fingerprint reader built in or connected, the HP ProtectTools Security Manager Setup Wizard guides you through the process of setting up or “enrolling” your fingerprints. 1. An outline of two hands is displayed.
NOTE: If you are having difficulty enrolling scenes, try moving closer to the webcam. As with any type of photography or videography, lighting and contrast are extremely important. Ensure that the lighting for your session is primarily in the foreground and not primarily in the background. If you find that Face Recognition does not readily authenticate you, you might want to reenroll your scene with improved lighting. To enroll a new scene from HP ProtectTools Security Manager: 1.
To change your Windows password, follow these steps: 1. From the Security Manager dashboard, click Credentials, and then click Password. 2. Enter your current password in the Current Windows password text box. 3. Type a new password in the New Windows password text box, and then type it again in the Confirm new password text box. 4. Click Change to immediately change your current password to the new one that you entered.
General tasks The applications included in this group assist you in managing various aspects of your digital identity. ● Security Manager—Creates and manages Quick Links, which allow you to launch and log on to Web sites and programs by authenticating with your Windows password, your fingerprint, or a smart card. ● Credentials—Provides a means to easily change your Windows password, enroll your fingerprints, or set up a smart card.
● Add a New Account—Allows you to add an account to a logon. ● Open Password Manager—Launches the Password Manager application. ● Help—Displays Password Manager software Help. NOTE: The administrator of this computer may have set up Security Manager to require more than one credential when verifying your identity. Adding logons You can easily add a logon for a Web site or a program by entering the logon information once. From then on, Password Manager automatically enters the information for you.
NOTE: After you use the manual mode of entering the logon data for a site, you must continue to use this method to log on to the same Web site in the future. NOTE: 8. iv. The manual mode of entering logon data is available only with Internet Explorer Click Close. Each time that you access that Web site or open that program, the Password Manager icon is displayed, indicating that you can use your registered credentials to log on. Editing logons To edit a logon, follow these steps: 1.
To add a category: 1. From the Security Manager dashboard, click Password Manager. 2. Click the Manage tab, and then click Add Category. 3. Enter a name for the category. 4. Click OK. To add a logon to a category: 1. Place your mouse pointer over the desired logon. 2. Press and hold the left mouse button. 3. Drag the logon into the list of categories. Categories will be highlighted as you move your mouse over them. 4. Release the mouse button when the desired category is highlighted.
Password Manager icon settings Password Manager attempts to identify logon screens for Web sites and programs. When it detects a logon screen for which you have not created a logon, Password Manager prompts you to add a logon for the screen by displaying the Password Manager icon with a "+" sign. Click the icon arrow, and then click Icon Settings to customize how Password Manager handles possible logon sites.
Your personal ID card Your ID card uniquely identifies you as the owner of this Windows account, showing your name and a picture of your choice. It is prominently displayed in the upper-left corner of Security Manager pages, and as a Windows Sidebar gadget. Clicking your ID Card in the Windows Sidebar is one of the many ways to get quick access to Security Manager. You can change the picture and the way that your name is displayed.
Fingerprint The following settings are available on the Fingerprint tab: ● Quick Actions—Use Quick Actions to select the Security Manager task to be performed when you hold down a designated key while scanning your fingerprint. To assign a Quick Action to one of the listed keys, click a (Key) + Fingerprint option, and then select one of the available tasks from the menu. ● Fingerprint Scan Feedback—Displays only when a fingerprint reader is available.
3. Select the previously created storage file. You can enter the path in the field provided, or click Browse. 4. Enter the password used to protect the file. 5. Select the modules whose data you want to restore. In most cases, this would be all of the modules listed. 6. Click Finish. Discover more Additional applications that provide new features for this program may be available. From the Security Manager dashboard, click [+] Discover more to browse additional applications.
8 Drive Encryption for HP ProtectTools (select models only) CAUTION: If you decide to uninstall the Drive Encryption module, you must first decrypt all encrypted drives. If you do not, you will not be able to access the data on encrypted drives unless you have registered with the Drive Encryption recovery service. Reinstalling the Drive Encryption module will not enable you to access the encrypted drives.
Setup procedures Opening Drive Encryption 38 1. Click Start, click All Programs, click HP, and then click HP ProtectTools Administrative Console. 2. In the left pane, click Drive Encryption.
General tasks Activating Drive Encryption Use the HP ProtectTools Setup Wizard to activate Drive Encryption. NOTE: This wizard is also used to add and remove users. – or – 1. Click Start, click All Programs, click HP, and then click HP ProtectTools Administrative Console. 2. In the left pane, click Security, and then click Features. 3. Select the Drive Encryption check box, and then click Next. 4. Under Drives to be encrypted, select the check box for the hard drive that you want to encrypt. 5.
NOTE: If the Windows administrator has enabled Pre-boot Security in the HP ProtectTools Security Manager, you will log on to the computer immediately after the computer is turned on, rather than at the Drive Encryption logon screen. 1. Click your user name, and then type your Windows password or Java™ Card PIN, or swipe a registered finger. 2. Click OK.
Advanced tasks Managing Drive Encryption (administrator task) The Encryption Management page allows administrators to view and change the status of Drive Encryption (active or inactive) and to view the encryption status of all of the hard drives on the computer. ● If the status is Inactive, Drive Encryption has not yet been activated in HP ProtectTools Security Manager by the Windows administrator and is not protecting the hard drive.
CAUTION: Be sure to keep the storage device containing the backup key in a safe place, because if you forget your password or lose your Java Card, this device provides your only access to your hard drive. 1. Open HP ProtectTools Administrative Console, click Drive Encryption, and then click Recovery. 2. Click Backup Keys. 3. On the Select Backup Disk page, select the check box for the device where you want to back up your encryption key, and then click Next. 4.
9 Privacy Manager for HP ProtectTools (select models only) Privacy Manager for HP ProtectTools enables you to use advanced security logon (authentication) methods to verify the source, integrity, and security of communication when using e-mail, Microsoft® Office documents, or instant messaging (IM).
Setup procedures Opening Privacy Manager To open Privacy Manager: 1. Click Start, click All Programs, click HP, and then click HP ProtectTools Security Manager. 2. Click Privacy Manager. – or – Right-click the HP ProtectTools icon in the notification area, at the far right of the taskbar, click Privacy Manager, and then click Configuration. – or – On the toolbar of a Microsoft Outlook e-mail message, click the down arrow next to Send Securely, and then click Certificates or Trusted Contacts.
Requesting a Privacy Manager Certificate 1. Open Privacy Manager, and click Certificates. 2. Click Request a Privacy Manager certificate. 3. On the Welcome page, read the text, and then click Next. 4. On the License Agreement page, read the license agreement. 5. Be sure that the check box next to Check here to accept the terms of this license agreement is selected, and then click Next. 6. On the Your Certificate Details page, enter the required information, and then click Next. 7.
If you click Cancel, refer to for Adding a Trusted Contact on page 48 information on adding a Trusted Contact at a later time. Viewing Privacy Manager Certificate details 1. Open Privacy Manager, and click Certificates. 2. Click a Privacy Manager Certificate. 3. Click Certificate details. 4. When you have finished viewing the details, click OK. Renewing a Privacy Manager Certificate When your Privacy Manager Certificate nears expiration, you will be notified that you need to renew it: 1.
3. Click Delete. 4. When the confirmation dialog box opens, click Yes. 5. Click Close, and then click Apply. Restoring a Privacy Manager Certificate During installation of your Privacy Manager certificate, you are required to create a backup copy of the certificate. You may also create a backup copy from the Migration page. This backup copy can be used when migrating to another computer or to restore a certificate to the same computer. 1. Open Privacy Manager, and click Migration. 2. Click Restore.
Trusted Contacts Manager allows you to perform the following tasks: ● View Trusted Contact details ● Delete Trusted Contacts ● Check revocation status for Trusted Contacts (advanced) Adding Trusted Contacts Adding Trusted Contacts is a 3-step process: 1. You send an e-mail invitation to a Trusted Contact recipient. 2. The Trusted Contact recipient responds to the e-mail. 3. You receive the e-mail response from the Trusted Contact recipient, and click Accept.
8. When you receive an e-mail response from a recipient accepting the invitation to become a Trusted Contact, click Accept in the lower-right corner of the e-mail. A dialog box opens, confirming that the recipient has been successfully added to your Trusted Contacts list. 9. Click OK. Adding Trusted Contacts using Microsoft Outlook contacts 1. Open Privacy Manager, click Trusted Contacts Manager, and then click Invite Contacts.
Deleting a Trusted Contact 1. Open Privacy Manager, and click Trusted Contacts. 2. Click the Trusted Contact you want to delete. 3. Click Delete contact. 4. When the confirmation dialog box opens, click Yes. Checking revocation status for a Trusted Contact To see if a Trusted Contact has revoked their Privacy Manager Certificate: 1. Open Privacy Manager, and click Trusted Contacts. 2. Click a Trusted Contact. 3. Click the Advanced button.
General tasks You can use Privacy Manager with the following Microsoft products: ● Microsoft Outlook ● Microsoft Office ● Windows Live Messenger Using Privacy Manager in Microsoft Outlook When Privacy Manager in installed, a Privacy button is displayed on the Microsoft Outlook toolbar, and a Send Securely button is displayed on the toolbar of each Microsoft Outlook e-mail message.
3. Click the down arrow next to Send Securely (Privacy in Outlook 2003), and then click Sign and Send. 4. Authenticate using your chosen security logon method. Sealing and sending an e-mail message Sealed e-mail messages that are digitally signed and sealed (encrypted) can only be viewed by people you choose from your Trusted Contacts list. To seal and send an e-mail message to a Trusted Contact: 1. In Microsoft Outlook, click New or Reply. 2. Type your e-mail message. 3.
Configuring Privacy Manager for Microsoft Office 1. Open Privacy Manager, click Settings, and then click the Documents tab. – or – On the toolbar of a Microsoft Office document, click the down arrow next to Sign and Encrypt, and then click Settings. 2. Select the actions you want to configure, and then click OK. Signing a Microsoft Office document 1. In Microsoft Word, Microsoft Excel, or Microsoft PowerPoint, create and save a document. 2.
To add a suggested signer to a Microsoft Word or Microsoft Excel document: 1. In Microsoft Word or Microsoft Excel, create and save a document. 2. Click the Insert menu. 3. In the Text group on the toolbar, click the arrow next to Signature Line, and then click Privacy Manager Signature Provider. The Signature Setup dialog box opens. 4. In the text box under Suggested signer, enter the name of the suggested signer. 5.
NOTE: To select multiple Trusted Contact names, hold down the ctrl key and click the individual names. 5. Click OK. If you later decide to edit the document, follow the steps in Removing encryption from a Microsoft Office document on page 55. When the encryption is removed, you can edit the document. Follow the steps in this section to encrypt the document again.
Viewing an encrypted Microsoft Office document To view an encrypted Microsoft Office document from another computer, Privacy Manager must be installed on that computer. In addition, you must restore the Privacy Manager Certificate that was used to encrypt the file. A Trusted Contact wanting to view an encrypted Microsoft Office document must have a Privacy Manager Certificate, and Privacy Manager must be installed on his or her computer.
– or – a. Right-click the ProtectTools icon in the notification area, click Privacy Manager for HP ProtectTools, and then select Start Chat. b. In Live Messenger, click Actions: Start an Activity, and then select Privacy Manager Chat. NOTE: Each user must be online in Live Messenger, and the users must be displayed in each other's Live Messenger online window. Click to select an online user. Privacy Manager sends an invitation to the contact to start Privacy Manager Chat.
● Send—Click this button to send an encrypted message to your contact. ● Send signed—Select this check box to electronically sign and encrypt your messages. Then, if the message is tampered with, it will be marked as invalid when the recipient receives it. You must authenticate each time you send a signed message. ● Send hidden—Select this check box to encrypt and send a message showing only the message heading. Your contact must authenticate to read the content of the message.
Reveal sessions for a specific account Revealing a session displays the decrypted Contact Screen Name for the currently selected session. To reveal a specific chat history session: 1. In the Live Messenger History Viewer, right-click any session, and then select Reveal Session. 2. Authenticate using your chosen security logon method. The Contact Screen Name is decrypted. 3. Double-click the revealed session to view its content.
Add or remove columns By default, the 3 most used columns are displayed in the Live Messenger History Viewer. You can add additional columns to the display, or you can remove columns from the display. To add columns to the display: 1. Right-click on any column heading, and then select Add/Remove Columns. 2. Select a column heading in the left panel, and then click Add to move it to the right panel. To remove columns from the display: 1.
Advanced tasks Migrating Privacy Manager Certificates and Trusted Contacts to a different computer You can securely migrate your Privacy Manager Certificates and Trusted Contacts to another computer, or back up your data for safekeeping. To do this, back up the data as a password-protected file to a network location or any removable storage device, and then restore the file to the new computer.
Central administration of Privacy Manager Your installation of Privacy Manager may be part of a centralized installation, that has been customized by your administrator. One or more of the following features may be either enabled or disabled: 62 ● Certificate use policy—You may be restricted to the use of Privacy Manager certificates issued by Comodo, or you may be allowed to use digital certificates issued by other certificate authorities.
10 File Sanitizer for HP ProtectTools File Sanitizer is a tool that allows you to securely shred assets (personal information or files, historical or Web-related data, or other data components) on your computer and to periodically bleach your hard drive. NOTE: This version of File Sanitizer supports the system hard drive only.
Shredding Shredding is different than a standard Windows® delete (also known as a simple delete in File Sanitizer) in that when you shred an asset using File Sanitizer, an algorithm that obscures the data is invoked, which makes it virtually impossible to retrieve the original asset. A Windows simple delete may leave the file (or asset) intact on the hard drive or in a state where forensic methods could be used to recover the file (or asset).
Free space bleaching Deleting an asset in Windows does not completely remove the contents of the asset from your hard drive. Windows only deletes the reference to the asset. The content of the asset still remains on the hard drive until another asset overwrites that same area on the hard drive with new information. Free space bleaching allows you to securely write random data over deleted assets, preventing users from viewing the original contents of the deleted asset.
Setup procedures Opening File Sanitizer To open File Sanitizer: 1. Click Start, click All Programs, click HP, and then click HP ProtectTools Security Manager. 2. Click File Sanitizer. – or – ▲ Double-click the File Sanitizer icon located on your desktop. – or – ▲ Right-click the HP ProtectTools icon in the notification area, at the far right of the taskbar, click File Sanitizer, and then click Open File Sanitizer.
To set a free space bleaching schedule: 1. Open File Sanitizer, and click Free Space Bleaching. 2. Select the Activate Scheduler check box, enter your Windows password, and then enter a day and time to bleach your hard drive. 3. Click Apply, and then click OK. NOTE: The free space bleaching operation can take a long time. Even though free space bleaching is performed in the background, your computer may run slower due to increased processor usage.
NOTE: To remove an asset from the available shred options, click the asset, and then click Delete. 4. Under Shred the following, select the check box next to each asset that you want to confirm before shredding NOTE: To remove an asset from the shred list, click the asset, and then click Remove. 5. To protect files or folders from automatic shredding, under Do not shred the following, click Add and then browse or type the path to the file name or folder. Click Open, and then click OK.
General tasks You can use File Sanitizer to perform the following tasks: ● Use a key sequence to initiate shredding—This feature allows you to create a key sequence (for example, ctrl+alt+s) to initiate shredding. For details, refer to Using a key sequence to initiate shredding on page 69. ● Use the File Sanitizer icon to initiate shredding—This feature is similar to the drag-and-drop feature in Windows. For details, refer to Using the File Sanitizer icon on page 70.
Using the File Sanitizer icon CAUTION: Shredded assets cannot be recovered. Carefully consider which items you select for manual shredding. 1. Navigate to the document or folder you want to shred. 2. Drag the asset to the File Sanitizer icon on the desktop. 3. When the confirmation dialog box opens, click Yes. Manually shredding one asset CAUTION: Shredded assets cannot be recovered. Carefully consider which items you select for manual shredding. 1.
– or – 1. Open File Sanitizer, and click Shred. 2. Click the Shred now button. 3. When the confirmation dialog box opens, click Yes. Manually activating free space bleaching 1. Right-click the HP ProtectTools icon in the notification area, at the far right of the taskbar, click File Sanitizer, and then click Bleach Now. 2. When the confirmation dialog box opens, click Yes. – or – 1. Open File Sanitizer, and click Free Space Bleaching. 2. Click Bleach Now. 3.
11 Device Access Manager for HP ProtectTools (select models only) Windows® operating system administrators use Device Access Manager for HP ProtectTools to control access to the devices on a system and to protect against unauthorized access: ● Device profiles are created for each user to define the devices that they are allowed or denied permission to access.
Setup Procedures Opening Device Access Manager To open Device Access Manager, follow these steps: 1. Click Start, click All Programs, click HP, and then click HP ProtectTools Administrative Console. 2. In the left pane, click Device Access Manager. Configuring device access Device Access Manager for HP ProtectTools offers three views: ● The Simple Configuration view is used to allow or deny access to classes of devices for members of the Device Administrators group.
NOTE: In order to use this view to read device access information, the user or group must be granted "read" access in the User Access Settings view. In order to use this view to modify device access information, the user or group must be granted "change" access in the User Access Settings view. ● All removable media (diskettes, USB flash drives, etc.
Stopping the Device Locking/Auditing service does not stop the device locking. Two components enforce device locking: ● Device Locking/Auditing service ● DAMDrv.sys driver Starting the service starts the device driver, but stopping the service does not stop the driver. To determine whether the background service is running, open a command prompt window, and then type sc query flcdlock. To determine whether the device driver is running, open a command prompt window, and then type sc query damdrv.
The same user, the same group, or a member of the same group can be denied write access or read+write access only for the same device or a device below this device in the device hierarchy. Example 3—If a user or group is allowed read access for a device or class of devices: The same user, the same group, or a member of the same group can be denied read access or read+write access only for the same device or a device below this device in the device hierarchy.
Allowing access for a user or a group To grant permission for a user or a group to access a device or a class of devices, follow these steps: 1. In the left pane of HP ProtectTools Administrative Console, click Device Access Manager, and then click Device Class Configuration. 2. In the device list, click one of the following: 3. ● Device class ● All devices ● Individual device Click Add. The Select Users or Groups dialog box opens. 4.
Allowing access to a class of devices for one user of a group To allow a user to access a class of devices while denying access to all other members of that user's group, follow these steps: 1. In the left pane of HP ProtectTools Administrative Console, click Device Access Manager, and then click Device Class Configuration. 2. In the device list, click the device class that you want to configure. ● Device class ● All devices ● Individual device 3.
To reset the configuration settings to the factory values, follow these steps: 1. In the left pane of HP ProtectTools Administrative Console, click Device Access Manager, and then click Device Class Configuration. 2. Click the Reset button. 3. Click Yes to confirm. 4. Click the Save icon.
Advanced tasks Controlling access to the configuration settings In the User Access Settings view, administrators specify the groups or users who are allowed to use the Simple Configuration and the Device Class Configuration pages. NOTE: A user or group must have "Full User Administrator rights" in order to modify the settings in the User Access Settings view.
Denying access to an existing group or user To deny permission for an existing group or user to view or change the configuration settings, follow these steps: 1. In the left pane of HP ProtectTools Administrative Console, click Device Access Manager, and then click User Access Settings. 2. Click a group or user to be denied access. 3. Under Permissions, click Deny for each type of permission to be denied for the selected group or user: 4.
12 LoJack Pro for HP ProtectTools Absolute Software’s line of Computrace products lets users track their HP computers and enhance data protection. The Computrace LoJack products also reduce machine loss and aid in recovery of stolen machines. To activate the Computrace product, follow these instructions: 1. Click Start, click All Programs, and then click HP ProtectTools Security Manager. 2. Click Theft Recovery, and then click Activate Now.
13 Troubleshooting HP ProtectTools Security Manager Short description Details Solution Smart cards and USB tokens are not available in Security Manager if installed after the Security Manager installation. In order to use smart cards or USB tokens in Security Manager, the supporting software (drivers, PKCS#11 providers, etc.) must be installed prior to Security Manager installation. Log on to Password Manager.
Short description Details Solution Password Manager does not recognize the Connect button on screen. If the Single Sign On credentials for Remote Desktop Connection (RDP) are set to Connect, when Single Sign On is relaunched, it always enters Save As instead of Connect. HP is researching a workaround for future product enhancements. The user is unable to log on to Password Manager after transitioning from Standby mode to Hibernation on Windows XP Service Pack 1 only.
Device Access Manager for HP ProtectTools Users have been denied access to devices within Device Access Manager, but the devices are still accessible. ● Explanation—Simple Configuration and/or Device Class Configuration have been used within Device Access Manager to deny users access to devices. Despite being denied access, users can still access the devices. ● Solution: ◦ Verify that the HP ProtectTools Device Locking service has started.
◦ One workaround is to deny the Users group at the DVD/CD-ROM Drives level and to allow the Administrators group at the level below DVD/CD-ROM Drives. ◦ An alternate workaround is to create specific Windows groups, one for allowing access to DVD/CD and one for denying access to DVD/CD. Specific users would then be added to the appropriate group. The Simple Configuration view has been used to define a device access control policy, but administrative users cannot access devices.
Miscellaneous Software Impacted— Short description Details Solution Security Manager— Warning received: The security application can not be installed until the HP Protect Tools Security Manager is installed. All security applications such as Java Card Security and biometrics are extendable plug-ins for the Security Manager interface. Security Manager must be installed before an HP-approved security plug-in can be loaded.
Glossary activation The task that must be completed before any of the Drive Encryption features are accessible. Drive Encryption is activated using the HP ProtectTools Setup Wizard. Only an administrator can activate Drive Encryption. The activation process consists of activating the software, encrypting the drive, creating a user account, and creating the initial backup encryption key on a removable storage device. administrator See Windows administrator.
dashboard A central location where you can access and manage the features and settings in Security Manager for HP ProtectTools. decryption Procedure used in cryptography to convert encrypted data into plain text. device access control policy The list of devices for which a user is allowed or denied access. device class All devices of a particular type, such as drives.
key sequence ctrl+alt+s. A combination of specific keys that, when pressed, initiates an automatic shred—for example, Live Messenger History Viewer A Privacy Manager Chat component that allows you to search for and view encrypted chat history sessions. logon An object within Security Manager that consists of a user name and password (and possibly other selected information) that can be used to log on to Web sites or other programs.
shred profile A specified erasure method and list of assets. Sign and Encrypt button A software button that is displayed on the toolbar of Microsoft Office applications. Clicking the button allows you to sign, encrypt, or removing encryption in a Microsoft Office document. signature line A placeholder for the visual display of a digital signature. When a document is signed, the signer's name and verification method are displayed. The signing date and the signer's title can also be included.
Index A aborting a shred or bleach operation 71 access allowing 77 controlling 72 denying 76 denying to existing groups or users 81 granting to existing groups or users 80 preventing unauthorized 3 activating Drive Encryption 39 free space bleaching 71 adding group 81 signature line 53 suggested signer's signature line 54 suggested signers 53 user 81 allowing access 77 Applications tab settings 20, 36 applications, configuring 18 authentication 13 B background service 74 backing up data 35 HP ProtectTools
logging in after Drive Encryption is activated 39 managing Drive Encryption 41 opening 38 E e-mail message Sealing for Trusted Contacts 52 signing 51 viewing a sealed message 52 e-mailing an encrypted Microsoft Office document 55 encrypting drives 37, 40, 41 Microsoft Office document 54 encryption status, displaying 40 enrolling fingerprints 26 scenes 26 Excel, adding a signature line 53 excluding assets from automatic deletion 68 F face enrolling scenes 26 settings 16 features, HP ProtectTools 2 File Sanit
Privacy Manager for HP ProtectTools authentication methods 43 managing Privacy Manager certificates 44 managing trusted contacts 47 migrating Privacy Manager Certificates and Trusted Contacts to a different computer 61 opening 44 Privacy Manager Certificate 44 security logon methods 43 setup procedures 44 system requirements 43 protecting assets from automatic shredding 68 R recovery, performing 42 registering credentials 26 removing encryption from a Microsoft Office document 55 group access 81 user access