
HP Color LaserJet Managed MFP E77822, E77825, E77830, E78323, E78325, E78330 - Engine Install Guide


[
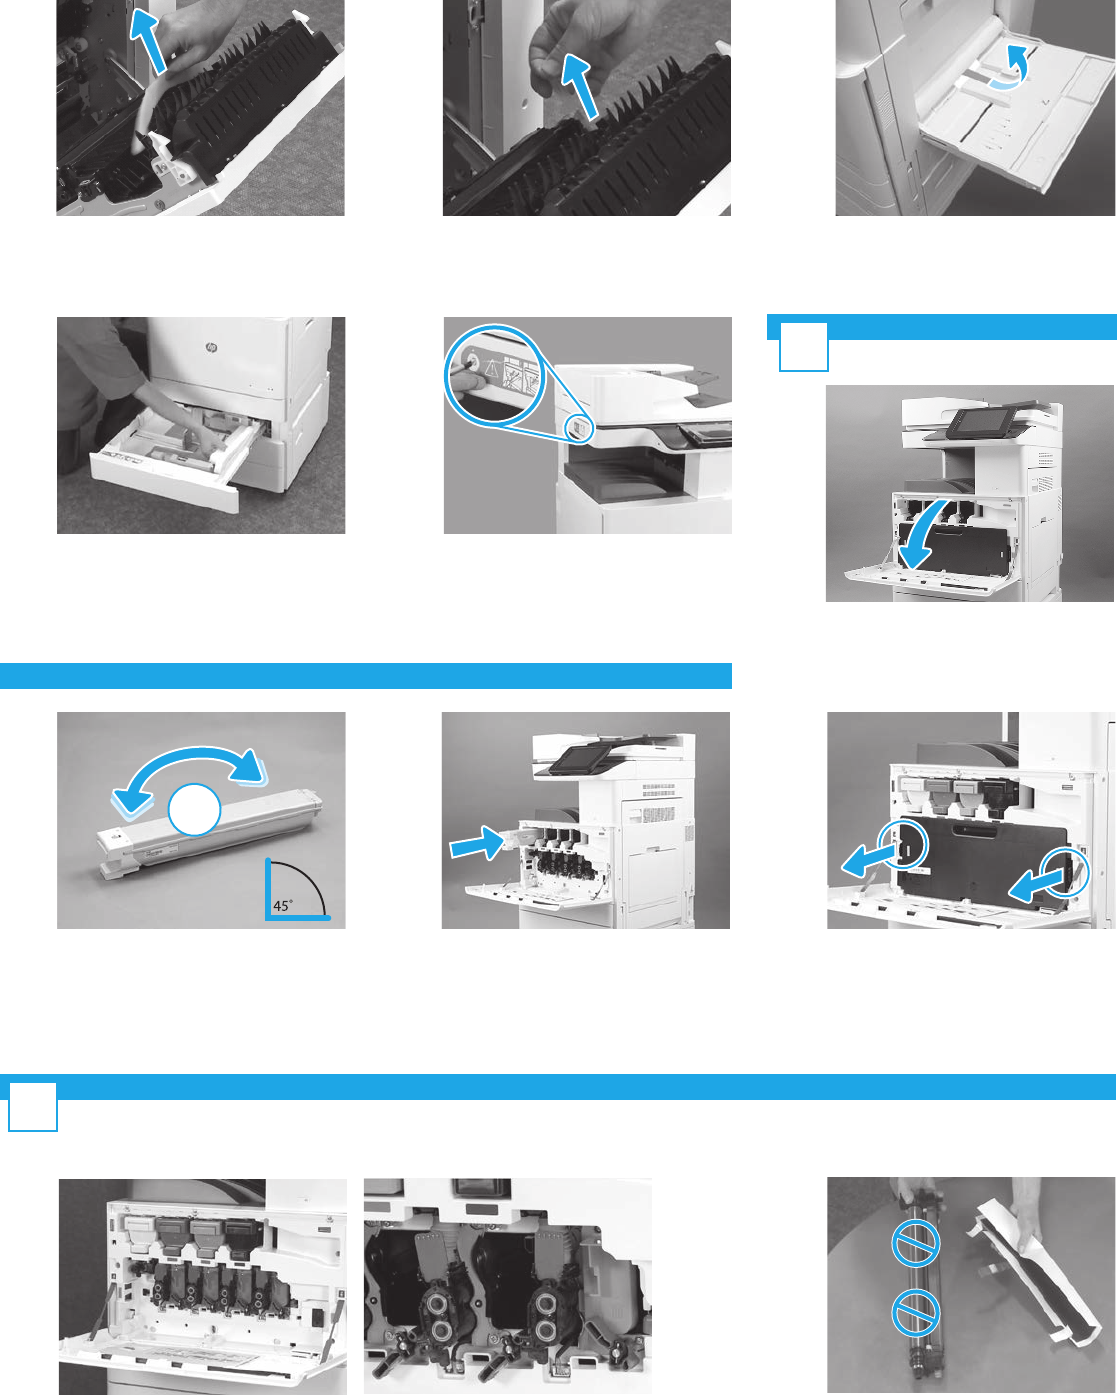
3
4.4
4.6
4.5
4.7
4.8
5.1
5.2
5.3
5.4
6
6.1
6.2
5
Open Tray 1 on the right side, and then remove the
foam near the pickup roller.
Carefully remove the strapping tape at the rear of the
transfer unit.
Remove the foam packaging material.
Remove the scanner lock screw and red sticker on the
left side of the printer.
WARNING: The scanner lock screw must be removed
prior to powering on the printer.
Open Tray 2-3 and remove all tape and
foam packaging material.
Remove the toner cartridge packaging. Shake each
toner cartridge side to side ve (5) times to distribute
the toner before installation.
Install the toner cartridges.
Use the color coding on the printer to install the
toner cartridge in the correct slot. Push it in to fully
seat the cartridge.
NOTE: Repeat the previous steps to install the
remaining cartridges.
Push the latches on each side of the TCU and then
remove the TCU.
Install the imaging unit.
CAUTION: Do not open the imaging unit package until it is ready to install. Prolonged exposure
tobright light can damage the imaging drum and cause image quality problems.
On the engine rotate the imaging unit lock down and then remove each orange shipping blank.
Remove the imaging drum units from the foam
packaging and plastic bags. Remove the protective
white cover.
CAUTION: Do not touch the drum surface.