
HP Enterprise printers and scanners - Imaging and Printing Security Best Practices (white paper)
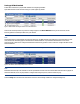

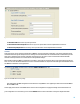


2. Select Protect Stored Data from the left-hand menu list to view the Protect Stored Data Page (Figure 7).
Figure 7: Shows the Protect Stored Data settings page in the EWS.
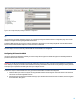
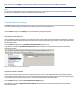
3. In the Hard Disk Status section of the Protect Stored Data page, you can see the Encryption Status for that device. If you
see a green checkmark, the device is encrypting your data properly (Figure 8).
Figure 8: Shows the Hard Disk Status a green check means an encrypted disk is Installed and Encrypted.
Note:
If your MFP is reporting an installed HP Secure Disk but its status is anything other than Encrypted it is recommended you resolve
the issues with your HP Secure Disk before continuing this checklist. If you do not you may need to re-apply the entire checklist to
the MFP.
The next step is to configure secure communications between HP Web Jetadmin and the MFPs:
Configuring SNMPv3
SNMPv3 provides encryption for communication between Web Jetadmin and MFPs. It helps to ensure that only authorized and
authenticated administrators have access to the configuration settings of the MFPs. It also helps to ensure that no one can gather
sensitive information, such as passwords, usernames, and other codes, over the network while you are configuring the MFPs.
Note:
It is best to configure SNMPv3 by itself to ensure that the settings save properly.
14