
HP Enterprise printers and scanners - Imaging and Printing Security Best Practices (white paper)


Note:
Secure File Erase requires that the File System Password be configured. If you are following this checklist in order this should not
be an issue.
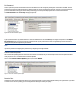
To set the Secure File Erase Mode follow these instructions:
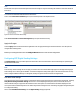
Click to select Secure File Erase Mode (Figure 47) and view the options in the dropdown menu.
Figure 47: The Secure File Erase Mode setting.
Select Secure Fast Erase or Secure Sanitizing Erase if you require maximum security.
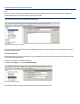
Apply the Changes
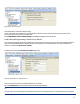
Click the Apply button located in the bottom right hand corner to apply the settings to the selected devices. This will open the
configure devices dialogue box.
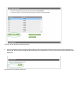
Review your settings and then click the Configure Devices button to execute the configuration.
Configuring MFP Digital Sending Settings
The Digital Sending category includes options for email and for send to network folder. This includes settings for protecting the
sender identification fields.
Note:
Some security-related settings that do not apply to LaserJet and Color LaserJet MFPs might appear on the Digital Sending page.
These settings are for other types of HP MFPs. You should configure the settings that appear in the instructions below. You may
wish to configure additional settings as a safeguard, but they are ignored on devices that do not support them.
Auto Reset Send Settings
This setting governs how long after sending a job the device waits to log off the current user and reset the control panel. Selecting
delay before resetting the default settings allows users to send multiple digital send jobs (email, send to folder, & fax) to a
location without having to retype all of the information in the control panel. It ensures that the information displayed on the
control panel resets automatically when a user walks away without clearing the menu. The setting only applies to digital send jobs.
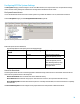
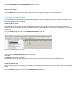
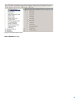
To configure this setting:
Click to select Auto Reset Send Setting from the Digital Sending category (Figure 48).