
HP LaserJet Enterprise, HP LaserJet Managed, HP PageWide Enterprise, HP PageWide Managed - Configuration Guide using the Embedded Web Server (EWS)
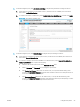

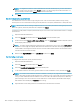


NOTE: You might nd it easier to create additional users in Excel and then import your list. The easiest
way is to create one or two users, select Export to create a .csv le, modify and add the users in the .csv
le, save the le, and then select Import to import the list to the EWS.
5. Click Apply.
Step four: Congure device access (optional)
The administrator can force users to login using an access code or lock down the printer for every activity,
however, this is not recommended. If locking down the printer is not required, administrators can skip this step.
NOTE: All Server-less Job Accounting Local Quota restrictions are still in place without locking the printer down.
When not signed in, all actions performed are completed as a Guest.
If locking down the printer is required, follow these steps to use Access Control and Permission Sets to congure
printer access.
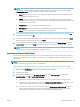
1. Open the Embedded Web Server.
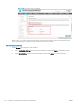
2. Select the Security tab and then select the Access Control option from the left pane.
3. Scroll down and under Sign-In and Permission Policies, clear the Device Guest checkbox. All printer options
should display with lock icons.
NOTE: To restrict outgoing Guest faxes and track every outgoing fax to an account, set the Device Guest
fax option to locked (sign-in required). Without this set the Guest account faxes and outgoing fax jobs
created while a user is signed in via User Access Code are tracked. Outbound faxes sent via the PC Send to
Fax driver cannot be tracked currently.
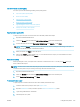
4. Make sure the Sign-In Method is set to Local Device, and then click Apply.
Step ve: Congure local quotas
To congure and setup local quotas, follow these steps.
1. Open the Embedded Web Server.
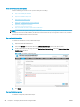
2. Select the Security tab and then select the Quota tab.
3. Select the Local Quota Conguration option from the left pane.
4. To set default credits for new users, type the number of credits available for users, and then click Apply.
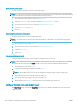
NOTE: You can also reset credits for all users to defaults or set the job-in-progress limit requirement to
Finish or Stop print jobs after a limit has been met. To make sure copy or print jobs can not be ran without a
code, you must default the Guest and Others account to 0 credits. This will force the printer to delete any
jobs not having a user code. In the case of users that have no credits left, the printer will receive the job,
then delete it and it will display as Canceled in the Job Log.
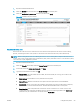
5. Adjust the Device User settings and set custom limits for individual users as needed.
100 Chapter 6 Congure printer features using the EWS ENWW