
HP LaserJet Enterprise, HP LaserJet Managed, HP PageWide Enterprise, HP PageWide Managed - Configuration Guide using the Embedded Web Server (EWS)

FutureSmart 3
Use the following steps for FutureSmart 3.
●
Introduction
●
Before you begin
●
Enable Save to SharePoint and create a Save to SharePoint Quick Set
●
Scan and save a le directly to a Microsoft SharePoint site
●
Quick set scan settings and options for Save to SharePoint
Introduction
Use Save to SharePoint® to scan documents directly to a Microsoft® SharePoint site. This feature eliminates the
need to scan the documents to a network folder, USB ash drive, or email message, and then manually upload
the les to the SharePoint site.
Save to SharePoint® supports all scanning options, including the ability to scan documents as images or use the
OCR features to create text les or searchable PDFs.
The feature is disabled by default. Enable Save to SharePoint® in the HP Embedded Web Server (EWS).
Before you begin
Before this procedure can be completed, the destination folder that the scanned les will be saved to must exist
on the SharePoint site, and write access must be enabled to the destination folder. Save to SharePoint® is
disabled by default.
Enable Save to SharePoint and create a Save to SharePoint Quick Set
Use the following steps to enable the Save to SharePoint feature and create a Quick Set.
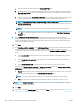
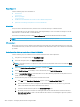
1. Using the top navigation tabs, click Scan/Digital Send.
2. In the left navigation pane, click Save to SharePoint®.
NOTE: Quick Sets are short-cut jobs that can be accessed on the printer Home screen or within the Quick
Sets application.
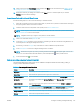
3. Select Enable Save to SharePoint®, and then click Apply.
4. Click Add in the Quick Sets area to launch the Quick Set Wizard.
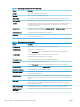
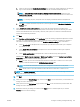
5. Enter a Quick Set Title (for example, “Scan to Sharepoint”) and a Quick Set Description.
6. Select a Button Location for the Quick Set to determine whether the Quick Set displays from the Home
screen or within the Quick Sets area on the product control panel.
7. Select a Quick Set Start Option to determine what occurs after selecting a Quick Set on the product control
panel, and then click the Next button.
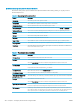
8. Use the following steps to add the path to the SharePoint folder.
a. Click Add on the SharePoint® Destination Settings page to open the Add SharePoint® Path page.
b. Open another browser window, navigate to the SharePoint folder to use, and then copy the folder
path for the SharePoint folder from that browser window.
ENWW Congure scanning and digital sending 195