
HP LaserJet Enterprise, HP LaserJet Managed, HP PageWide Enterprise, HP PageWide Managed - Configuration Guide using the Embedded Web Server (EWS)

FutureSmart 4
Use the following steps for FutureSmart 4.
●
Step one: Enable Scan to USB Drive
●
Step two: Congure the Quick Sets (optional)
●
Default scan settings for Scan to USB Drive setup
●
Default le settings for Save to USB setup
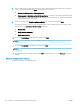
Step one: Enable Scan to USB Drive
Use the following steps to enable Scan to USB Drive.
1. Select the Security tab.
2. Scroll to Hardware Ports and make sure that Enable Host USB plug and play is enabled.
3. Select the Scan/Digital Send tab.
4. Select the Enable Scan to USB Drive check box.
5. Click Apply at the bottom of the page.
NOTE: Most devices ship with Hard disk drives (HDDs) already installed. In some cases, additional storage
devices can be added via USB. Verify whether the Scan to USB Drive feature needs to be expanded to USB and
Hard drive
Step two: Congure the Quick Sets (optional)
Quick Sets are short-cut jobs that can be accessed on the printer Home screen or within the Quick Sets
application.
1. In the Scan to USB Drive area of the left navigation pane, click Quick Sets.
2. Select one of the following options:
● Select an existing Quick Set under Quick Sets Application in the table.
-OR-
● Click Add to start the Quick Set Wizard.
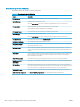
3. If you selected Add, the Quick Sets Setup page opens. Complete the following information, and then click
Next.
● Quick Set Name: Enter a title for the new Quick Set.
● Quick Set Description: Enter a description of the Quick Set.
● Quick Set Start Option: To set how the Quick Set starts, click either Enter application, then user
presses Start or Start instantly when selected from the Home Screen.
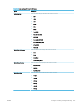
4. Select a default location where scanned les are saved on USB storage devices inserted into the USB port
on the control panel, and then click Next. The default location options are:
ENWW Congure scanning and digital sending 209