
HP LaserJet Enterprise, HP LaserJet Managed, HP PageWide Enterprise, HP PageWide Managed - Configuration Guide using the Embedded Web Server (EWS)


Set up and congure fax archive
Learn how to congure settings for archiving and forwarding faxes.
●
Introduction
●
Before you begin
●
Step one: Set up Fax Archive
●
Step two: Set up Fax Forwarding
●
Step three: Complete the setup
Introduction
Use the Fax Archive and Forwarding page to congure settings for archiving and forwarding faxes on the printer
control panel.
Use the Fax Archive settings to send a copy of all incoming and outgoing faxes to an email address, a network
folder, or an FTP server.
Use the Fax Forwarding settings to send a copy of all incoming and outgoing faxes to another fax number.
Before you begin
The fax feature must be congured on the printer to archive and forward faxes.
Connect the fax cable to the fax port on the printer and to the phone port on the wall.
Administrators need the following information before beginning the conguration process:
● Administrative access to the printer
● DNS sux (e.g., companyname.com)
● SMTP server (e.g., smtp.mycompany.com)
NOTE: If you do not know the SMTP server name, SMTP port number, or authentication information,
contact the e-mail/Internet service provider or system administrator for the information. SMTP server
names and port names are typically found by doing an Internet search. For example, use terms like "Gmail
SMTP server name" or "yahoo SMTP server name" to search.
● SMTP server authentication requirements for outgoing e-mail messages, including the user name and
password used for authentication, if applicable.
Step one: Set up Fax Archive
Use the Fax Archive settings to send a copy of all incoming and outgoing faxes to an email address, a network
folder, or an FTP server.
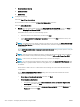
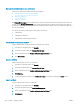
1. Using the top navigation tabs, click Fax.
2. In the left navigation pane, click Fax Archive and Forwarding.
3. From the Fax Archiving drop-down list, select one of the following options:
ENWW Congure faxing 255