
HP LaserJet Enterprise, HP LaserJet Managed, HP PageWide Enterprise, HP PageWide Managed - Configuration Guide using the Embedded Web Server (EWS)


● For more information on how to certify images, go to the HP Web Jetadmin 10.4 User Guide or use the HP
Web Jetadmin help (http://WJA_IP:8000/WebJetadmin/Help/en/Common/
dm_fwupgrade_available_editproperties.html where WJA_IP is the IP address of the WJA server).
● For information on how to determine newer qualied rmware les, or for other detailed ways to update
the rmware using Web Jetadmin, go to the HP Web Jetadmin White Paper Upgrading rmware.
● For new releases of WJA and release notes, go to www.hp.com/go/wja.
Manually import rmware les into WJA
To manually import rmware les into WJA, follow these steps:
NOTE: The following steps are typically used to import rmware les in WJA when the client PC does not have
internet access (for example).
1. Start Web Jetadmin.
2. Click Device Management.
3. Click Firmware and click Repository.
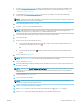
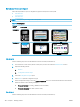
4. Click Import.
5. Browse to the location where you saved the rmware, select the images to add to the repository, and then
click Next.
NOTE: The rmware le for HP FutureSmart is in the format "xxxxxxx.bdl" where "xxxxxxxx" indicates the
rmware le name and ".bdl" is the le extension.
6. Select the images to import (indicated by a No value in the Repository column) and click Next.
7. Conrm the selected images and click Import.
8. After the import completes, click Done.
9. Wait for the rmware to import into the Web Jetadmin repository and click Done.
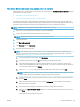
Set up automated rmware updates for WJA (optional)
To set up automated rmware updates from WJA, follow these steps:
To set up automated rmware updates, set a tag for either the qualied version or the latest version of rmware,
and then assign a policy to a group of printers for which you want to automatically update rmware.
1. Select Edit properties, type a Description such as FutureSmart FW version 3.
NOTE: If you do not want to use the latest version of rmware and only want to use a known version that
has been tested with the eet, select the Qualify image check box and click OK.
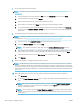
2. Click All Devices.
3. Use Ctrl + Click to select a group of printers, right-click and select Add devices to new group.
4. Type a group name and click Next.
5. Right-click the group name and select Edit group policies.
6. Click Add.
ENWW Update the rmware 299