
Secure Boot Customization Guide - Technical whitepaper


Technical whitepaper
© Copyright 2017 HP Development Company, L.P.
2 Setting up a customized Secure Boot environment 16
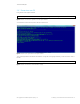
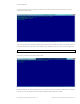
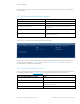
If successful, the command should produce output similar to the following:
Figure 15 Successful import of PK to Windows
This command imports the PK into your system.
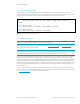
2.6 Install the new PK-signed KEK
Launch PowerShell as Administrator. Again, the Format-SecureBootUEFI and Set-SecureBootUEFI commands are used to
install the new PK-signed KEK.
Obtain your KEK public key as a DER-encoded certificate file. You should obtain this certificate from your HSM provider. In
this case, I assume that the KEK filename is KEK.CER. The KEK key must be formatted using the Format-SecureBootUEFI
command inside Windows PowerShell before being imported.
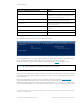
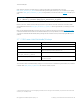
Format-SecureBootUEFI Command Line Parameter
Meaning
-Name KEK Indicates that you are working with the Key Exchange Key (KEK)
-SignatureOwner DEF16466-F946-4E71-BE22-
CF8B1B7B36A0
The hexadecimal number is a GUID that uniquely identifies you to the
platform. Since this represents the signature owner, it should be the
same GUID used to import the PK.
-ContentFilePath .\KEK_SigList.bin This file is created to hold the content that is generated by Format-
SecureBootUEFI, i.e. the formatted content.
-FormatWithCert Tells Format-SecureBootUEFI to integrate the entire certificate into the
formatted content.
-Certificate .\KEK.CER Indicates the path to the desired certificate, in this case, the KEK
certificate.
-SignableFilePath .\KEK_SigList_Serialization_for_KEK.bin Specifies the file that should be signed after formatting.
-Time
2016-02-01T13:30:00Z
Specifies the current date and time, which must be specified.
Table 4 Command line switches to format the KEK