Touch by HTC™ Getting Started Guide www.sprint.com © 2008 Sprint. Sprint and the logo are trademarks of Sprint. Other marks are the property of their respective owners. Printed in the U.S.A.
Please Read Before Proceeding THE BATTERY MUST BE CHARGED BEFORE YOU CAN USE THE DEVICE. DO NOT REMOVE THE BATTERY PACK WHEN THE DEVICE IS CHARGING. YOUR WARRANTY IS INVALIDATED IF YOU OPEN OR TAMPER WITH THE DEVICE’S OUTER CASING. PRIVACY RESTRICTIONS Some countries require full disclosure of recorded telephone conversations, and stipulate that you must inform the person with whom you are speaking that the conversation is being recorded.
Copyright © 2008, Tao Group Limited. All Rights Reserved. Licensed by QUALCOMM Incorporated under one or more of the following patents: 4,901,307 5,490,165 5,056,109 5,504,773 5,101,501 5,778,338 5,506,865 5,109,390 5,511,073 5,228,054 5,535,239 5,710,784 5,267,261 5,544,196 5,267,262 5,568,483 5,337,338 5,659,569 5,600,754 5,414,796 5,657,420 5,416,797 All other company, product and service names mentioned herein are trademarks, registered trademarks or service marks of their respective owners.
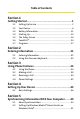
Table of Contents Section 1 Getting Started ...............................................................1 1.1 1.2 1.3 1.4 1.5 1.6 1.7 Setting Up Service ...................................................................... 2 Your Device ................................................................................... 6 Battery Information ................................................................. 11 Starting Up .................................................................................
.3 5.4 Setting Up ActiveSync® on Windows XP®........................... 53 Synchronizing With Your Computer .................................... 54 Section 6 Organizing Contacts, Appointments, Tasks, and Other Information ...................................................................57 6.1 6.2 6.3 6.4 Contacts ...................................................................................... 58 Calendar ......................................................................................
10.2 Internet Explorer Mobile ........................................................ 91 10.3 Using Bluetooth ........................................................................ 92 10.4 Windows Live™.......................................................................... 96 Section 11 Experiencing Multimedia .............................................99 11.1 11.2 11.3 11.4 Using the Built-in Camera ....................................................100 Camera Album .............................
Section 1 Getting Started In This Section 1.1 1.2 1.3 1.4 1.5 1.6 1.
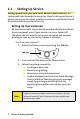
1.1 Setting Up Service Setting up service on your new smart device is quick and easy. This section walks you through the necessary steps to set up your device's phone, set up your voicemail, establish passwords, and contact Sprint for assistance with your Sprint service. Setting Up Your Voicemail All unanswered calls to your device are automatically transferred to your voicemail, even if your phone is in use or turned off.
Sprint Account Passwords As a Sprint customer, you enjoy unlimited access to your personal account information, your voicemail account, and your Sprint Vision® account. To ensure that no one else has access to your information, you will need to create passwords to protect your privacy. Account Password If you are the account owner, you’ll have an account password to sign on to www.sprint.com and to use when calling Sprint Customer Service.
Getting Help Visit www.sprint.com You can go online to: Access your account information. Check your minutes used (depending on your Sprint service plan). View and pay your bill. Enroll in Sprint online billing and automatic payment. Purchase accessories. Shop for the latest Sprint phones. View available Sprint service plans and options. Learn more about Sprint Power Vision and other great products like Sprint TVSM, the Sprint Music StoreSM, Sprint Picture Mail, games, ringers, screen savers, and more.
Sprint 411 You have access to a variety of services and information through Sprint 411, including residential, business, and government listings; assistance with local or long-distance calls; movie listings; and hotel, restaurant, shopping, and major local event information. There is a per-call charge and you will be billed for airtime. To call Sprint 411: From the Phone screen, dial press the Talk Key.
1.2 Your Device Front Components Notification LEDs Earpiece Listen to a phone call from here. Touch Screen TALK Press to answer an incoming call or dial a number. END Press to end a call or to return to the Today screen. Navigation Control/ENTER Button Press this multi-directional control up, down, left, or right to move through menus and program instructions. Carry out the selection by pressing the center button.
Back Components EAR M AE RA Speaker .0 E C GMA SM EPGIX XECLA AEPLIS Self-portrait Mirror Use it when taking self-portrait shots. 2.0 M2 2 Megapixel Camera See page 102 for details. Back Cover Slide the back cover upward to remove it. Top Components POWER Press to turn off the display temporarily. To turn off the power, press and hold for about five seconds. For more information, see “Starting Up” on page 13.
Left and Right Components Stylus Volume Slider • Slide up or down to adjust the speaker volume. • During a call, slide up or down to adjust the earpiece volume. Storage Card Slot Cover Remove the back cover and then pry open the slot cover to install the microSD card for storing data. CAMERA Press to activate the Camera. See page 102 for details. Lanyard/Strap holder Bottom Components RESET With the stylus, press the RESET button to soft reset your device.
Accessories 1 4 2 3 5 8 6 9 7 10 Screen Protector 1 AC Phone Charger Recharges the battery. 2 USB Sync Cable Connects your device to a PC and synchronizes data. 3 Mini-USB Stereo Headset Provides a volume control slider and a Send/ End button. Press the Send/End button to pick up a call or put a call on hold; press and hold the button to end the call. 4 Battery Rechargeable Lithium-ion battery, 1100 mAh. 5 microSD™ card Provides 512 MB of storage space.
Installing the microSD card 1. Remove the back cover. 2. Use your thumb or finger to pry open the cover that houses the storage card slot. To open the slot cover more easily, pry it open from both ends. storage card slot slot cover 3. Flip your device so that the touch screen faces upward. 4. Hold open the slot cover with one hand. 5. Insert the microSD card into the storage card slot with the gold contacts facing down. storage card 6. Close the slot cover. 7. Replace the back cover.
1.3 Battery Information Your device comes with a rechargeable Li-Ion battery. Use only manufacturer-specified original batteries and accessories with your device. Battery performance depends on many factors, including network configuration, signal strength, the temperature of the environment in which you operate your device, the features and settings you select and use, items attached to your device’s connecting ports, and your voice, data, and other program usage patterns.
To install the battery: 1. Install the battery by inserting it with its exposed copper part aligned with the protruding copper conductor on the right side of the battery compartment. Insert the right side of the battery first, and then gently push the battery into place. 2. Replace the back cover. To remove the battery: 1. Make sure your device is turned off. 2. Remove the back cover. 3. To remove the battery, lift it up from the lower-left end of the battery.
Low Battery When the low-battery warning appears, do the following: Immediately save your current data. Immediately charge the battery by using the AC phone charger. Synchronize with your PC (see page 50). Turn off your device. To check the battery power: Tap Start > Settings > System tab > Power. 1.4 Starting Up Turning Your Device On and Off To turn on your device, press and hold the Power Key at the top left of the device.
Switching to Sleep Mode Quickly pressing the Power Key turns off the display temporarily and switches your device to sleep mode. Sleep mode suspends your device to a low power state while the display is off in order to save battery power. Your device also automatically goes into sleep mode when you leave the device idle after a certain amount of time. To specify the timeout period before your device goes into sleep mode: 1. Tap Start > Settings > System tab > Power > Advanced tab. 2.
To lock buttons: Tap the Lock icon ( ) on the Launch tab of HTC Home. (See “HTC Home” on page 19 for details.) To unlock buttons: Tap Unlock twice on the Today screen. To change the Key Lock settings, tap Start > Settings > System tab > Key Lock. Note: The Key Lock feature does not disable the phone function of your device. When you enable this feature, you still can use the buttons on the device to receive or reject an incoming call.
1.5 The Today Screen The Today screen displays important information, such as upcoming appointments and status indicators. You can tap a section on the screen to open the associated program. Connection status Notification Open Start Menu. HTC Home (See “HTC Home” on page 19 for details.) Signal strength Adjust volume Battery status Open Quick Menu (See “Quick Menu” on page 18 for details.) Your upcoming appointments. To access the Today screen, tap Start > Today.
Indicators The following are some of the status icons that you may see on your device. Icons that appear in this area Data connection is active but idle. Data connection is active and transmitting data. Icons that appear in this area Maximum signal strength. 1xRTT available. No signal. EVDO available. Phone is turned off. Connection is active. No phone service. Connection is not active. Searching for phone service. Synchronization in progress. Voice call in progress.
The Start Menu The Start menu, located at the top left corner of the Today screen, displays a list of programs. It lets you close a screen and switch from one program to another. You can start a program by scrolling through the programs list and then pressing the ENTER button, or by tapping a program with the stylus. Open a recently used program. Switch to the Today screen. Open a program. (The items displayed in the Start menu can be customized by tapping Start > Settings > Personal tab > Menus.
HTC Home HTC Home is a Today screen plug-in that gives you up-to-date local information at a glance, such as time, day and weather information, and shows new messages and missed calls. It also has a customizable launcher where you can add your favorite applications for one-touch access. HTC Home has four components: Home, Weather, Launcher, and Sound. At the bottom of HTC Home, there is a toolbar that allows you to switch between these components.
The Home tab Home displays the current day, date and local time. When you have new incoming messages and calls, it shows you the number of new email and text messages, and missed calls. If you have set up the alarm, it also shows the Alarm icon. Time display. Touch this display area when you want to change the date or time, or to enable the alarm. Current day and date Alarm icon Number of new email messages. Touch this icon to view your email messages. Number of new text messages.
After selecting your city, your device automatically connects to the Internet via the data connection and downloads weather information for the current day and the next four days of the week. The current temperature, the highest and lowest temperatures, and a visual indicator of the climate (showing if it’s a cloudy or rainy day, etc.) will be displayed on the Weather screen. Shows the time that has passed since the last download of weather information. Touch here to download the latest weather data.
3. Enable or disable the following options: Download weather data automatically. When this check box is selected, weather information will automatically be downloaded from the AccuWeather Web site whenever you select the Weather tab, if the data has not been updated within the last three hours. Weather data will also be downloaded every time an ActiveSync connection occurs (through over-the-air or USB connection). Clear this check box if you prefer to manually download weather information.
The Launcher tab Launcher allows you to add quick shortcuts to your favorite programs and settings for one-touch access. Quick settings such as Adjust Backlight, Rotate Screen, Lock Device, and a few program shortcuts are added by default. They can be replaced with your preferred settings and programs. Touch a quick shortcut to open the associated program or apply the associated setting. Touch an empty slot (if have) to add a shortcut to a setting or your favorite program. Touch a shortcut to remove it.
Note: 1.6 Tap the Automatic icon to set the device volume to Automatic mode. If Automatic is selected, the device will vibrate during a scheduled event in your calendar; if there are no scheduled events in your calendar, the device will use the Normal mode setting. TouchFLO™ TouchFLO™ is a special feature that gives you a better touch screen experience on your device. With TouchFLO, you can simply use your finger to scroll and pan the screen.
To close Touch Cube, slide your finger downward. Touch Cube is a three-dimensional, cubic user interface. To flip the interface from one side to another, slide your finger left or right on the touch screen. Finger-scrolling and finger-panning With TouchFLO, you can use finger-scrolling and finger-panning when viewing content that cannot be fit entirely on the screen, such as Web pages, documents, and messages.
To use finger-panning: To pan downward, touch and hold on the touch screen and then drag your finger upward. To pan upward, touch and hold on the touch screen and then drag your finger downward. To pan towards the right, touch and hold on the touch screen and then drag your finger to the left. To pan towards the left, touch and hold on the touch screen and then drag your finger to the right. You can also pan diagonally.
1.7 Programs The following are some of the icons for the programs that are already installed on your device. Programs in the Start Menu Icon Description Office Mobile Use the complete suite of Microsoft® Office applications for your mobile device. Excel Mobile Create new workbooks or view and edit Microsoft® Office Excel® workbooks. OneNote Mobile Create OneNote files on your device and then synchronize them with your PC. PowerPoint Mobile View Microsoft® Office PowerPoint® slides and presentations.
Icon Description Bluetooth Explorer Search for other Bluetooth devices that have file sharing enabled and access their Bluetooth shared folder. Calculator Perform basic arithmetic and calculations, such as addition, subtraction, multiplication, and division. Calendar Keep track of your appointments and create meeting requests. Camera Album View your photos and videos. Camera Take photos or shoot video clips with accompanying audio. File Explorer Organize and manage files on your device.
Icon Description Tasks Keep track of your tasks. Voice Recorder Record your voice, play it back, and then send it via email, MMS, or via Bluetooth. You can also set the recorded voice as your ring tone. Voice Speed Dial Record voice tags so that you can dial a phone number or launch programs simply by speaking. Windows Live Use the mobile version of Windows Live™ to find information on the Web.
Section 2 Entering Information In This Section 2.1 2.
2.1 Entering Information When you start a program or select a field that requires text or numbers, the Input Panel icon becomes available on the menu bar. Tap the Input Selector arrow (that appears next to the Input Panel icon) to open a menu where you can select a text input method and customize input options. After selecting a text input method, the corresponding Input Panel is then displayed and you can use it to enter text.
2.2 Using the Onscreen Keyboard The onscreen keyboard is available when text entry is possible. You can enter text by tapping keys on the keyboard that are displayed on the screen. To enter text using the onscreen keyboard: 1. In a program, tap the Input Selector arrow, and then tap Keyboard. 2. Enter text by tapping keys on the onscreen keyboard. To enlarge the onscreen keyboard: 1. Tap the Input Selector arrow, and then tap Options. 2. In the Input method list, select Keyboard. 3. Tap Large Keys.
Section 3 Using Phone Features In This Section 3.1 3.2 3.3 3.
3.1 Using the Phone Like a standard wireless phone, you can use your device to make, receive, and keep track of calls and send SMS text messages. You can also take notes while talking and dial directly from Contacts. The Phone Screen From the Phone screen, you can access Call History, Speed Dial, and Phone settings. To open the Phone screen, do one of the following: Use the stylus and tap Start > Phone. —or— Press the Talk Key on the device.
Airplane mode Another way to turn off the phone function is to switch your device to Airplane mode. When you enable Airplane mode, it turns off all wireless radios on your device, which include the phone function and Bluetooth. 1. Tap Start > Settings > Connections tab > Comm Manager. 2. On the Comm Manager screen, tap the Airplane Mode button to enable Airplane mode. 3. Disable Airplane mode by tapping the Airplane Mode button again on the Comm Manager screen.
To adjust the conversation phone volume, you must do it during a call. Adjusting the volume at another time will affect the ring, notification, and MP3 sound levels. Notes: 3.2 When you enable Vibrate mode, sound will automatically be muted and the device will vibrate when an incoming call is received. The Vibrate icon ( ) will appear in the title bar to indicate that vibrate mode is enabled. Making a Call With your device, you can make a call from Phone, Contacts, Call History, and Speed Dial.
Making a Call From Contacts Tap Contacts on the Today screen or tap Start > Contacts, and then do one of the following: Press the Navigation Control up or down to select a contact, and press the Talk Key. Tap the desired contact in the Contacts list, and tap the phone number that you want to call. Tap and hold the desired contact, and on the shortcut menu, tap Call Work, Call Home, or Call Mobile.
One-touch Speed Dial Use Speed Dial to call frequently used numbers with a single tap. For example, if you assign a contact to Location 2 in Speed Dial, you can simply tap and hold the key on the Phone screen to dial the contact’s number. The number must already exist in Contacts before you can create a speed dial entry. When creating a speed dial, note that Location 1 is generally reserved for your voicemail. To create a speed dial entry: 1. On the Phone screen, tap Menu > Speed Dial. 2. Tap Menu > New. 3.
To put a call on hold: Your device notifies you when you have another incoming call, and gives you the choice of rejecting or accepting the call. If you are already on a call and accept the new call, you can choose to switch between the two callers, or set up a conference call between all three parties. 1. Tap Answer to take the second call, and put the first one on hold. 2. To end the second call and return to the first call, tap End, or press the End Key.
To mute a call: You can turn off the microphone during a call, so that you can hear the caller but the caller cannot hear you. During a call, tap Mute. When the microphone is turned off, the mute icon ( ) appears on the screen. Tap Unmute to turn on the microphone again. To check a missed call: You will see the icon on top of the screen when you missed a call. To check who the caller is: Tap the icon , and then tap View. —or— On the Phone screen, tap the Call History button ( ).
To change the ring type: You can change the way that you are notified of incoming calls. For example, you can choose to be notified by a ring, a vibration, or a combination of both. 1. Tap Start > Settings > Personal tab > Phone > Phone tab. 2. In the Ring type list, tap the desired option. To change the keypad tone: You can change the tone you hear when entering a phone number on the keypad. If set to Long tones, the tone is heard continuously for as long as the number on the keypad is pressed.
Section 4 Setting Up Your Device In This Section 4.
4.1 Basic Settings Time and Date To set the time and date: 1. Tap Start > Settings > System tab > Clock & Alarms > Time tab. 2. Select the correct time zone and change the date or time. Note: During synchronization, the time on your device is updated to the time on your PC. To set the time and date for a different location: If you visit or communicate with someone in a particular time zone often, you can select it as your visiting time zone. 1.
Display Settings To adjust screen brightness: On the Today screen, tap the Launcher tab of HTC Home, and then tap the Backlight Adjust icon ( ) to toggle among the brightness levels. —or— Tap Start > Settings > System tab > Backlight > Brightness tab and then move the slider to adjust the brightness. To set the backlight to dim after a time delay: 1. Tap Start > Settings > System tab > Backlight. 2. Tap the Battery power tab, or the External power tab. 3.
The device name must begin with a letter, consist of letters from A to Z, numbers from 0 to 9, and cannot contain spaces. Use the underscore character to separate words. Alarms and Notifications To set an alarm: 1. Tap Start > Settings > System tab > Clock & Alarms > Alarms tab. 2. Tap and enter a name for the alarm. 3. Tap the day of the week for the alarm. You can select multiple days by tapping each desired day. 4. Tap the time to open a clock and set the time for the alarm. 5.
Section 5 Synchronizing Information With Your Computer In This Section 5.1 5.2 5.3 5.
5.1 About Synchronization You can take information from your computer wherever you go by synchronizing it to your device.
5.2 Setting Up Windows Mobile® Device Center on Windows Vista® Microsoft Windows Mobile® Device Center is the replacement for Microsoft® ActiveSync® on Windows Vista®. Note: Some versions of Windows Vista come with Windows Mobile Device Center already installed. If Windows Mobile Device Center is not available on your Windows Vista, you can install it from the Software Installation CD that came with your device.
Using Windows Mobile Device Center To open Windows Mobile Device Center, click Start > All Programs > Windows Mobile Device Center on your Windows Vista PC. From Windows Mobile Device Center, you can do the following: Click Mobile Device Settings to change synchronization settings. When you click Pictures, Music and Video > _ new pictures/video clips are available for import, a wizard guides you to tag and transfer photos from your device to the Photo Gallery on your Windows Vista PC.
5.3 Setting Up ActiveSync® on Windows XP® The Software Installation CD that comes with your device contains Microsoft ActiveSync 4.5 or later. Follow the steps in this section to install and set up ActiveSync on Windows XP or other compatible Windows systems. Note: For a list of compatible Windows systems, please go to: http://www.microsoft.com/windowsmobile/activesync/ activesync45.mspx Installing ActiveSync 1. Insert the Software Installation CD into the disc drive on your PC. 2.
5.4 Synchronizing With Your Computer Connect and synchronize your device with your PC using the USB Sync cable or Bluetooth connection. Starting and Stopping Synchronization You can manually synchronize either from your device or PC. From your device 1. Tap Start > Programs > ActiveSync. 2. Tap Sync. To end synchronization before it completes, tap Stop. Tip: To delete a partnership with one PC completely, tap Menu > Options, tap the computer name, and then tap Delete.
1. In ActiveSync on the device, tap Menu > Options. 2. Select the check box for any items you want to synchronize. If you cannot select a check box, you might have to clear the check box for the same information type elsewhere in the list. 3. To change synchronization settings for an information type, for instance, E-mail, select it and tap Settings. You can then set the download size limit, specify the time period of information to download, and more.
Section 6 Organizing Contacts, Appointments, Tasks, and Other Information In This Section 6.1 6.2 6.3 6.
6.1 Contacts Contacts is your address book and information storage for the people and businesses you communicate with. There are two types of contacts that you can create on your device: Outlook contacts. Contacts that are stored on your device, which can be created on your device or synchronized with your PC or the Exchange Server.
Tips: If someone who is not in your list of contacts calls you or sends you a message, you can create a contact from Call History, or from the message by tapping Menu > Save to Contacts. To save a phone number that is contained in a message, tap the phone number, and then tap Menu > Save to Contacts. In the list of contact information, you’ll see where you can add a picture or assign a ringer to a contact. To change contact information: 1. Tap Contacts on the Today screen. 2. Tap the contact. 3.
To work with the Contacts list: There are several ways to use and customize the Contacts list. Here are a few tips: 1. Tap Contacts on the Today screen. 2. In the Contacts list, do any of the following: In Name view, you can search for a contact by entering a name or number, or by using the alphabetical index. To switch to Name view, tap Menu > View By > Name. To see a summary of information about a contact, tap the contact. From there you can also make a call or send a message.
Sharing Contact Information You can quickly send contact information to another mobile phone or device via Bluetooth. 1. Tap Contacts on the Today screen, and then select a contact. 2. Tap Menu > Send Contact > Beam. 3. Select a device where to send the contact to. Note: 6.2 Before you can send, make sure Bluetooth is turned on and set to visible mode on your device and the target mobile device. You can also send contact information to your PC. For more information, see “Using Bluetooth” on page 94.
5. Specify the type of category for your appointment, so that it can be grouped with other related appointments. Tap Categories, and then select a preset category (Business, Holiday, Personal, or Seasonal), or tap New to create your own category. 6. When you are finished, tap OK to return to the calendar. Notes: Tip: All-day events do not occupy blocks of time in the calendar; instead, they appear in banners at the top of the calendar.
Viewing Appointments By default, Calendar displays appointments in Agenda view. You can also look at your appointments in Day, Week, Month, and Year views. The highlighted hours here indicate the time of your appointments. Tap to view appointment details. To see detailed appointment information in any view, tap the appointment. To view appointments by category, tap Menu > Filter, and then select the desired category.
Sending Appointments To send a meeting request: Use Calendar to schedule meetings via email with contacts who use Outlook or Outlook Mobile. 1. Tap Calendar on the Today screen. 2. Schedule a new appointment, or open an existing one and tap Menu > Edit. 3. Tap Attendees, tap Add Required Attendee or Add Optional Attendee, and add the contacts you want to invite. You can specify if an attendee is required or optional only if your device is connected to a Microsoft Exchange 2007 server.
6.3 Tasks Use Tasks to keep track of things you need to do. A task can occur once or repeatedly (recurring). You can set reminders for your tasks and you can organize them using categories. Your tasks are displayed in a task list. Overdue tasks are displayed in red. To create a task: 1. Tap Start > Programs > Tasks. 2. Tap New, enter a subject for the task, and fill in information such as start and due dates and priority. 3.
To set a default reminder for all new tasks: You can have a reminder automatically turned on for all new tasks you create. 1. Tap Start > Programs > Tasks. 2. Tap Menu > Options. 3. Select the Set reminders for new items check box. 4. Tap OK to return to the task list. Note: The new tasks must have due dates set in order for the reminder to take effect. To show start and due dates in the task list: 1. Tap Start > Programs > Tasks. 2. Tap Menu > Options. 3. Select the Show start and due dates check box. 4.
6.4 Notes Notes helps you to quickly capture thoughts, questions, reminders, to-do lists, and meeting notes. You can create handwritten and typed notes, record voice notes, convert handwritten notes to text for easy readability, and send notes to others. Entering Information in Notes There are several ways to enter information in a note. You can enter typed text by using the onscreen keyboard or handwriting recognition software. You can also use the stylus to write or draw directly on the screen.
Note: To select handwritten text, tap and hold near the text. As soon as dots appear, and before they form a complete circle, quickly drag across the text. (If a letter crosses three ruled lines, it is treated as a drawing rather than text.) To draw in a note: 1. Tap Start > Notes. 2. In the note list, tap New. 3. Draw on the screen, crossing at least three ruled lines. (A selection box labeled Drawing appears around your drawing.) 4. When you are finished, tap OK to return to the note list.
5. Tap the stop icon ( ) when finished recording. 6. If you are adding a recording to a note, tap OK to return to the note list when finished. 7. If you are recording in an open note, an icon will appear in the note. 8. If you are creating a stand-alone recording, the recording will appear in the note list. Tip: To quickly create a recording, press and hold the Voice Command Key, and then you can begin to record after a beep sound. Release the button when you are finished. To change recording formats: 1.
Section 7 Exchanging Messages In This Section 7.1 7.2 7.3 7.
7.1 Messaging Messaging is where your SMS text and email messages are located. When you receive new messages, you can open them from the Today screen. Simply tap the type of message that you want to open. New email messages New text messages To select a messaging account: Tap Start > Programs > Messaging. The Account Selection screen then appears where you can select an account.
7.2 Text Messages Sending text messages 1. Tap Start > Programs > Messaging. 2. Tap Text Messages on the Account Selection screen. 3. Tap Menu > New. 4. Enter the email address or wireless phone number of one or more recipients, separating each with a semicolon. To access addresses and phone numbers from Contacts, tap To. 5. Enter your message. To quickly add common messages, tap Menu > My Text, and then tap a desired message. To check the spelling, tap Menu > Spell Check. 6. Tap Send.
7.3 Setting Up Email Accounts Email Setup Wizard Windows Mobile’s Email Setup Wizard lets you easily set up your personal and work email accounts. You can add an email account from an Internet Service Provider (ISP) or other email provider as well as Web-based accounts.
7.4 Using Email Creating and sending messages To compose and send a message: 1. Tap Start > Programs > Messaging, and then select an email account. 2. Tap New. 3. Enter the email address of one or more recipients, separating them with a semicolon. To access addresses from Contacts, tap To. 4. Enter your message. To quickly add common messages, tap Menu > My Text and tap a desired message. 5. To check the spelling, tap Menu > Spell Check. 6. Tap Send. To enter symbols, tap 123 on the onscreen keyboard.
Viewing and replying to messages To read an incoming message: By default, each email received in the inbox on your device contains only the first few kilobytes of the message. When you open an email, it displays only the headers and part of the message. You must download the whole email to view the complete content. To download a complete email message, open the email and then do one of the following: In the message list, select a message then tap Menu > Download Message. —or— Notes: Open a message.
To reply to or forward a message: 1. Open the message and tap Menu > Reply, Menu > Reply All, or Menu > Forward. 2. Enter your response. To quickly add common messages, tap Menu > My Text and tap a desired message. 3. To check the spelling, tap Menu > Spell Check. 4. Tap Send. To see more header information, scroll up. Tips: To always include the original message, from the list view, tap Menu > Tools > Options > Message tab, and select the When replying to e-mail, include body check box.
Section 8 Working With Company Email and Meeting Appointments In This Section 8.1 8.2 8.3 8.
8.1 Synchronizing Your Device with the Exchange Server To keep up-to-date with your company email and meeting schedules while you’re out of the office, you can connect your device to the Internet wirelessly and synchronize this information with your company’s Exchange Server. You can also access your company address book anytime. Your company must have a mail server that is running Microsoft Exchange Server with Exchange ActiveSync.
9. Select the items that you want to sync with the Exchange Server. 10. Tap Finish. Starting synchronization Before you start synchronizing with the Exchange Server, make sure your device has been set up with a data connection to the Internet so that you can synchronize wirelessly. After you finish setting up an Exchange Server connection, your device automatically starts synchronization. You can manually start synchronization anytime by tapping Sync in ActiveSync. Note: 8.
To enable Direct Push via Comm Manager: 1. Tap Start > Settings > Connections tab > Comm Manager. 2. On the Comm Manager screen, tap the Microsoft Direct Push button. To enable Direct Push via ActiveSync: 1. In ActiveSync on your device, tap Menu > Schedule. 2. Select As items arrive in the Peak times and Off-peak times boxes. Scheduled synchronization If you do not want to use Direct Push, you can set a regular schedule for synchronizing Outlook email and information.
8.3 Managing Meeting Requests When you schedule and send meeting requests from your device, you can invite attendees to your meeting and check their status to know about their availability. When you receive a meeting request, you can reply by accepting or declining the request. The meeting request also clearly indicates whether or not there are conflicting or adjacent meetings. To reply to a meeting request: 1. When you receive a meeting request, a notification will be displayed on the Today screen.
8.4 Finding Contacts in the Company Directory In addition to contacts stored on your device, you can access contact information from your organization’s Company Directory. By having over-the-air access to the Company Directory, you can easily send email messages and meeting requests to anyone in your company. 1. Synchronize with Exchange Server if you have never done so. 2. Do any of the following: In Contacts, tap Menu > Company Directory.
Section 9 Working With Documents and Files In This Section 9.1 9.
9.1 Microsoft® Office Mobile Microsoft® Office Mobile consists of the following applications: Microsoft® Office Excel® Mobile lets you create and edit Excel workbooks and templates on your device. Microsoft® Office OneNote® Mobile lets you create notes with text, photos, and voice recordings for synchronization later with Microsoft® Office OneNote® 2007 on your computer. Microsoft® Office PowerPoint® Mobile allows you to view (not create) slide show presentations in *.ppt and *.pps formats.
9.2 Adobe Reader LE Adobe Reader LE allows you to open and view Portable Document Format (PDF) files. These files usually have a *.pdf file extension. To open a PDF file on your device: 1. Tap Start > Programs > Adobe Reader LE. 2. Tap Open. 3. Browse to a folder and tap the PDF file you want to view. Note: To open another PDF file, tap Menu > Open. Tap Browse, select the desired file, and tap Open. You can also open a PDF file from File Explorer.
To customize page view and orientation: 1. Open a PDF file you want to view. 2. Tap Tools > View. 3. Select an option to suit your view. To find text in a PDF file: 1. Open a PDF file you want to view. 2. Tap Tools > Find > Text. 3. Enter the text to be searched. 4. Choose search parameters, such as Match case, Whole word, Backwards, and tap Find. Adobe Reader LE offers you the following advanced features. It displays a bookmark pane for the PDF files that contain bookmarks.
Section 10 Getting Connected In This Section 10.1 10.2 10.3 10.
10.1 Comm Manager Comm Manager acts as a central switcher that lets you enable or disable phone features as well as manage your data connections easily. To open Comm Manager: Tap Start > Settings > Connections tab > Comm Manager. 1 2 3 4 5 6 1 Tap to toggle Airplane mode on or off. Turning Airplane mode on turns off the phone and Bluetooth functions. 2 Tap to toggle between enabling or disabling the phone function. Tap Settings > Phone to customize phone settings. 3 Tap to toggle Bluetooth on or off.
10.2 Internet Explorer Mobile Internet Explorer Mobile is a full-featured Internet browser that is optimized for use on your wireless device. To start Internet Explorer Mobile: Tap Start > Internet Explorer. To choose a Home page: 1. In the address bar on top of the Internet Explorer Mobile screen, enter a Web page address. Tap to open the Web page. 2. Tap Menu > Tools > Options > General tab. 3. Do one of the following: Tap Use Current to use the displayed page as your Home page.
10.3 Using Bluetooth Bluetooth is a short-range wireless communications technology. Devices with Bluetooth capabilities can exchange information over a distance of about 33 feet without requiring a physical connection. You can even send information to a device in a different room, as long as it is within the Bluetooth signal coverage range.
To turn Bluetooth on and make your device visible: 1. On your device, tap Start > Settings > Connections tab > Bluetooth. 2. From the Mode tab, select the Turn on Bluetooth and Make this device visible to other devices check boxes. 3. Tap OK. Note: To add an extra layer of security while sending information to other devices, or to set up Bluetooth synchronization, tap Start > Settings > Connections tab > Bluetooth > Security tab.
7. Wait for the paired device to accept the partnership. The receiving party needs to enter the same passcode that you specified. 8. The name of the paired device is then displayed. You may edit and enter a new name for that device. 9. Select the check boxes of services that you want to use from the paired device. 10. Tap Finish. To accept a Bluetooth partnership: 1. Ensure that Bluetooth is turned on and in visible mode. 2. Tap Yes when prompted to establish a partnership with the other device. 3.
If your computer has Windows XP SP2 and your computer’s built-in or external Bluetooth adapter is supported by Windows XP SP2, open Bluetooth Devices from the Control Panel. Click the Options tab, and then select the Turn discovery on and the Allow Bluetooth devices to connect to this computer options. If the Bluetooth adapter on your computer was installed using a third-party provided driver, open the Bluetooth software that came with the Bluetooth adapter.
Note: If the device you want to send to does not appear in the box, make sure that it is turned on and visible. To receive a Bluetooth signal: Your device will not detect and notify you of incoming Bluetooth signals unless you set it up to do this. 1. Tap Start > Settings > Connections tab > Beam. 2. Select the Receive all incoming beams check box. 3. Make sure your device is turned on, visible, and within Bluetooth range of the device that is sending the information. 4.
3. On the next screen, tap the links to read the Windows Live Terms of Use and Privacy Statement. After reviewing them, tap Accept. 4. Enter your Windows Live Mail or Hotmail address and password, select the Save password check box, and then tap Next. 5. Choose whether to show Windows Live’s search bar and applications on the Today screen, and then tap Next. 6. Choose what information you want to sync online with your device. 7. Tap Next. 8. After synchronization is complete, tap Done.
Live Search Bar Use the Live Search Bar to easily find information on the Internet. It is integrated into the Windows Live interface. To find information on the Internet: 1. Enter your keywords in the search bar. 2. Tap or Search. Internet Explorer Mobile then launches and displays links to related Web sites. The links are organized by category. 3. Scroll through the categories and tap a link to go to the Web site where the information that you want is located.
Section 11 Experiencing Multimedia In This Section 11.1 11.2 11.3 11.
11.1 Using the Built-in Camera Taking photos and capturing video clips along with audio is easy with the built-in camera on your device. To open the Camera screen: Press the Camera Key on your device. —or— Camera Key Tap Start > Programs > Camera. To exit the Camera: Tap the Exit icon ( ) on the Camera screen. Capture Modes The camera on your device allows you to capture pictures and video clips by using various built-in modes with flexibility.
Contacts Picture: Captures a still image with the option to immediately assign it as a Photo ID for a contact. Picture Theme: Captures still images and place them within frames. Panorama: Ideal for taking scenic shots. Captures parts of a scenery and then stitches all the shots to create a panoramic view of the scenery. Sports: Captures a sequence of still images (3, 5, 7, or 10) automatically.
Onscreen controls and indicators: 1 2 7 3 5 4 6 Photo mode 102 Video mode 1 Mode Switching control. Tapping the left or right arrow ( / ) on the screen allows you to switch the capture mode. 2 Remaining information indicator. In Photo, Contacts Picture, Picture Theme, Panorama, Sports, and Burst modes, this shows the remaining available shots based on current settings. In Video mode, this shows the remaining duration that can be recorded. While recording video, this shows the recorded duration.
10 8 9 Picture Theme mode Sports mode 8 Template Selector icon. In Picture Theme mode, tap to toggle among the different templates. After taking the first photo, this icon switches to Progress indicator. 9 Progress indicator. In Picture Theme, Panorama, Sports and Burst modes, this shows the number of consecutive shots. 10 Exit. Tap Note: to exit the Camera program. The onscreen controls and indicators are displayed for a few seconds only and are then hidden from the Camera screen.
Quick Settings Panel The Quick Settings Panel provides a quick way of adjusting the most common camera settings. Tap on the screen to open the Quick Settings Panel. Keep tapping a button on the panel (for example, Resolution) to cycle through the available settings. 1 4 2 5 3 1 Resolution. Available resolutions include: . 2 Storage. Tap to toggle between saving captured photos or video clips to the device memory ( ) or to the storage card ( ). 3 White Balance.
The Review Screen After taking a still image or recording a video clip, you can view the image or video clip on the Review screen. In addition, you can tap the icons at the bottom of the Review screen to delete a captured image or video, send an image or video via email, and more. Icon Capture Mode Back: Go back to the live Camera screen. Delete: Remove the captured image or video. Send: Send via email. View: View the captured photo or play the recorded video.
Camera settings Tap the Menu icon ( ) to open the Camera Settings screen. The Camera Settings screen allows you to configure Capture Settings and Advanced settings. Capture Settings Advanced Camera Settings screen in Photo mode Capture Settings menu ( 106 ) Effect. Choose a special effect such as Grayscale or Sepia to apply to your photos or video clips. Time Stamp (Photo, Sports and Burst modes). Choose whether to include the shooting date and time on captured photos. Quality.
Direction (in Panorama mode only). Choose in what direction images will be stitched in a panorama. Stitch Count (in Panorama mode only). Select the desired number of snapshots to be taken and stitched into a panorama. Capture Speed (Sports and Burst modes). This determines the interval between shots. Fast captures consecutive shots at the shortest interval. Snapshots (in Sports mode only). Select the number of consecutive shots to capture. Advanced menu ( ) Capture Format.
Flicker Adjustment. When taking indoor shots, flicker on the camera screen may be caused by inconsistencies between the vertical scan rate of the camera display and the flicker frequency of fluorescent lighting. To reduce flicker, you can change the flicker adjustment setting to the proper frequency (50Hz or 60Hz) of the country where your device is being used. Record with Audio (in Video mode only). Select On to record audio with the captured video clips, or select Off to capture video without audio.
Image Properties. This option allows you to adjust the camera display properties, such as Contrast, Saturation, Hue, and Sharpness. a Tap a property to adjust. a b c d e b Tap the left/right arrow or press the Navigation Control left or right to decrease or increase the value. c Tap to save the settings. d Tap to reset all properties to their default. e Tap to close the submenu without applying and saving the changes. Show Reminder (in Contacts Picture mode only).
Depending on the capture mode you are in, Camera Album will show either still images or video clips in your device. Touch to go to Camera mode. Opened from video capture mode Tip: Opened from still image capture mode If you have a lot of images in your device, scroll up or down by sliding your finger upward or downward on the touch screen. To view an image: On the main Camera Album screen, touch the thumbnail of the image you want to view.
While viewing an image, you can advance to the next image or go back to the previous image; rotate the image; zoom in or out on the image, and more. To advance to the next image or go back to the previous image: Advance to the next image by sliding your finger across the screen from right to left. —or— Go back to the previous image by sliding your finger from left to right. To rotate the image: With your finger, make a half-circle motion on the screen.
To zoom in or out of an image: With your finger, make a full-circle motion on the screen. Slide your finger clockwise to zoom in. —or— 112 Slide your finger counter-clockwise to zoom out.
Tips: When you zoom in on an image, you can double-tap the screen to automatically zoom out and fit the image to the screen. When you zoom in on an image, touch and hold the screen so you can pan the image. To view the images as a slide show: 1 Touch to open the slide show options where you can set the transition effect, time per slide, and orientation of the images. 2 Touch to go back to the previous image. 3 Touch to play or pause slideshow playback. 4 Touch to advance to the next image.
11.3 Using Pictures & Videos To view pictures 1. Tap Start > Programs > Pictures & Videos. The images in the My Pictures folder appear as thumbnails by default. 2. Select an image and tap View. If you cannot find the desired image in the default My Pictures folder, go to another folder by tapping the down arrow ( ). Down arrow Tap to view the selected image. To play GIF animation files 1. Tap Start > Programs > Pictures & Videos. 2. Select a GIF animation file and tap View.
Media icon 3. Tap to select a video and play it in Windows Media Player. To view slide shows You can view your pictures as a slide show on your device. Pictures are shown in full-screen view with a five-second interval between slides. 1. Tap Start > Programs > Pictures & Videos. 2. Tap Menu > Play Slide Show. Note: You can specify how pictures are scaled to optimize their display in a slide show. Tap Menu > Options, and then tap Portrait pictures or Landscape pictures on the Slide Show tab.
To delete a picture or video clip 1. Do any of the following to remove a picture or a video clip: Select a picture or video clip on the Pictures & Videos screen, and tap Menu > Delete. Tap and hold the thumbnail of the picture you want to delete, and then tap Delete. 2. Tap Yes to confirm the deletion. 11.
About the controls 1 2 3 4 5 6 7 8 9 The following are available controls on the Windows Media Player. Control Function 1 Adjusts the playback progress of a selected file. 2 Displays the video in full screen. 3 Displays a Web site where you can find music and videos to play. 4 Skips to the beginning of the current file or to the previous file. 5 Plays/Pauses a file. 6 Skips to the next file. 7 Decreases the volume level. 8 Increases the volume level. 9 Turns the sound on or off.
About the Screens and Menus Windows Media Player has three primary screens: Playback screen. The default screen that displays the playback controls (such as Play, Pause, Next, Previous, and Volume) and the video window. Now Playing screen. The screen that displays the Now Playing playlist. This special playlist indicates the current file being played and any files that are “queued up” to play next. Library screen. The screen that lets you quickly find your audio files, video files, and playlists.
Synchronizing video and audio files Use the latest version of Microsoft Windows Media Player on your PC to synchronize digital media files from your PC to your device. This ensures that protected files and album art are copied to your device correctly. To synchronize content to your device automatically: 1. On your PC, start Windows Media Player and then connect your device to your PC. 2. In the Device Setup Wizard, select Yes, search my computer now. 3.
3. From the Content List, drag the media files that you want to sync to your device and drop them to the Sync List. 4. Click Start Sync to start synchronizing the selected files to your device. Use Windows Media Player 11 or higher on your PC to synchronize media files to your device. Notes: Audio files copy faster if Windows Media Player is configured to automatically set the quality level for audio files copied to your device. For more information, see the Windows Media Player Help.
Note: To play a file that is stored on your device but is not in a library, on the Library screen, tap Menu > Open File. Tap and hold the item that you want to play (such as a file or a folder), and then tap Play. Troubleshooting If you encounter a problem while using the Windows Media Player, a number of resources are available to help you troubleshoot the issue. For more information, see the Troubleshooting Windows Media Player Mobile page at the Microsoft Web site (http://www. microsoft.
Section 12 Managing Your Device In This Section 12.1 12.2 12.
12.1 Adding and Removing Programs Before purchasing additional programs for your device, you should note the name of your device, the version of Windows Mobile software running on it, and the type of processor. This information will help you select a program that is compatible with your device. Programs available for purchase usually include a setup program (commonly named “setup.exe”) that you must first install on your PC.
To remove programs: You can remove only programs that you installed. Programs that have been pre-loaded onto your device cannot be removed. 1. Tap Start > Settings > System tab > Remove Programs. 2. In the Programs in storage memory list, select the program you want to remove, and then tap Remove. 3. Tap Yes. If another confirmation message appears, tap Yes again. 12.
3. Choose an action for shutting down programs (by tapping the button, tapping and holding the button, or both). 4. Tap OK. Note: When the Enable the “X” button to end running programs check box is not selected, tapping the Exit button will only close a program screen. The program is not ended and continues to run in the background. To close running programs from the Task Manager: 1. Tap the Running tab. 2.
To remove a program from the exclusive list: In the Running tab, tap and hold the program name in the list, and then tap Remove from Exclusive. —or— In the Exclusive tab, select the program name and tap Remove. To sort running programs in the Quick Menu: 1. Tap the Advanced tab. 2. Select Program name or Memory usage to sort running programs by order of the program name or the memory usage. 12.3 Resetting Your Device Soft Reset Occasionally you may need to reset your device.
Hard Reset You can also perform a hard reset (also known as a full reset). A hard reset should be performed only if a normal reset does not solve a system problem. After a hard reset, the device is restored to its default settings — the way it was when you first purchased it and turned it on. Any programs you installed, data you entered, and settings you customized on the device will be lost. Only Windows Mobile software and other preinstalled programs will remain. To perform a hard reset: 1.
Appendix In This Section A.1 A.2 A.
A.1 Regulatory Notices Regulatory Agency Identifications For regulatory identification purposes, your Touch™ by HTC is assigned a model number of VOGU100. FCC ID: NM8VOGU100. IC: 4115A-VOGU100. To ensure continued reliable and safe operation of your device, use only the accessories approved by the manufacturer with your Touch™ by HTC. The battery pack has been assigned a model number of ELF0160.
Modifications The FCC requires the user to be notified that any changes or modifications made to the device that are not expressly approved by High Tech Computer Corporation may void the user’s authority to operate the equipment. FCC Hearing-Aid Compatibility (HAC) Regulations for Wireless Devices On July 10, 2003, the U.S.
In the above example, if a hearing aid meets the M2 level rating and the wireless phone meets the M3 level rating, the sum of the two values equal M5. This should provide the hearing aid user with “normal usage” while using their hearing aid with the particular wireless phone. “Normal usage” in this context is defined as a signal quality that is acceptable for normal operation. The M mark is intended to be synonymous with the U mark. The T mark is intended to be synonymous with the UT mark.
Ministry of Health (Canada), Safety Code 6. The standards include a substantial safety margin designed to assure the safety of all persons, regardless of age and health. The exposure standard for wireless mobile CDMA phone employs a unit of measurement known as the Specific Absorption Rate, or SAR. The SAR limit set by the FCC is 1.6 W/kg*. The FCC has granted an Equipment Authorization for this model device with all reported SAR levels evaluated as in compliance with the FCC RF exposure guidelines.
Telecommunications & Internet Association (TIA) Safety Information Pacemakers The Health Industry Manufacturers Association recommends that a minimum separation of six inches be maintained between a handheld wireless phone and a pacemaker to avoid potential interference with the pacemaker. These recommendations are consistent with the independent research by and recommendations of Wireless Technology Research.
The WEEE logo (shown at the left) on the product or on its box indicates that this product must not be disposed of or dumped with your other household waste. You are liable to dispose of all your electronic or electrical waste equipment by relocating over to the specified collection point for recycling of such hazardous waste. Isolated collection and proper recovery of your electronic and electrical waste equipment at the time of disposal will allow us to help conserving natural resources.
grounding conductor and a grounding plug. The plug must be plugged into an appropriate outlet which is properly installed and grounded in accordance with all local codes and ordinances. SAFETY PRECAUTIONS FOR POWER SUPPLY UNIT Use the correct external power source A product should be operated only from the type of power source indicated on the electrical ratings label. If you are not sure of the type of power source required, consult your authorized service provider or local power company.
If the battery leaks: Do not allow the leaking fluid to come in contact with skin or clothing. If already in contact, flush the affected area immediately with clean water and seek medical advice. Do not allow the leaking fluid to come in contact with eyes. If already in contact, DO NOT rub; rinse with clean water immediately and seek medical advice. Take extra precautions to keep a leaking battery away from fire as there is a danger of ignition or explosion.
INTERFERENCE WITH MEDICAL EQUIPMENT FUNCTIONS This product may cause medical equipment to malfunction. The use of this device is forbidden in most hospitals and medical clinics. If you use any other personal medical device, consult the manufacturer of your device to determine if it is adequately shielded from external RF energy. Your physician may be able to assist you in obtaining this information.
Unplug the product from the electrical outlet and refer servicing to an authorized service technician or provider under the following conditions: Liquid has been spilled or an object has fallen into the product. The product has been exposed to rain or water. The product has been dropped or damaged. There are noticeable signs of overheating. The product does not operate normally when you follow the operating instructions.
A.2 Cleaning Unplug the product from the wall outlet before cleaning. Do not use liquid cleaners or aerosol cleaners. Use a damp cloth for cleaning, but NEVER use water to clean the LCD screen. Additional Safety Information This section provides more safety information in addition to the information at the beginning of the user manual.
If you must use the phone function while driving, please: Give full attention to driving. Driving safely is your first responsibility. Use hands-free operation and/or one-touch, speed dialing, and auto answer modes. Pull off the road and park before making or answering a call. WARNING: Failure to follow these instructions could lead to serious personal injury and possible property damage.
Turn Off Your Device Before Flying AIRCRAFT FCC regulations prohibit using the transmitting and phone functions of your device while in the air. In addition, most airline regulations prohibit the on-board use of portable PCs (and all other portable electronic devices that could potentially emit stray RF energy), particularly during take-offs and landings, to prevent any possible interference with the reception of signals by airborne electronic navigational devices.
DO NOT drop your device or subject it to severe shock. When not using, lay down the unit to avoid possible damage due to instability. DO NOT expose this equipment to rain or spilled beverages. DO NOT use unauthorized accessories. DO NOT disassemble the device or its accessories. If service or repair is required, return unit to an authorized UT Starcom cellular service center. If the unit is disassembled, the risk of electric shock or fire may result.
Store the discharged battery in a cool, dark, and dry place. Purchase a new battery when its operating time gradually decreases after fully charging. Properly dispose of the battery according to local regulations. DON’Ts Don’t attempt to disassemble the battery – it is a sealed unit with no serviceable parts. Don’t expose the battery terminals to any other metal object (e.g., by carrying it in your pocket or purse with other metallic objects such as coins, clips and pens).
Never alter the AC cord or plug on an AC phone charger. If the plug will not fit into the available outlet, have a proper outlet installed by a qualified electrician. Never allow any liquids or water to spill on an AC phone charger when it is connected to an AC power source. Always use the supplied AC phone charger to avoid any risk of bodily injury or damage to your cellular phone or battery. Never attempt to connect or disconnect the AC phone charger with wet hands.
A.
on your device before submitting it for repair or service. This includes all contact lists, downloads (i.e. third-party software applications, ringtones, games and graphics) and any other data added to your device.
148 IN USA: UTStarcom Personal Communications 555 Wireless Blvd.
Index
A About licenses and protected media 118 ActiveSync - overview 27 Add and remove programs 124 Adobe Reader LE - overview 27 - use 87 Appointment 61 Camera Album 109 Conference call 41 Contacts 58 Contacts Picture capture mode 101 D Delete pictures and videos 116 Digital Rights Management (DRM) 118 E B Excel Mobile 27 Battery - battery information 11 - charge battery 11 - install battery 11 Bluetooth - create partnership 93 - overview 92 - turn on/off 92 Burst capture mode 101 F G Games 27 GIF animati
L Library screen (Windows Media Player Mobile) 118 M Messaging - overview 28 N Notes 27,67 Now Playing screen (Windows Media Player Mobile) 118 O Onscreen keyboard 33 Open PDF file 87 P Panorama capture mode 101 PDF 87 Phone 27 Phone settings 42 Pictures & Videos - delete 116 - file formats 114 - overview 28 - play GIF animation 114 - play videos 114 - sort 115 - view pictures 114 - view slideshows 115 Picture Theme capture mode 101 Playback screen (Windows Media Player Mobile) 118 Play GIF animation 114
R Z Regulatory notices 130 Reset device 127 Review screen (Camera) 105 Ring tone 42 Ring type 43 ZIP - overview 29 Zoom (Camera) 103 S Search 28 Sports capture mode 101 Start Menu 18 Start up 13 T Tasks 29,65 Text size 47 Troubleshoot Windows Media Player 121 V View - photo slideshows 115 - pictures 114 Voice Speed Dial - overview 29 W Windows Media Player Mobile - file formats 116 - menus 118 - overview 29 - troubleshoot 121 Word Mobile 27 152 Index