EG860 V200R003C00 User Guide Issue 02 Date 2015-04-10 HUAWEI TECHNOLOGIES CO., LTD.
Copyright © Huawei Technologies Co., Ltd. 2015. All rights reserved. No part of this document may be reproduced or transmitted in any form or by any means without prior written consent of Huawei Technologies Co., Ltd. Trademarks and Permissions and other Huawei trademarks are trademarks of Huawei Technologies Co., Ltd. All other trademarks and trade names mentioned in this document are the property of their respective holders.
EG860 User Guide About This Document About This Document Introduction This document describes hardware, functions, networking, installation, configurations, and operation and maintenance (O&M) information of an EG860.
EG860 User Guide About This Document 4 Installation This chapter describes how to install an EG860. 5 Configuration Data configuration for EG860 can be performed by using WebUI or by auto-configuration. 6 Maintenance This chapter describes how to maintain an EG860. 7 Reference This chapter describes how to use the Web network management system (NMS). 8 Alarm Reference This chapter describes possible alarms related to EG860, and how to handle them.
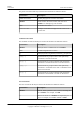
EG860 User Guide About This Document The general conventions that may be found in this document are defined as follows. Convention Description Times New Roman Normal paragraphs are in Times New Roman. Boldface Names of files, directories, folders, and users are in boldface. For example, log in as user root. Italic Book titles are in italics. Courier New Examples of information displayed on the screen are in Courier New.
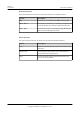
EG860 User Guide About This Document Keyboard Operations The keyboard operations that may be found in this document are defined as follows. Format Description Key Press the key. For example, press Enter and press Tab. Key 1+Key 2 Press the keys concurrently. For example, pressing Ctrl+Alt +A means the three keys should be pressed concurrently. Key 1, Key 2 Press the keys in turn. For example, pressing Alt, A means the two keys should be pressed in turn.
EG860 User Guide Contents Contents About This Document.....................................................................................................................ii 1 Change History..............................................................................................................................1 2 Introduction....................................................................................................................................5 2.1 Product Functions.......................
EG860 User Guide Contents 4.3.1.2 Connecting Cables to an EG860 Mounted on a Pole.............................................................................................39 4.3.2 Mounting an EG860 on a Wall..................................................................................................................................47 4.3.2.1 Mounting EG860 Equipment on a Wall.................................................................................................................48 4.3.2.
EG860 User Guide Contents 7.6 VPN..............................................................................................................................................................................96 7.7 System..........................................................................................................................................................................98 7.7.1 Device Information.............................................................................................
EG860 User Guide 1 Change History 1 Change History Updates between document issues are cumulative. Therefore, the latest document issue contains all updates made in previous issues. 02 (2015-04-10) This is the second release of the V200R003C00 version. Compared with issue V200R003C00 01, the documentation does not contain any new information. Compared with issue V200R003C00 01, the documentation includes the following changes: Topic Change Description l 5.1.
EG860 User Guide 1 Change History Topic Change Description l 2.3 Technical Specifications Optimized the content. l 3.1.3 Indicators l 4.3.1 Mounting an EG860 on a Pole l 5.2 Remote Configuration (Autoconfiguration) l 7.2.3 DHCP Settings l 7.2.10 IGMP Management l 7.7.10 Log l 7.7.15 Alarm Configuration Compared with issue V200R003C00 Draft C, the documentation deletes the following information.
EG860 User Guide 1 Change History Compared with issue V200R003C00 Draft A, the documentation includes the following changes: Topic Change Description l 3.2.1 PoE Cable Optimized the content. l 5.1.1 Log in to the WebUI l 5.2 Remote Configuration (Autoconfiguration) l 7.2.12 FTP Settings l 7.2.13 Security access Settings Compared with issue V200R003C00 Draft A, the documentation does not delete any information. Draft A (2014-10-30) This is the Draft A release of the V200R003C00 version.
EG860 User Guide 1 Change History Topic Change Description 7.7.9 Diagnosis Deleted the Tmsi information query. Added the configuration of WAN ICMP function. 7.7.11 Device Switch Added the configuration of Antenna status parameter. 7.7.14 SIM Configuration Deleted the default value of PLMN. l 5.2 Remote Configuration (Autoconfiguration) Optimized the content. l 7.1.1 Internet l 7.1.2 LAN l 7.1.3 WLAN l 7.2.2 Internet Settings l 7.2.3 DHCP Settings l 7.2.4 WLAN Settings l 7.2.
EG860 User Guide 2 Introduction 2 Introduction About This Chapter This section describes functions, networking, and technical specifications of an EG860. 2.1 Product Functions An EG860, as a data service device on the Internet of Things (IoT), is used in a long term evolution (LTE) network to upload or download user data. It provides data service (in route mode), security service (firewall/NAT), and equipment maintenance and management. NAT is short for Network Address Translation. 2.
EG860 User Guide 2 Introduction 2.1 Product Functions An EG860, as a data service device on the Internet of Things (IoT), is used in a long term evolution (LTE) network to upload or download user data. It provides data service (in route mode), security service (firewall/NAT), and equipment maintenance and management. NAT is short for Network Address Translation. Background Information A wireless data private network is an important part of IoT infrastructures.
EG860 User Guide 2 Introduction A government private network covers agencies, offices, and business units regardless of size within a municipality. The integrated network is shown as Figure 2-1. Figure 2-1 A government integrated network The networking of wireless networks is shown as Figure 2-2. Issue 02 (2015-04-10) Huawei Proprietary and Confidential Copyright © Huawei Technologies Co., Ltd.
EG860 User Guide 2 Introduction Figure 2-2 The networking of wireless networks An EG860 operates on an LTE network. Data from a sensor travels through a FE port of the EG860 and, after being encapsulated to IPv4 packets by the EG860, is transferred to backend servers. NOTE Personal information will be anonymized to protect user privacy. 2.3 Technical Specifications The technical specifications of an EG860 cover mechanical, power, surge protection, performance, antenna, and environment specifications.
EG860 User Guide 2 Introduction Table 2-2 Electrical specifications of an EG860 Equipment Rated voltage Power EG860 24 V DC (PWR) Maximum power consumption: 30 W -48 V DC (POE) Surge Protection Specifications Table 2-3 lists the surge protection specifications of the EG860.
EG860 User Guide 2 Introduction Mode Item Description Receiver sensitivity l 1.8G and 1.4G – -92dBm/20MHz – -95dBm/10MHz – -98dBm/5MHz l 800M – -88dBm/20MHz – -92dBm/10MHz – -95dBm/5MHz Wi-Fi Blocking 3GPP TS 36.101-compliant Working mode IEEE 802.11b/g/n: 2.4 GHz Output power IEEE 802.11b: <16dBm IEEE 802.11g: <15dBm IEEE 802.11n: <13dBm Receiver sensitivity IEEE 802.11b: ≤-76 dBm@11Mbps IEEE 802.11g: ≤-65 dBm@54Mbps IEEE 802.
EG860 User Guide 2 Introduction Mode Item Description Receiver sensitivity -92dBm/20MHz -95dBm/10MHz -98dBm/5MHz -100.2dBm/3MHz Wi-Fi Blocking 3GPP TS 36.101-compliant Working mode IEEE 802.11b/g/n: 2.4 GHz Output power IEEE 802.11b: <16dBm IEEE 802.11g: <15dBm IEEE 802.11n: <13dBm Receiver sensitivity IEEE 802.11b: ≤-76 dBm@11Mbps IEEE 802.11g: ≤-65 dBm@54Mbps IEEE 802.
EG860 User Guide 2 Introduction LTE Antenna (1.4G) LTE Antenna (1.8G) LTE Antenna (800M) Wi-Fi Antenna Built-in directional antenna: ≥ 7.5dBi Built-in directional antenna: ≥ 7.
EG860 User Guide 2 Introduction Item LTE Antenna (400M) Wi-Fi Antenna Gain l 380MHz~410MHz/ 410MHz~440MHz/ 440MHz~450MHz:≥3.5 dBi ≥ 2 dBi l 380MHz~450MHz:≥1.
EG860 User Guide 2 Introduction Table 2-9 Storage environment specifications Item Description Temperature -40℃~+70℃ Relative humidity 10%~100% Temperature change rate 1 ℃/min Atmospheric pressure 62 Kpa~106 Kpa Air flow rate ≤ 55 m/s 2.4 Product Security EG860 security includes network security and application security. Application security includes wireless security and OM security. 2.4.
EG860 User Guide 2 Introduction HTTPS provides secure HTTP channels. HTTPS is HTTP to which SSL is added, and SSL ensures the security of HTTPS. 2.4.2 Application Security EG860 application security includes wireless security and OM security. 2.4.2.1 Wireless Security EG860 wireless security includes authentication, air-interface data encryption, and integrity protection. For details, see Security Feature Manual. 2.4.2.
EG860 User Guide 2 Introduction – Passwords are encrypted and are stored locally. l Default account management – By default, the admin user is able to perform all operations except for the functions related to the TR069 protocol on the system. The acs user only can control the authentication between eOMC910 and EG860. l User names and passwords Table 2-10 describes the user names and default passwords for an EG860.
EG860 User Guide 2 Introduction uploads software to the target server or device. When a target device downloads, loads, or runs software, the target device performs the Hash check or authenticates the digital signature. By doing so, software integrity protection ensures end-to-end software reliability and integrity. Software integrity protection helps detect viruses or malicious tampering in a timely manner, preventing insecure or virus-infected software from running on the device. 2.4.2.2.
EG860 User Guide 2 Introduction – If the two message digests are different, the software package fails the verification and cannot be used. The public key used to decrypt digital signatures is stored in the secure storage area of an NE and cannot be queried or exported. 2.5 Certification Information This section describes the certification that EG860 has passed. Table 2-11 describes the certification that EG860 has passed.
EG860 User Guide 3 Hardware 3 Hardware About This Chapter This section describes hardware components and cables of an EG860. 3.1 EG860 Hardware This section describes the exterior, front panel, indicators, and ports of an EG860. 3.2 EG860 Cables This section describes the cables of an EG860, including power over Ethernet (PoE) cables, power cables and protection ground (PGND) cables. Issue 02 (2015-04-10) Huawei Proprietary and Confidential Copyright © Huawei Technologies Co., Ltd.
EG860 User Guide 3 Hardware 3.1 EG860 Hardware This section describes the exterior, front panel, indicators, and ports of an EG860. 3.1.1 Appearance The exterior of an EG860 provides you a fair idea of major components. Figure 3-1 shows the exterior of an EG860. Figure 3-1 EG860 exterior (unit: mm) 3.1.2 Front Panel An EG860 has an FE port, a power port, external antenna ports, subscriber identity module (SIM) card window, indicators, a nameplate, and a ground screw on its front panel.
EG860 User Guide 3 Hardware Figure 3-2 EG860 front panel Table 3-1 provides port description for the front panel. Table 3-1 Ports of the EG860 front panel Item Port Description FE Data service port Receives/Transmits data services and supplies power to an EG860. PWR Power port Connects to a power supply. RF1 External antenna port Connects to an external antenna. RF2 Issue 02 (2015-04-10) Huawei Proprietary and Confidential Copyright © Huawei Technologies Co., Ltd.
EG860 User Guide 3 Hardware Item Port Description LED None Indicates the operating status of an EG860. For details, see 3.1.3 Indicators. SIM card window None Houses SIM cards. Nameplate None Displays manufacturer information. Ground screw None Connects ground cables. 3.1.3 Indicators All the indicators are on the front panel to show the operating status of an EG860. Table 3-2 provides status explanation of the indicators.
EG860 User Guide 3 Hardware Indicator Color Status Description Blinks on (green) and off at 3 Hz An FE port transmits/ receives data at the speed of 10 Mbit/s. Blinks on (green) and off at 12 Hz An FE port transmits/ receives data at the speed of 100 Mbit/s. Steady off No connection exists at an FE port. 3.1.4 Ports An EG860 has an FE port, a power port, and external antenna ports.
EG860 User Guide 3 Hardware – Use a POE cable with the maximum length of 60 m. – Standard Cat 5e outdoor network cables are used. Technical Specifications Table 3-3 lists the specifications of a POE cable. Table 3-3 Technical specifications of a PoE cable Item Specifications Color Black Number of wires Four twisted pairs (eight signal cables) Cross-sectional area 0.2 mm² (24 AWG) External diameter 6.8 mm ± 0.
EG860 User Guide 3 Hardware Figure 3-3 Connecting a PoE adapter DATA: connects to the network cable of a computer or a camera. PoE: connects to a POE cable. Table 3-4 lists the specifications of a power adapter. Table 3-4 Specifications of a power adapter Item Specifications Application Scenario Temperature Range 35 W POE power adapter -40degC-50degC-90 V-264V-54V/0.65AC8/RJ45-GE When power is supplied through the POE port. -40℃~50℃ 3.2.2 Power Cable The power cable transmits 24V DC power.
EG860 User Guide 3 Hardware Figure 3-4 Power cable appearance Pin Assignment A power cable (24V) is a two-core cable. Table 3-5 describes the pin assignment for the wires of a power cable (24V). Table 3-5 Pin assignment for the wires of a power cable Wire Color NEG(-) Blue RTN(+) Black Technical Specifications Table 3-6 lists the specifications of a power cable. Table 3-6 Technical specifications of a power cable Item Specifications Color Black Cross-sectional area of conductor 0.
EG860 User Guide 3 Hardware sectional area equal to or more than 6 mm2 is recommended. Figure 3-5 shows the exterior of a PGND cable. Figure 3-5 PGND cable exterior Technical Specifications Table 3-7 lists the specifications of a PGND cable. Table 3-7 Technical specifications of a PGND cable Issue 02 (2015-04-10) Item Specifications Color Yellow and green Cross-sectional area 6 mm² (9 AWG) External diameter 5.1 mm ± 0.
EG860 User Guide 4 Installation 4 Installation About This Chapter This chapter describes how to install an EG860. 4.1 Site Preparations This section describes how to prepare a site before EG860 installation. 4.2 Installation Preparations This section describes how to unpack and check the goods onsite and prepare installation tools before EG860 installation. 4.3 Installation Procedure This section describes how to install an EG860 on a pole and wall. 4.
EG860 User Guide 4 Installation 4.1 Site Preparations This section describes how to prepare a site before EG860 installation. Select a site and space for installing an EG860 that meets the following requirements to ensure installation, commissioning, and operating of the equipment.
EG860 User Guide 4 Installation Figure 4-1 Space requirements for installing an EG860 (unit: mm) Requirements for Operating Environment For details about operating environment requirements, see 2.3 Technical Specifications. 4.2 Installation Preparations This section describes how to unpack and check the goods onsite and prepare installation tools before EG860 installation. Prerequisites Upon the device arrival, inspect the device and ensure that the device is intact. Verify that: 1.
EG860 User Guide 4 Installation l If the temperature is -10℃ or below, it is recommended to heat EG860 by setting Heat status to Enable in System > Hardware Settings in WebUI. Installation Tools Table 4-1 lists the tools used to install an EG860. Table 4-1 Installation tools ESD gloves Vacuum cleaner Heat gun Hammer drill (with Ø14 and Ø12 drill bits) Flat-head screwdriver (M2.5– M6) Phillips screwdriver (M2.
EG860 User Guide 4 Installation Wire clipper Wire stripper Adjustable wrench (capacity ≥ 32 mm) Multimeter Hydraulic pliers Marker (diameter ≤ 10 mm) Combination wrench (21 mm–21 mm) for installation on a pole Torque screwdriver 1 N m–5 N m (17 mm–17 mm) for installation on a wall Measuring tape Diagonal pliers Hex key (5 mm) 4.3 Installation Procedure This section describes how to install an EG860 on a pole and wall. 4.3.
EG860 User Guide 4 Installation Figure 4-2 Requirements for a mental pole of EG860 (unit: mm) NOTE l The product fitting bag contains 4 steel ties. Two of them are used for the mental pole whose diameter is lager than 114 mm, and the other two are used for the mental pole whose diameter is equal to or less than 114 mm. l The steel tie for the mental pole whose diameter is lager than 114 mm is different from that for the mental pole whose diameter is equal to or less than 114 mm.
EG860 User Guide 4 Installation Figure 4-4 EG860 and installation components NOTICE To avoid direct lightning, EG860 must be installed in the protection angle of 45 degrees below a separate lightning rod, or protection angle of 45 degrees below a surrounding highrise building. 4.3.1.1 Mounting EG860 Equipment on a Pole This section describes how to mount EG860 equipment on a pole. Procedure Step 1 Optional: Open the EG860 SIM card window and insert a SIM card, as shown in Figure 4-5.
EG860 User Guide 4 Installation Figure 4-5 Inserting a SIM card NOTE Use a tweezer or a pair of needle-nose pliers to remove SIM cards. Step 2 Assemble steel strapping tapes with the installation component, as shown in Figure 4-6. Figure 4-6 Assembling steel strapping tapes with the installation component Step 3 Install the assembled installation component on the EG860, with the torque being 48 kgf.cm, as shown in Figure 4-7.
EG860 User Guide 4 Installation Figure 4-7 Installing an EG860 installation component Step 4 Mounting the EG860 with the assembled installation component on the pole. 1. Issue 02 (2015-04-10) Roll the steel strapping tapes on the pole, let them go through the bayonet, and buckle up the bayonet after proper adjustment, as shown in Figure 4-8. Huawei Proprietary and Confidential Copyright © Huawei Technologies Co., Ltd.
EG860 User Guide 4 Installation Figure 4-8 Buckle up the bayonet 2. Use the inner hexagon tool to tighten the steel strapping tapes, with the torque being 48 kgf.cm, as shown in Figure 4-9. Figure 4-9 Tightening steel strapping tapes Issue 02 (2015-04-10) Huawei Proprietary and Confidential Copyright © Huawei Technologies Co., Ltd.
EG860 User Guide 4 Installation Step 5 Properly adjust horizontal and vertical angles and tighten the screws on the top and side of the installation component. l Properly adjust the horizontal angle and tighten the screws on the top of the installation component, with the torque being 120 kgf.cm and a maximum of 45 degrees adjustment, as shown in Figure 4-10.
EG860 User Guide 4 Installation 4.3.1.2 Connecting Cables to an EG860 Mounted on a Pole This section describes how to connect cables to an EG860 mounted on a pole. Procedure Step 1 Connect the PGND cables, as shown in Figure 4-12. Figure 4-12 Connecting the PGND cable to the EG860 Step 2 Install the POE cable. 1. Issue 02 (2015-04-10) Loosen the PG connector at the FE port on the EG860. Figure 4-13 shows the structure of the connector.
EG860 User Guide 4 Installation Figure 4-13 PG connector 2. Insert a POE cable into the PG connector and ensure that the lock nut, rubber seal, and connector are compact, as shown in Figure 4-14. Figure 4-14 Inserting a PoE cable into the PG connector Issue 02 (2015-04-10) Huawei Proprietary and Confidential Copyright © Huawei Technologies Co., Ltd.
EG860 User Guide 4 Installation 3. Inserting a POE cable into the FE port on the EG860, as shown in Figure 4-15. Figure 4-15 Inserting a PoE cable into the FE port on the EG860 4. Optional: In outdoor scenarios, waterproof the connecting joints as shown in Figure 4-16. Figure 4-16 Waterproof NOTE l Before wrapping waterproof tape, stretch the tape evenly until the width of the tape is half of its original width.
EG860 User Guide 4 Installation 5. Connect one end of the POE cable to the POE adapter as shown in Figure 4-17. Figure 4-17 Connecting a PoE adapter DATA: connects to the network cable of a computer or a camera. PoE: connects to a POE cable. NOTE In the outdoor, it is recommended to place the POE adapter in a surge protection box (provided by customer). Step 3 Optional: Connect the power cable. 1. Issue 02 (2015-04-10) Screw the waterproof cover off the PWR connector, as shown in Figure 4-18.
EG860 User Guide 4 Installation Figure 4-18 Screwing the waterproof cover off the PWR connector 2. Pass the power cable through the PWR connector and tighten the waterproof cover, as shown in Figure 4-19. Figure 4-19 Passing the power cable through the PWR connector and tightening the waterproof cover 3. Issue 02 (2015-04-10) Connect the power cable to the EG860 and tighten the waterproof cover, as shown in Figure 4-20. Huawei Proprietary and Confidential Copyright © Huawei Technologies Co., Ltd.
EG860 User Guide 4 Installation Figure 4-20 Connecting the power cable to the EG860 4. Optional: In outdoor scenarios, waterproof the connecting joints as shown in 2.4. Step 4 (This step is for the installation of external antenna. Please skip this step if built-in antenna is used.) Install an antenna. Connect the antenna to EG860 using a ground device (DC) for the central conductor. Figure 4-21 shows the DC for the central conductor.
EG860 User Guide 4 Installation Figure 4-22 Loosening the antenna connector 2. Screw the SMA connector, with the torque being 10 kgf.cm, as shown in Figure 4-23. Figure 4-23 Screwing the SMA connector 3. Optional: In outdoor scenarios, waterproof the connecting joints as shown in 2.4. 4. Connect an external antenna through the DC for the central conductor, as shown in Figure 4-24 and Figure 4-25. Issue 02 (2015-04-10) Huawei Proprietary and Confidential Copyright © Huawei Technologies Co., Ltd.
EG860 User Guide 4 Installation Figure 4-24 Connecting an external antenna (single antenna) Issue 02 (2015-04-10) Huawei Proprietary and Confidential Copyright © Huawei Technologies Co., Ltd.
EG860 User Guide 4 Installation Figure 4-25 Connecting an external antenna (double antennas) NOTE l The ground device of central conductor needs to be fixed on the pole or other fixed blocks to avoid any unexpected swing. Also, waterproofing must be done at the connector of the device and RF cables. l For details about how to install an external antenna, see the Antenna Installation Guide. ----End 4.3.2 Mounting an EG860 on a Wall This section describes how to mount an EG860 in indoor scenarios.
EG860 User Guide 4 Installation l Requirements for a metal pole of an antenna. Figure 4-26 shows the requirements for a metal pole of an antenna. Figure 4-26 Requirements for a metal pole of an antenna (unit: mm) The requirements for antenna installation are as follows: – The installation of lightning rod is required. – The antenna must be mounted vertically. – The antenna must be mounted on the top of metal pole.
EG860 User Guide 4 Installation Procedure Step 1 Optional: Open the EG860 SIM card window and insert a SIM card, as shown in Figure 4-28. Figure 4-28 Inserting a SIM card NOTE Use a tweezer or a pair of needle-nose pliers to remove SIM cards. Step 2 Install the installation component on the EG860, with the torque being 48 kgf.cm, as shown in Figure 4-29. Issue 02 (2015-04-10) Huawei Proprietary and Confidential Copyright © Huawei Technologies Co., Ltd.
EG860 User Guide 4 Installation Figure 4-29 Installing an EG860 installation component Step 3 Place a marking-off template against the wall, use a level to verify that the marking-off template is placed horizontally, and then mark anchor points with a marker, as shown in Figure 4-30. Issue 02 (2015-04-10) Huawei Proprietary and Confidential Copyright © Huawei Technologies Co., Ltd.
EG860 User Guide 4 Installation Figure 4-30 Marking anchor points Step 4 Use a hammer drill with a Ø14 drill bit to drill a hole on the anchor points, install expansion bolts, and remove dust from the hole, as shown in Figure 4-31. Figure 4-31 Installing an expansion bolt Step 5 Align the installation holes in the bracket with the expansion bolt holes in the wall, fasten the nuts of the expansion bolts, and mount the EG860 on the wall, as shown in Figure 4-32.
EG860 User Guide 4 Installation Figure 4-32 Mounting the EG860 on the wall Step 6 Properly adjust horizontal and vertical angles and tighten the screws on the top and side of the installation component. For details, see Mounting EG860 Equipment on a Pole Step 5 of 4.3.1.1 Mounting EG860 Equipment on a Pole. ----End 4.3.2.2 Connecting Cables to an EG860 Mounted on a Wall This section describes how to connect cables to an EG860 mounted on a wall.
EG860 User Guide 4 Installation Figure 4-33 Connecting the PGND cable to the EG860 Step 2 Install the POE cable. 1. Issue 02 (2015-04-10) Loosen the PG connector at the FE port on the EG860. Figure 4-34 shows the structure of the connector. Huawei Proprietary and Confidential Copyright © Huawei Technologies Co., Ltd.
EG860 User Guide 4 Installation Figure 4-34 PG connector 2. Insert a POE cable into the PG connector and ensure that the lock nut, rubber seal, and connector are compact, as shown in Figure 4-35. Figure 4-35 Inserting a PoE cable into the PG connector Issue 02 (2015-04-10) Huawei Proprietary and Confidential Copyright © Huawei Technologies Co., Ltd.
EG860 User Guide 4 Installation 3. Inserting a POE cable into the FE port on the EG860, as shown in Figure 4-36. Figure 4-36 Inserting a PoE cable into the FE port on the EG860 4. Optional: In outdoor scenarios, waterproof the connecting joints as shown in Figure 4-37. Figure 4-37 Waterproof NOTE l Before wrapping waterproof tape, stretch the tape evenly until the width of the tape is half of its original width.
EG860 User Guide 4 Installation 5. Connect one end of the POE cable to the POE adapter as shown in Figure 4-38. Figure 4-38 Connecting a PoE adapter DATA: connects to the network cable of a computer or a camera. PoE: connects to a POE cable. NOTE In the outdoor, it is recommended to place the POE adapter in a surge protection box (provided by customer). Step 3 Optional: Connect the power cable. 1. Issue 02 (2015-04-10) Screw the waterproof cover off the PWR connector, as shown in Figure 4-39.
EG860 User Guide 4 Installation Figure 4-39 Screwing the waterproof cover off the PWR connector 2. Pass the power cable through the PWR connector and tighten the waterproof cover, as shown in Figure 4-40. Figure 4-40 Passing the power cable through the PWR connector and tightening the waterproof cover 3. Issue 02 (2015-04-10) Connect the power cable to the EG860 and tighten the waterproof cover, as shown in Figure 4-41. Huawei Proprietary and Confidential Copyright © Huawei Technologies Co., Ltd.
EG860 User Guide 4 Installation Figure 4-41 Connecting the power cable to the EG860 4. Optional: In outdoor scenarios, waterproof the connecting joints as shown in 2.4. Step 4 (This step is for the installation of external antenna. Please skip this step if built-in antenna is used.) Install an antenna. Connect the antenna to EG860 using a ground device (DC) for the central conductor. Figure 4-42 shows the DC for the central conductor.
EG860 User Guide 4 Installation Figure 4-43 Loosening the antenna connector 2. Screw the SMA connector, with the torque being 10 kgf.cm, as shown in Figure 4-44. Figure 4-44 Screwing the SMA connector 3. Optional: In outdoor scenarios, waterproof the connecting joints as shown in 2.4. 4. Connect an external antenna through the DC for the central conductor, as shown in Figure 4-45 and Figure 4-46. Issue 02 (2015-04-10) Huawei Proprietary and Confidential Copyright © Huawei Technologies Co., Ltd.
EG860 User Guide 4 Installation Figure 4-45 Connecting an external antenna (single antenna) Issue 02 (2015-04-10) Huawei Proprietary and Confidential Copyright © Huawei Technologies Co., Ltd.
EG860 User Guide 4 Installation Figure 4-46 Connecting an external antenna (double antennas) NOTE l The ground device of central conductor needs to be fixed on the pole or other fixed blocks to avoid any unexpected swing. Also, waterproofing must be done at the connector of the device and RF cables. l For details about how to install an external antenna, see the Antenna Installation Guide. ----End 4.4 Checking Installation Check hardware and power-on status of an EG860 after installation.
EG860 User Guide 4 Installation Table 4-2 Checklist for hardware installation No. Check Item 1 The equipment position conforms to the engineering drawing and meets the space requirement. Sufficient space is reserved for equipment maintenance. 2 A SIM card is properly inserted. 3 The EG860 is properly mounted on a mental pole. The bracket is secure. 4 The EG860 is fixedly mounted on a wall.
EG860 User Guide 4 Installation No. Check Item 8 Unused PG connectors are tightened and the protective covers of SMA connectors are sealed. Step 2 Perform a power-on check by referring to Figure 4-47. Figure 4-47 EG860 power-on check procedure ----End Issue 02 (2015-04-10) Huawei Proprietary and Confidential Copyright © Huawei Technologies Co., Ltd.
EG860 User Guide 5 Configuration 5 Configuration About This Chapter Data configuration for EG860 can be performed by using WebUI or by auto-configuration. 5.1 Onsite Configuration (WebUI) This section describes how to configure an EG860 through a web-based management interface. 5.2 Remote Configuration (Auto-configuration) EG860 supports the auto-configuration function. Auto-configuration deployment operations can be performed to EG860 on the NMS system.
EG860 User Guide 5 Configuration 5.1 Onsite Configuration (WebUI) This section describes how to configure an EG860 through a web-based management interface. 5.1.1 Log in to the WebUI This section describes how to connect to EG860 by using the Web management interface. Prerequisites l An EG860 has been properly mounted. l After being powered on, the EG860 operates normally based on default configuration parameters. l EG860 has been registered to the core network. l Internet Explorer 8.
EG860 User Guide 5 Configuration To modify the SIM configuration parameter and PLMN configuration parameter, choose System > SIM configuration. The modification can be performed on the SIM configuration page. After the modification, restart the device to validate the new data. 5.1.3 Configuring Transmission Data This section describes how to configure transmission data for EG860 in typical service scenarios. Context EG860 provides the following three transmission modes for configuration.
EG860 User Guide 5 Configuration Table 5-1 Transmission modes and relevant NEs and devices Transmission Mode Relevant NE and Device Routing Behind MS l EG860 l Core network device l Router (configured only when the 2U core network device is used and interworking between different EG860 is required) l Video server (configured when multiple network adapters are configured) l LAN host (configured when multiple network adapters are configured) NAT l EG860 l Core network device l Video server (configured
EG860 User Guide 5 Configuration Figure 5-1 Typical application scenarios of EG860 Table 5-2 to Table 5-5 list the data plans for different transmission modes. Table 5-2 Data plan for the Routing Behind MS transmission mode (take the attached sensor network gateway as an example) Parameter Example IP address of the attached device of EG860 192.168.22.2 IP address of the LAN port on the EG860 192.168.22.1 IP address allocated by the core network to the WAN port on the EG860 122.22.24.
EG860 User Guide 5 Configuration Table 5-4 Data plan for the GRE transmission mode (take the attached PC as an example) NOTE EG860 supports both GRE single-tunnel transmission mode and GRE dual-tunnel transmission mode. The following table takes the GRE dual-tunnel transmission mode as an example. Parameter Example IP address of the attached PC of EG860 192.168.43.2 IP address of the LAN port on the EG860 192.168.43.1 IP address allocated by the core network to the WAN port on the EG860 122.22.22.
EG860 User Guide 5 Configuration l 1. Choose General Settings > Internet Settings. The Internet Settings page is displayed. 2. In the Internet Settings page, set Routing Behind MS to Enable. The Enable Routing Behind MS needs disenabling the natport function or clear the natport and the Internet will be reconnectted, continue or no? dialog box is displayed. Click OK. 3. Optional: In the Internet Settings page, set Quick Forward to Enable. 4. In the Internet Settings page, click Submit.
EG860 User Guide 5 Configuration l Parameter Example 1 Example 2 Example 3 Description Local Host 192.168.2.2 192.168.2.2 192.168.2.2 IP address of the camera Local Port – 80 – The port number of local host Status Enable Enable Enable Status of port mapping GRE 1. Choose General Settings > Internet Settings. The Internet Settings page is displayed. 2. In the Internet Settings page, configure data for Tunnel. Tunnel1 is a tunnel for downlink data.
EG860 User Guide 5 Configuration Table 5-8 Examples for static route configuration l Parameter Parameter Value Description Destination IP 155.1.1.111 IP address of the video server Subnet Mask 255.255.255.255 The subnet mask 255.255.255.255 indicates that the destination of routes is only one host. Gateway IP 43.0.1.2 IP address of tunnel 2 on the EG860 side L2TP 1. Choose General Settings > L2TP Settings. The L2TP interface is displayed. 2.
EG860 User Guide 5 Configuration 5.1.4 Configuring Dedicates Bearers This section describes how to configure dedicated bearers. To ensure the service performance, configure dedicated bearers based on specific service and planning. For data configuration on the EG860 side, see 7.2.9 Dedicated Context. For data configuration on the side of other NEs, see the QoS Feature Manual. 5.2 Remote Configuration (Auto-configuration) EG860 supports the auto-configuration function.
EG860 User Guide 5 Configuration Figure 5-2 Flowchart for Auto-configurable Commissioning Table 5-10 Description of the Auto-configurable Commissioning Steps Issue 02 (2015-04-10) No. Steps Description 1 Prepare auto-configurable commissioning data – 2 Fill in TerminalConfData.xls Obtain complete directory of configuration file from the EG860 software package, which contains the TerminalConfData.xls sheet and other files. Fill TerminalConfData.xls based on the actual service scenario.
EG860 User Guide 5 Configuration No. Steps Description 3 Generate terminal configuration file Use eOMC910's Auto ConfigData Building tool to generate a terminal configuration file. See Addendum of eOMC910 Terminal Management Client User Guide in eOMC910 Product Documentation for details.
EG860 User Guide 6 Maintenance 6 Maintenance About This Chapter This chapter describes how to maintain an EG860. 6.1 Preparations for Site Maintenance Before maintaining an EG860, familiarize yourself with the site information, choose a maintenance task, and arrange tools and spare parts. 6.2 Powering on/off an EG860 Perform the following operations to power on or power off an EG860. Issue 02 (2015-04-10) Huawei Proprietary and Confidential Copyright © Huawei Technologies Co., Ltd.
EG860 User Guide 6 Maintenance 6.1 Preparations for Site Maintenance Before maintaining an EG860, familiarize yourself with the site information, choose a maintenance task, and arrange tools and spare parts.
EG860 User Guide 6 Maintenance 2. Check the status of the PWR indicator on the front panel. Table 6-1 provides the status explanation for the PWR indicator. Table 6-1 Status explanation for the PWR indicator Status Description On The power supply is functional. Off The power supply is abnormal. Troubleshoot as follows: l Verify that the power cable is properly connected. l Remove and connect the power cable, and then switch on the power supply.
EG860 User Guide 7 Reference 7 Reference About This Chapter This chapter describes how to use the Web network management system (NMS). 7.1 Status This section describes how to check Internet, local area network (LAN), and wireless local area network (WLAN) status through the Status menu on the Web NMS. 7.
EG860 User Guide 7 Reference 7.1 Status This section describes how to check Internet, local area network (LAN), and wireless local area network (WLAN) status through the Status menu on the Web NMS. 7.1.1 Internet This page presents Internet connection status and traffic statistics. Background Information For the precise data about traffic statistics and online duration, contact related carriers.
EG860 User Guide 7 Reference l LAN1: display LAN port status. Statistics In Statistics, view the following information: l Received: displays the number of received packets. l Sent: displays the number of sent packets. l Total Volume: displays the total number of received or sent bytes. l Packets: displays the total number of received and sent packets. l Errors: displays the number of error packets. l Discarded: displays the number of discarded packets.
EG860 User Guide 7 Reference 7.2 General Settings The Web NMS offers the General Settings menu to configure the subscriber identity module (SIM), Internet, Dynamic Host Configuration Protocol (DHCP), and wireless local area network (WLAN). 7.2.1 SIM Card Settings The personal identification number (PIN) of a subscriber identity module (SIM) card can be properly configured to prevent unauthorized access to a router.
EG860 User Guide 7 Reference l When Connection mode is Always on, modify parameters on the page and click Submit, the number will be redialed. l When Connection mode is Manual, modify parameters on the page and click Submit, and click Connect after the configuration takes effect. Procedure Step 1 Choose General Settings > Internet Settings. The Internet Settings page is displayed. Step 2 Configure the parameters in Data Connect. If Data Connect is Connected, the Internet is accessible. 1.
EG860 User Guide 7 Reference l If the APN in use does not match the operator, Internet services will be unavailable. l The APN in use cannot be deleted. l The default APN cannot be edited or deleted. Step 4 Click Edit APN Profile and configure APN, Dialed Number, User Name, and Password. Step 5 Click Submit. ----End 7.2.3 DHCP Settings A Dynamic Host Configuration Protocol (DHCP) server manages all the equipment and assigns IP addresses to them within a LAN or WLAN.
EG860 User Guide 7 Reference 7.2.4 WLAN Settings Wi-Fi equipment can connect to the Internet within the range of a WLAN. Context When WLAN parameters are modified, the Wi-Fi equipment needs to restart and the WLAN will be disconnected for about 30s. Procedure Step 1 Choose General Settings > WLAN Settings. The WLAN Settings page is displayed. Step 2 Configure the parameters in General Settings. The parameters in General Settings are basic control parameters for WLAN ports.
EG860 User Guide 7 Reference Context If WLAN Multi-SSID parameters are modified, Wi-Fi equipment needs to restart. The WLAN will be disconnected for about 30s. Procedure Step 1 Choose General Settings > WLAN Multi-SSID. The WLAN Multi-SSID page is displayed. Step 2 Configure the parameters in SSID List. When several WLAN ports are activated, corresponding channels can be provided for Wi-Fi access.
EG860 User Guide 7 Reference Step 3 Click Set Up List and configure WLAN MAC List. Access restrictions for Wi-Fi devices are based on MAC addresses. If the MAC address of WiFi equipment is changed, the previous filter rules become invalid. The related parameters are as follows: l Configure MAC as required. l If For SSIDn is Enable, the MAC filter rules are valid for SSID. Step 4 Click Submit. ----End 7.2.7 Internet MTU Set the maximum transmission unit (MTU) on an Internet port in Internet MTU.
EG860 User Guide 7 Reference 7.2.9 Dedicated Context This page describes how to configure a dedicated channel. Procedure Step 1 Choose General Settings > Dedicated Context. The Dedicated Context page is displayed. Step 2 Click Add to configure parameters in Dedicated Context. The related parameters are as follows: l CID: indicates the channel identifier. l QCI: indicates the QoS class identifier as shown in Table 7-1.
EG860 User Guide 7 Reference l IP address: indicates the IPv4 address. Packets can be transmitted this IP address by using dedicated bearers. l MASK: indicates the subnet mask. l Packet Filter Id: indicates the identifier of packet filter. l Precedence: indicates the priority of the relative packet filter. l Protocol Id: ranges from 0 to 255 and is configured as required. l Local port and Remote port: range from 0 to 65535 and are configured as required. l CID: indicates the channel identifier.
EG860 User Guide 7 Reference Step 3 Set IGMP mode to Dynamic IGMP or Static IGMP. NOTE Configure the multicast source and multicast group if IGMP mode is set to Static IGMP. Step 4 Set Query interval time to a value within the range from 10 to 256, the unit is second. Step 5 Click Submit. ----End 7.2.11 L2TP Settings This section describes how to set related parameters of the L2TP transmission mode on the L2TP Settings interface. Context l L2TP implements Layer 2 VPN.
EG860 User Guide 7 Reference NOTE The FTP port needs to be enabled when using V100R200C00 eOMC910 to manage V200R003C00 EG860 for configuration delivery, log import/export, and upgrading. Step 3 Click Submit. ----End 7.2.13 Security access Settings This section describes how to enable or disable the two-way authentication with eOMC910 on the Security access Settings interface. Procedure Step 1 Choose General Settings > Security access Settings. The Security access Settings interface is displayed.
EG860 User Guide 7 Reference Procedure Step 1 Choose Security Settings > Firewall General. The Firewall General page is displayed. Step 2 Configure the parameters in Firewall Level. The related parameters are as follows: l Current firewall level: indicates the validity level of the firewall. To configure validity rules, set the current firewall level to Custom. l Firewall level: can be set to existing levels or customized. Step 3 Click Submit. ----End 7.3.
EG860 User Guide 7 Reference Index MAC 4 44:19:B7:11:0A:9C 5 5C:F3:FC:2D:27:9F 6 D4:6E:5C:70:8F:66 NOTE l 00:1E:10:1F:04:05 is the MAC address allocated by the core network to the WAN port on theEG860 l 00:E0:4C:98:58:98 is the MAC address of PC for EG860 local maintenance l D4:BE:D9:AF:F3:80 is the service MAC address of the eOMC910 l 44:19:B7:11:0A:9C is the MAC address of the attached camera of EG860 l 5C:F3:FC:2D:27:9F is the MAC address of the Dispatcher l D4:6E:5C:70:8F:66 is the MAC address
EG860 User Guide 7 Reference Index Application name Source Address Range Destination Address Range 2 Custom 122.22.22.71 191.162.1.3 3 Custom 191.162.1.3 122.22.22.71 4 Custom 192.168.71.1 184.1.5.10 5 Custom 184.1.5.10 192.168.71.1 NOTE l 192.168.71.5 is the IP address of PC for EG860 local maintenance l 192.168.71.1 is the IP address of the attached camera of EG860 l 192.168.71.10 is the IP address for logging into the EG860 WebUI l 122.22.22.
EG860 User Guide 7 Reference Step 3 Click Submit. ----End 7.5 QoS Management This section describes how to set QoS parameters on the QoS Management page. Context EG860 supports QoS on multiple concurrent services to guarantee CPU resources for highpriority services. EG860 supports traffic filtering based on the source/destination IP addresses, source/destination port IDs, DSCP, and protocol types, to perform QoS on specified services. QoS configurations are valid only for egress queues.
EG860 User Guide 7 Reference l Rule priority: The value range is 1-32. Rule priority must be unique for each rule. l Protocol number: specifies the protocol used by a rule. Common protocol numbers include 1 (ICMP), 2 (IGMP), 6 (TCP), 17 (UDP), and 47 (GRE). If a rule is used to match a GRE tunnel, the protocol number is 47, and the matching port is invalid. l DSCP: specifies that a rule is matched using the DSCP. The value range is 0-63.
EG860 User Guide 7 Reference If Manual encryption algorithm is des-cbc, Manual encryption key must contain 8 characters. – IPsec mode: includes Transmission and Tunnel. – Data source: required if IPsec mode is Tunnel. – Subnet mask of data source: required if IPsec mode is Tunnel. – Data destination: required if IPsec mode is Tunnel. – Subnet mask of data destination: required if IPsec mode is Tunnel.
EG860 User Guide 7 Reference – Authentication mode: includes Pre-shared key and Certificate modes. If Authentication mode is Certificate, the common certificate, private certificate, and peer common certificate must be uploaded. – Pre-shared key: required if Authentication mode is Pre-shared key, and contains 1 to 32 characters. Step 3 Click Submit. ----End 7.7 System The Web NMS offer the System menu to view and configure parameters such as Device Information, Reset, Backup & Recovery, and Upgrade. 7.
EG860 User Guide 7 Reference Context A router will restart after configuration files are recovered. Do not switch off the power supply during the recovery. Procedure Step 1 Choose System > Backup & Recovery. The Backup & Recovery page is displayed. Step 2 Optional: To download configuration files, click Backup. Step 3 Optional: When the router is faulty, recover the configuration files as follows: 1. Click Browse to upload the configuration files. 2. Click Recover to recover the configuration files.
EG860 User Guide 7 Reference l Keep your password secure. Procedure Step 1 Choose System > Password Change. The Password Change page is displayed. Step 2 Change the password in Password Change. NOTICE The password of the acs user must be changed on both the eOMC910 and the Web management interface. Step 3 Click Submit. ----End 7.7.6 Password Complexity This section describes how to query and set the password complexity on the Password Complexity interface.
EG860 User Guide 7 Reference 7.7.7 Password security Settings This section describes how to set password security policies on the Password security Settings interface. Procedure Step 1 Choose System > Password security Settings. The Password security Settings interface is displayed. Step 2 Set password security policies on the Password security Settings interface. The related parameters are as follows: l Login Fail count: indicates the maximum login attempts to the WebUI. Value range: 1-10.
EG860 User Guide 7 Reference Procedure Step 1 Choose System > Diagnosis. The Diagnosis page is displayed. Step 2 Configure Method as required. l If Method is set to Ping, you can ping Destination IP address or domain to help diagnose network faults. The related parameters are as follows: – Destination IP address or domain: indicates the destination IP address or domain name. – Packet size: indicates the number of transmitted bytes and ranges from 1 bytes to 9,000 bytes.
EG860 User Guide 7 Reference 7.7.10 Log User operations and equipment abnormalities are recorded in logs. Procedure Step 1 Choose System > Log. The Log page is displayed. Step 2 Export logs. 1. Set Log level. The following options are provided to help troubleshoot: l Information: records information of the system, including login information, upgrade information, and reset information. l Warning: indicates problems that may affect operating of the system.
EG860 User Guide 7 Reference Step 3 Set WAN Antenna. Set Antenna status based on the actual product. The EM350-D61 data card supports only Outer Antenna. The EM350-C71 data card supports Outer Antenna, Inner Antenna, and Outer Antenna Prefer. Step 4 Set WIFI antenna. MIMO is used in 802.11n mode, so set Antenna status to Double WIFI antenna. Step 5 Optional: Set Wan auto reset. This parameter is valid only if General Settings > Internet Settings > Connection mode is set to auto. Step 6 Click Submit.
EG860 User Guide 7 Reference Step 4 Click Submit. ----End 7.7.14 SIM Configuration This section describes how to modify virtual SIM card and PLMN configurations on the SIM configuration page. Context l After modifying SIM configurations and PLMN configurations, power off and restart Modem to validate the modification. l You can change the SIM card number in SIM configuration. After PLMN configurable parameter is configured, the SIM card number is generated automatically.
EG860 User Guide 7 Reference Alarm Name Alarm ID Alarm Type Alarm Severity the Alarm Configuration of High Temperature 50002 Environment alarm Major the Alarm Configuration of RadioSignal Weak 50003 Quality of Service (QoS) alarm Major Procedure Step 1 Choose System > Alarm Configuration. The Alarm Configuration page is displayed. Step 2 Configure the Alarm Configuration of Lan state, the Alarm Configuration of High Temperature, and the Alarm Configuration of RadioSignal Weak.
EG860 User Guide 7 Reference l In the Alarm Configuration of RadioSignal Weak, the value range of AlarmReportTh and AlarmResumeTh are -150 dBm~-50 dBm, set AlarmReportTh and AlarmResumeTh with a difference of more than 5 dB. Step 3 Click Submit. ----End 7.8 Logout The login user interface is displayed upon a logout of the Web NMS. Procedure Step 1 Click Logout. Step 2 In the displayed Are you sure you want to log out dialog box, click OK.
EG860 User Guide 8 Alarm Reference 8 Alarm Reference About This Chapter This chapter describes possible alarms related to EG860, and how to handle them. 8.1 ALM-50001 Lan state This alarm is reported when the LAN port of an EG860 is faulty and the link between the EG860 and the device connected to it is unavailable. 8.2 ALM-50002 High Temperature This alarm is reported when the temperature of an EG860 exceeds a preset threshold. 8.
EG860 User Guide 8 Alarm Reference 8.1 ALM-50001 Lan state This alarm is reported when the LAN port of an EG860 is faulty and the link between the EG860 and the device connected to it is unavailable. Attribute Alarm ID Alarm Severity Alarm Type 50001 Critical Fault Parameters None Impact on the System Alarm Severity Alarm Impact Critical The link between the EG860 and the device (such as a PC or a camera) connected to it is unavailable, and the device fails to connect to the network.
EG860 User Guide 8 Alarm Reference Related Information None 8.2 ALM-50002 High Temperature This alarm is reported when the temperature of an EG860 exceeds a preset threshold. Attribute Alarm ID Alarm Severity Alarm Type 50002 Major Fault Parameters None Impact on the System Alarm Severity Alarm Impact Major Hardware may be damaged, and the EG860 fails to work properly, and services may be interrupted.
EG860 User Guide 8 Alarm Reference Related Information None 8.3 ALM 50003-RadioSignal Weak This alarm is reported when the signals received by an EG860 are weak. Attribute Alarm ID Alarm Severity Alarm Type 50003 Major Fault Parameters None Impact on the System Alarm Severity Alarm Impact Major Air interface signals received by the EG860 are weak and services may be affected.
EG860 User Guide 8 Alarm Reference Related Information None Issue 02 (2015-04-10) Huawei Proprietary and Confidential Copyright © Huawei Technologies Co., Ltd.
EG860 User Guide 9 Glossary 9 Glossary This table provides the related glossary for reference.
EG860 User Guide Issue 02 (2015-04-10) 9 Glossary Glossary Full Name IPv4 Internet Protocol version 4 L2TP Layer Two Tunneling Protocol LAN Local Area Network LTE Long Term Evolution MAC Media Access Control MIMO Multiple Input Multiple Output MP3 MPEG audio layer-3 MPLS Multiprotocol Label Switching MS Mobile Station MSTP Multi-Service Transmission Platform MTU Max Transmission Unit NMS Network Management System OTA Over the Air PC Personal Computer PCB Printed Circuit Boa
EG860 User Guide Issue 02 (2015-04-10) 9 Glossary Glossary Full Name SELV Safety Extra-low Voltage SFTP Secure File Transfer Protocol SIM Subscriber Identity Module SMA Sub-Miniature-A Connector SSID Service Set Identifier TCP Transmission Control Protocol TFT Thin Film Transistor TMO Trunking Mode Operation TMSI Temporary Mobile Subscriber Identity TNV Telecommunication Network Voltage USB Universal Serial Bus VPN Virtual Private Network WAN Wide Area Network WebUI Web User