User Guide
Contents Essentials Basic Gestures System Navigation Phone Clone Lock and Unlock Your Screen Get Familiar with the Home Screen Notification and Status Icons Control Panel Quickly Access Frequently Used App Features Home Screen Widgets Set Your Wallpaper Screenshots & Screen Recording View and Clear Notifications Adjust Sound Settings multi-window Show Date and Time When the Screen Is Off Power On and Off or Restart Your Device Charging 1 4 5 6 7 8 9 14 15 15 16 20 21 23 25 27 27 Smart Features AI Voice AI
Contents Documents Mode High-Res Mode Pro Mode Record Videos Slow-Mo Recording Time-Lapse Photography Story Creator Filters Adjust Camera Settings Manage Gallery Smart Photo Categorization People Album Videos Highlights 63 64 64 68 69 70 71 72 72 74 81 81 82 Apps Contacts Phone Messaging MeeTime Calendar Clock Notepad Recorder Email Calculator Flashlight Compass App Twin Optimizer Phone Clone 84 87 93 95 97 98 99 103 104 108 108 109 109 109 113 Search for Items in Settings Wi-Fi Mobile Network More Con
Contents Security Privacy Accessibility Features Users & Accounts System & Updates About Phone 140 143 146 148 149 153 iii
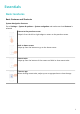
Essentials Basic Gestures Basic Gestures and Shortcuts System Navigation Gestures Go to Settings > System & updates > System navigation and make sure that Gestures is selected. Return to the previous screen Swipe in from the left or right edges to return to the previous screen. Back to home screen Swipe up from the bottom to go to the home screen. Recent tasks Swipe up from the bottom of the screen and hold to view recent tasks.
Essentials Switch between apps • Slide across the bottom edge of the screen to switch between apps. Before using this gesture, touch Settings on the System navigation screen, and ensure that Slide across bottom to switch apps is enabled. • Swipe across the bottom of the screen in an arc to switch between apps. If your device does not have the Slide across bottom to switch apps switch, it indicates that the corresponding feature is not supported.
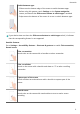
Essentials More Gestures Access Home screen editing mode Pinch two fingers together on the home screen. Display the shortcut panel on the lock screen Turn on the screen and swipe up from the bottom of the lock screen. Display the search bar Swipe down from the middle of the home screen. Display the notification panel Swipe down from the upper left edge of the screen.
Essentials Turn down volume Press the Volume down button. Take a screenshot Press the Volume down and Power buttons simultaneously. Some products do not have volume buttons. System Navigation Change the System Navigation Mode Navigate with Gestures Go to Settings > System & updates > System navigation and select Gestures. You can then: • Go back to the previous screen: Swipe inward from the left or right edge. • Return to the home screen: Swipe up from the bottom of the screen.
Essentials • Touch to access the recent tasks screen. You can touch Settings to configure more settings. • Select a navigation key combination. • Enable Hide navigation keys to allow you to hide the navigation bar when not in use. • Touch (if available in the selected navigation key combination) to open the notification panel.
Essentials 2 Follow the onscreen instructions to download and install Phone Clone on your old device. 3 On the old device, open the Phone Clone app, touch This is the old device, and follow the onscreen instructions to connect the old device with your new device by scanning a code or connecting manually. 4 On your old device, select the data you want to clone, then follow the onscreen instructions to complete the data cloning.
Essentials Use Fingerprint Unlock Once the screen is turned on, the fingerprint icon will display on the screen. Touch the icon with an enrolled finger to unlock the screen. Change the Lock Screen Display When using an official theme, you can customize the content displayed on the lock screen. Display Your Signature on the Lock Screen Go to Settings > Home screen & wallpaper, touch Lock screen signature, then type text to display on the lock screen.
Essentials • Open apps: In a large folder, touch an icon to access the app directly. • Enter and exit folders: Touch the lower right corner of a large folder to enter it. Touch a blank area in the folder to exit it. When there are more than nine apps within a large folder, a stacked icon will appear in the lower right corner of the folder. You can touch the stacked icon to view more apps within the folder. • Add or remove apps: Open a large folder and touch .
Essentials Charging Quick charging Super charging Wireless super charging Fast charging Regular wireless charging Power Saving mode on Digital Balance enabled Bluetooth enabled Bluetooth device battery Bluetooth device connected VPN connected Driving mode Projection device connected Location service enabled Eye Comfort enabled Connected Headset with a microphone connected In call VoLTE enabled Missed call There are unread messages.
Essentials The figures are for reference only. • Media controls: To control media playback and switch between recently used media apps and media devices (such as Visions and Bluetooth headsets). • Shortcut controls: To enable, disable, or set frequently used features. • Device+: Automatically discovers nearby devices logged in to the same HUAWEI ID and allows you to link them so they work together as one.
Essentials The figures are for reference only. • Touch a shortcut switch to enable or disable the corresponding feature. • Touch and hold a shortcut switch to access the settings screen of the corresponding feature (supported by some features). • Touch to access the system settings screen.
Essentials Manage Audio Playback in Audio Control Panel When multiple audio apps (such as Music) are opened, you can manage music playback and switch between these apps in Audio Control Panel with ease. 1 After opening multiple audio apps, swipe down from the upper right edge of the phone to display Control Panel, then touch the audio playback card at the top of Control Panel.
Essentials • Computer: Enable Bluetooth and Wi-Fi, and ensure that it is logged in to the same HUAWEI ID as your phone and can access the Internet. • Vision: Ensure that it is connected to the same LAN and logged in to the same HUAWEI ID as your phone. • Bluetooth device: Some Bluetooth devices (such as Bluetooth headsets) can be linked with your phone via Device+ after establishing a Bluetooth connection. • Certain device models do not support collaborating with smart speakers.
Essentials The figures are for reference only. Use Multi-Screen Collaboration on a Computer or Tablet You can view or edit files on your phone using your computer or tablet, drag files across devices, and even use phone apps on your computer or tablet. 1 Swipe down from the upper right edge of your phone to display Control Panel. Available devices will be displayed in the Device+ section. You can also touch nearby devices manually.
Essentials Quickly Access Frequently Used App Features Touch and hold an app icon until a pop-up menu is displayed, then touch a frequently used feature to access it. For example, touch and hold the Camera icon, then touch a shooting mode, such as Selfie or Video, from the pop-up menu to access it. If no pop-up menu is displayed after you touch and hold an app icon, it indicates that the app does not support this feature.
Essentials Use a Preset Wallpaper 1 Go to Settings > Home screen & wallpaper > Wallpaper. 2 Touch an image you want to set as the wallpaper. 3 Apply effects on the image as prompted, such as Blur. 4 Touch APPLY and choose whether to set it as Lock screen, Home screen, or Both. Set an Image from Gallery as Your Wallpaper 1 Open Gallery, and open the image you want to set as your wallpaper. 2 Go to > Set as > Wallpapers, then follow the onscreen instructions.
Essentials The figures are for reference only. After you take a screenshot, a thumbnail will be displayed in the lower left corner of the screen. You can then: • Swipe down on the thumbnail to take a scrolling screenshot. • Swipe up on the thumbnail to select a way to share the screenshot with your friends. • Touch the thumbnail to edit or delete it. You can also touch Scrollshot to take a scrolling screenshot. Screenshots are saved to Gallery by default.
Essentials The figures are for reference only. 1 Knock on the screen with a knuckle and hold to draw an outline around the part of the screen that you want to capture. Make sure that your knuckle does not leave the screen. 2 The screen will display the movement trajectory of your knuckle and take a screenshot of the selected area. You can then: • Drag the frame to the desired position or resize it. • Touch any of the shape options at the bottom of the screen to change the shape of the captured area.
Essentials Take a Scrolling Screenshot You can use Scrollshot to capture a memorable chat, article, or essential work document that cannot be displayed in full on the screen. Use Your Knuckle to Take a Scrolling Screenshot The figures are for reference only. 1 Tap a knuckle against the screen and hold to draw an "S". Your device will automatically scroll to the bottom of the page to capture all of the content in a single screenshot. 2 You can touch the screen at any time to stop the scrolling.
Essentials • If there is a screen protector on the screen, knock the screen harder or remove the screen protector and try again. Record the Screen Record your screen activities in sharable videos to compose a tutorial, show off your awesome gaming skills, and a lot more. Use a Key Combination to Start Screen Recording Press and hold the Power and Volume up buttons simultaneously to start screen recording. To stop recording, press and hold both buttons again.
Essentials Clear Notifications • You can remove a notification by swiping right on it. • You can touch at the bottom of the notification panel to clear all notifications. Some system notifications and notifications from apps running in the foreground cannot be cleared. Do Not Disturb Settings for Notifications If you wish not to be disturbed by a notification, swipe left on it, touch , and choose from options including Disable notifications, Use gentle notifications, and DELAY.
Essentials • Set a vibration pattern. Touch Vibration and select a vibration pattern as you prefer. When Synchronized (default) is selected, your phone will vibrate according to the rhythm of the tone. For other options, the vibration pattern of your phone is fixed. Use a Shortcut to Switch Between Sound, Vibration, and Silent Modes 1 Swipe down from the upper right edge of the screen to display Control Panel and touch to expand the shortcut switches panel (depending on your device model).
Essentials Use either of the following methods to enable this feature (depending on your device model): • Go to Settings > Accessibility features > Shortcuts & gestures > Mute ringtone/Reduce volume and make sure that Raise to reduce volume is enabled. • Go to Settings > Accessibility features > Motion control > Raise and ensure that Reduce call ringing volume and Reduce timer and alarm volume are enabled.
Essentials Drag and Drop Between Apps with Multi-Window Use the Multi-Window feature to easily drag and drop images, text, and documents between apps. • Drag and drop an image: When taking notes with Notepad, open Files, select the photo you want to add, and drag it into the Notepad editor. • Drag and drop text: When sending an SMS message, open Notepad, touch and hold the text you want to send, and drag it into the message text input box.
Essentials Drag the bottom edge, two sides, or bottom corners of the floating window to resize it. Display in full screen: Touch at the top of the floating window to display it in full screen. Minimize the floating window: Touch at the top of the floating window to minimize and shrink it into a floating bubble. Close the floating window: Touch at the top of the floating window to close it.
Essentials Always On Display With Always On Display enabled, the lock screen will show the date, time, and more when the screen is off. Enable Always On Display 1 Go to Settings > Home screen & wallpaper > Always On Display, and enable Always On Display. 2 Set Display mode as prompted. Set the Style for Always On Display You can customize the display style for Always On Display (AOD) on your phone according to your preferences.
Essentials Touch colors. 3 , take a photo or select a photo from Gallery, and then go to > Extract Touch Apply. Clock Styles You can select an Analog or Digital clock style for Always On Display. 1 From under Analog or Digital on the Always On Display screen, swipe left or right to browse the clock styles and select your preferred clock style. 2 Set the related options for the selected clock style, such as Show date. 3 Touch Apply.
Essentials Precautions for Charging Charge your device using the standard charger and USB cable that came with your device. • Using other chargers may result in a fire, explosion, or other hazard. Do not use the charger in damp areas, such as in a bathroom. Do not handle the charger • with wet hands. • Do not charge your device when there is moisture in the device. • After you connect your device to a charger or other devices using a USB cable, your device will automatically inspect the USB port.
Essentials Overview of Battery Icons You can check the battery level from the battery icon on the phone screen. Battery Icon Battery Level Less than 10% battery remaining. Charging, less than 10% battery remaining. Charging, 10% to 90% battery remaining. Charging, at least 90% battery remaining. If 100% is displayed next to the battery icon, or a charging complete message is displayed on the lock screen, the battery is fully charged.
Smart Features AI Voice AI Voice AI Voice allows you to communicate verbally with your phone. To operate hands-free on your phone, wake up AI Voice and give a voice command. • This feature is only available in some countries and regions. • Please make sure your device has been updated to the latest system version. Countries and Regions that Support AI Voice AI Voice is only supported in certain countries and regions.
Smart Features • The settings items vary by device. If your phone does not provide a specific item, it indicates that the corresponding feature is not supported. • You cannot wake up AI Voice with the wakeup phrase when your phone is in a call. • You cannot wake up AI Voice with the wakeup phrase either if you are making an audio or screen recording (with microphone enabled). In this case, you can press and hold the Power button to wake up AI Voice.
Smart Features Send SMS Messages with Voice Commands You can send SMS messages with AI Voice. Wake up AI Voice and give voice commands such as "Send a message", "Check messages", or "Send Dad a message saying the party is tomorrow". Set Alarms with Voice Commands You can create, disable, and query alarms with AI Voice. Wake up AI Voice and give voice commands such as "Wake me up at 8 AM tomorrow", "Set an alarm for 8 PM", "Set a Wednesday alarm for 7 AM", or "Show my alarms".
Smart Features Open an App with Voice Commands Wake up AI Voice and give voice commands such as "Open the Camera", "Open YouTube", "Open PayPal", or "Open HUAWEI Music". • This feature is only available in some countries and regions. • Not all apps support voice control.
Smart Features Set Calendar Events and Reminders with Voice Commands AI Voice allows you to create and check your Calendar events and add reminders for these events. Wake up AI Voice and give voice commands such as "Schedule a meeting for 9 tomorrow morning", "Set a meeting for 2 o'clock tomorrow afternoon", "What's my schedule for tomorrow morning?", or "Do I have any appointments on Monday?". • This feature is only available in some countries and regions.
Smart Features Scan to Learn More with AI Voice 1 Wake up AI Voice and ask questions or give voice commands such as "Help me see what this flower is" or "Please have a look what is this building". 2 Position the object within the viewfinder and wait for it to be identified. 3 Touch the information card to obtain additional information.
Smart Features Open Camera, select Photo mode, and touch to access AI Lens. From the Lock Screen When the screen is locked, turn it on, swipe up from the bottom to open the shortcuts panel, and touch to unlock the screen and access AI Lens. Scan to Shop When you see an item you wish to buy in a magazine or when you are strolling on the street, you can use AI Lens to quickly search for the item and compare prices across multiple shopping platforms before making a purchase.
Smart Features Scan and Count Calories AI Lens allows you to count the calories and nutrients in an item of food by scanning it with your camera. Scan and Count Calories with Camera 1 Go to Camera > Photo, touch 2 Position the food within the viewfinder and wait for information about the calories and nutrients per 100 g to be displayed. , and then touch . The information is for reference only.
Smart Features Easy Projection Project Your Phone Screen Wirelessly Project your phone wirelessly to stream movies and work on a bigger screen (such as a TV). Different display devices support different projection protocols. Therefore, the projection method may vary. Choose a suitable method based on the protocol supported by your device. For details about the supported projection protocols, refer to the product manual or contact the product manufacturer.
Smart Features Therefore, you can edit a document on the large display while chatting on your phone. You don't need to worry about missing out on notifications, calls, or messages, as a red dot will appear on the notification panel on the external display to let you know. Use Your Phone as a Touchpad After projecting your phone on the large display in Desktop mode, if no keyboard is available, your phone can work as a touchpad to complete input operations of a mouse and keyboard. Go to • > Touchpad.
Smart Features • Quick app projection: Touch and hold an app icon on your phone to view the projection options. You can then project and open the app on the large display. Exit Desktop Mode To exit Desktop mode, go to > Projection mode and select Phone.
Smart Features Connect Your Phone to the PC by Scanning the QR Code 1 Open PC Manager (version 10.0 or later) on your PC, go to My devices > Phone > Connect, and select the QR code option in the upper left corner. To check the version of PC Manager, go to > About. To update PC Manager, go to > Check for updates. 2 Ensure that your phone is connected to the Internet and use it to scan the QR code displayed on the PC. 3 Follow the onscreen instructions to connect your phone and PC.
Smart Features • In the device window on the PC, open Gallery or Files, click and hold a picture or video, click and hold any of the selected files until a dragging icon is displayed, then drag the files to a folder on your PC. • In the device window on the PC, drag the selected pictures or text and drop them in an opened document on your PC. For example, drag a photo or text from Notepad in the device window and drop it to an Office document opened on your PC, then continue editing on your PC.
Smart Features 1 Shake your device and immediately place the NFC area (near the rear camera) on the or label on your PC until your device vibrates or back of the device against the plays a tone. Your PC screen will then be projected and recorded on your device. 2 Touch on your device to stop the screen recording, which will be saved to Gallery on your device. • This feature is currently supported on Intel laptops only. • Ensure that PC Manager is running version 9.1 or later.
Smart Features The figures are for reference only. • Access the lock screen in the virtual window of your phone on your computer, and unlock the screen with a preset PIN, pattern, or password using the keyboard or touchpad of your computer. • To access a locked app on your phone, touch the app in the virtual window of your phone on your computer, and unlock the app with a preset PIN, pattern, or password using the keyboard or touchpad of your computer.
Smart Features • Input text: Use the input method on your PC to enter text in the phone window. • Copy and paste text: Press Ctrl+C on the PC keyboard to copy text and press Ctrl+V to paste it in the phone window. To view information about the text you have copied recently, click the Notification Center icon on the PC, then select the Clipboard tab. • Send messages quickly: Press Ctrl+Enter on the keyboard to send a message in the phone window.
Smart Features • Make sure that your laptop is running PC Manager 11.1 or a later version. In addition, go to > Settings > Connections in PC Manager to ensure that Multi-Device Files is enabled. • To check the PC Manager version, go to > About. To update PC Manager, go to > Check for updates. View files on your phone from the laptop: Use the following methods: • Open PC Manager, click Home, then go to Connect your phone > Access phone files for your phone.
Smart Features Multi-screen Collaboration Between Your Phone and Tablet Connect your phone and tablet to use Multi-screen Collaboration for cross-device operations, such as to display your phone screen on the tablet, use your phone apps on the tablet, drag files across the two devices, and edit a file from your phone on the tablet. Connect Your Phone and Tablet Only certain Huawei and Honor tablets support this feature.
Smart Features When your phone screen is unlocked, you can perform the following operations in the phone window on your tablet: • Open Phone to make a call by dialing a number. • Open Messaging to view and reply to SMS messages. • Open Gallery or Files to view photos, videos, and files, as well as to play video or audio files from your phone.
Smart Features 1 On the receiving device, enable Huawei Share. 2 On the sending device, open the app or website you want to share the content from, go to > More, touch Huawei Share, wait for the system to scan for available devices, and touch the name of the device you want to send the content to. 3 On the receiving device, touch ACCEPT to accept the transfer. The content will be opened upon completion of the transfer. • The operations may vary depending on the app you share from.
Smart Features 1 On the receiving device, enable Huawei Share. 2 On the sending device, touch and hold the file to be shared, and touch . Then touch Huawei Share, wait for the system to scan for available devices, and touch the name of the device you want to send the file to. These steps may be different if you are sharing files directly from an app. 3 On the receiving device, touch ACCEPT to accept the transfer. Then open Files to view the received file.
Smart Features 1 Make sure your phone and computer are connected to the same Wi-Fi network. 2 On your phone, access the Huawei Share settings, then enable Huawei Share and Computer share. 3 Make a note of the name displayed next to Name shown on computers as well as the user name and password under Verification on computers. 4 Perform the following operations on a Windows-based computer (desktop or laptop) or a macOS-based computer (laptop): • Windows: Go to This PC (Computer) > Network.
Smart Features 2 In the displayed dialog box on your phone, touch Accept. Ensure that PC Manager is running version 11.1 or later. Huawei Print Print Files Using Huawei Print Your phone can easily detect nearby printers that support Huawei Print and allows you to print photos and documents stored on your phone with just a touch. 1 Power on the target printer and ensure that it is connected to the same Wi-Fi network as your phone or that Wi-Fi Direct is enabled.
Smart Features • Tablet: Enable Bluetooth and Wi-Fi, and ensure that it is logged in to the same HUAWEI ID as your phone. • Computer: Enable Bluetooth and Wi-Fi, and ensure that it is logged in to the same HUAWEI ID as your phone and can access the Internet. • Vision: Ensure that it is connected to the same LAN and logged in to the same HUAWEI ID as your phone.
Smart Features The figures are for reference only. Use Multi-Screen Collaboration on a Computer or Tablet You can view or edit files on your phone using your computer or tablet, drag files across devices, and even use phone apps on your computer or tablet. 1 Swipe down from the upper right edge of your phone to display Control Panel. Available devices will be displayed in the Device+ section. You can also touch nearby devices manually.
Smart Features Manage Audio Playback in Audio Control Panel When multiple audio apps (such as Music) are opened, you can manage music playback and switch between these apps in Audio Control Panel with ease. 1 After opening multiple audio apps, swipe down from the upper right edge of the phone to display Control Panel, then touch the audio playback card at the top of Control Panel.
Camera and Gallery Launch Camera Launch Camera There are multiple ways to open the Camera app. From the Home Screen From the home screen, open Camera. From the Lock Screen When the screen is locked, turn on the screen, then swipe up on the camera icon in the lower right corner to open the camera. Using Ultra Snapshot When this feature is enabled, you can open the camera or take a snapshot when the screen is off or locked.
Camera and Gallery The figures are for reference only. 1 Open Camera. 2 You can then: • Focus: Touch the location you want to focus on. To adjust focus and metering separately, touch and hold the viewfinder and drag the respective frame or ring to the desired location. • Adjust brightness: Touch the viewfinder. When the symbol appears next to the focus frame, drag it up or down. • Zoom in or out: On the viewfinder, pinch in or out, or drag the zoom slider.
Camera and Gallery • Turn the flash on or off: Touch and select (Auto), (On), (Off), or (Always on). If you select (Auto) and the camera detects that you are in a dimly lit environment, a flash icon will appear in the viewfinder and the flash will be automatically turned on when you take a photo. These features may not be available in some camera modes. 3 Touch the shutter button to take a photo.
Camera and Gallery 2 Return to the viewfinder and touch the shutter button. Your phone will take a photo when the countdown ends. Use Audio Control to Take Photos You can use your voice to take photos without having to touch the shutter button. 1 Go to Camera > 2 Go back to the viewfinder, then say your command to take a photo. > Audio control, and select an option.
Camera and Gallery 4 Your phone will adjust the exposure time based on the ambient brightness. Keep your phone steady until the countdown finishes. You can also touch the shutter button to take a photo before the countdown finishes. Some phones do not support ending a countdown before it is due to finish. Use the Front Camera to Take Night Portraits To take a selfie at night or when there is not sufficient light around you, you can use the front camera in Night mode.
Camera and Gallery Take Professional-Looking Photos Master AI is a pre-installed camera feature that helps you take better photos by intelligently identifying objects and scenes (such as food, beaches, blue skies, and greenery, as well as text) and optimizing the color and brightness settings accordingly. Master AI is displayed as AI photography or AI camera on some devices. 1 Open Camera and select Photo mode. 2 Touch to turn on 3 Frame the subject within the viewfinder.
Camera and Gallery Take Panoramic Photos Take Panoramic Photos Add some width to your landscape or group photos with the Panorama feature. The camera takes multiple photos of objects within your field of view and stitches them together into a single panoramic photo. Use the Rear Camera to Take Panoramic Photos Panorama mode combines multiple shots into a seamless panoramic photo. Simply move the camera as you shoot and the camera will take care of the rest. 1 Go to Camera > More and select Panorama mode.
Camera and Gallery 2 Touch to shoot. Play Moving Pictures Moving pictures are saved in JPG format in Gallery. Go to Gallery > Albums > Camera, touch a moving picture, then touch at the top of the picture to view it. The moving picture will automatically stop after a complete playback. You can also touch the screen to stop the playback.
Camera and Gallery Use Documents Mode to Straighten Photos Images shot at an angle always suffer from the problem of perspective. If you aren't able to take a perfectly straight photo of a document, use Documents mode. The camera will automatically adjust skewed images shot in Documents mode and remove shadows from them. Shoot Photos in Documents Mode 1 Go to Camera > More and select Documents mode. If the Documents option is not present in More, touch , then download Documents.
Camera and Gallery Use Pro Mode to Shoot Like a Pro Pro mode lets you fine-tune photos and videos and gives you full control over ISO sensitivity, focus mode, and more when taking photos or recording videos. Use Pro Mode to Shoot Like a Pro The figures are for reference only. 1 Open Camera or go to Camera > More(depending on your device model), and select Pro mode. 2 You can then: • Adjust the metering mode: Touch M and select a metering mode.
Camera and Gallery Metering Mode Description Matrix Center natural landscapes. Concentrates on the light at the center of the screen. Applicable when shooting portraits. Concentrates on the light in a small area of the screen, such as the Spot • Measures the light in the whole frame. Applicable when shooting subject's eyes. Adjust the ISO sensitivity: Touch ISO and drag the slider. In low-light conditions, increase the ISO sensitivity.
Camera and Gallery Enable AF assist light: For better focus in low-light environments, touch • to enable AF assist light. 3 Touch the shutter button to shoot a photo. • Not all devices support these features. • Changing a specific setting will sometimes cause other settings to change as well. Adjust them according to your actual requirements. Use Pro Mode to Record Videos 1 to switch to Video mode. You can then: In Pro mode, touch • Adjust the metering mode: Touch M and select a metering mode.
Camera and Gallery When shooting in bright sunlight, select Touch 2 Touch . In dimly-lit environments, select . to adjust the color temperature. to start recording. • Not all devices support these features. • Changing a specific setting will sometimes cause other settings to change as well. Adjust them according to your actual requirements. Record Videos Record Videos 1 Open Camera and select Video mode.
Camera and Gallery Touch 4 Touch to take a photo while recording. to pause and touch to end the recording. Use AI Movie Effects to Record Videos Use AI Movie effects to add an artistic element to your videos without the need for postprocessing. 1 Open Camera and select Video mode. 2 Switch to the rear camera, touch or , and select AI color, Background blur, or other movie effects(depending on your device model).
Camera and Gallery • 128x or 64x: suitable for recording balls being hit and racing. • 32x or 16x: suitable for recording bubbles popping and water splashing. • 8x or 4x: suitable for recording breakdowns of fast movements, such as diving into water and a football being kicked. You can customize the overall shooting length and the length of the slow-mo portion. For best results, shoot the slow-mo videos in bright and natural lighting.
Camera and Gallery Use Time-Lapse to Create a Short Video You can use Time-lapse to capture images slowly over several minutes or even hours, then condense them into a short video. This allows you to capture the beauty of change – blooming flowers, drifting clouds, and more. 1 Go to Camera > More and select Time-lapse mode. 2 Place your phone in position. To reduce camera shake, use a tripod to steady your phone. 3 Touch to start recording, then touch to end the recording.
Camera and Gallery Touch to start recording. Your phone will take care of the focusing, rotating, and zooming in the viewfinder. When the preset time has elapsed, your phone will stop and record the next shot until all shots are recorded. recording. You can touch 4 To shoot a different scene, exit the camera. Your phone will automatically save your shots. When you enter Story creator mode again, you can continue with the saved shots (only the shots recorded from the last time are saved).
Camera and Gallery To enable Location Services on your phone: • Swipe down from the upper right edge of the phone to display Control Panel, touch to expand the shortcut switches panel (depending on your device model), and enable Location. • Go to Settings > Location and enable Access my location. Add Device Watermarks Enable Add watermark. Photos and videos shot with the rear camera will have a device watermark added. Adding a device watermark to videos is not supported on certain phones.
Camera and Gallery Customize Camera Mode Layout You can customize the layout of the Camera mode screen based on your preferences by moving the frequently used modes to the camera home screen, or change the order of modes. Photo, Portrait, and Video modes cannot be moved to More. 1 Go to Camera > More, and touch 2 Touch and hold a mode and drag it to the desired position.
Camera and Gallery The figures are for reference only. View by Shooting Time Open Gallery. On the Photos tab, pinch in on the screen to switch to the monthly view and pinch out to switch to the daily view. You can also drag the track ball on the edge to view the time. View by Album You can view images and videos by album on the Albums tab. Some images and videos are stored in default albums. For example, videos recorded with the camera are saved in the Camera album.
Camera and Gallery View by Category Gallery intelligently sorts images into categories, allowing you to quickly sift through large albums by category. Touch a category album on the Discover tab (such as food, portrait, or scenery) to view images in that album. View Details About Images and Videos 1 In Gallery, touch an image or video to view it in Full screen mode. Touch the screen again to hide the menu.
Camera and Gallery Quickly Search for Images in Gallery Quickly locate an image by searching with keywords, such as a date, food, or category, in Gallery. 1 Go to Gallery, touch the search bar at the top of the screen, then type in a keyword (such as "food" or "scenery") or touch a suggested word to start searching. 2 Thumbnails of images related to that keyword will be displayed, and more keywords will be suggested. Touch a suggested keyword or enter more keywords for more precise results.
Camera and Gallery 2 Touch or to save the edits. Add Stickers to Images 1 In Gallery, touch an image, then go to 2 Select a sticker and drag it anywhere you like. Touch and hold the dot on the corner of the > More > Stickers. sticker and drag it to resize the sticker. Touch to delete the sticker. You can also edit the text in some types of stickers. Touch the editable area which is typically encircled with dash lines to enter the new text.
Camera and Gallery • Add or remove borders: By default, borders are displayed between images and along the grid edges. To remove them, touch Frame. 3 Touch to save the collage. To view the saved collage, go to Albums > Collages.
Camera and Gallery Adjust the Album Display Style Go to Gallery > Albums > , touch Switch view, and select an album display style. Move Images and Videos 1 Open an album, then touch and hold to select the images and videos you want to move. 2 Touch 3 Once the items are moved, they will no longer be in their original album. > Move to album to select the desired album. The All photos and Videos albums show all images and videos stored on your device.
Camera and Gallery Hide Albums You can hide images and videos in Gallery to keep them private. On the Albums tab, touch an album, touch and hold to select the images and videos you want to hide, then go to > Hide > OK. The selected images and videos will then be hidden. You can then: • On the Albums tab, go to • In Hidden items, touch and hold to select images and videos, then touch Unhide. > Hidden items to view the hidden images and videos.
Camera and Gallery People Album Videos Gallery automatically creates People albums by identifying faces in images. View People Album Videos 1 Go to Gallery > Discover and touch a People album. 2 Touch on the album cover. Highlights Introduction to Highlights Gallery automatically creates Highlights albums from your best photos and videos based on time, location, and theme information, and even generates a short video clip so you can walk down memory lane and instantly relive the good times.
Camera and Gallery Touch the Highlights video you want to share, then go to > Share. Your phone will automatically generate an image for the video and you can follow the onscreen instructions to share it with others. You can also share the photo under Gallery > Albums > Collages, where the images created for Highlights videos are saved by default. Add or Remove Images or Videos from a Highlights Album 1 In the Highlights tab, select a Highlights album.
Apps Contacts Create and Edit Contact Information You can create contacts in multiple ways, as well as view and manage your contacts list. Create Contacts 1 Open Phone, touch the Contacts tab, and touch . If you are creating a contact for the first time, touch Create new contact to start adding a contact. 2 Set a profile picture for the contact, enter information such as the name, organization, and phone number of the contact, then touch .
Apps Merge Duplicate Contacts 1 On the Contacts screen, go to contacts. 2 Select duplicate contacts you want to merge and touch Merge. > Settings > Organize contacts > Merge duplicate Search for Contacts 1 Open Contacts, go to > Settings > Display preferences, and touch All contacts to display all your contacts. Ensure that the corresponding icon at the bottom is enabled. 2 On the top of the Contacts screen, enter keywords for the contact you want to find in the search box.
Apps Manage Contact Groups You can conveniently send emails or messages to multiple contacts by creating and managing contact groups. Your phone automatically groups contacts by company, city, and last contact time, but you can also create new groups based on your preferences. New Group 1 Open Phone, touch the Contacts tab, and touch Groups. 2 Touch 3 In a chat group, touch , enter the group name, such as "Family" or "Friends", then touch OK.
Apps 3 Touch to automatically create a QR code business card. You can share your business card using the QR code. Add Emergency Information 1 From the Contacts screen, go to My card > Emergency information. 2 Touch ADD and set your personal, medical, and emergency contact information. 3 To modify the information, touch on the Emergency screen.
Apps Set a Call Background To set a wallpaper as the call background, do the following: 1 Go to Settings > Home screen & wallpaper > Wallpaper. 2 Select a picture and set it as the wallpaper. You can also set a profile picture for a contact to be shown on the call background. 1 Open Phone, touch the Contacts tab, then select a contact. 2 Touch and then to set a profile picture for the selected contact.
Apps • On the Phone screen, swipe left on the entry you want to delete, then touch . Set a Ringtone You can set a personalized ringtone for incoming calls depending on your preferences. If you are carrying your phone in your pocket, the ringtone volume will gradually increase to prevent you from missing important calls. If your phone has two SIM cards installed, configure the settings for SIM 1 and SIM 2 respectively. Set a Music Ringtone 1 > Settings > Ringtone.
Apps Answer or Reject an Incoming Call If you receive a call when the screen is locked: • Drag right to answer the call. • Drag left to reject the call. • Touch to reject the call and reply with a message. • Touch to set a reminder for calling back. If you receive a call when the screen is unlocked: • Touch to answer the call. • Touch to reject the call. • Touch to reject the call and reply with a message. • Touch to set a reminder for calling back.
Apps 2 Select and enable a forwarding method, then enter and confirm the target number. You can cancel call forwarding in the same path. If your phone has two SIM cards installed, configure the settings for SIM 1 and SIM 2 respectively. This feature may vary depending on your carrier. Filter and Block Spam Calls Set different block rules to block sales, fraud, and other kinds of spam calls. Filter Spam Calls 1 > Blocked > Go to Phone > . Alternatively, go to Optimizer > Blocked > 2 .
Apps Use Emergency SOS If you are in an emergency situation, you can quickly and secretly send an SOS message or make an SOS call to your emergency contacts. 1 Go to Settings > Security > Emergency SOS, and touch Emergency contacts to add an emergency contact. 2 Enable Auto-SOS message and Auto-SOS call, and set related permissions as prompted.
Apps Messaging Send and Manage Messages You can send and receive messages that include text, emojis, pictures, audio files, and more. You can also manage your messages in the message list. Send Messages 1 Open Messaging and touch 2 On the New message screen, enter your message content. Touch of content such as pictures and audio files. 3 In the recipient box, touch , select contacts or contact groups, then touch .
Apps • On the Messaging screen, swipe left on the message that you want to mark as read, then touch • . On the Messaging screen, go to > Mark all as read. Favorite Important Messages You can favorite an important message for future use. Touch and hold a message, select messages to be favorited in a message thread, and go to More > Favorite or > More > Favorite. To view the messages you have favorited, open Messaging and go to > Favorites.
Apps To unblock messages that contain a specific keyword, touch and hold the keyword in the Keyword blocklist and touch Remove. Set Whether to Receive Notifications for Blocked Messages Go to Messaging > > Blocked > > Receive notifications and set whether to receive notifications when messages are blocked. Manage Blocked Messages On the Blocked screen, you can manage blocked message, such as by deleting records, restoring messages, or submitting appeals if a number has been incorrectly marked.
Apps Make a High-quality Video or Voice Call Use MeeTime to make smooth and high-quality calls between Huawei devices such as phones and tablets. You can enjoy clear video calls even in dark environments and adjust the beauty level during video calls. 1 Open MeeTime and follow the onscreen instructions to activate and enable it. 2 In the MeeTime app, go to Contacts > MeeTime, and touch or next to a contact who has enabled MeeTime on their devices to make a high-quality video or voice call.
Apps • Touch to add another phone number if only one phone number has been linked. • Touch to delete any numbers or add new ones if multiple phone numbers have been linked. • In the list of Outgoing number (this device), select one of the added phone numbers to set it as the default number. Calendar Use Events Events help you schedule activities in your daily and work life, such as attending company meetings, arranging social get-togethers, and making credit card repayments.
Apps • Touch Default reminder time or Reminder time for all-day events to set a reminder time. • Touch Notifications and enable Allow notifications. Then follow the onscreen instructions to set a notification type. Customize Calendar View Settings You can customize calendar view settings, such as by specifying the start day of the week, and whether to show week numbers. 1 Go to Calendar > 2 Select the start day of the week, or enable the switch to show week numbers. > Settings.
Apps Use the Timer or Stopwatch You can use the timer to count down from a specified time. You can also use the stopwatch to measure the duration of an event. Timer Go to Clock > Timer, set the duration of time, and touch touch to start the timer. To stop it, . Stopwatch Go to Clock > Stopwatch, and touch to start the stopwatch. To stop it, touch . View the Time in Cities Worldwide Use Clock to see the local time in different time zones around the world.
Apps • Touch to change the text style, paragraph alignment, and background. • Touch to insert a picture. Touch and hold the picture, then drag it to the desired position in the note. • To organize your notes for easier access and viewing, categorize a note after finishing it. 3 Touch to save the note. Add a Note by Scanning Documents 1 Open Notepad and go to Notes > 2 Align your device camera with the picture or file you want to scan and touch scanning. The scanned pages are saved in Notepad.
Apps Create Notes by Sharing You can share web pages, images, text, and other content from other apps to Notepad. Not all apps support this feature. 1 Open the content you want to share (such as a web page, image, or text) in an app that supports the sharing feature. 2 Touch the Share button and select Notepad. 3 Follow the onscreen instructions to save the shared content to an existing note or create a new note.
Apps Enable the app lock for Notepad: Go to Settings > Security > App Lock, enter the lock screen password or customize the app lock password as prompted, and then turn on the switch next to Notepad. Lock a note: Open the note you need to lock in Notepad, go to the onscreen instructions. To unlock your note, go to > Add lock, and follow > Remove lock.
Apps Handwritten notes do not support Export as document, and other types of notes can be exported into TXT or HTML files when using Export as document. You can view saved notes as follows: Open Files, search for and touch Documents, then touch Notepad. • To share multiple notes, access the All notes screen, touch and hold a note, select the ones you want to share, then touch and share them as prompted. Print Notepad Items 1 On the All notes screen, open the item you want to print.
Apps • Touch to adjust the playback speed. • Touch to add a tag. • Touch a tag to rename it. Edit a Recording 1 On the Recorder home screen, touch a recording. 2 Touch Edit to display the waveform of the recording. 3 Drag the start and end bars to adjust the clip length. Pinch your fingers on the waveform to zoom in or out to adjust the clip length more precisely. 4 Touch Trim and select Keep selected part or Delete selected part.
Apps To view draft emails, go to Inbox > Show all folders > Drafts. Reply to an Email 1 On the Inbox screen, open the email you wish to reply to. 2 Touch 3 After writing your reply, touch to reply to the email sender, or touch to reply to everyone in the thread. . Set Encryption for Outgoing Emails You can encrypt outgoing emails to protect your confidential information.
Apps 3 Swipe left or right on the email screen to view the previous or next email. Organize Emails by Subject > Settings > General, and enable Organize by subject. On the Inbox screen, go to Add an Email Contact to a Group You can create email groups to communicate more efficiently. 1 On the Inbox screen, open an email and go to 2 Add the email sender or recipient to the group and touch OK. 3 On the group selection screen, select an existing group, then touch to save the contact in the group.
Apps Emails are displayed in List view by default. Some operations may not be supported after switching to Conversation view. Delete Emails On the Inbox screen, touch and hold the email you want to delete, touch any other emails you want to delete as well, then touch . Manage Multiple Email Accounts You can add and manage multiple email accounts. Add Multiple Email Accounts 1 Go to Email > 2 Select an existing email service provider or enter a new email address and password to add an email account.
Apps 2 On the VIP list screen, touch 3 Select the VIP contact you want to delete, then touch . . Calculator Calculator Use the calculator on your phone to perform basic mathematical calculations and for calculating exponential, logarithmic, and trigonometric functions. Use Calculator You can open Calculator in the following ways (depending on your device model): • Swipe down from the middle of the home screen to display the search box and search for Calculator.
Apps When the flashlight is turned on, a notification indicating that it is turned on will be displayed on the lock screen. Touch to turn off the flashlight. Compass Compass View Directions and Coordinates Using Compass Compass shows you the direction your phone is pointing, as well as your current longitude and latitude. 1 You can open Compass in the following ways: • Swipe down from the middle of the home screen to display the search box and search for Compass.
Apps Clean Up Phone Storage You can use Cleanup in Optimizer to scan for redundant or large files, such as app residue, unwanted installation packages, WeChat data, and more. Once detected, you can choose whether or not to delete files as suggested. 1 Open Optimizer, then touch Cleanup. 2 When the scan is complete, touch Clean up after each item and delete any files you don't need. Automatically Clean Up System Trash 1 Open Optimizer, and touch Cleanup.
Apps 1 On the Data usage screen, touch Smart Data Saver, then enable it. The then display in the status bar. 2 If you want to allow unrestricted access to data for some apps even when they are running in the background, toggle on the switches for these apps. icon will Add Mobile Data Usage Reminders Add data plans for your SIM cards and usage reminders in Optimizer to keep you informed of your data consumption.
Apps Go to Phone > • > Blocked. You can then: Touch a record and select Call to call back numbers, select Add to trustlist or Add contact, or touch Delete to delete call records. • Touch Clear to delete blocked calls in batches. • Touch Block rules to change the block rules. Filter and Block Spam Messages Set different block rules, such as your blocklist, to block sales, fraud, and other kinds of spam messages. Block Spam Messages 1 Go to Messaging > > Blocked > .
Apps • Touch a record and select Restore to messages to restore this message to the Messaging app. Touch Add to trustlist to add the number corresponding to this message to the trustlist. Touch Delete to delete the message record. • Touch Clear to delete blocked messages in batches. • Touch Block rules to change the block rules. One-Touch Optimization Use the OPTIMIZE feature of Optimizer to keep your phone in an optimal state. 1 Open Optimizer, and touch OPTIMIZE.
Apps You can search for iOS versions that support Phone Clone in App Store and view more information on the app details screen.
Settings Search for Items in Settings Quickly Find What You're Looking For Tired of trudging through layers of settings? Just search for them using the search box. • Swipe down from the middle of the screen to display the search box. Enter the name of a setting to obtain search results. • Open Settings and enter the name of a setting in the search box at the top of the screen to obtain search results.
Settings These steps may be different if you are sharing files directly from an app. 4 Touch the icon of the receiving device to establish a connection, then share the files. 5 On the receiving device, accept the Wi-Fi Direct transfer request. Then search for and access the Wi-Fi Direct folder in Files to view the received files.
Settings Configure Dual SIM Settings If your phone has two SIM cards inserted, you can set the default mobile data SIM and the default calling SIM, and enable call forwarding between the two SIM cards. This feature applies to dual-SIM devices only. Set the Default Mobile Data and Default Calling SIM Cards Go to Settings > Mobile network > SIM management and set SIM 1 or SIM 2 as the default mobile data or default calling SIM card.
Settings Share Your Network via Bluetooth 1 Go to Settings > Bluetooth, and enable Bluetooth. Select a device, then follow the onscreen instructions to complete pairing. 2 Go to Settings > Mobile network > Personal hotspot > More, and enable Bluetooth tethering. 3 On the Bluetooth settings screen of the paired device, touch next to the name of your device, then enable Internet access to share your network. Share Your Network via USB 1 Use a USB cable to connect your phone to your computer.
Settings 2 On the More data settings screen, touch Usage reminders. From there, you can set whether a notification will be sent or if mobile data will be disabled once the monthly data limit or roaming data limit has been topped. 3 On the More data settings screen, you can set whether to Show data used when the screen is locked. Enable Data Roaming Once you have activated the international roaming service, you can enable this feature to use mobile data when traveling abroad.
Settings 1 Ensure that the DVKit/Cast+/Miracast switch or the projection switch is enabled on the display device. For details about how to turn on the switch, refer to the product manual or contact the product manufacturer. 2 Swipe down from the upper right edge of your phone to display Control Panel and touch . 3 to expand the shortcut switches panel (depending on your In Control Panel, touch device model) and touch Wireless Projection.
Settings Share Local Files Between Phones If both devices support ultra-fast transmission, you can share a 2 GB movie or a series of albums with a lot of photos between the devices within 30 seconds via Huawei Share (for the list of devices that support ultra-fast transmission, please visit the official website). You can preview the content on the receiving device before the transfer. Upon receiving the file, the content will be displayed directly on the receiving device.
Settings Share Files Between Your Phone and Computer with Huawei Share You can use Huawei Share to easily share files wirelessly between your phone and a computer (Windows or macOS). Share Files from Your Phone to Your Computer Share files from your phone to your computer using Huawei Share. You can then easily access the shared folders on your phone from your computer. The figures are for reference only. 1 Make sure your phone and computer are connected to the same Wi-Fi network.
Settings Currently, this feature is only available on Macs running macOS 10.8 to 10.14. 5 On your computer, double-click the name of your phone and enter the user name and password that you made a note of. 6 Open a shared folder, such as the Internal storage or Album folder, to view, edit, or copy files from your phone to your computer or vice versa. Changes made to files in the shared folders on your computer will be automatically synced to your phone and vice versa.
Settings If it is not, consult with its manufacturer to install the corresponding app or plug-in for it on your phone. 2 Connect your phone and the printer to the same Wi-Fi network using any of the following methods: • Connect to a Wi-Fi router: Enable Wi-Fi on the printer and connect it to the Wi-Fi router. On your phone, go to Settings > Wi-Fi, enable Wi-Fi, touch the same Wi-Fi router, and follow the onscreen instructions to complete the settings.
Settings Connect to a PPTP Server 1 Obtain the required data such as the VPN server name and address from your VPN server administrator. 2 Go to Settings > More connections > VPN > Add VPN network, enter the VPN name, set the server type to PPTP, then enter the server address. 3 If the VPN server does not have a DNS address, touch Show advanced options and enter the DNS domain, DNS server address, and forwarding route. 4 Touch Save.
Settings Select the Home Screen Layout Pattern Pinch two fingers together on the home screen, go to Home screen settings > Layout, then select a layout pattern you prefer. Set Your Home Screen in Settings You can also go to Settings > Home screen & wallpaper > Home screen settings, then enable Auto-align and more. Put App Icons in Folders For easy management of your app icons on the home screen, you can put similar apps in a folder and name the folder.
Settings You can still find it in the Drawer. Disable the App Drawer To disable the App Drawer, set Home screen style to Standard. Display & Brightness Adjust the Screen Brightness, Color Mode, and Color Temperature You can set the screen brightness, color mode, and color temperature according to your preferences. Manually Adjust the Screen Brightness You can manually adjust the screen brightness using the following methods: • Swipe down from the upper right edge of the screen to display Control Panel.
Settings Enable or Disable Eye Comfort Mode • Swipe down from the upper right edge of the screen to display Control Panel and touch to expand the shortcut switches panel (depending on your device model). Enable or disable Eye Comfort. Touch and hold Eye Comfort to access the settings screen. • Go to Settings > Display & brightness > Eye Comfort and enable or disable Enable all day.
Settings Use Smart Screen Resolution Go to Settings > Display & brightness > Screen resolution and select Smart Resolution. Your device will automatically adjust the screen resolution according to the current running status. Set the Screen Resolution Go to Settings > Display & brightness > Screen resolution, and select a screen resolution according to your preferences. A higher screen resolution will result in a clearer display, but will consume more power.
Settings Go to Settings > Display & brightness > More display settings, and enable or disable Display carrier name and Display network speed according to your preferences. Switch Between Portrait and Landscape Orientation Swipe down from the upper right edge of the screen to display Control Panel and touch to expand the shortcut switches panel (depending on your device model). Then enable Autorotate.
Settings Make Exceptions in Do Not Disturb Mode While in Do Not Disturb mode, you can enable your phone to ring for calls and messages from certain sources so you don't miss anything important. Go to Settings > Sounds & vibration > Do Not Disturb, and enable Do Not Disturb or Scheduled. Then you can: • Touch Calls or Messages and select one of the options. If you set an exception, your phone will ring for calls or messages from the selected source.
Settings 2 On the contact details screen, touch Ringtone and select a ringtone. Set a Notification Tone for a Specific App You can set a notification tone for certain apps by performing the following: 1 Go to Settings > Apps > Apps. 2 Select an app (such as Notepad). 3 Go to Notifications > To-do notifications > Notification sound. 4 You can then perform the following operations: • Set a notification tone Select a preset tone, or touch Music on device to select a locally saved song.
Settings Turn Off App Badges 1 Go to Settings > Notifications, and touch App icon badges. 2 Turn off the switch for some or all apps. Change the Badge Display Mode On the App icon badges screen, touch Badge display mode, and select Numbers or Dots according to your preference.
Settings Notifications Turn on Screen Go to Settings > Notifications > More notification settings, and enable Wake screen. Your phone will then automatically turn on the lock screen when it receives a notification. Show Notification Icons in the Status Bar Go to Settings > Notifications > More notification settings, and enable Show notification icons in the status bar.
Settings 2 Turn on the switch for Access Safe and follow the onscreen instructions to link your fingerprint with the Safe. Now you can go to Files > Me, touch Safe, then use your fingerprint to access it. Please make sure your device has been updated to the latest system version.
Settings Set Face Unlock On the Face Recognition screen, touch Unlock device and select an unlock method. If you have enabled PrivateSpace or added multiple users to your phone, you can use Face unlock only in MainSpace or with the Owner account. Access App Lock with Face Recognition On the Face Recognition screen, enable Access App Lock, and follow the onscreen instructions to add your facial data to App Lock. You can then touch a locked app on your home screen and use face recognition to access the app.
Settings Change the Lock Screen Password 1 On the Biometrics & password screen, go to Change lock screen password. 2 Enter the original lock screen password. 3 Enter a new password, or touch Change unlock method to select a password type, then follow the onscreen instructions to input a new password. Disable Lock Screen Password On the Biometrics & password screen, go to Disable lock screen password. Enable Lockdown There are several ways to unlock your phone.
Settings Some apps cannot be uninstalled. Check the App Version or Change the App Settings Go to Settings > Apps > Apps and touch the app you are interested in to go to its details screen. The version of the app is displayed next to the app icon. Battery Check the Power Consumption of Your Phone Go to Settings > Battery (or Optimizer > • ), and you can: View Power consumption details to learn about the power consumption and the power usage ranking of apps.
Settings Enable Smart Charge Smart Charge learns from your charging habits and manages the charging process intelligently. This feature reduces the battery wear level and prolongs the battery life by reducing the time your device spends fully charged. It is advised that you keep this feature enabled. For example, if you are used to charging your device overnight or for an extended period of time, Smart Charge will pause the charging when the battery capacity reaches a certain level.
Settings Check Storage Usage Go to Settings > Storage to check storage usage and optimize it when you feel necessary. Clean Up Phone Storage You can use Cleanup in Optimizer to scan for redundant or large files, such as app residue, unwanted installation packages, WeChat data, and more. Once detected, you can choose whether or not to delete files as suggested. 1 Open Optimizer, then touch Cleanup. 2 When the scan is complete, touch Clean up after each item and delete any files you don't need.
Settings toggling on the switch next to this app. When the switch is toggled off, the autofill feature will be disabled. 2 If you log out of the app, the next time you log in, your device will autofill the username and password once you have verified your identity with your lock screen password, fingerprint, or face ID. Not all devices support fingerprint features. When you switch to a new Huawei phone, you can use Phone Clone to transfer data in Password Vault to your new device.
Settings Enable Smart Unlock Smart Unlock enables you to unlock your phone with a Bluetooth device, such as a smart band, without a password, fingerprint, or facial authentication. 1 Pair your phone with the Bluetooth device. After the pairing is successful, the Bluetooth device name will be displayed in the Paired devices list on the Bluetooth settings screen. 2 On your phone, go to Settings > Biometrics & password > Smart Unlock, and enable Smart Unlock.
Settings The PIN and PUK of your SIM card are provided by your carrier. The number of digits and maximum number of attempts allowed to unlock your PIN and PUK are subject to your carrier. 1 Go to Settings > Security > More settings to enter the SIM lock settings screen. 2 Enable Lock SIM card, enter the PIN, then touch OK. To change the PIN, touch Change SIM PIN, and follow the onscreen instructions. Pin a Screen You can pin the screen of an app so you can stay focused on it.
Settings Manage Permissions to Access Other Private Data You can also manage permissions to access your personal data, such as Contacts, Messaging, Call logs, Body sensors, Calendar, and Camera, to enjoy better services and protect your privacy. On the Permission manager screen, touch the permission you want to manage, and toggle the switch for each app on or off as required. Use Location Services Some apps need to obtain your location information to provide better services.
Settings Create a PrivateSpace for Your Private Data Create your PrivateSpace that is completely independent of MainSpace (the original space) on your phone, which can be accessed using your fingerprint or a password. Not all devices support fingerprint features. You can move private photos, videos, and other files to your PrivateSpace to prevent unauthorized access. You can also move your payment and gaming apps to PrivateSpace to prevent them from being accessed by your child.
Settings 2 Follow the onscreen instructions to complete the verification, select and answer the security question, then touch Finish. 3 > Reset In MainSpace, go to Settings > Privacy > PrivateSpace, then go to password, and follow the onscreen instructions to complete the verification and reset the password. Transfer Data in PrivateSpace to Your New Phone You can quickly transfer your PrivateSpace data, such as contacts, photos, and files, from your old phone to your new one.
Settings On the Accessibility > Magnification screen, touch Magnification, then enable it. Zoom in or out by touching the screen three times in a row. • While zoomed in, spread two or more fingers to further zoom in, then pinch two or more fingers together to zoom back out. • Drag the screen with two or more fingers to view other parts of the screen. Enable Color Inversion Color inversion allows you to invert the color of the text and the background.
Settings If you hold your device with your left hand, it is recommended that you swipe from right to left across the bottom of the screen and hold. The mini screen view will be displayed on the left side of the screen. If you hold your device with your right hand, it is recommended that you swipe from left to right across the bottom of the screen and hold. The mini screen view will be displayed on the right side of the screen.
Settings • Swipe down from the upper right edge of the screen to display Control Panel, touch , and touch the profile picture of the account you wish to switch to. • Go to Settings > Users & accounts > Signed in as and touch the name of the account you wish to switch to. Delete a User or Guest Account Deleting a user or guest account will delete all of its related data. Please exercise caution.
Settings • To manually set the time zone, disable Set automatically. Change the Time Format • Enable 24-hour time and your phone will display time in the 24-hour format. • Disable 24-hour time and your phone will display time in the 12-hour format. Use Phone Clone to Move Data to Your New Device Phone Clone lets you quickly and seamlessly move all the basic data (including contacts, calendar, images, and videos) from your old phone to your new phone.
Settings Restore All Settings This operation will reset all network settings, your lock screen password, and the home screen layout. If your phone supports fingerprint or facial recognition, the enrolled fingerprints and facial data will be deleted as well. Other data or files will not be deleted from your phone. This operation does not restore the settings of Find Device, Users & accounts, Device administrators, or app settings either.
Settings • Before updating, make sure that your phone is running an official system version. Otherwise, the update may fail and your phone may experience some issues. • Back up your user data before the update. • After an update, third-party apps that aren't compatible with the new system version may become unavailable. In such cases, it may take some time for a compatible app version to be released.
Settings About Phone Legal Notice Copyright © Huawei 2021. All rights reserved.
This guide is for reference only. The actual product, including but not limited to the color, size, and screen layout, may vary. All statements, information, and recommendations in this guide do not constitute a warranty of any kind, express or implied. Please visit https://consumer.huawei.com/en/support/hotline for recently updated hotline and email address in your country or region. Model: NAM-LX9 EMUI12.