User Guide
Contents Essentials Basic Gestures System Navigation Phone Clone Lock and Unlock Your Screen Get Familiar with the Home Screen Notification and Status Icons Shortcut Switches Home Screen Widgets Set Your Wallpaper Screenshots&Screen Recording View and Clear Notifications Adjust Sound Settings Enter Text Split-screen Mode and Floating Window Power On and Off or Restart Your Device Charging 1 4 5 6 7 8 10 10 10 11 15 16 17 17 19 19 Smart Features AI Lens Easy Projection Multi-screen Collaboration Huawei Sha
Contents Time-Lapse Photography Filters Adjust Camera Settings Manage Gallery Smart Photo Categorisation 39 39 39 40 44 Apps Contacts Phone Messaging Calendar Clock Notepad Recorder Email Calculator Torch Compass App Twin Quickly Access Frequently Used App Features Optimizer Phone Clone Tips 46 47 49 57 59 61 62 63 64 68 69 69 69 70 70 71 72 Apps Settings Search for Items in Settings Wi-Fi Bluetooth Mobile Data More Connections Home Screen&Wallpaper Display&Brightness Sounds&Vibration Notifications Bi
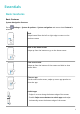
Essentials Basic Gestures Basic Gestures System Navigation Gestures Go to Settings > System & updates > System navigation and ensure that Gestures is selected. Back Swipe inward from the left or right edge to return to the previous screen. Back to the home screen Swipe up from the bottom to go to the home screen. View recent tasks Swipe up from the bottom of the screen and hold to view recent tasks. Close an app On the recent tasks screen, swipe up on an app preview to close the app.
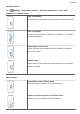
Essentials Knuckle Gestures Go to Settings > Accessibility features > Shortcuts & gestures to enable Take screenshot and Record screen. Take a screenshot Knock twice on the screen with a knuckle to take a screenshot. Take a scrollshot Knock on the screen with a knuckle and draw an "S" to take a scrolling screenshot. Capture part of the screen Knock and draw an enclosed area with a knuckle to capture part of the screen.
Essentials Display the search bar Swipe down on the home screen. Open the notification panel Swipe down from the status bar. Button Shortcuts Power off and restart Press and hold the Power button until the Power off and Restart options appear. Increase the volume Press the Volume up button. Decrease the volume Press the Volume down button. Take a screenshot Press the Volume down and Power buttons simultaneously.
Essentials Ultra snapshot Double-press the Volume down button when the screen is off or locked to take a photo. System Navigation Change the Navigation Mode Go to Settings > System & updates > System navigation to select a navigation mode according to your preferences. Navigate with Gestures Settings > System & updates > System navigation and enable or disable Go to Gestures. After enabling Gestures, you can: • Go back to the previous screen: Swipe inward from the left or right edge.
Essentials • Select a navigation key combination. • Enable Hide navigation keys to allow you to hide the navigation bar when not in use. Navigation Dock Go to Settings > System & updates > System navigation > More, and enable Navigation Dock. After the Navigation dock button appears, you can: • Drag the button to your desired position. • Touch the button to go back. • Double-touch the button to go back two steps. • Touch and hold the button, then release it to go back to the home screen.
Essentials 4 On your old device, select the data you want to clone, then follow the onscreen instructions to complete the data cloning. Phone Clone is only available on devices running iOS 8.0 or later. Lock and Unlock Your Screen Lock and Unlock Your Screen Lock the Screen If your phone remains inactive for a period of time, it will automatically lock the screen and enter sleep mode to save power. Alternative, you can manually lock the screen in either of the following ways: • Press the Power button.
Essentials Display Your Signature on the Lock Screen Go to Settings > Home screen & wallpaper, touch Lock screen signature, then type text to display on the lock screen. To remove the signature, touch Lock screen signature and delete the text. Access Apps from the Lock Screen You can access commonly used apps such as Camera, Recorder, and Calculator from the lock screen. • Turn on the screen, touch and hold , then swipe up to open Camera.
Essentials Notification and Status Icons Notification and Status Icons Network status icons may vary according to your region or network service provider. Supported functions vary according to the device model. Some of the following icons may not be applicable to your device.
Essentials Data saver enabled SIM card not found Hotspot enabled Hotspot connected Calling VoLTE enabled Wi-Fi network connected SkyTone in use Hotspot disconnected Network being switched by Wi-Fi + Airplane mode enabled Alarm set Battery empty Battery low Charging Quick charging Super charging Super wireless charging Quick wireless charging Regular wireless charging Power saving mode enabled Digital balance enabled Bluetooth enabled Bluetooth device battery Bluetooth device connect
Essentials Performance mode enabled New email Event reminders Shortcut Switches Shortcut Switches Turn on a Shortcut Switch Swipe down from the status bar to open the notification panel, then swipe down further to show all shortcut switches. • Touch a shortcut switch to enable or disable the corresponding feature. • Touch and hold a shortcut switch to enter the settings screen for that feature. (Only available for some features) • Touch to open Settings.
Essentials Set Your Wallpaper Use a Preset Wallpaper 1 Go to 2 Touch an image you want to set as the wallpaper. 3 Set the following according to your preferences: 4 Settings > Home screen & wallpaper > Wallpaper. • Blur: applies a blur effect, which can be adjusted by dragging the slider. • Scrollable: enables the wallpaper to be scrollable on the home screen. Touch , then determine whether you'd like to set it as the wallpaper for the Lock screen, Home screen, or Both.
Essentials Share and Edit a Screenshot, or Switch to Scrollshot After you take a screenshot, a thumbnail will display in the lower left corner of the screen. Then you can: • Swipe down on the thumbnail to take a scrolling screenshot. • Swipe up on the thumbnail to select a sharing mode and share the screenshot with your friends. • Touch the thumbnail to edit or delete it. Screenshots are saved to Gallery by default.
Essentials 1 Knock the screen with a knuckle and hold to draw an "S". The screen will automatically scroll down to the bottom for you to capture the entire page. 2 You can touch the screen at any point to stop the screenshot.
Essentials 1 Knock the screen with a knuckle and hold to draw an outline around the part of the screen that you want to capture. Make sure that your knuckle does not leave the screen. 2 The screen will display the movement trajectory of your knuckle and take a screenshot of the selected area. You can then: 3 • Drag the frame to the desired position or resize it. • Touch a shape icon to determine the shape of the partial screenshot. Touch to save the screenshot.
Essentials Record the Screen Record your screen activities in sharable videos to compose a tutorial, show off your awesome gaming skills, and a lot more. Use a Key Combination to Start Screen Recording Press and hold the Power and Volume up buttons simultaneously to start screen recording. To stop recording, press and hold both buttons again. Use a Shortcut to Start Screen Recording 1 Swipe down from the status bar to open the notification panel, then swipe down on it again to show all shortcuts.
Essentials • Touch at the bottom of the notification panel to clear all notifications. Block, Silence, or Delay Notifications Swipe left on a notification, then touch to block, silence, or delay notifications from that source. Some system notifications can't be blocked, cleared, or delayed. Adjust Sound Settings Adjust Sound Settings Press a Volume Button to Adjust the Volume Press the Volume up or down button to adjust the volume.
Essentials Enter Text Edit Text You can select text displayed on your screen, copy or cut it to the clipboard, then paste it somewhere else. You can also share it in multiple ways. 1 Touch and hold the text until appears. In some apps, what happens after you touch and hold the text may differ. For example, if you touch and hold a sent or received message, an option menu will be displayed, and will appear only after you touch Select text. 2 Drag 3 Touch Copy or Cut as needed.
Essentials • • Display the floating window: 1 Swipe inward from the left or right edge and hold to bring up the Multi-Window dock. 2 Touch an app icon in the Multi-Window dock to open the app in a floating window. Relocate the floating window: Drag the horizontal line at the top of the floating window to the desired location. • Display in full screen: Touch on the floating window to display the content in the window in full screen.
Essentials Disable Multi-Window Multi-Window is enabled by default. To disable it, go to Settings > Accessibility features > Multi-Window, then disable Multi-Window dock. Power On and Off or Restart Your Device Power On and Off or Restart Your Device Power Your Device On and Off To power off your device, press and hold the Power button for a few seconds, touch Power off and Touch to power off.
Essentials Batteries have a limited number of charge cycles. When the battery life becomes noticeably • shorter, go to an authorised Huawei Customer Service Centre to replace the battery. • Do not cover your device or charger during charging. • Your device may heat up when you have been using it for an extended period of time, especially in high temperatures. In this case, stop charging, disable some features, and move your device to a cool place.
Essentials 2 Swipe down from the status bar to open the notification panel, touch Touch for more options, and then select Reverse charge. 3 Follow the onscreen instructions on the device to be charged to start charging.
Smart Features AI Lens Access AI Lens There are multiple ways to access AI Lens. From Camera Open the camera and select Photo mode. Touch to access AI Lens. From the Search Bar While the device is unlocked, swipe down on the screen to display the search bar. Then, touch to access AI Lens. From the Lock Screen When the device is locked, swipe up from the bottom of the screen. Touch , then unlock the device to access AI Lens.
Smart Features 2 Position the target object within the viewfinder. You will receive purchase recommendations once the object has been recognised. You can also touch photo, which will be recognised automatically. to take a Scan to Acquire Calorie Information Scan food to get the weight, calorie, and nutritional information. 1 Open the camera, touch 2 Frame your food in the viewfinder, and wait for the weight, calorie, and nutritional information to pop up. , then touch .
Smart Features Multi-screen Collaboration Connect Your Device to a Computer When you connect your device to a laptop, the device screen will be displayed in a window on the laptop screen, allowing you to easily operate your device while on your laptop. Connect Your Device and Computer with a Tap 1 Make sure that your computer is marked with a Huawei Share icon or Magic-link icon . 2 On your computer, enable Wi-Fi. Open PC Manager and agree to the End User Licence Agreement (EULA).
Smart Features To check the version of PC Manager, go to > About. To update it, go to > Check for updates. 2 Ensure that your device is connected to the Internet, and use it to scan the QR code on your computer screen. 3 Follow the onscreen instructions on your device and computer to complete the connection. Disconnect Your Device from Computer You can disconnect your device from computer using any of the following methods: • On your computer, open PC Manager, and go to My Phone > Disconnect.
Smart Features These steps may be different if you are sharing files directly from an app. 3 On the receiving device, touch Accept to accept the transfer. To view the received files, go to Files, then go to Internal storage > Huawei Share on the Categories tab. Received pictures or videos can also be found in Gallery > Albums > Huawei Share.
Smart Features If you are connecting a Bluetooth printer to your device for the first time, find the printer on your device, touch the printer name, then press and hold the Power button on the printer for about 1 second to confirm the connection. For a list of supported printers, touch Help on the Huawei Share sharing screen, select Printers, then touch What printers are supported?.
Camera and Gallery Launch Camera Launch Camera There are multiple ways to open the Camera app. From the Home Screen From the home screen, open Camera. From the Lock Screen When the screen is locked, turn on the screen, then swipe up on the camera icon in the lower right corner to open the camera. Using Ultra Snapshot When enabled, simply double-press the Volume down button to open the camera when the screen is off.
Camera and Gallery • Turn the flash on or off: Touch and select (Auto), (On), (Off), or (Always on). Some features are only available when using the rear camera. 3 Touch to take a photo. Take Burst Photos Use Burst mode to take a sequence of photos in quick succession so you can choose the best one. Burst shooting is only available when using the rear camera. 1 Open 2 or press and hold one of the Volume buttons to take a burst photo.
Camera and Gallery 3 Go back to the viewfinder, then say your command to take a photo. Shoot in Portrait, Night, and Wide Aperture Modes Shoot in Portrait, Night, and Wide Aperture Modes Use Portrait Mode to Shoot Portraits Portrait mode lets you apply beauty and lighting effects to your photos to shoot stunning portraits. 1 Open 2 Frame your subject within the viewfinder. Camera and select Portrait mode. To take a selfie, touch 3 .
Camera and Gallery 1 Open 2 Touch where you want to focus. For best results, your device needs to be within 2 meters (about 7 ft.) of your subject. 3 Touch in the viewfinder and drag the slider to adjust aperture settings. A smaller aperture value will create a more blurred background. 4 Touch the shutter button to shoot a photo or video. When recording, touch the viewfinder to adjust the focus. Camera and select Aperture mode.
Camera and Gallery Take Photos with Various Zoom Settings The zoom capabilities of your device's camera allow you to capture more of a scene, or distant vistas. Take Wide-Angle Photos 1 Open 2 Touch 3 Aim the camera at the object you want to take a photo of. The camera will automatically recommend Super wide angle mode if it detects a building. Touch Wide to have a wider angle of view. You can also drag the zoom slider in the viewfinder, or pinch in or out to adjust the zoom level.
Camera and Gallery Use the Rear Camera to Take Panoramic Photos 1 Go to 2 Touch 3 Point the camera at your starting point, then touch 4 Slowly move the camera in the direction of the arrow displayed on the screen. Keep your device steady and the arrow on the centre line the entire time. 5 Touch Camera > More and select Panorama mode. at the bottom of the viewfinder to set the pan direction. to start shooting. when you are finished.
Camera and Gallery Capture Rivers and Waterfalls in Silky Water Mode Silky water lets you capture silky smooth photographs of waterfalls and rivers. 1 Go to 2 This feature works best when taking photos of a stream or waterfall where the water is flowing heavily. 3 Touch Camera > More > Light painting > Silky water. to start shooting. Observe the shot in the viewfinder. When the exposure is just right, touch to finish shooting.
Camera and Gallery Take Moving Pictures Go to Camera > More > Moving picture and touch to take a photo. Play Moving Pictures Moving pictures are saved in JPG format in Gallery. Go to Gallery > Albums > Camera, touch a moving picture, then touch at the top of the picture to view it. The moving picture will automatically stop after a complete playback. You can also touch the screen to stop the playback.
Camera and Gallery Take High-Resolution Photos Take High-Resolution Photos Take high-resolution photos if you would like to print them later or display them on a large screen. 1 Go to 2 Frame your subject within the viewfinder, then touch where you want to focus. High-res does not allow you to zoom in or out, or adjust the aspect ratio. 3 Touch to take a photo. It may take longer to take a photo in High-res mode. Keep your device steady when the photo is being taken.
Camera and Gallery • Adjust the focus: Touch AF and select a focus mode. Focusing Mode • Applicable Scenario AF-S (single) Stationary subjects AF-C (continuous) Moving subjects MF (manual) Touch the subject on which you want to focus. Adjust the colour cast: Touch WB and select a mode. When shooting in bright sunlight, select Touch • . In low-light environments, select . to adjust the colour temperature. Use high resolution: Touch to take a photo with the highest possible resolution.
Camera and Gallery When this feature is enabled, your device will use a video format that takes up less storage space. However, this may result in other devices being unable to play the video. Please exercise caution when selecting this option. 3 Touch to start recording. While recording, touch and hold 4 or Touch to take a photo while recording. Touch to pause and to smoothly zoom in or out. to end the recording.
Camera and Gallery 5 When you are finished, go to > Save slow-mo file to save your edits. Time-Lapse Photography Time-Lapse Photography You can use Time-lapse to capture images slowly over several minutes or even hours, then condense them into a short video. This allows you to capture the beauty of change – blooming flowers, drifting clouds, and more. 1 Go to 2 Place your device in position. To reduce camera shake, use a tripod to steady your device. 3 Touch Camera > More, then touch Time-lapse.
Camera and Gallery Swipe up on a photo or video in Gallery to view its shooting location. Add Device Watermarks Enable Add watermark. Photos and videos shot with the rear camera will have a device watermark added. Adding a device watermark to videos is not supported on certain devices. Use the Assistive Grid to Compose Your Photos Use the assistive grid to help you line up the perfect shot. 1 Go to 2 Enable Assistive grid. 3 Grid lines will appear in the viewfinder.
Camera and Gallery On the Photos tab, pinch two fingers on the screen to switch to the monthly view and spread them to enter the daily view. View by Album You can view photos and videos by album on the Albums tab. Some photos and videos are stored in default albums. For example, videos recorded with the camera are saved in the Camera album. Screenshots and screen recordings are saved in the Screenshots album.
Camera and Gallery • Add a filter effect: Touch • Adjust photo effects: Touch to select a filter. to adjust the brightness, contrast, saturation, and other qualities of the photo. • Other: Touch to edit the photo in other ways, such as adding a colour splash, blur, doodle, or text element. 2 Touch to save your edits, or touch to save the photo. Add Stickers to Photos 1 Touch a photo, then go to 2 Select the type of sticker you want to add, such as Time, Location, Weather, or Mood.
Camera and Gallery 3 • Rotate a photo: Touch the photo, then touch to rotate it or to flip it. • Add borders: Touch Frame to add borders to the collaged photos. Touch to save the collage. To view the saved collage, go to Albums > Collage. Share Photos and Videos There are several ways to share photos and videos from Gallery. 1 Open 2 Use either of the following methods: Gallery. .
Camera and Gallery To permanently delete a photo or video manually, touch and hold its thumbnail in the Recently deleted album, then go to > Delete. Recover Deleted Photos and Videos In the Recently deleted album, touch and hold to select the items you want to recover, then touch to restore them to their original albums. If the original album has been deleted, a new one will be created. Add Photos and Videos to Favorites Open a photo or video, then touch .
Camera and Gallery To remove a photo from an album, touch and hold to select the photo, then touch (or for portraits). Not all photos can be removed from the category albums. View and Set People Albums Once you have taken a sufficient number of photos, Gallery will automatically create People albums of individuals or groups by identifying faces in your photos. This will happen when your device is charging and the screen is off.
Apps Apps Apps Locate an Installed App Swipe down from the middle of the home screen to show the search bar, and enter the app name. When the app is found, touch next to its name. Uninstall an App You can uninstall an app using either of the following methods: • Touch and hold the app icon you want to uninstall until your device vibrates, touch Uninstall, then follow the onscreen instructions to uninstall the app.
Apps Go to Settings > Apps > Apps, select the app for which you want to clear the cache, then go to Storage > Clear cache. Contacts Create and Edit Contact Information You can create contacts in multiple ways, as well as view and manage your contacts list. Create Contacts 1 Open Phone, select the Contacts tab at the bottom of the screen, then touch . If you are creating a contact for the first time, touch Create new contact to start adding a contact.
Apps 2 Touch Export to storage and follow the onscreen instructions to export contacts. The exported .vcf files are saved in the root directory of your device's internal storage by default. You can open Files to view the exported files in the internal storage. Delete Contacts Delete contacts using either of the following methods: • Touch and hold the entry you want to delete, then touch Delete.
Apps Delete Contact Groups On the Groups screen, touch and hold the group to be deleted, then touch Delete. Create Personal Information You can create a business card containing your personal information to share with others. You can also add personal emergency information so you can call for help quickly in an emergency. Create a Personal Business Card 1 Open card. 2 Set your profile picture, enter personal information such as your name, work address, and phone number.
Apps Touch to end a call. Use Speed Dial Once you've set up speed dialling for a contact, you can quickly call that contact with the assigned number key. Go to Phone > > Settings > Speed dial, select a number key, then set a contact for this speed dial number. Press the Power Button to End a Call During a call, press the Power button to end the call. Go to Phone > > Settings > More and enable Power button ends call. Set a Call Background You can set a wallpaper as the call background.
Apps View Missed Calls 1 To display all missed calls, open Phone, swipe down on the call log list, then touch the Missed tab. All missed calls are displayed in red in the call log list for you to quickly identify them on the All screen. 2 Touch next to a call log to call back or send a message. Delete Call Logs Delete call logs using any of the following methods: • On the Phone screen, touch and hold an entry, then touch Delete entry.
Apps MeeTime Use MeeTime to make HD video or audio calls with contacts who have Huawei/Honor devices, such as phones and tablets, and share your screen during calls. Using GPU Turbo technology, this feature will automatically improve video quality when the network connection is poor. Thanks to its intelligent algorithms, your face will be seen clearly even when making a video call at night or in a poorly-lit environment. During a video call, you can adjust the beauty effects.
Apps • Touch to mute the call. • Touch to use the speaker. • Touch to switch to a voice call. Share Your Screen During a MeeTime Call During a call, you can share your screen and doodle on it for both parties to convey messages with each other even more effectively. For example, show your parents how to use their phone by talking to them while operating on your phone. When discussing with your colleagues and customers over a call, you can demonstrate your idea and make notes on the screen.
Apps Enable VoLTE 1 Contact your mobile carrier to activate the 4G and VoLTE functions for your SIM card. If both the primary and secondary SIM card trays of a dual-SIM device support 4G and VoLTE, 4G and VoLTE can be enabled for both SIM cards. 2 Go to Settings > Mobile network > Mobile data. In the network settings area of SIM 1 or SIM 2, turn on the VoLTE calls switch. • This feature may vary depending on your carrier. • The 4G network is used as an example here.
Apps • Touch to set a callback reminder. Enable Call Waiting The Call waiting feature lets you answer incoming calls when a call is already in progress by placing the first call on hold. This feature requires the support of your mobile carrier. For details, contact your carrier. Go to Phone > > Settings. Under the SIM card you wish to enable call waiting on, go to More > Call waiting. This feature may vary depending on your carrier.
Apps 2 Touch Call block rules and toggle on the switches of corresponding block rules. Block Incoming Calls from Specific Numbers You can block incoming calls from specific numbers using either of the following methods: • Go to Phone > > Blocked > > Blocklist, touch , then add the phone numbers you want to block. • On the Phone screen, touch the Contacts tab at the bottom, touch the contact you want to block, then go to > Block contact.
Apps • Touch to enable hands-free mode. • Touch to start another call (only available once three-way calling has been activated). This feature requires the support of your mobile carrier. For details, contact your carrier. to use the dialler. • Touch • During a call, you can hide the call screen and access other apps by returning to the previous screen or home screen using the current navigation mode. To return to the call screen, touch the green bar on the status bar. • Touch to end the call.
Apps To send a group message to those not included in your contacts list, touch anywhere blank in the recipient box and enter the recipients' phone number. Touch the return key in the keyboard when you finish entering each of the phone numbers. 4 After finishing editing, touch to send the message. Save a Draft Message to save a draft message. From the New message screen, touch Cancel Sending a Message On the Messaging screen, go to > Settings > Advanced and enable Recall messages.
Apps Block Spam Messages Go to Messaging > You can also go to > Blocked > and set block rules. Optimiser > Blocked > to set block rules. Block Messages from Specific Numbers 1 Go to 2 Touch and add the numbers you want to block. SMS and MMS messages sent by these numbers will all be blocked. Messaging > > Blocked > > Blocklist. Block Messages Containing Specific Keywords 1 Go to 2 Touch and add the keywords to be filtered. All messages containing these keywords will be blocked.
Apps Search for Events 1 On the Calendar screen, touch 2 Enter keywords of your event in the search box, such as the title and location. . Share an Event 1 On the Calendar screen, touch an event on the calendar or under the schedule. 2 and follow the onscreen instructions to share the event using whichever Touch method you prefer.
Apps View National/Regional Holidays View national/regional holidays in the calendar to help plan your travel. 1 Go to 2 Turn on the switch of a country/region, and your device will automatically download holiday information for that country/region and display it in the Calendar. Calendar > > Settings > National/Regional holidays. Clock Alarm You can set alarms to play a sound or vibrate at specific times. Set an Alarm 1 Go to 2 Select a sound for the alarm.
Apps Timer Go to Clock > Timer, set the duration of time, and touch it, touch to start the timer. To stop . Stopwatch Go to Clock > Stopwatch, and touch to start the stopwatch. To stop it, touch . View the Time in Cities Worldwide Use Clock to see the local time in different time zones around the world. Go to Clock > World clock, touch , and enter the name of a city or select one from the list of cities.
Apps 3 Touch 4 Touch SAVE. , set a reminder time, then touch OK. Sort Notepad Items by Category Categorise notepad items to make them easier to find. Notes in different categories are displayed in different colours. You can sort notepad items using either of the following methods: • , then select a On the All notes or All to-dos screen, swipe left on an item, touch category.
Apps Play a Recording Recording files are listed on the Recorder home screen. Touch a recording to play it. On the recording playback screen, you can: • Touch to skip the muted parts. • Touch to adjust the playback speed. • Touch to add a tag. • Touch a tag to rename it. Edit a Recording 1 On the Recorder home screen, touch a recording. 2 Touch to display the waveform of the recording. 3 Drag the start and end bars to adjust the clip length.
Apps Add an Exchange Account Microsoft Exchange enables digital messaging within a company. If your company mailbox uses the Exchange server, you can log in to your company email account on your device. 1 Contact the company email server administrator to obtain the domain name, server address, port number, and security type. 2 Open 3 Enter the email address, user name, and password. 4 Touch Manual setup.
Apps Set Encryption for Outgoing Emails You can encrypt outgoing emails to protect your confidential information. Encrypted emails can be viewed only by recipients who have the required digital certificates, ensuring information security. 1 Apply for and install a digital certificate. You need to apply for a digital certificate from a trusted third-party certificate authority (CA) before installing it. The processing procedure varies between different CAs. For details, refer to the relevant CA website.
Apps 3 Swipe left or right to view the next or previous email. Organise Emails by Subject On the Inbox screen, go to > Settings > General, then enable Organise by subject. Sync Emails After automatic email syncing is enabled, the emails on your device will be automatically synced with those on the email server. 1 On the Inbox screen, go to 2 Touch the account you wish to sync emails for, then turn on the Sync Email switch. 3 Touch Sync frequency to set the automatic syncing period. > Settings.
Apps Manage VIP Contacts Important email contacts can be added as VIP contacts. Emails from VIP contacts will be automatically stored in the VIP inbox. Add a VIP Contact You can add VIP contacts using either of the following methods: • Go to Email > > Settings > VIP contacts. On the VIP list screen, go to Add > Create or touch Add from contacts, then follow the onscreen instructions. • Open an email, touch the account name of the sender or receiver, then touch Add to VIP list.
Apps • Clear the display: Touch . You can also touch to clear the display after touching to complete the calculation. Torch Torch You can turn on the torch using either of the following methods: • Swipe down from the status bar to open the notification panel, and touch to turn the torch on or off. • Swipe up from the bottom edge of the lock screen to display the shortcut panel, and touch to turn the torch on or off.
Apps 2 Two icons for the same app will display on the home screen for you to log in to your separate accounts simultaneously. 3 To disable App twin, touch and hold the twinned version of the app, then touch Delete. All the data of the twin app will be deleted. Quickly Access Frequently Used App Features Quickly Access Frequently Used App Features You can access frequently used features of certain apps from app icons on the home screen, and even add shortcuts for these features to the home screen.
Apps Manage Data Usage Open Optimiser, then touch Data usage to view data usage and manage network access. View and Manage High Data Consumption Apps 1 You can find out how much data your apps are using in comparison to each other by going to Data usage this month on the Data usage screen. 2 Touch a high data consumption app to set mobile data, roaming data, or background data usage limits for it.
Apps Tips Tips Tips provides you with an abundance of information so you can quickly familiarise yourself with your device and make the best use of it. In Tips, you can also find a full set of user guides for more detailed instructions. • Vividly depicted cards: Browse through the easy-to-read cards with a short clip or image to quickly get to grips with all the most useful features on your device. The cards are categorised so you can jump directly to a category you are interested in.
Settings Search for Items in Settings Search for Items in Settings Tired of trudging through layers of settings? Just search for them using the search box. • Swipe down from the middle of the screen to display the search box. Enter the name of a setting to obtain search results. • Open Settings, and enter the name of a setting in the search box at the top of the screen, to obtain search results.
Settings These steps may be different if you are sharing files directly from an app. 4 Touch the icon of the receiving device to establish a connection, then share the files. 5 On the receiving device, accept the Wi-Fi Direct transfer request. To view the received files, open Files, then go to Internal storage > Wi-Fi Direct on the Categories tab.
Settings 3 From the list of Available devices, select the one you want to pair your device with, and follow the onscreen instructions to complete pairing. On the Bluetooth settings screen, touch to view tips for connecting various Bluetooth devices. Transfer Files via Bluetooth You can use Bluetooth to transfer videos, pictures, contacts, and more to another device provided that both devices are within the effective Bluetooth range. 1 Pair the sending and recipient devices via Bluetooth.
Settings Once disabled, a SIM card cannot be used for calling, messaging, or accessing the Internet. Name Your SIM Card You can name your SIM cards for easier identification and management. For example, you could mark one SIM card as "Work" and the other as "Personal". Go to Settings > Mobile network > SIM management and touch to edit the SIM card name.
Settings • Set Password. • Touch Connected devices to view the connected devices list and blocklist. Touch a device in the Connected devices list to move it to the Blocklist list as prompted. You can also remove a device from the list. • If you are sharing a mobile data network, you can also touch More to set Data limit and AP band. Share Your Network Connection via Bluetooth 1 Go to Settings > Bluetooth, enable Bluetooth, select a device, then follow the onscreen instructions to complete pairing.
Settings • Swipe down from the status bar to open the notification panel, then swipe down again to display all shortcuts. Touch • Go to to enable or disable Airplane mode. Settings > Mobile network, and enable or disable Airplane mode. When Airplane mode is enabled, Wi-Fi and Bluetooth will automatically be disabled. You can re-enable them if allowed to do so by the airline.
Settings 1 Go to Settings > More connections and enable NFC and Huawei Beam on the devices of both the sender and recipient. 2 On the sending device, touch and hold a file, select the files you want to share, touch and select Huawei Beam. Operations may vary if you are sharing files from apps directly.
Settings • Connect to a router: Enable Wi-Fi on the printer and connect it to the router. On your device, enable Wi-Fi, connect to the same router, then follow the onscreen instructions to finish configuring the settings. • Use Wi-Fi Direct: If your printer supports Wi-Fi Direct, follow the instructions in the printer manual to enable this feature. On your device, enable Wi-Fi Direct, then touch the printer to establish the connection.
Settings 3 If the VPN server does not have a DNS address, touch Show advanced options, then enter the DNS domain, DNS server address, and forwarding route. 4 Touch Save. 5 Touch the VPN you have just set up, enter your VPN user name and password, then touch Connect. Connect to a L2TP/IPSec PSK Server 1 Obtain the VPN server name, server address, L2TP key (optional), IPSec identifier (optional), and IPSec pre-shared key from your VPN server administrator.
Settings Put App Icons in Folders For easy management of your app icons on the home screen, you can stack similar apps in a folder and name the folder. 1 Touch and hold an app icon until your device vibrates, then drag it over another app. A folder will automatically be created to house these two apps. 2 Open a folder, touch its name, then enter a name for it. Add App Icons to a Folder or Remove Them Open a folder and touch .
Settings You can enable or disable eBook mode using either of the following methods: • Swipe down from the status bar to open the notification panel, then swipe down on it again to show all shortcuts. Touch If the switch is not available, touch to enable or disable eBook mode. and find and drag the switch towards the top of the screen for it to display in the notification panel. • Settings > Display & brightness, and enable or disable eBook mode.
Settings Adjust the Colour Temperature Go to Settings > Display & brightness > Colour mode & temperature, and select the colour temperature that you prefer. Default and Warm will be easier on your eyes and are therefore recommended. • Default: a natural tint • Warm: a yellowish tint • Cool: a whitish tint • You can touch anywhere on the colour circle or drag the spot to adjust the colour temperature.
Settings Dark Mode In low light conditions or at night, you can enable Dark mode to apply a darker colour scheme, which helps prevent excessive screen light from irritating your eyes. Go to Settings > Display & brightness, and enable or disable Dark mode. Adjust Text Style Settings You can adjust the system text size and app display size, as well as the text style. Enlarge or Reduce Text Size Go to Settings > Display & brightness > Text and display size, and drag the slider for Text size.
Settings • Auto • Show cutout • Hide cutout Hide the Notch Go to Settings > Display & brightness > More display settings > Cutout, and select Hide cutout. Display Carrier Name and Network Speed in the Status Bar You can check the carrier name and network speed with a single glance at the status bar. Go to Settings > Display & brightness > More display settings, and enable or disable Display carrier name and Display network speed according to your preferences.
Settings • Go to Settings > Sounds & vibration > Do Not Disturb, and enable or disable Do Not Disturb. When Do not disturb is enabled, will be displayed in the status bar. You can check for notifications on the lock screen or by swiping down from the status bar to open the notification panel. Swipe left on a notification and touch to delay the notification.
Settings 2 Select a preset tone, or touch Music on device to select a local song as the notification tone. Notifications App Badges When new notifications arrive for an app, a numbered badge will appear on the app icon. You can also set a dot as the badge, or hide the badge for some or all apps. Turn Off App Badges 1 Go to 2 Turn off the switch for some or all apps. Settings > Notifications, and touch App icon badges.
Settings Notification methods supported by an app may vary. Lock Screen Notifications Go to Settings > Notifications and enable Hide notification content. Notification content will no longer be displayed on the lock screen of your device. When Hide notification content is disabled, the contents of new notifications will be displayed on the lock screen. More Notification Settings Go to Settings > Notifications > More notification settings and enable Wake screen.
Settings 3 Touch the fingerprint sensor with your finger. The recognised fingerprint will be highlighted. Use Your Fingerprint to Access Your Safe 1 Settings > Biometrics & password > Fingerprint ID and enter your lock screen Go to password. 2 Turn on the switch for Access Safe and follow the onscreen instructions to link your fingerprint with the Safe. Now you can go to Files > Categories, touch Safe, then use your fingerprint to access it.
Settings You can then touch a locked app on your home screen and use face recognition to access the app. Disable or Delete Facial Data On the Face Recognition screen, you can do the following: • Disable facial data for certain features: Disable Unlock device, or Access App Lock as required. This will not delete your facial data. • Delete facial data: Touch Delete facial data and follow the onscreen instructions to delete your facial data.
Settings Check Power Consumption Go to Settings > Battery (or Optimiser > ). You can: • Touch Battery usage to view power-intensive apps. • Touch a power-intensive app to view Battery usage details or adjust the settings as required. For example, you can close the power-intensive app. • Touch Power consumption details to learn more about the software and hardware power consumption.
Settings When the battery level is sufficient, go to Settings > Battery (or Optimiser > ) and enable Performance mode. The icon will then be displayed in the status bar. Performance mode is not available on some devices. If this option is not displayed in Optimiser, it indicates that your device does not support the feature. Battery Settings You can also set whether to display the battery percentage in the status bar, and whether to maintain a network connection when the device screen is turned off.
Settings If you have enabled face or fingerprint unlock, you can link App Lock with a face ID or fingerprint ID as prompted. Not all devices support fingerprint features. Change the App Lock Password or Security Questions Enter the App Lock settings screen, go to > Password type, and select Lock screen password or Custom PIN as the App Lock password. If you select Custom PIN, you can go on to set a new password and security questions.
Settings 2 Enable Lock SIM card, enter the PIN code, and then touch OK. To modify the PIN, touch Change SIM PIN and follow the instructions. • You will have to enter a PIN Unlocking Key (PUK) to unlock the SIM card if you exceed the maximum number of failed attempts to enter the PIN. A new PIN needs to be set up once you successfully unlock your SIM with a PUK. Should you also exceed the maximum number of failed attempts to enter the PUK, your SIM card will be blocked.
Settings Manage Permissions to Access Other Private Data You can also manage permissions to access your personal data, such as Contacts, Messaging, Call logs, Body sensors, Calendar, and Camera, to enjoy better services and protect your privacy. On the Permissions screen, touch the permission you want to manage, and toggle the switch for each app on or off as required. Location Services Some apps need to obtain your location information to provide better services.
Settings Accessibility Screen reader apps are designed to assist visually impaired users to use a device. Enable Colour Correction to Customise the Screen Colour Colour correction helps people with poor eyesight see the screen content more easily. 1 Go to Settings > Accessibility features > Accessibility > Colour correction and enable Colour correction. 2 Touch Correction mode to select a colour correction mode. Use Magnification Gestures Use magnification gestures to zoom in on the screen.
Settings 2 Access One-Handed mode using one of the following methods, depending on the navigation mode you are using on your device. • If you're using Gestures, swipe up diagonally from one of the bottom corners and hold. • 3 If you're using Three-key navigation, swipe left or right across the navigation bar. Touch the blank area to exit. One-Handed mode will not work if Gesture magnification is enabled on your device.
Settings Go to Settings > System & updates > Date & time, then set the options according to your requirements. Set the Date and Time Automatically or Manually • Enable Set automatically, and your device will sync to the local date and time over a mobile network. • To manually set the date and time, disable Set automatically. Change the Time Zone • Enable Set automatically, and your device will sync to the local time zone over a mobile network.
Settings 2 Select the backup you want to restore from the RESTORE FROM BACKUP list. 3 Select the data you want to restore, touch Restore, and enter the password as prompted. Back Up with a USB Storage Device In case of insufficient storage space on your device, you can back up large files and any data on a USB storage device, such as a USB flash drive or card reader. 1 Connect your device to a USB storage device via a USB OTG cable.
Settings 2 On your device, scan for available NAS devices using your Wi-Fi network, then touch an applicable one to access and add its shared folders. 3 Select the backup you want to restore from the RESTORE FROM BACKUP list. 4 Select the data you want to restore, touch Restore, and enter the password as prompted. Reset Your Device Reset Network Settings This operation will reset your Wi-Fi, mobile data network, and Bluetooth settings.
Settings Update the System Online When an update is available, your device will prompt you to download and install the update package. • Before updating, make sure your device is running an official system version. Otherwise, the update may fail and your device may experience unknown issues. • Back up your user data before the update. • After an update, third-party apps that aren't compatible with the new system version may become unavailable.
This guide is for your reference only. The actual product, including but not limited to the colour, size, and screen layout, may vary. All statements, information, and recommendations in this guide do not constitute a warranty of any kind, express or implied. Please visit https://consumer.huawei.com/en/support/hotline for up to date support hotline and email address information for your country or region. Model: PPA-LX1 PPA-LX2 EMUI 10.1.