User Guide
Contents Essentials Basic Gestures System Navigation Lock and Unlock Your Screen Screenshots & Screen Recording Adjust Sound Settings Show Date and Time When the Screen Is Off Power On and Off or Restart Your Device Charging Get Familiar with the Home Screen Notification and Status Icons Shortcut Switches Quickly Access Frequently Used App Features Home Screen Widgets Set Your Wallpaper View and Clear Notifications Multi-Window Phone Clone Enter Text 1 4 5 6 10 12 13 14 15 16 18 19 19 20 20 21 25 26 Smart
Contents Pro Mode Record Videos Slow-Mo Recording Time-Lapse Photography Dual-View Mode Leica Colors Manage Gallery Huawei Vlog Editor Huawei Vlogs Highlights Launch Camera Light Painting Take HDR Photos Documents Mode Filters Adjust Camera Settings Smart Photo Categorisation 53 56 58 59 59 60 60 66 67 67 68 69 70 70 71 71 72 Apps Phone Compass Tips Apps Notepad Mirror App Twin Contacts Messaging Calendar Clock Recorder Email Calculator Torch Optimizer Phone Clone HiSuite 74 82 82 83 84 86 87 87 91 92 9
Contents Security Accessibility Features System & Updates Search for Items in Settings Wi-Fi Bluetooth Home Screen & Wallpaper Notifications Apps Battery Storage Privacy Users & Accounts About Phone 127 130 132 137 138 139 140 141 143 143 145 146 149 150 iii
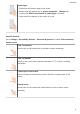
Essentials Basic Gestures Basic Gestures and Shortcuts This feature may vary by device. System Navigation Gestures Go to Settings > System & updates > System navigation, and confirm that Gestures is selected. Return to the previous screen Swipe inward from the left or right edge to return to the previous screen. Return to the home screen Swipe up from the bottom of the screen to return to the home screen. View recent tasks Swipe up from the bottom of the screen and hold to view recent tasks.
Essentials Switch apps • Slide along the bottom edge of the screen. Before using this gesture, go to System navigation > Settings and confirm that Slide across bottom to switch apps is enabled. • Swipe across the bottom of the screen in an arc. Knuckle Gestures Go to Settings > Accessibility features > Shortcuts & gestures to enable Take screenshot, Record screen. Take a screenshot Knock twice on the screen with a knuckle to take a screenshot.
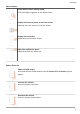
Essentials More Gestures Access Home screen editing mode Pinch two fingers together on the home screen. Display the shortcut panel on the lock screen Swipe up from the bottom of the lock screen. Display the search bar Swipe down on the home screen. Open the notification panel Swipe down from the status bar. Button Shortcuts Power off and restart Press and hold the Power button until the Power off and Restart options appear. Increase the volume Press the Volume up button.
Essentials Take a screenshot Press the Volume down and Power buttons simultaneously. Ultra snapshot Double-press the Volume down button when the screen is off or locked to take a photo. This feature may vary by device. System Navigation Change the System Navigation Mode Navigate with Gestures Go to Settings > System & updates > System navigation, and select Gestures. You can then: • Go back to the previous screen: Swipe inward from the left or right edge.
Essentials • Touch to access the recent tasks screen. You can touch Settings to configure more settings. • Select a navigation key combination. • Enable Hide navigation keys to allow you to hide the navigation bar when not in use. • Touch (if available in the selected navigation key combination) to open the notification panel. Use the Navigation Dock to Operate the Device Go to Settings > System & updates > System navigation > Navigation dock, and enable Navigation Dock.
Essentials • Go to Settings > Accessibility features > Shortcuts & gestures > Wake screen, and enable Raise to wake, Double-tap to wake, and/or Show palm to wake. Then use the corresponding feature to turn on the screen. If your device does not have this option, it indicates that this feature is not supported. Unlock the Screen with Password Once the screen is turned on, swipe up from the middle of the screen to display the password input panel. Then, enter your lock screen password.
Essentials Use Your Knuckle to Take a Screenshot 1 Go to Settings > Accessibility features > Shortcuts & gestures > Take screenshot, and ensure that Knuckle screenshots is enabled. 2 Knock the screen twice in quick succession with one knuckle to take a screenshot. Use a Key Combination to Take a Screenshot Press and hold the Power and Volume down buttons simultaneously to take a screenshot.
Essentials • Touch the thumbnail to edit or delete it. You can also touch Scrollshot to take a scrolling screenshot. Screenshots are saved to Gallery by default. Use Your Knuckle to Take a Scrolling Screenshot 1 Knock the screen with a knuckle and hold to draw an "S". The screen will automatically scroll down to the bottom for you to capture the entire page. 2 You can touch the screen at any point to stop the screenshot.
Essentials Record the Screen Record your screen activities in sharable videos to compose a tutorial, show off your awesome gaming skills, and a lot more. Use a Key Combination to Start Screen Recording Press and hold the Power and Volume up buttons simultaneously to start screen recording. To stop recording, press and hold both buttons again. Use a Shortcut to Start Screen Recording 1 Swipe down from the status bar to open the notification panel, then swipe down on it again to show all shortcuts.
Essentials 1 Knock on the screen with a knuckle and hold to draw an outline around the part of the screen that you want to capture. Make sure that your knuckle does not leave the screen. 2 The screen will display the movement trajectory of your knuckle and take a screenshot of the selected area. You can then: • Drag the frame to the desired position or resize it. • Touch a shape icon to determine the shape of the partial screenshot, or retain the current shape. 3 Touch to save the screenshot.
Essentials Flip to Mute or Raise to Reduce Ringing Volume When you receive an incoming call, you can flip your device to mute it, or raise it to reduce the ringing volume. Go to Settings > Accessibility features > Shortcuts & gestures > Mute ringtone/Reduce volume, then enable Flip to mute ringtone and Raise to reduce volume. Change the Sounds and Vibration Settings You can set the messaging tone, notification tone, and call ringtone depending on your preferences, as well as set the vibration pattern.
Essentials Go to Settings > Sounds & vibration > More settings and enable or disable System haptics according to your preferences. Set More settings On the Sounds & vibration screen, touch More settings, and set more notification methods according to your preferences. For example, you can set Keypad tones and Screenshot. This feature may vary by device.
Essentials Create an Artistic Image for Always On Display You can choose from multiple modern art styles (such as the Mondrian style). You can also specify the colour scheme for the artistic image, by taking a photo or choosing from your favourite photos. The colours in the photo will form a colour palette for the artistic image. 1 From under Artistic on the Always On Display screen, touch the style you would like to use. 2 Set the related options for the Artistic style, such as Layout.
Essentials Force Restart Your Device You can force restart your device if it isn't working or won't turn off normally. To do this, just press and hold the Power 10 seconds or longer. Charging Charge Your Device Your device will alert you when it is running out of power. Please make sure to charge your device in time to prevent it from turning off automatically when the power runs out. Precautions for Charging • Charge your device using the standard adapter and USB cable that came with your device.
Essentials If another option has been set previously, the dialog box will not pop up. Swipe down from the status bar to open the notification panel, touch Settings, then select Charge only. Overview of Battery Icons You can check the battery level from the battery icon on the device screen.
Essentials Notification and Status Icons Notification and Status Icons Network status icons may vary according to your region or network service provider. Supported functions vary according to the device model. Some of the following icons may not be applicable to your device.
Essentials Data saver enabled No SIM card detected Hotspot enabled Hotspot connected Wi-Fi connected Hotspot disconnected Switching network via Wi-Fi+ Alarm set Battery empty Low battery Charging Quick charging Super charging Super wireless charging Quick wireless charging Regular wireless charging Power saving mode enabled Digital balance enabled Bluetooth enabled Bluetooth device battery Bluetooth device connected VPN connected Driving mode Projection device connected Location ser
Essentials Airplane mode enabled Shortcut Switches Use Shortcut Switches Turn on a Shortcut Switch Swipe down from the status bar to open the notification panel, then swipe down on it again to show all shortcuts. • Touch a shortcut switch to enable or disable the corresponding feature.
Essentials • Touch and hold a shortcut switch to access the settings screen of the corresponding feature. (Supported by some features.) • Touch to access the system settings screen. Customise Shortcut Switches Touch , touch and hold a shortcut switch, then drag it to the desired position.
Essentials To configure the Weather app, open it, and touch to set the configurations as prompted. For example, to switch between Celsius and Fahrenheit, go to > Temperature unit, and touch Celsius (℃) or Fahrenheit (℉). Move or Delete a Widget Touch and hold a widget on your home screen until your device vibrates, then drag it to the desired position or touch Remove. Set Your Wallpaper Set Your Wallpaper Use a Preset Wallpaper 1 Go to Settings > Home screen & wallpaper > Wallpaper.
Essentials • You can touch to clear all notifications. Some system notifications and notifications from apps running in the foreground cannot be cleared. Do Not Disturb Settings for Notifications If you wish not to be disturbed by a notification, swipe left on it, touch , and choose from options including Disable notifications, Use gentle notifications, and DELAY. Some system notifications and notifications from apps running in the foreground cannot be disabled or delayed.
Essentials Touch and hold at the top of a split-screen pane until the pane shrinks, then drag it to the other side of the screen to switch panes. Exit split-screen mode: Touch and hold or in the middle of the split screen line and drag it until either pane disappears. • Support for split-screen mode varies by app. • Split-screen mode is limited to two apps at any given time.
Essentials Multi-Window View for a Single App You can create two task windows for the same app (such as Email and Notepad), and drag images, text, or documents between them. This feature is unavailable in some apps. 1 Enter the split-screen view within an app. • Open the Email app. • Swipe inward from the left or right edge of your device and hold to bring up the MultiWindow dock. • 2 Touch and hold the Email icon, and drag it to the screen to enter split-screen view.
Essentials 2 Touch an app icon in the Multi-Window dock to open the app in a floating window. Relocate the floating window: Drag the bar at the top of the floating window to move the window to the desired location. Resize the floating window: Drag the bottom edge or corners of the floating window to resize it. Display in full screen: Touch at the top of the floating window to display it in full screen.
Essentials 2 Touch the floating ball to display all floating window previews: • Browse through the floating window previews: Swipe up or down to find the floating window preview of the app you are looking for. • Display the floating window for an app: Touch the floating window preview of the app to display it in a floating window. • Close the floating window for an app: Touch on the floating window preview to close it.
Essentials Migrate Data from an iPhone or iPad 1 On your new device, open the Phone Clone app. Alternatively, go to Settings > System & updates > Phone Clone, touch This is the new device, then touch iPhone/iPad. 2 Follow the onscreen instructions to download and install Phone Clone on your old device. 3 On your old device, open the Phone Clone app and touch This is the old device.
Smart Features AI Lens Enable AI Lens There are multiple ways to access AI Lens. From Camera Open Camera, select Photo mode, and touch to access AI Lens. From the Search Bar When the screen is unlocked, swipe down from the centre of the home screen to open the search box, and touch next to it to access AI Lens. From the Lock Screen Turn on the screen when it is locked, swipe up from the bottom to open the shortcuts panel, and touch to unlock the screen and access AI Lens.
Smart Features Scan to Learn More AI Lens allows you to learn more about artworks or landmarks you see by scanning the objects with your camera. Scan to Learn More Using Camera 1 Go to Camera > Photo, touch 2 Position the object within the viewfinder and wait for it to be identified. 3 Touch the information card to obtain additional information. , and then touch . Scan and Count Calories AI Lens allows you to count the calories and nutrients in an item of food by scanning it with your camera.
Smart Features Touch and Hold the Screen with Two Fingers for Visual Shopping 1 Go to Settings > Accessibility features > AI Touch and enable AI Touch. 2 When you see an item you wish to buy on your device, touch and hold the screen with two fingers spread slightly apart. 3 When several items are displayed on the screen, adjust the size and position of the identification box to fit around the item you wish to buy.
Smart Features Device Projection Using a Wired Connection You can project your device screen on a large display (for example, a TV) using a wired connection. It is recommended that you purchase the accessories from authorised channels. Projection Using a Type-C Cable 1 Prepare a Type-C cable. Use a Type-C to HDMI, Type-C to DP, or Type-C to MiniDP cable depending on your large display. 2 Connect the Type-C end to your device and the other end to the large display.
Smart Features 1 Prepare a docking station. Multiple types of ports are available on a docking station. If the large display supports HDMI and you need to use a wired mouse and keyboard, use a docking station with at least one HDMI port and two USB ports. 2 Connect your device and the large display to the docking station, then connect the wired mouse and keyboard to the docking station. 3 On the external display, set the corresponding HDMI, DP, or MiniDP input as the signal source.
Smart Features Use Desktop Mode After your phone screen is projected, go to > Projection mode on your phone, and touch Desktop mode. In Desktop mode, your phone and the large display work independently and can show different content. The content projected on the large display is in a layout similar to that on a computer desktop. Therefore, you can edit a document on the large display while chatting on your phone.
Smart Features • When no external keyboard is connected, touch the text input box on the external display to display the onscreen keyboard to input text. If an external keyboard is connected, the onscreen keyboard will not be available. In this case, you need to use the external keyboard to input text. Use Screen Projection to Make Work Easier In Desktop mode, you can use the following features: • Multi-window display: Open multiple windows at a time to multitask.
Smart Features 2 Open PC Manager (version 10.0 or later), go to My Phone > Connect, and select to search for your phone over Bluetooth. Place your phone above the keyboard and your PC will start searching for your phone. To check the version of PC Manager, go to > About. To update PC Manager, go to > Check for updates. 3 Follow the onscreen instructions to connect your phone and PC. Connect Your Phone to the PC by Scanning the QR Code 1 Open PC Manager (version 10.
Smart Features Drag and drop files After Multi-screen Collaboration is established between your phone and PC, you can drag and drop files such as pictures and videos between them to make your work easier. Transfer files from your phone to the PC. • In the phone window on the PC, open Gallery or Files, click and hold a picture or video, click and hold any of the selected files until a dragging icon is displayed, then drag the files to a folder on your PC.
Smart Features Ensure that PC Manager is running version 9.0 or later. Record the PC screen: Shake your phone and place it against your PC to project and record the PC screen on your phone. 1 Shake your phone and immediately place the NFC area (near the rear camera) on the label on your PC until your phone vibrates or back of the phone against the or plays a tone. Your PC screen will then be projected and recorded on your phone. The PC screen recording can be up to 60 seconds.
Smart Features • Copy and paste text: Press Ctrl+C on the PC keyboard to copy text and press Ctrl+V to paste it in the phone window. To view information about the text you have copied recently, click the Notification Centre icon on the PC, then select the Clipboard tab. • Send messages quickly: Press Ctrl+Enter on the keyboard to send a message in the phone window. • Exit an app: Press the ESC key on the keyboard to exit an app in the phone window.
Smart Features Multi-screen Collaboration Between Your Tablet and Phone Multi-screen Collaboration Between Your Phone and Tablet Connect your phone and tablet to use Multi-screen Collaboration for cross-device operations, such as to display your phone screen on the tablet, use your phone apps on the tablet, drag files across the two devices, and edit a file from your phone on the tablet. Connect Your Tablet and Phone Only some Huawei and Honor tablets support this feature.
Smart Features Access Phone Apps and Files from Your Tablet After connecting your phone with your tablet, you can operate your phone from your tablet, such as to operate phone apps and files, view phone notifications (such as SMS messages), and make or answer phone calls. When your phone screen is unlocked, you can perform the following operations in the phone window on your tablet: • Open Phone to make a call by dialling a number. • Open Messaging to view and reply to SMS messages.
Smart Features Switch to a Different Output Device During Playback When playing music or videos through your earphones, you can quickly switch playback to another device without having to unplug your wired earphones or disconnect your Bluetooth earphones. 1 Enable Bluetooth on your device and connect it to wired earphones or a Bluetooth audio device (such as Bluetooth earphones, a Bluetooth speaker, or a vehicle-mounted device).
Smart Features Quickly Share Files Between Devices with Huawei Share You can use Huawei Share to quickly share files between Huawei devices. The recipient can preview the files before they are sent, then view the full content of the files once they have been received. For example, the recipient can view received pictures or videos in Gallery. 1 On the receiving device, enable Huawei Share. 2 On the sending device, touch and hold to select a file or album you want to share, then touch .
Smart Features Share Files Between Your Device and Computer with Huawei Share You can use Huawei Share to easily share files wirelessly between your device and a computer (Windows or macOS). 1 Make sure your device and computer are connected to the same Wi-Fi network. 2 On your device, enter the Huawei Share settings and enable Huawei Share and Computer Share. 3 Make a note of the name displayed next to Name shown on computers, as well as the user name and password under Verification.
Smart Features Changes made to files in the shared folders on your computer will be automatically synced to your device and vice versa. One-Touch Printing with Huawei Share When a printer that supports Huawei Share is nearby, you can use Huawei Share to find the printer and print out pictures or PDF files stored on your device. 1 Depending on the type of printer, ensure the following: • Wi-Fi capable printers: The printer must be powered on and connected to the same network as your device.
Smart Features For a list of supported printers, touch Help on the Huawei Share sharing screen, select Printers, then touch What printers are supported?.
Camera and Gallery Take Photos Take Photos The figures are for reference only. 1 Open Camera. 2 You can then: • Focus: Touch the location you want to focus on.
Camera and Gallery To adjust focus and metering separately, touch and hold the viewfinder and drag the respective frame or ring to the desired location. • Adjust brightness: Touch the viewfinder. When the symbol appears next to the focus frame, drag it up or down. • Zoom in or out: On the viewfinder, pinch in or out, or drag the zoom slider. • Select a camera mode: Swipe up, down, left, or right across the camera mode options.
Camera and Gallery To delete the whole burst photo, touch and hold to select the photo, then touch . Take Timed Photos The camera timer allows you to set a countdown so you can get into position after you have touched the shutter button. 1 Go to Camera > 2 Return to the viewfinder and touch the shutter button. Your device will take a photo when the countdown ends. > Timer and select a countdown.
Camera and Gallery Take Night Shots Night mode gives your photos sharper details and brighter colors even when shooting in low light or at night. 1 Open Camera and select Night mode. 2 If you are using the rear camera, touch or on the viewfinder to adjust the ISO sensitivity to adjust the shutter speed. This feature may vary by device. 3 Steady your device and touch the shutter button. 4 Your device will adjust the exposure time based on the ambient brightness.
Camera and Gallery 2 Touch a photo tagged with 3 Touch the photo to adjust the focus. Drag the slider at the bottom to adjust the aperture. 4 Touch 5 Touch to save the edited photo as a new photo. The new photo does not allow background blur editing. , then touch at the top of the photo. to save the settings. Zoom to Take Photos Take Wide-Angle or Long-Focus Photos The zoom capabilities of your device's camera allow you to capture more of a scene, or distant vistas.
Camera and Gallery 1 Go to Camera > More and select Super macro mode. If your device allows, you can also drag the zoom slider in the viewfinder to take a macro photo with a focal length below 1x. 2 Touch to take a photo. Automatically Switch to Super Macro Mode 1 Open Camera. When the camera is close enough to the object you want to shoot, it will automatically focus on the object. If 2 Touch is enabled, the screen will display Super macro. to take a photo.
Camera and Gallery Take Black and White Photos Take Black and White Photos Black and white photography removes distracting colours to help you focus more on form, shape, and texture. 1 Go to Camera > More and select Monochrome mode. 2 Select one of the following modes based on your subject and scene: • Normal: This mode suits all kinds of subjects. • Aperture: This mode blurs the background and lends greater emphasis to the subject.
Camera and Gallery 3 Touch to start recording. 4 Touch to finish recording. This feature may vary by device. Moving Pictures Take Moving Pictures to Bring Photos to Life When you want to capture a photo-worthy moment, but do not feel sure about when to touch the shutter button, you can use the Moving picture feature. Take Moving Pictures 1 Go to Camera > More and select Moving picture mode. 2 Touch to take a photo. Play Moving Pictures Moving pictures are saved in JPG format in Gallery.
Camera and Gallery Add Stickers to Photos Add a sticker, such as time, weather, mood, or food, to spice up your photos. 1 Go to Camera > More and select Stickers mode. If the Stickers option is not present, touch , then download Stickers. 2 Touch 3 Drag the sticker to change its position. You can also edit the text of some types of stickers. 4 Touch and select a sticker. The selected sticker will be displayed in the viewfinder. to take a photo.
Camera and Gallery 1 Open Camera and select Pro mode. 2 You can then: • Adjust the metring mode: Touch M and select a metring mode. Metring Mode Matrix Centre Spot • Description Measures the light in the whole frame. Applicable when shooting landscapes. Places more emphasis on light levels at the centre of the screen. Applicable when shooting portraits. Concentrates on the light in a small area of the screen, such as the subject's eyes. Adjust the ISO sensitivity: Touch ISO and drag the slider.
Camera and Gallery In low-light conditions, increase the ISO sensitivity. In well-lit environments, lower the ISO sensitivity to avoid image noise. • Adjust the shutter speed: Touch S and drag the slider. The shutter speed affects the amount of light allowed to enter the camera lens. When you are shooting stationary scenes or portraits, lower the shutter speed. When you are shooting moving scenes or objects, increase the shutter speed. • Adjust EV exposure compensation: Touch EV and drag the slider.
Camera and Gallery Metring Mode Centre Places more emphasis on light levels at the centre of the screen. Applicable when shooting portraits. Concentrates on the light in a small area of the Spot • Description screen, such as the subject's eyes. Adjust the ISO sensitivity: Touch ISO and drag the slider. In low-light conditions, increase the ISO sensitivity. In well-lit environments, lower the ISO sensitivity to avoid image noise. • Adjust the shutter speed: Touch S and drag the slider.
Camera and Gallery • Turn the flash on or off: Touch , then touch to keep the flash on, or to turn it off. When using the front camera to record videos, you can set the flash to (Always on) when there is insufficient light. The camera will then increase the screen brightness to illuminate the subject's face. • Adjust the beauty effect: Touch and drag the slider to adjust beauty settings. • Adjust the video resolution and frame rate: Go to > Video resolution and select the desired resolution.
Camera and Gallery Shoot 4K UHD Videos Your device supports 4K Ultra HD (UHD) video recording. 1 Open Camera and select Video mode. 2 Go to > Video resolution and select [16:9] 4K. Beauty mode, filters, and special effects are not supported at 4K, and will be automatically disabled when you select the 4K resolution. 3 Return to the Video screen and touch to record a video. A higher resolution will result in a higher quality video, but will also take up more storage space.
Camera and Gallery Shoot Slow-Mo Videos 1 Go to Camera > More and select Slow-mo mode. 2 Touch and select 4x or 8x. The 8x option is not available on certain devices. 3 Touch to start recording. 4 Touch to end the recording. Adjust the Slow-Mo Part in Slow-Mo Videos For a slow-mo video, you can change which part of it you want to play in slow motion. This feature is only available for slow-mo videos recorded at 4x or 8x. The 8x option is not available on certain devices.
Camera and Gallery Record Dual-View Videos The Dual-view feature splits the recording screen into two views, allowing you to watch the regular view side by side with a zoomed-in view. 1 Go to Camera > More, then touch Dual-view. 2 Frame your subject in the viewfinder, then touch to start recording. The regular view and the zoomed-in view display side by side on the screen, with the zoomed-in area being the centre of the regular view.
Camera and Gallery 2 Touch or to save your edits. Add Stickers to Photos 1 In Gallery, touch a photo, then go to 2 Select the type of sticker you want to add, such as Time, Weather, or Mood. 3 Select a sticker and drag it to change its position. You can also edit the text of some types of stickers. 4 Touch to save your edits and touch > More > Stickers. to save the photo.
Camera and Gallery • Add or remove borders: By default, borders are displayed between photos and along the grid edges. To remove them, touch Frame. 3 Touch to save the collage. To view the saved collage, go to Albums > Collages. View Photos and Videos In Gallery, you can view, edit, and share your photos and videos, as well as browse the clips automatically generated from them. View by Shooting Time Open Gallery.
Camera and Gallery You can also drag the track ball on the edge to view the time. View by Album You can view photos and videos by album on the Albums tab. Some photos and videos are stored in default albums. For example, videos recorded with the camera are saved in the Camera album. Screenshots and screen recordings are saved in the Screenshots album. View by Category Gallery intelligently sorts photos into categories, allowing you to quickly sift through large albums by category.
Camera and Gallery • Save items from other devices to your device: Touch the target device, touch and hold to select photos or videos, then touch . The saved items are displayed in Gallery > Albums > From other devices. To disable this feature, disable Multi-Device Collaboration. Quickly Search for Photos in Gallery Quickly locate a photo by searching with keywords in Gallery. 1 Open Gallery, then touch the search box at the top. 2 Enter a keyword (such as "food", "scenery", or "flower").
Camera and Gallery The All photos and Videos albums show all photos and videos stored on your device. Moving items across albums will not affect the view in these albums. Delete Photos and Videos Touch and hold to select the items you want to delete, then go to > Delete. Some preset albums, such as All photos, My favourites, Videos, and Camera albums, cannot be deleted. Deleted photos and videos will be temporarily moved to the Recently deleted album before being permanently deleted after 30 days.
Camera and Gallery Huawei Vlog Editor Huawei Vlog Editor The Huawei Vlog editor automatically creates Huawei Vlogs, such as Spotlight Reels, Highlights videos, and People albums, with added background music from your photos and videos. You can also select photos and videos yourself to create your own Huawei Vlogs. Either way, you can edit and share your Huawei Vlogs at the touch of a finger.
Camera and Gallery Huawei Vlogs View, Edit, and Share People Album Videos Gallery automatically creates People albums by identifying faces in photos. View, edit, and share the videos generated in these People albums. View People Album Videos 1 Go to Gallery > Discover and touch a People album. 2 Touch on the album cover. Share People Album Videos Go to Gallery > Albums > Video Editor, where you will find all your exported videos. Touch and hold to select videos you would like to share, then touch .
Camera and Gallery Share Highlights Videos as Videos 1 Go to Gallery > Albums > Video Editor, where you will find all your exported videos. 2 Touch and hold to select the videos you want to share, then touch . Share Highlights Videos as Photos Touch the Highlights album you want to share, then go to > Share. Follow the onscreen instructions to share the created photo. You can also share the photo under Gallery > Albums > Collages, where the photos created for Highlights videos are saved by default.
Camera and Gallery Using Ultra Snapshot When enabled, simply double-press the Volume down button to open the camera or take a snapshot when the screen is off or locked. 1 Go to Camera > 2 You can now open the camera or take a snapshot without unlocking your screen. > Ultra Snapshot and select Open Camera or Take a snapshot. Light Painting Use Light Painting to Shoot Light Trails Light painting helps you capture light trails by allowing the shutter to stay open for a longer time.
Camera and Gallery 2 This feature works best when taking photos of a stream or waterfall where there is a lot of flowing water. 3 Touch 4 When the exposure is just right, touch to start shooting. Look at the shot in the viewfinder. to finish shooting. Capture the Beauty of the Stars in Star Trails Mode Star trails mode lets you use your camera to capture the movement of the stars in the night sky. 1 In Light painting mode, select Star trails.
Camera and Gallery 2 Frame the document you want to shoot within the viewfinder, then touch 3 The camera will automatically identify the text area within the viewfinder, unskew the image, and remove any shadows. . This feature may vary by device. Adjust the Text Area If you find the skew correction of a photo unsatisfactory, you can also manually adjust the text area. This is only available for photos taken in Documents mode.
Camera and Gallery Add Device Watermarks Enable Add watermark. Photos and videos shot with the rear camera will have a device watermark added. Adding a device watermark to videos is not supported on certain devices. Use the Assistive Grid to Compose Your Photos Use the assistive grid to help you line up the perfect shot. 1 Enable Assistive grid. Grid lines will then appear in the viewfinder. 2 Place the subject of your photo at one of the intersecting points, then touch the shutter button.
Camera and Gallery View and Set People Albums Once you have taken a sufficient number of photos, Gallery will automatically create People albums for individuals or groups by identifying faces in your photos. This will happen when your device is charging and the screen is off. You can name these People albums and set the relationships of individuals with you. Group photo albums require a specific number of photos containing 2 to 10 faces that have already been named in People albums.
Apps Phone Set a Ringtone for Incoming Calls You can set your favourite music or a video as the ringtone for incoming calls. If you are carrying your device in your pocket, the ringtone volume will gradually increase. This helps prevent you from missing important calls. If your phone has two SIM cards installed, configure the settings for SIM 1 and SIM 2 respectively. Set a Music Ringtone 1 Go to Phone > > Settings > Ringtone. Or go to Settings > Sounds & vibration > Phone ringtone.
Apps Your linked phone number will be used by default to make and receive MeeTime calls. Other devices can confirm that you have enabled the feature by checking this number. Charges for MeeTime • MeeTime only uses Wi-Fi or mobile data and will not be charged as calls by your carrier. It is recommended that you use this feature over a Wi-Fi network.
Apps Set MeeTime Phone Numbers You can use MeeTime with more than one of your phone numbers. 1 On the MeeTime screen, touch your account to access the Settings screen. 2 Touch Number settings. You can then: • Touch to add another phone number if only one phone number has been linked. • Touch to delete any numbers or add new ones if multiple phone numbers have been linked. • Select one of the added phone numbers to set it as the default number.
Apps If your phone has two SIM cards installed, configure the settings for SIM 1 and SIM 2 respectively. This feature may vary depending on your network provider. Answer a New Incoming Call During a Call 1 2 When you receive an incoming call when you are already engaged in a previous call, touch to answer it. Touch or touch a held call in the call list to switch between the two calls.
Apps Go to Phone > > Settings > Speed dial, select a number key, then set a contact for this speed dial number. Press the Power Button to End a Call During a call, press the Power button to end the call. Go to Phone > > Settings > More, and enable Power button ends call. Set a Call Background To set a wallpaper as the call background, do the following: 1 Go to Settings > Home screen & wallpaper > Wallpaper. 2 Select a picture and set it as the wallpaper.
Apps Delete Call Logs Delete call logs using any of the following methods: • On the Phone screen, touch and hold an entry, then touch Delete entry. • On the Phone screen, go to > Delete entries, select the entries you want to delete, then touch Delete. • On the Phone screen, swipe left on the entry you want to delete, then touch . Use VoLTE to Make HD Video Calls VoLTE (Voice over LTE) is an IP-based data transmission technology.
Apps Filter Spam Calls 1 Go to Phone > > Blocked > . Alternatively, go to Optimiser > Blocked > 2 . Touch Call block rules and toggle on the switches of corresponding block rules. Block Incoming Calls from Specific Numbers You can block incoming calls from specific numbers using either of the following methods: • > Blocked > Go to Phone > > Blocklist, touch , then add the phone numbers you want to block.
Apps call your emergency contacts one by one and play a pre-recorded SOS message, then end the call automatically. If Auto-SOS call is disabled, after the message is sent, your device will bring up the emergency call screen, from which you can quickly call an emergency service or one of your emergency contacts. Make Emergency Calls In the event of an emergency, you can make emergency calls directly from the lock screen of your device even if there is no signal.
Apps 2 Go to Voicemail > Voicemail number, enter the voicemail number obtained from your network provider, and touch OK. If your phone has two SIM cards installed, configure the settings for SIM 1 and SIM 2 respectively. Listen to a Voicemail Message Touch and hold the 1 key on the dialler and then enter your voicemail number. Compass Compass Compass shows you the direction your device is pointing, as well as your current coordinates and altitude. The feature availability varies by device.
Apps • Collections: Browse through the easy-to-read cards that contain a short clip or image to quickly get to grips with all the most useful features on your device. The cards are categorised so you can jump directly to a category you are interested in. • More Tips: Find detailed instructions in the comprehensive user guides. • Me: Configure the related settings. For example, check for updates of the Tips app.
Apps • Swipe across to view app previews. • Touch an app preview to access an app. • Swipe up on an app preview to close an app. • Swipe down on an app preview to lock it. preview. Touching will appear at the top of the app will not close this app. • Swipe down again to unlock it. • Touch will disappear. to close all apps (except for those you have locked). Clear the Cache of an App Delete app cache files to free up storage space.
Apps 2 Align your phone camera with the picture or file you want to scan and touch scanning. The scanned pages are saved in Notepad. 3 Go to Extract text > Save > Save images and text > to start to save the note. Add a Handwritten Note You can add a handwritten note to write down thoughts and inspirations that would be difficult to convey through text. 1 Go to Notepad > Notes and touch 2 Touch to write or draw the content you need in the selected colour. 3 Touch to save the note. .
Apps • Touch and hold a note or to-do item, select the ones you want to classify under the same category, then touch . Items in an Exchange account cannot be moved. Sync Notepad Items Swipe down from the Exchange mail list to sync the notes and tasks from the current account to Notepad. The corresponding notes and to-do items will then be generated automatically. A folder named after the Exchange account will be automatically generated in Notepad.
Apps Go to Tools > Mirror. You can then: • Zoom in or out: Drag the zoom slider at the bottom. You can also touch the screen twice to zoom in and touch it twice again to restore the original view. • Save the image: Touch the screen to pause on the current image. Touch the screen again to resume. When the image is paused, touch to save the image. You can find the saved image in Gallery. • Adjust mirror brightness: Touch • Fog up the screen: Touch or at the top of the screen. and enable Blow.
Apps Import Contacts 1 On the Contacts screen, go to 2 Select Import via Bluetooth, Import via Wi-Fi Direct, or Import from storage, then follow the onscreen instructions to import contacts. > Settings > Import/Export. Scan Business Cards to Add Contacts 1 On the Contacts screen, go to 2 Place a business card on a flat surface, adjust the camera so that the contents on the > Scan or go to Business cards > Scan.
Apps Share Contacts 1 2 On the Contacts screen: • Touch and hold the contact you want to share, then touch Share contact. • Touch the contact you want to share, then go to > Share contact. Select a sharing method, then follow the onscreen instructions to share the contact. Export Contacts 1 On the Contacts screen, go to 2 Touch Export to storage and follow the onscreen instructions to export contacts. > Settings > Import/Export. The contacts will be exported into .vcf files.
Apps Edit a Contact Group 1 On the Groups screen, select the group you want to edit and touch contact. 2 Touch to add a new for Remove members, Group ringtone, Delete group, or Rename. Send Group Messages or Emails On the Groups screen, open a group. You can then: • Touch to send a group message. • Touch to send a group email. Delete Contact Groups On the Groups screen, do either of the following to delete a contact group from your device: • Touch and hold the group and select Delete.
Apps 2 Go to > Erase history > Erase to delete all call and message records for that contact. Messaging Filter and Block Spam Messages Set different block rules, such as your blocklist, to block sales, fraud, and other kinds of spam messages. Block Spam Messages 1 Go to Messaging > > Blocked > . Alternatively, go to Optimiser > Blocked > 2 . Touch Message block rules and enable Block unknown numbers. Your device will then block all messages from unknown numbers.
Apps • Touch Block rules to change the block rules. Calendar Use Events Events help you schedule activities in your daily and work life, such as attending company meetings, arranging social get-togethers, and making credit card repayments. You can add events and set reminders to help you arrange your schedule in advance. Add an Event 1 Open Calendar and touch 2 Enter the details of the event, such as the title, location, and start and end times.
Apps • Touch Default reminder time or Reminder time for all-day events to set a reminder time. • Touch Notifications and enable Allow notifications. Then follow the onscreen instructions to set a notification type. Customise Calendar View Settings You can customise calendar view settings, such as by specifying the start day of the week, and whether to show week numbers. 1 Go to Calendar > 2 Select the start day of the week, or enable the switch to show week numbers. > Settings.
Apps Snooze an Alarm If you don't want to get up when an alarm rings, simply touch the snooze button or press the Power button. The snooze length is set when creating the alarm. Turn Off an Alarm When an alarm rings, swipe left or right on the button that appears at the bottom of the screen to turn it off. Use the Timer or Stopwatch You can use the timer to count down from a specified time. You can also use the stopwatch to measure the duration of an event.
Apps Recording 1 In the Tools folder, open Recorder, and touch 2 During a recording, you can touch 3 When you are finished, touch 4 You can also touch and hold a recording, then share, rename, or delete it. to start a recording. to add a tag. to stop recording. Recordings are saved under Files > Categories > Internal storage > Sounds. Play a Recording Recording files are listed on the Recorder home screen. Touch a recording to play it.
Apps Add a Personal Email Account 1 Open Email on your device, then select from the available mailbox providers or touch Other. 2 Enter your email address and password, touch Sign in, and follow the onscreen instructions to complete configuration. The system will automatically connect to the server and check the server settings. Add an Exchange Account Microsoft Exchange enables digital messaging within a company.
Apps 2 Touch 3 After writing your reply, touch to reply to the email sender, or touch to reply to everyone in the thread. . Set Encryption for Outgoing Emails You can encrypt outgoing emails to protect your confidential information. Encrypted emails can only be viewed by recipients who have the required digital certificates, thereby ensuring information security. 1 Apply for and install a digital certificate.
Apps 2 Open an email, then view, reply to, forward, or delete the email. If you are notified about an important event in an email, go to import the event into your calendar. 3 > Add to calendar to Swipe left or right on the email screen to view the previous or next email. Organise Emails by Subject On the Inbox screen, go to > Settings > General, and enable Organise by subject. Add an Email Contact to a Group You can create email groups to communicate more efficiently.
Apps 2 Select an existing email service provider or touch Other, then follow the onscreen instructions to add an email account. Repeat for each of the accounts you wish to add. Switch Between Email Accounts On the Inbox screen, touch Inbox and select the email account you wish to use. Change Account Name and Signature On the Inbox screen, go to > Settings, select an account, and set the corresponding Account name, Signature, and Default account.
Apps • Find Calculator in the Tools folder. • Swipe up from the bottom of the lock screen to display the shortcut panel, then touch to open the calculator. Use the Scientific Calculator > Scientific. Open the calculator and go to Copy, Delete, or Clear Numbers • Copy a calculation result: Touch and hold the calculation result, touch Copy, then paste the result somewhere else, such as in a note or message. • Delete the last digit: Touch • Clear the display: Touch . .
Apps Automatically Clean Up System Trash 1 Open Optimiser, and touch Cleanup. 2 Swipe down from the top of the screen, and your device will automatically clean up system trash. Manually Clean Up System Trash In addition to automatic cleanup, your device will also detect and recommend trash files for you to clean up manually. On the Cleanup screen, touch Clean up next to a category, select the items you want to clean up, then touch DELETE .
Apps 2 On the More data settings screen, touch Usage reminders. From there, you can set whether a notification will be sent or if mobile data will be disabled once the monthly data limit or roaming data limit has been topped. 3 On the More data settings screen, you can set whether to Show data used when the screen is locked. Filter and Block Spam Calls Set different block rules to block sales, fraud, and other kinds of spam calls. Filter Spam Calls 1 > Blocked > Go to Phone > .
Apps Block Spam Messages 1 Go to Messaging > > Blocked > . Alternatively, go to Optimiser > Blocked > 2 . Touch Message block rules and enable Block unknown numbers. Your device will then block all messages from unknown numbers. Block Messages from Specific Numbers 1 Go to Messaging > 2 Touch and add the numbers you want to block. SMS and MMS messages sent by these numbers will all be blocked. > Blocked > > Blocklist.
Apps Phone Clone Use Phone Clone to Move Data to Your New Device Phone Clone lets you quickly and seamlessly move all the basic data (including contacts, calendar, images, and videos) from your old device to your new device. Migrate Data from an Android Device 1 On your new device, open the Phone Clone app. Alternatively, go to Settings > System & updates > Phone Clone, touch This is the new device, then touch Huawei or Other Android.
Apps 2 Use a USB cable to connect your device to your computer. When the Use USB to dialog box is displayed on your device, select Transfer files. 3 On the computer, open Huawei HiSuite and select USB. Then follow the onscreen instructions to establish a connection between your device and computer.
Settings Mobile Data Share Your Network Connection with Other Devices Share Your Network via Personal Hotspot • The settings items vary by device. If your device does not provide a specific item, it indicates that the corresponding feature is not supported. • Some Wi-Fi networks that require authentication cannot be shared. Go to Settings > Mobile network > Personal hotspot, and enable Personal hotspot. The mobile data of your device will then be shared with other devices.
Settings Swipe down from the status bar to open the notification panel, then swipe down again • to show all shortcuts. Turn on Mobile data. Go to Settings > Mobile network > Mobile data, and enable Mobile data. • To save battery power and mobile data, disable the mobile data service when you don't need it. Manage SIM Cards You can enable or disable SIM cards and name them for easier identification.
Settings Quickly Switch the Default Mobile Data SIM If two SIM cards have been installed on your device, you can use a shortcut to quickly switch the default mobile data SIM card. 1 Swipe down from the status bar to open the notification panel, then swipe down again to show all shortcuts. Turn on Mobile data. 2 Touch the text under OK. until a prompt is displayed, then select a SIM card and touch When the prompt is displayed, touch Settings to access the SIM management screen.
Settings During a voice call, you can touch to switch to a video call. Manage Data Usage Open Optimiser, then touch Data usage to view data usage and manage network access. View and Manage High Data Consumption Apps 1 You can find out how much data your apps are using in comparison to each other by going to Data usage this month on the Data usage screen. 2 Touch a high data consumption app to set mobile data, roaming data, or background data usage limits for it.
Settings You can enable or disable Airplane mode using either of the following methods: • Swipe down from the status bar to open the notification panel, then swipe down again to display all shortcuts. Touch • to enable or disable Airplane mode. Go to Settings > Mobile network, and enable or disable Airplane mode. When Airplane mode is enabled, Wi-Fi and Bluetooth will automatically be disabled. You can re-enable them if allowed to do so by the airline.
Settings Projection Using a Type-C Cable 1 Prepare a Type-C cable. Use a Type-C to HDMI, Type-C to DP, or Type-C to MiniDP cable depending on your large display. 2 Connect the Type-C end to your device and the other end to the large display. 3 On the external display, set the corresponding HDMI, DP, or MiniDP input as the signal source. Projection Using a Docking Station You can use a docking station to connect your device with a large display, and connect them with a wired keyboard and mouse.
Settings 2 Connect your device and the large display to the docking station, then connect the wired mouse and keyboard to the docking station. 3 On the external display, set the corresponding HDMI, DP, or MiniDP input as the signal source. Introduction to NFC Near Field Communication (NFC) is a short-range wireless communications technology that allows mobile and other electronic devices to connect in countless ways, allowing you to transfer data and make mobile payments easily.
Settings • Not all devices support NFC. • Enable Read and write/P2P on the NFC settings screen if available. This feature may vary depending on your network provider. Enable or Disable NFC You can enable or disable NFC as follows: • Swipe down from the status bar to open the notification panel, swipe down further to show all shortcut switches, then enable or disable NFC. You can touch and hold NFC to access the settings screen. • Go to Settings > More connections > NFC, then enable or disable NFC.
Settings Enable or Disable Huawei Share You can enable or disable Huawei Share in either of the following ways: • Swipe down from the status bar to open the notification panel, swipe down on it again to show all shortcuts, then turn on or turn off Huawei Share. You can also touch and hold Huawei Share to access its settings screen. • Go to Settings > More connections > Huawei Share to enable or disable Huawei Share.
Settings To view the received files, open Files, touch the Categories tab, then go to Internal storage > Huawei Share. You can also view the received images or videos by going to Gallery > Albums > Huawei Share. Share Files Between Your Device and Computer with Huawei Share You can use Huawei Share to easily share files wirelessly between your device and a computer (Windows or macOS). 1 Make sure your device and computer are connected to the same Wi-Fi network.
Settings 5 On your computer, double-click the name of your device and enter the user name and password previously noted down. 6 Open a shared folder on your device, such as the Internal storage or Album folder to view, edit, or copy files from your device to your computer or vice versa. Changes made to files in the shared folders on your computer will be automatically synced to your device and vice versa.
Settings 3 Once the printer has been discovered, touch its name on your device, and adjust the settings on the preview screen. Then touch PRINT to print. If you are connecting a Bluetooth printer to your device for the first time, find the printer on your device, touch the printer name, then press and hold the Power button on the printer for about 1 second to confirm the connection.
Settings • Connect with Wi-Fi Direct: If your printer supports Wi-Fi Direct, follow the instructions in the printer manual to enable this feature. On your device, go to Settings > Wi-Fi, enable Wi-Fi, go to More settings > Wi-Fi Direct, then touch the printer to establish the connection. • Connect to your printer's hotspot: If your printer can double as a wireless hotspot, follow the instructions in the printer manual to enable the hotspot and set a password.
Settings 5 Touch the VPN you have just set up, enter your VPN user name and password, then touch Connect. Connect to an L2TP/IPSec PSK Server 1 Obtain the VPN server name, server address, L2TP key (optional), IPsec identifier (optional), and IPsec pre-shared key from your VPN server administrator. 2 Go to Settings > More connections > VPN > Add VPN network, enter the VPN name, set the server type to L2TP/IPSec PSK, then enter the server address, L2TP key, IPSec identifier, and IPSec pre-shared key.
Settings Adjust the Colour Temperature Go to Settings > Display & brightness > Colour mode & temperature, and select the colour temperature that you prefer. Default and Warm will be easier on your eyes and are therefore recommended. • Default: a natural tint • Warm: a yellowish tint • Cool: a whitish tint • You can touch anywhere on the colour circle or drag the spot to adjust the colour temperature.
Settings Enlarge or Reduce Text Size Go to Settings > Display & brightness > Text and display size, and drag the slider for Text size. Enlarge or Reduce Display Size Display size determines the size of content (including text and images) displayed within apps. Go to Settings > Display & brightness > Text and display size, and drag the slider for Display size. Use Smart Screen Resolution Go to Settings > Display & brightness > Screen resolution, and enable Smart Resolution.
Settings Display Carrier Name and Network Speed in the Status Bar You can check the carrier name and network speed with a single glance at the status bar. Go to Settings > Display & brightness > More display settings, and enable or disable Display carrier name and Display network speed according to your preferences. Sounds & Vibration Set a Ringtone for Incoming Calls You can set your favourite music or a video as the ringtone for incoming calls.
Settings Set a Notification Tone for a Specific App You can set a notification tone for certain apps by doing the following: 1 Go to Settings > Apps > Apps. 2 Select an app (for example, Notepad). 3 Go to Notifications > To-do notifications > Notification sound. 4 You can then: • Set a tone. Select a preset tone, or touch Music on device to select a locally saved song. • Set a vibration pattern. Touch Vibration and select your preferred type of vibration.
Settings Set a Schedule for Do Not Disturb 1 Go to Settings > Sounds & vibration > Do Not Disturb, and disable Do Not Disturb. 2 Enable Scheduled. Your device will enter Do not disturb mode at the specified time on Saturdays and Sundays by default. 3 Touch Scheduled to set the time frame and repeat cycle. 4 You can also touch Add to set multiple start times.
Settings Identify a Fingerprint Fingerprint identification allows you to match your fingers with the enroled fingerprints. 1 Go to Settings > Biometrics & password > Fingerprint ID and enter your lock screen password. 2 In the Fingerprint list section, touch Identify fingerprint. 3 Touch the fingerprint sensor with your finger. The recognised fingerprint will be highlighted.
Settings Set an Alternate Look You can add an alternate look for more accurate and convenient face recognition. On the Face Recognition screen, touch Set an alternate look, and follow the onscreen instructions to enrol the alternate facial data. Enable Face Unlock On the Face Recognition screen, touch Unlock device, and select an unlock method. If you have enabled PrivateSpace on or added multiple users to your phone, you can use Face unlock only in MainSpace or with the Owner account.
Settings Lock Screen Password You can set a numeric, pattern, or hybrid password as your lock screen password. Set the Lock Screen Password You can set a numeric, pattern, or hybrid password. 1 Go to Settings > Biometrics & password and touch Lock screen password. 2 Enter a password containing 6 digits. 3 Alternatively, touch Change unlock method and select a password type, then follow the onscreen instructions to input a new password.
Settings • Cancel App Lock: On the locked app list, toggle off the switches beside the apps for which you want to cancel the lock. • Reset App Lock: Go to > Disable App Lock > DISABLE. This will cancel all locks, and clear all app lock settings. Encrypt Content on the Memory Card You can encrypt files stored on the memory card. Encrypted files can only be viewed and used on your device. 1 Insert a memory card into your device and ensure that the memory card has sufficient storage space.
Settings • Exit Safe mode: Restart your device to exit. Use the Password Vault to Automatically Fill in the Password Password Vault saves your usernames and passwords and autofills them for you each time you log in to an app. This data is hardware encrypted and stored only on your device. Huawei does not have access to it, and will not upload it to the network or server. • Before using Password Vault, set a lock screen password for your device. • Password Vault is only compatible with certain apps.
Settings The PIN and PUK of your SIM card are provided by your network provider. The number of digits and maximum number of attempts allowed to unlock your PIN and PUK are subject to your network provider. 1 Go to Settings > Security > More settings to enter the SIM lock settings screen. 2 Enable Lock SIM card, enter the PIN, then touch OK. To change the PIN, touch Change SIM PIN, and follow the onscreen instructions. Pin a Screen You can pin the screen of an app so you can stay focused on it.
Settings Enable Colour Inversion Colour inversion allows you to invert the colour of the text and the background. When Colour inversion is enabled, your device will display text in white and the background black. On the Accessibility screen, enable Colour inversion. Use a Shortcut to Activate an Accessibility Feature You can use Volume buttons to quickly activate an accessibility feature. 1 On the Accessibility screen, touch Accessibility shortcut.
Settings Operate Your Device with One Hand You can switch to a mini-screen view so you can use your device with one hand. 1 Go to Settings > Accessibility features > One-Handed mode, and enable One-Handed mode. 2 You can access One-Handed mode using any of the following methods: If you are using Gestures and Slide across bottom to switch apps is enabled, slide • across the bottom of the screen and hold.
Settings 1 Go to Settings > System & updates > Backup & restore > Data backup > External storage and touch Memory card. 2 Touch BACK UP, select the data you want to back up, then touch Back up. 3 Follow the onscreen instructions to set the password and password hint. The data will be encrypted and backed up. The password will be required if you want to restore your data backup. To reset the password, go to the Memory card backup screen, then password.
Settings Back Up with a NAS Device You can back up your important data on a network-attached storage (NAS) device, also known as a private cloud storage server. The NAS device provides shared folders for data backup. 1 On the External storage screen of your device, touch Shared folder. 2 On your device, scan for available NAS devices using your Wi-Fi network, then touch an applicable one to access and add its shared folders. 3 Touch BACK UP, select the data you want to back up, then touch Back up.
Settings Change the Time Zone • Enable Set automatically, and your device will sync to the local time zone over a mobile network. • To manually set the time zone, disable Set automatically. Change the Time Format • Enable 24-hour time and your device will display time in the 24-hour format. • Disable 24-hour time and your device will display time in the 12-hour format.
Settings Enable Simple Mode Go to Settings > System & updates > Simple mode and touch Enable. Touch and hold any icon to drag it to the desired location or uninstall it if it is not a mandatory app. Exit Simple mode Open Settings and touch Exit Simple mode. Update Your Device System Online When an update is available, your device will prompt you to download and install the update package. • Before updating, make sure your device is running an official system version.
Settings 1 Download the input method from an official app market. 2 Follow the onscreen instructions to set it as the default input method, or go to Settings > System & updates > Language & input > Default keyboard and select the input method. Use Phone Clone to Move Data to Your New Device Phone Clone lets you quickly and seamlessly move all the basic data (including contacts, calendar, images, and videos) from your old device to your new device.
Settings Wi-Fi Introduction to Wi-Fi Connecting to the Internet over Wi-Fi is an effective way to save mobile data. You can also enable Wi-Fi security monitoring to avoid risky hotspots and ensure safe Internet access. Connect to a Wi-Fi Network Be extra careful when connecting to a free public Wi-Fi hotspot to avoid security risks and economic loss resulting from the leakage of your personal data. 1 Go to Settings > Wi-Fi, and enable Wi-Fi.
Settings 1 Go to Settings > Wi-Fi. 2 Touch More settings and enable or disable Wi-Fi+. Bluetooth Bluetooth You can connect your device to Bluetooth headsets, speakers, and car kits. You can also use Bluetooth to share data between your device and other devices. Make sure your device is within 10 m (about 33 ft.) of other Bluetooth devices.
Settings Operations may vary if you are sharing files from apps directly. 3 Touch the Bluetooth name of the recipient device to start sharing. 4 On the recipient device, accept the Bluetooth transfer request. Unpair a Bluetooth Device 1 On the Bluetooth settings screen, enable the Bluetooth switch. 2 In the list of Paired devices, touch then touch Unpair.
Settings 2 Open a folder, touch its name, then enter a name for it. Add App Icons to a Folder or Remove Them Open a folder and touch . Then you can: • Select one or more apps, and touch OK to add them to the folder. • Deselect one or more apps, and touch OK to remove them from the folder. If you deselect all apps, the folder will be deleted. Use App Drawer to Store Apps You can put your apps in a drawer and display only frequently used apps on your home screen to streamline your home screen.
Settings Change the Badge Display Mode On the App icon badges screen, touch Badge display mode, and select Numbers or Dots according to your preference. Disable App Notifications Disable Notifications from a Specific App If you do not want to be disturbed by notifications from an app, perform either of the following: • After you receive a notification from the app, swipe left on it in the notification panel, and go to • > Disable notifications.
Settings Show Notification Icons in the Status Bar Go to Settings > Notifications > More notification settings, and enable Show notification icons in the status bar. Apps Enable App Twin App Twin enables you to log in to two WhatsApp or Facebook accounts simultaneously, allowing you to keep your work and private life separate. App Twin is only supported by some apps. Go to Settings > Apps > App Twin, and enable App Twin. The twin app will then be displayed on the home screen.
Settings Enable Smart Battery Capacity Smart Battery Capacity intelligently adjusts the maximum available battery capacity based on the current battery state to slow down battery wear and prolong the battery lifespan. It is advised that you keep this feature enabled. To enable this feature, go to Settings > Battery > More battery settings, and enable Smart Battery Capacity.
Settings Performance mode is not available on some devices. If this option is not displayed in Optimiser, it indicates that your device does not support the feature. Customise Battery Settings You can also set whether to display the battery percentage in the status bar, and whether to maintain a network connection when the device screen is turned off.
Settings On the Cleanup screen, touch Clean up next to a category, select the items you want to clean up, then touch DELETE . Clean Up Duplicate Files Optimiser can identify duplicate files on your device. On the Cleanup screen, touch Duplicate files , then select unwanted files to delete them. Privacy Use Location Services Some apps need to obtain your location information to provide better services.
Settings Create a PrivateSpace for Your Private Data Create your PrivateSpace that is completely independent of MainSpace (the original space) on your device, which can be accessed using your fingerprint or a password. Not all devices support fingerprint features. You can move private photos, videos, and other files to your PrivateSpace to prevent unauthorised access. You can also move your payment and gaming apps to PrivateSpace to prevent them from being accessed by your child.
Settings 2 Follow the onscreen instructions to complete the verification, select and answer the security question, then touch Finish. 3 > Reset In MainSpace, go to Settings > Privacy > PrivateSpace, then go to password, and follow the onscreen instructions to complete the verification and reset the password. Transfer Data in PrivateSpace to Your New Device You can quickly transfer your PrivateSpace data, such as contacts, photos, and files, from the old device to the new one.
Settings 2 On the Permission manager tab, touch Location, touch the icon of the corresponding app, then select Allow all the time, Allow only while in use, or Deny. Manage Permissions to Access Other Private Data You can also manage permissions to access your personal data, such as Contacts, Messaging, Call logs, Body sensors, Calendar, and Camera, to enjoy better services and protect your privacy.
Settings • Swipe down from the status bar to open the notification panel, touch > More settings, touch the name of the account you wish to delete, then follow the onscreen instructions to delete it. About Phone Legal Notice Copyright © Huawei 2021. All rights reserved.
This guide is for your reference only. The actual product, including but not limited to the colour, size, and screen layout, may vary. All statements, information, and recommendations in this guide do not constitute a warranty of any kind, express or implied. Please visit https://consumer.huawei.com/en/support/hotline for up to date support hotline and email address information for your country or region. Model: VOG-L09 VOG-L29 EMUI 11.