
Installation Instructions


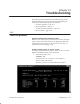
Table Of Contents
- Title page
- Contents
- About this manual
- Safety information
- Ch 1 - Introduction
- Ch 2 - Adding cards to the Controller
- Unpacking the System Controller
- Unpacking the picocells
- System Controller card configuration
- Adding cards to the System Controller (first steps)
- Jumper and DIP switch settings
- Attaching bus cables
- Adding cards to the System Controller (final steps)
- Configuring Controller cards
- Verifying the card configuration
- Ch 3 - Installing the Controller
- Ch 4 - Verifying the Controller configuration
- Ch 5 - Configuring the router
- Ch 6 - Testing picocells
- Ch 7 - Installing picocells
- Ch 8 - Connecting to external equipment
- Ch 9 - System testing
- Ch 10 - Installation inspection
- Ch 11 - Provisioning
- Ch 12 - Remote Client
- Ch 13 - Troubleshooting
- Ch 14 - Maintaining Quad T1 cards
- App A - Specifications
- App B - Standards compliance information
- App C - Part numbers
- App D - Updates and backups
- Index

1026209–0001 Revision B
Installation inspection 10–1
Chapter 10
Installation inspection
This chapter briefly discusses the installation quality inspection.
When all the initial AIReach Office subscribers have been entered
into the Controller, complete the Installation Quality Assurance
(QA) Inspection Checklist. Obtain this checklist from your
AIReach OS Program Manager.
Invite a customer representative to accompany the person
performing the QA inspection.
Complete the Installation Quality Assurance (QA) Inspection
Checklist as follows:
1. Check the Y box when an item is complete or the N box
when an item is NOT complete (discrepancy).
2. Correct any discrepancies and initial the associated
CLEARED box when the discrepancy is corrected.
3. Sign the checklist when the inspection is complete.
4. Obtain the customer’s representative’s signature.
5. Send the completed Installation Quality Assurance (QA)
Inspection Checklist to the HNS Installation Manager.