Chapter 1 2 Welcome 4 Making the Right Connections 6 Safety & Care 9 Hardware Reference 12 Getting Familiar 16 Choose Your Setup 26 Guided Setup & Activation 28 Programming Your Remote Control
Getting Started Welcome TIP You can find additional information and the latest updates at DIRECTV.com. With its astounding variety of channels and choices, crisp digital-quality picture and sound and one-of-a-kind sports and events… DIRECTV® service offers everything you’d want in your television experience. With the DIRECTV Receiver you can expect more than ever before, with access to over 225 channels, including over 30 premium movie channels, with all the convenience of DIRECTV service.
Making the Right Connections Making the Right Connections Are you ready to connect your DIRECTV® Receiver and your other components? Whether you’re having your system professionally installed or handling it yourself, be sure to read over the following few pages to familiarize yourself with some important tips for safety and care. Before you begin Your satellite dish antenna must be installed before you can begin following the procedures in this User Guide. (Professional installation is highly recommended.
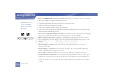
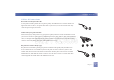
Getting Connected Package Contents The following items are included with your DIRECTV Receiver: A/V cables (RCA type) Access card S-Video cable User Guide Phone cord Remote Control & batteries Power cord Note to Satellite Dish Installer Important 44 Making the Right Connections This reminder is provided to call your attention to articles 810 and 820 of the 2002 National Electrical Code.
Safety & Care Safety & Care Your DIRECTV System has been designed and manufactured to stringent quality and safety TIP standards. You should, however, be aware of the following important precautions for safe and optimal use of the equipment. We highly recommend plugging the DIRECTV Receiver into a surge Be sure to… protector to prevent • Read and follow all installation and operating instructions. damage from fluctuations • Keep instructions for future reference. in your power supply.
Getting Connected • Have your DIRECTV Receiver professionally serviced (do not attempt to service it yourself) if: The power supply cord or plug is damaged or frayed IMPORTANT: Be sure not Liquid has spilled into the product or it has been exposed to water to place your DIRECTV The receiver has been dropped or damaged Receiver near anything The receiver exhibits a distinct change in performance The receiver does not operate normally when you follow operating instructions as described in this
Safety & Care • Do not drop your DIRECTV Receiver and always move it with care. • Place it on a flat, hard surface — do not operate the DIRECTV Receiver on a carpet or other padded surface. Ensure that the rack or cabinet the receiver is placed on is stable, and not subject to being tipped over. • Ensure proper ventilation — the slots on top of the DIRECTV Receiver must be left uncovered to allow proper airflow to the unit.
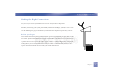
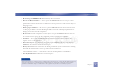
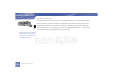
Getting Connected Hardware Reference General Satellite Dish Antenna This is your “dish” and related hardware, affixed to your roof or other surface, which picks up the broadcast signals from our satellites. DIRECTV Receiver (or Satellite Receiver) Your DIRECTV Receiver picks up the signal from your satellite dish antenna and translates it into viewable TV programming. POWER GUIDE MENU REC ACTIVE INFO SELECT OPEN OPEN Access Card Contains information about your DIRECTV® service.
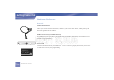
Hardware Reference Cables & Connections Best Video: S-Video Jack and Cable S-video jacks and cables provide the best picture quality. You will still need to connect the left and right audio cables to the TV, or optical audio cable to your stereo, because the S-Video cable only carries the picture signal, not sound. S-Video Jack Audio/Video (A/V) Jack and Cable Audio/Video (A/V) cables provide very good picture quality and stereo sound, and should be used if your TV does not have S-video jacks.
Helpful Hardware Re Getting Connected Telephone Jack and Cord The telephone line cord is required to connect your DIRECTV Receiver to a land-based telephone line if you choose to subscribe to DIRECTV programming. The phone line connection is used to periodically call DIRECTV. You will need an RJ11-type modulator jack (the most common type Phone Jack of phone jack). Note: Do not connect your receiver to a digital PBX phone system — doing so may permanently damage your equipment and void your warranty.
eference Getting Familiar Getting Familiar DIRECTV Receiver Front Panel 1 1) 2 3 4 5 6 5 7 8 9 POWER – Turns your DIRECTV Receiver on or off. Your DIRECTV Receiver still tunes and receives messages when powered off. 2) REMOTE SENSOR – The infrared sensor picks up commands from the remote control. 3) GUIDE – Displays the onscreen program guide. 4) MENU – Brings up the Quick Menu to access settings and services. 5) ARROWS – Move the onscreen highlight up, down, left or right.
etting Connected Insert your DIRECTV Access Card Locate the access card that came packed with your DIRECTV Receiver materials and insert the card, SELECT Acti ve In fo facing upward, fully into the slot. DIRECTV Receiver Rear Panel 1 2 3 4 5 6 7 8 9 10 Your equipment may not look exactly like the model illustrated. 1) SATELLITE IN – Use to connect the DIRECTV Receiver to the satellite dish antenna. 2) OUT TO TV – Connects the DIRECTV Receiver to your TV or VCR using RF coaxial cable.
Getting Familiar 5) S-VIDEO – Provides the best picture quality, better than VIDEO RCA-type or RF coaxial cable jacks. If your TV has an S-Video jack, use it along with the audio jacks (S-Video only carries picture information, not sound) to connect to your TV. 6) VIDEO (Yellow) – Provides better picture quality than the OUT TO TV jack. Connect the second RCA-type composite VIDEO jack to another device, such as a VCR. You must also connect the AUDIO cables when using the VIDEO connection.
Getting Connected Choose Your Setup TIP There are several ways to connect your receiver to match your particular equipment setup and to gain When working with optimum signal quality. The basic steps are as follows: cables, be sure to connect corresponding • Connect the satellite dish cable to your receiver. outputs and inputs (Video • Connect the receiver audio and video to your TV or VCR. OUT to Video IN, Right • If you connected the receiver to a VCR, connect the VCR to your TV.
Choose Your Setup Connecting Your DIRECTV Receiver to your TV or VCR Depending on the connections on the back of your TV or VCR, you have the following options: • S-Video & A/V Audio Connection (Best Quality) • A/V Connection (Better Quality) • RF Coaxial Connection (Good Quality) These connections are described on the following pages.
Getting Connected S-Video & A/V Audio Connection (Best Quality) Using the S-Video cable, connect one end to the S-VIDEO output jack on the DIRECTV Receiver and the other end to the S-VIDEO input jack on the TV. Using the A/V cable, connect the white and red plugs from one end of the A/V cable to the AUDIO L (white) and R (red) jacks on the back of the DIRECTV Receiver. Connect the plugs from other end of the A/V cable to the corresponding audio INPUT jacks on your TV or VCR.
Choose Your Setup BEST QUALITY CONNECTION – Television S-Video & A/V Audio The back panels of your equipment may not look exactly like those illustrated.
Getting Connected A/V Connection (Better Quality) Using the A/V cable, connect the white, red and yellow plugs from one end of the A/V cable to the AUDIO L (white) and R (red) and VIDEO (yellow) output jacks on the back of the DIRECTV TIP To switch between watching your VCR and watching video from your receiver, you may need to program the INPUT key on your DIRECTV Receiver. Connect the other end of the A/V cable to the corresponding A/V input jacks on your TV.
Choose Your Setup VERY GOOD QUALITY CONNECTION – A/V The back panels of your equipment may not look exactly like those illustrated.
Getting Connected RF Coaxial Connection (Good Quality) TIP To switch between watching your VCR and watching video from your receiver, you may need to program Using an RF coaxial cable, connect one end to the OUT TO TV jack on the DIRECTV Receiver and the other end to the ANTENNA IN jack on the TV or VCR. If hooking up a VCR, use another RF coaxial cable to connect one end to the OUT TO TV jack on the VCR and the other end to the ANTENNA IN jack on the TV. the INPUT key on your DIRECTV remote.
Choose Your Setup GOOD QUALITY CONNECTION – RF Coaxial Television The back panels of your equipment may not look exactly like those illustrated.
Getting Connected Guided Setup & Activation Now that your receiver and equipment are all hooked up and plugged in, you’re ready to finish all the details to begin receiving your DIRECTV service. TIP You may decide to set up, change or adjust some of the MENU settings later. When you’re 1) Make sure the MODE SWITCH on the remote control is set to DIRECTV. 2) Press TV POWER ON. The DIRECTV Receiver will turn on. 3) The first screen will allow you to select a language.
Guided Setup & Activation After these setup procedures are complete, you’ll see the Satellite Data Acquisition screen, as the receiver gathers information from the satellite for the onscreen program guide. Next, you’ll be given the opportunity to set up your phone connection, as well as program your remote to control other equipment such as your TV and/or DVD player.
Getting Connected Programming Your Remote Control You can program the DIRECTV remote control to operate your TV power, volume and mute, additional equipment such as a DVD, VCR, stereo, or second TV or DIRECTV Receiver. 1) Press MENU to display the Quick Menu. 2) Highlight Settings and press SELECT. 3) Highlight Setup and press SELECT. 4) Press SELECT on Remote in the left menu. 5) Follow the onscreen instructions to program your remote for your TV or additional equipment (AV1 and AV2).
Programming Your Remote Control Factory Defaults To reset all the functions of the remote control to the factory defaults, follow these steps: 1) Point the remote away from your DIRECTV Receiver and components. Press and hold MUTE and SELECT until the light above the slide switch on the remote flashes twice (about 5 seconds). 2) Enter 9-8-1. The light on the remote will flash twice, indicating you have cleared AV1, AV2 and TV modes.
Getting Connected 26
Chapter 2 28 Watching TV 30 The Guide 32 The Mini Guide 32 Autotune 34 Pay Per View
What’s On TIP Use the Channel Watching TV Now that everything’s set up, you’re ready to grab your remote and start surfing! Lineup (included in your Welcome pack- With the MODE SWITCH to the left (under the DIRECTV logo), press TV POWER ON. To age) to get familiar access the channel of your choice, simply key in its numbers on your remote (the channel will appear with our channel in a few seconds, or press ENTER after the numbers and it will appear right away). You can also numbers.
Watching TV The Channel Banner 1 Any time you tune to a channel, you’ll see the channel banner appear across the top of the screen. Th is banner displays the following useful information: 1) Current date & time 2 3 4 5 6 7 The channel banner gives you info on the channel and show you are currently watching. 2) DIRECTV Channel – Channel logo, number and call letters of the station you’re currently viewing. 3) Program – Program title, stop and start time and rating of the current program.
What’s On The Guide Overview of the DIRECTV Advanced Program Guide® The Guide displays listings of current and upcoming programs for up to 3.5 days in advance. Find out what’s on (now or later), change the channel, find and purchase a pay per view movie or event, or search for a program you’re interested in. Icons you may see in the Guide: TIP Press the GUIDE key twice ID E to skip the Category Sort 30 GU screen.
The Guide Getting Around in the Guide LIST ID E GU IT EX Press the GUIDE key on your remote, then choose how you want to fi lter the Guide. Select All E ACTIV Channels, or channels in a specific category. SELECT Moving through the Guide is simple: The UP, DOWN, LEFT and RIGHT arrow keys move you through listings and time slots. Highlight a program or channel cell to view its description. Use the CHAN key up or down to scroll a full page.
What’s On The Mini Guide Program Listings While You Watch TV The Mini Guide is a special version of the Guide that displays only one channel at a time, and appears over full-screen TV. To display the Mini Guide, press the BLUE key on the remote while watching TV. Just as you can with the Guide, you can scroll through channels and times, set programs to record, access program info, and other Guide features.
The Mini Guide 3) Select the Set Autotune button, then OK on the confirmation screen. If a program you select to autotune conflicts with another program, you will be notified of the conflict at the time and given a choice of which autotune to cancel.
What’s On Pay Per View The Latest Movies, 24 Hours a Day You don’t have to go out for the best and biggest movies and special events! Recent hits and events like sports, comedy and more are available 24 hours a day on DIRECTV ® Pay Per View. You’ll find them listed in the Guide in the 100s, with previews on channel 100. TIP Tune to a pay per view program or press INFO on a highlighted pay per view program. Select a Buy You can also order DIRECTV option and follow the onscreen instructions.