09.
Table of Contents Page 1.0 2.0 3.0 4.0 4.1 4.1.1 4.1.2 4.1.3 5.0 5.1 5.2 5.3 5.4 5.5 5.6 5.7 5.8 6.
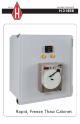
1.0 Introduction The H-3185B controller (Figure 1) uses on-off control of heating and cooling devices to cycle between two temperatures. It can be set to cycle between two temperatures for a finite number of cycles and then stop. When set to run for a finite number of cycles, ramp rate between temperature extremes can be adjusted as well as soak duration at each temperature extreme. The controller is programmed to cycle from 40°F to 0°F when set to run in cycle mode.
2.0 Setup 1) Mount the controller box securely on a wall nearest to the Freeze/Thaw cabinet, but away from water or extreme moisture. 2) Plug in all electrical devices on the cabinet such as heaters, cooling system compressor, fan, and mechanical thermostat to the sockets at the bottom of the controller box (Figure 2). All electrical connections have twist to lock plugs that easily attach to the controller box. Each connection is different and no two connections can be confused.
4) Plug the main power cord from the controller box into an appropriate receptacle. The controller requires a 125VAC, 30 amp power source. 5) Connect the thermocouple wire from the machine to the matching connector coming from under the chart recorder. 6) The main circuit breaker is located on the side of the controller box near the door latches. Set the breaker to the ON position. 7) Wait for the controller to go through its self test.
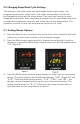
Up arrow button Down arrow button Mode button Menu button Figure 4A - Button Guide 3.0 Set Value Control The default mode for the controller is “Normal” mode. In this mode, the controller will try to maintain the temperature controlled by the Set Value (green display). When the controller receives power, it will automatically go to this mode. The controller will continue to heat or cool to maintain the set value temperature until it is manually stopped.
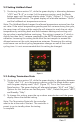
4.1 Changing Operational Modes 1) To change the mode of operation, press and hold the Mode button (see figure 4A) for at least three seconds. The red display will read “Ctrl” and the green display will read whatever mode it is currently in. 2) Use the up or down arrow buttons to change the setting on the green display to show the mode desired.
4.1.2 Standby Mode 1) To change to Standby mode, follow step 1 in section 4.1 for changing the operational mode. 2) When the red display reads “CtrL”, press one of the arrow buttons until the green display reads “Stby” (Figure 6). 3) Follow step 3 in section 4.1 to return to the temperature readings and begin the operation.
5.0 Changing Ramp/Soak Cycle Settings The settings in the cycle recipe can be changed to the user’s needs. The temperature set points, ramp times, soak times, and number of cycles can be changed by going into the recipe menu. One cycle can have up to eight temperature set points. Each temperature set point has an associated ramp time to reach that temperature set point and a soak time at that temperature. This controller is preset to have two temperature set points in a cycle. 5.
5.2 Setting Holdback Band 1) Continuing from section 5.1, while the green display is alternating between “rOPt” and “8.r.S” as in step 3 of the previous section, push the Mode button again until the green display reads “HLd.b” (Figure 11). This is the Holdback Band function. The green display will alternate between “HLd.b” and the holdback set temperature variance. Note: The Holdback Band changes the allowed temperature variance from the set value.
5.4 Setting Number of Cycles 1) Continuing from section 5.3, while the green display is alternating between “tEr.S” and “Stby” as in the previous section, push the Mode button again repeatedly until the green display reads “”rcY.n” (Figure 13). The green display will alternate between “rcY.n” and the number of cycles desired minus one (i.e for 36 total cycles, it should display 35). 2) To change the number of cycles, press the up or down arrow button until the desired number minus one is displayed. 5.
5.6 Setting Ramp Times 1) Continuing from section 5.5, while the green display is alternating between “PFrE” and the set option as in the previous section, continue pressing the Mode button until the green display reads “rt1” (Figure 15). The display will alternate between “rt1” and the ramp time value (in minutes) for the first ramp in the cycle. It is capable of 8 ramp operations in the cycle. This is the first ramp time setting.
5.8 Setting Soak Time 1) Continuing from section 5.7, while the green display is alternating between “SL1” and the soak temperature, continue pressing the Mode button until the green display flashes “St1” (Figure 17). The display will alternate between “St1” and the soak time (in minutes). As in the case of the ramp time, this is the first of 8 soak times available.