Classic Stand Fan Owner’s Manual English Models 90438 90439 61902-01 R20141230
TABLE OF CONTENTS Introduction ............................................................. 3 Safety and Warnings ................................................ 3 Grounding ............................................................... 5 Fused Plug ............................................................... 6 Unpacking ............................................................... 7 Base Assembly ......................................................... 7 Attaching Motor To Pole ...................
INTRODUCTION Thank you for choosing the Hunter Oscillating Stand Fan. This manual gives you complete instructions for assembling and using your fan. Here are some of the features you will enjoy with your fan: 3 3 3 3 An attractive design that enhances any decor A powerful motor for maximum air flow Three speeds to adjust your comfort level All metal construction SAFETY AND WARNINGS READ AND SAVE THESE INSTRUCTIONS! To reduce with any solid-state speed control device.
8. Close supervision is necessary when any appliance is used near children. 9. NEVER insert fingers, pencils or any other objects through the grill when the fan is running. 10. DO NOT operate any appliance with a damaged cord or plug, after the appliance malfunctions or has been dropped or damaged in any manner. 11. To disconnect, grip plug and pull from wall outlet. NEVER yank on cord. 12. ALWAYS use on a dry surface. 13.
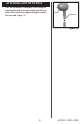
GROUNDING This appliance is for household use only and may be plugged into any 120-volt AC electrical outlet (ordinary household current). DO NOT use any other type of outlet. Grounded Plug WARNING Grounding Pin Grounded Outlet Box Cover This unit is suitable for grounded receptacle use only. The power cord has a grounded plug as shown in Figure 1, and must be used with an electrical outlet that can accommodate the grounding pin.
FUSED PLUG This plug is a safety feature. It contains a safety device (fuse) that should not be removed. Discard product if the attachment plug is damaged. To reduce the risk of fire, electric shock and personal injury, DO NOT remove, replace, repair or tamper with the originally supplied plug. If the fan does not function properly, it may be due to the safety device incorporated in this plug. If the fuse fails, it is generally due to a short circuit or circuit overload.
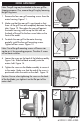
UNPACKING As you unpack the fan, save the carton and packing materials in case you want to move or ship the unit in the future. Carefully remove all items from the box. NOTE: It is best to have someone hold the box while you lift the fan and the protective packaging out of the carton. Make sure all shipping materials are removed from fan before operating. Height Adjustment Knob Base Trim Ring Telescoping Pole Figure 6 BASE ASSEMBLY 1.
ATTACHING MOTOR TO POLE 1. Press the clip buttons in completely while sliding the pole from the motor housing assembly into the inner pole until the clip buttons appear through the hole in the inner pole. Figure 10.
GRILL ASSEMBLY Note: The grill ring may be attached to the rear grill for shipping purposes. If so, remove the grill ring by loosening the grill ring screw. 1. Remove the four rear grill mounting screws from the motor housing. Figure 11. 2. Make sure that the rear grill is positioned so that three of the grill lines are completely between the top tabs, Figure 12.
GRILL ASSEMBLY CONT. Rear Grill Hunter Logo 6. Remove the grill ring from the front grill by loosening the screw holding it. 7. Place the front grill against the rear grill so that the Hunter logo faces right side up and push together until the tabs on the grills hold them together. Figure 16. 8. Expand the grill ring by loosening the screw that secures it. Figure 17. Front Grill Figure 16 9. Slide the grill ring over both front and rear grills turning the ring so that the screw is on the bottom.
OPERATION Off / Speed Selection High Medium Low Off Turn the fan “ON” or “OFF” by moving the power/speed lever. The power should always be OFF before unplugging the fan. To select the speed, move the power/ speed lever from OFF to the desired speed setting: O (off), I (low), II (medium), III (high). Figure 20. Oscillation Figure 20 To allow the fan to oscillate, push the knob beside the fan speed control down. Pull up on the knob if oscillation is not desired. Figure 21.
MAINTENANCE This fan is permanently lubricated and will not require additional lubrication (oil) for the life of the fan. This fan requires little maintenance and contains no user serviceable parts. DO NOT try to fix it yourself. Contact qualified service personnel if servicing is needed. Before cleaning, turn the fan off and unplug from electrical outlet. Wipe off excess dust with a lint-free cloth.
TROUBLESHOOTING 1. Problem 3 Fan will not oscillate. Solution 3 Push down on the knob on top of motor housing to activate oscillation. TECHNICAL SUPPORT If you have any additional questions or problems with your Hunter Portable Fan, please call: USA: 1-888-880-3267 We open 24 hours a day, 7 days a week. You may also reach us online at www.HunterHomeComfort.com. An electronic copy of this user manual can also be obtained online at www.HunterHomeComfort.com.
y IF THE USER OR CONSUMER PURCHASER CEASES TO OWN THE FAN, THIS WARRANTY AND ANY IMPLIED WARRANTY WHICH THEN REMAINS IN EFFECT, INCLUDING BUT NOT LIMITED TO ANY IMPLIED WARRANTY OF MERCHANTABILITY OR FITNESS FOR A PARTICULAR PURPOSE, ARE VOIDED. NO WARRANTY, EXPRESSED OR IMPLIED, INCLUDING ANY WARRANTY OF MERCHANTABILITY OR FITNESS FOR A PARTICULAR PURPOSE, IS MADE IN RESPECT TO THE GLASS GLOBES OR LIGHT BULBS OR THE FINISH ON ANY METAL PORTION OF THE FAN.
IN NO EVENT SHALL HUNTER HOME COMFORT BE LIABLE FOR CONSEQUENTIAL OR INCIDENTAL DAMAGES. y SOME STATES DO NOT ALLOW LIMITATIONS ON HOW LONG AN IMPLIED WARRANTY LASTS OR THE EXCLUSION OR LIMITATION OF INCIDENTAL OR CONSEQUENTIAL DAMAGES SO THE ABOVE LIMITATION MAY NOT APPLY TO YOU. nt ra ar W for any such damage. Proof of purchase is required when requesting warranty service. The purchaser must present sales receipt or other document that establishes proof of purchase.