Operator’s manual (EPA III) Manual de instrucciones (EPA III) 455e Rancher 455 Rancher 460 Rancher Please read the operator’s manual carefully and make sure you understand the instructions before using the machine. Lea detenidamente el manual de instrucciones y asegúrese de entender su contenido antes de utilizar la máquina. English (2-43) Spanish (44-86) 115 13 82-96 Rev.
KEY TO SYMBOLS Symbols on the machine: WARNING! Chain saws can be dangerous! Careless or improper use can result in serious or fatal injury to the operator or others. Please read the operator’s manual carefully and make sure you understand the instructions before using the machine.
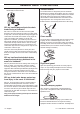
KEY TO SYMBOLS You will find the following labels on your chain saw: EPA III The Emissions Compliance Period referred to on the Emission Compliance label indicates the number of operating hours for which the engine has been shown to meet Federal emissions requirements. Maintenance, replacement, or repair of the emission control devices and system may be performed by any nonroad engine repair establishment or individual.
CONTENTS Contents KEY TO SYMBOLS Symbols on the machine: ...................................... Symbols in the operator’s manual: ........................ CONTENTS Contents ............................................................... INTRODUCTION Dear customer! ..................................................... WHAT IS WHAT? What is what on the chain saw? ........................... GENERAL SAFETY PRECAUTIONS Before using a new chain saw .............................. Important .......................
INTRODUCTION Dear customer! Congratulations on your choice to buy a Husqvarna product! Husqvarna is based on a tradition that dates back to 1689, when the Swedish King Karl XI ordered the construction of a factory on the banks of the Huskvarna River, for production of muskets. The location was logical, since water power was harnessed from the Huskvarna River to create the waterpowered plant.
WHAT IS WHAT? 1 29 2 3 4 30 10 23 11 31 32 12 5 9 13 14 8 7 6 27 15 16 26 28 25 24 23 22 21 20 19 18 17 What is what on the chain saw? 1 Cylinder cover 17 Chain 2 Starter handle 18 Bar 3 Air purge 19 Bumper spike 4 Stop switch (Ignition on/off switch.
GENERAL SAFETY PRECAUTIONS Before using a new chain saw • Please read this manual carefully. • Check that the cutting equipment is correctly fitted and adjusted. See instructions under the heading Assembly. • Refuel and start the chain saw. See the instructions under the headings Fuel Handling and Starting and Stopping. • Do not use the chain saw until sufficient chain oil has reached the chain. See instructions under the heading Lubricating cutting equipment.
GENERAL SAFETY PRECAUTIONS provide information about which training materials and courses are available. • Fire Extinguisher and Shovel Generally clothes should be close-fitting without restricting your freedom of movement. IMPORTANT! Sparks can come from the muffler, the bar and chain or other sources. Always have fire extinguishing tools available if you should need them. Help prevent forest fires.
GENERAL SAFETY PRECAUTIONS • The chain brake (A) can either be activated manually (by your left hand) or automatically by the inertia release mechanism. • The brake is applied when the front hand guard (B) is pushed forwards. • • • • • To release the chain brake pull the front hand guard backwards, towards the front handle. • Kickback can be very sudden and violent. Most kickbacks are minor and do not always activate the chain brake.
GENERAL SAFETY PRECAUTIONS of the front hand guard, the chain brake can only be activated by the inertia action. Throttle lockout The throttle lockout is designed to prevent accidental operation of the throttle control. When you press the lock (A) (i.e. when you grasp the handle) it releases the throttle control (B). When you release the handle the throttle control and the throttle lockout both move back to their original positions.
GENERAL SAFETY PRECAUTIONS chain saw, including the cutting equipment, is insulated from the handles by vibration damping units. requiring among other things the muffler must be equipped with an approved type of spark arrestor screen. Cutting hardwoods (most broadleaf trees) creates more vibration than cutting softwoods (most conifers). Cutting with cutting equipment that is blunt or faulty (wrong type or badly sharpened) will increase the vibration level.
GENERAL SAFETY PRECAUTIONS • • Keep the chain properly tensioned! If the chain is slack it is more likely to jump off and lead to increased wear on the bar, chain and drive sprocket. Bar • Length (inches/cm) • Number of teeth on bar tip sprocket (T). • Chain pitch (inches). The spacing between the drive links of the chain must match the spacing of the teeth on the bar tip sprocket and drive sprocket. • Number of drive links.
GENERAL SAFETY PRECAUTIONS Sharpening your chain and adjusting depth gauge setting gauge. This will help you obtain the maximum kickback reduction and cutting performance from your chain. General information on sharpening cutting teeth • Never use a blunt chain. When the chain is blunt you have to exert more pressure to force the bar through the wood and the chips will be very small. If the chain is very blunt it will produce wood powder and no chips or shavings.
GENERAL SAFETY PRECAUTIONS General advice on adjusting depth gauge setting • Tensioning the chain When you sharpen the cutting tooth (A) the depth gauge setting (C) will decrease. To maintain optimal cutting performance the depth gauge (B) has to be filed down to achieve the recommended depth gauge setting. See instructions under the heading Technical data to find the correct depth gauge setting for your particular chain.
GENERAL SAFETY PRECAUTIONS 455e Rancher • Lubricating cutting equipment ! Release the knob by folding it out. WARNING! Poor lubrication of cutting equipment may cause the chain to snap, which could lead to serious, even fatal injuries. Chain oil Chain oil must demonstrate good adhesion to the chain and also maintain its flow characteristics regardless of whether it is warm summer or cold winter weather. • Turn the knob anti clockwise to loosen the bar cover.
GENERAL SAFETY PRECAUTIONS Checking chain lubrication • Chain drive sprocket Check the chain lubrication each time you refuel. See instructions under the heading Lubricating the bar tip sprocket. Aim the tip of the bar at a light coloured surface about 20 cm (8 inches) away. After 1 minute running at 3/4 throttle you should see a distinct line of oil on the light surface.
GENERAL SAFETY PRECAUTIONS Bar • To prolong the life of the bar you should turn it over daily. Check regularly: • Whether there are burrs on the edges of the bar. Remove these with a file if necessary. ! • • Whether the groove in the bar has become badly worn. Replace the bar if necessary. Whether the tip of the bar is uneven or badly worn. If a hollow forms on the underside of the bar tip this is due to running with a slack chain.
ASSEMBLY Fitting the bar and chain ! should be tensioned until it does not sag from the underside of the bar. WARNING! Always wear gloves, when working with the chain. 455 Rancher, 460 Rancher Check that the chain brake is in disengaged position by moving the front hand guard towards the front handle. Remove the bar nuts and remove the clutch cover (chain brake). Take off the transportation ring (A).
ASSEMBLY Fit the bar over the bar bolts. Place the bar in its rearmost position. Place the chain over the drive sprocket locate it in the groove on the bar. Begin on the top edge of the bar. Make sure that the edges of the cutting links are facing forward on the top edge of the bar. Fit the clutch cover and locate the chain adjuster pin in the hole in the bar. Check that the drive links of the chain fit correctly over the drive sprocket and that the chain is correctly located in the groove in the bar.
FUEL HANDLING Fuel Mixing ratio 1:50 (2%) for all engines. Note! The machine is equipped with a two-stroke engine and must always be run using a mixture of gasoline and two-stroke oil. It is important to accurately measure the amount of oil to be mixed to ensure that the correct mixture is obtained. When mixing small amounts of fuel, even small inaccuracies can drastically affect the ratio of the mixture. Gasoline, litre WARNING! Always ensure there is adequate ventilation when handling fuel.
FUEL HANDLING Fueling ! • Move the machine at least 10 ft (3 m) from the refuelling point before starting it. • Never start the machine: 1 If you have spilled fuel or chain oil on the machine. Wipe off the spillage and allow remaining fuel to evaporate. 2 If you have spilled fuel on yourself or your clothes, change your clothes. Wash any part of your body that has come in contact with fuel. Use soap and water. 3 If the machine is leaking fuel.
STARTING AND STOPPING Starting and stopping ! starting the machine. Once the machine has started the valve will automatically return to its original setting. WARNING! Note the following before starting: C The chain brake must be engaged when the chain saw is started to reduce the chance of contact with the moving chain during starting. Never start a chain saw unless the bar, chain and all covers are fitted correctly. Otherwise the clutch can come loose and cause personal injuries.
STARTING AND STOPPING by disengaging the throttle lock. Disengagement is done by gently touching on the throttle trigger. This prevents unnecessary wear to the clutch, clutch drum and brake band. Allow the machine to idle a few seconds before giving full throttle. drop start. This method is very dangerous because you may lose control of the saw. • Never start the machine indoors. Exhaust fumes can be dangerous if inhaled.
WORKING TECHNIQUES Before use: Basic safety rules 1 Look around you: • To ensure that people, animals or other things cannot affect your control of the machine. • To make sure that none of the above might come within reach of your saw or be injured by falling trees. , 1 Check that the chain brake works correctly and is not damaged. 2 Check that the rear right hand guard is not damaged. 3 Check that the throttle lockout works correctly and is not damaged.
WORKING TECHNIQUES 6 Before moving your chain saw switch off the engine and lock the chain using the chain brake. Carry the chain saw with the bar and chain pointing backwards. Fit a guard to the bar before transporting the chain saw or carrying it for any distance. 7 When you put the chain saw on the ground, lock the saw chain using the chain brake and ensure you have a constant view of the machine. Switch the engine off before leaving your chain saw for any length of time.
WORKING TECHNIQUES user. If the saw chain is jamming, the saw may be pushed back at you. Terms Cutting = General term for cutting through wood. Limbing = Cutting branches off a felled tree. Splitting = When the object you are cutting breaks off before the cut is complete.
WORKING TECHNIQUES Limbing When limbing thick branches you should use the same approach as for cutting. If it is possible (can you turn the log?) stop cutting about 2/3 of the way through the log. Cut difficult branches piece by piece. 1 2 3 Cutting ! Turn the log and finish the cut from the opposite side. The log is supported at one end. There is a high risk that it will split. WARNING! Never attempt to cut logs while they are in a pile or when a couple of logs are lying together.
WORKING TECHNIQUES Tree felling technique IMPORTANT! It takes a lot of experience to fell a tree. Inexperienced users of chain saws should not fell trees. Do not attempt any task beyond your experience level! The main point to avoid is letting the tree fall onto another tree. It is very dangerous to remove a trapped tree and there is high accident risk. See instructions under the heading Freeing a tree that has fallen badly.
WORKING TECHNIQUES Felling ! Make the felling cut about 1.5-2 inches (3-5 cm) above the bottom directional cut. WARNING! Unless you have special training we advise you not to fell trees with a diameter larger than the bar length of your saw! Felling is done using three cuts. First you make the directional cuts, which consist of the top cut and the bottom cut, then you finish with the felling cut. By placing these cuts correctly you can control the felling direction very accurately.
WORKING TECHNIQUES find out which lengths of bar are recommended for your saw. There are methods for felling trees with a diameter larger than the bar length. However these methods involve a much greater risk that the kickback zone of the bar will come into contact with the tree. The safest method is to use a winch. • Tractor-mounted • Portable Cutting trees and branches that are in tension Preparations: Work out which side is in tension and where the point of maximum tension is (i.e.
WORKING TECHNIQUES How to avoid kickback ! WARNING! Kickback can happen very suddenly and violently; kicking the chain saw, bar and chain back at the user. If this happens when the chain is moving it can cause very serious, even fatal injuries. It is vital you understand what causes kickback and that you can avoid it by taking care and using the right working technique.
MAINTENANCE General Basic settings and running in The user must only carry out the maintenance and service work described in this manual. More extensive work must be carried out by an authorized service workshop. The basic carburetor settings are adjusted during testing at the factory. Avoid running at a too high speed for extended periods during the first 10 hours. Carburetor adjustment CAUTION! If the chain rotates while idling the T-screw must be turned anti-clockwise until the chain stops. Rec.
MAINTENANCE When test run at the factory, the high speed jet is set so that the engine satisfies the applicable legal requirements at the same time as achieving maximum performance. The carburetor’s high speed jet is then locked using a limiter cap in the fully screwed out position. The limiter cap limits the potential to adjust the high speed jet to at most half a turn. Checking the front hand guard Make sure the front hand guard is not damaged and that there are no visible defects such as cracks.
MAINTENANCE Checking the brake trigger • Check that the throttle control and throttle lockout move freely and that the return springs work properly. • Start the chain saw and apply full throttle. Release the throttle control and check that the chain stops and remains stationary. If the chain rotates when the throttle control is in the idle position you should check the carburetor idle adjustment. Place the chain saw on firm ground and start it.
MAINTENANCE Vibration damping system Some mufflers are equipped with a special spark arrestor screen. If your machine has this type of muffler, you should clean the screen at least once a week. This is best done with a wire brush. A blocked screen will cause the engine to overheat and may lead to serious damage. Regularly check the vibration damping units for cracks or deformation. Note! The screen must be replaced if it is damaged.
MAINTENANCE recoil spring by letting the pulley rotate slowly backwards. Undo the screw in the centre of the pulley and remove the pulley. Insert and fasten a new starter cord to the pulley. Wind approx. 3 turns of the starter cord onto the pulley. Connect the pulley to the recoil spring so that the end of the spring engages in the pulley. Fit the screw in the center of the pulley. Insert the starter cord through the hole in the starter housing and the starter handle.
MAINTENANCE An air filter that has been in use for a long time cannot be cleaned completely. The filter must therefore be replaced with a new one at regular intervals. A damaged air filter must always be replaced. A HUSQVARNA chain saw can be equipped with different types of air filters according to working conditions, weather, season, etc. Contact your dealer for advice. Spark plug The spark plug condition is influenced by: • Incorrect carburetor adjustment.
MAINTENANCE Cooling system Special measures are therefore often required: • Partly mask the air inlet on the starter to increase the working temperature of the engine. Temperature 0°°C (32°°F) or colder: To keep the working temperature as low as possible the machine is equipped with a cooling system. The cooling system consists of: 1 Air intake on the starter. 2 Air guide plate. 3 Fins on the flywheel. 4 Cooling fins on the cylinder. 5 Cylinder cover (directs cold air over the cylinder).
MAINTENANCE Maintenance schedule The following is a list of the maintenance that must be performed on the machine. Most of the items are described in the Maintenance section. Daily maintenance Weekly maintenance Monthly maintenance Clean the outside of the machine. On chain saws without a catalytic converter, check the cooling system weekly. Check the brake band on the chain brake for wear. Replace when less than 0.024 inch (0.6 mm) remains at the most worn point.
TECHNICAL DATA Technical data 455e Rancher 455 Rancher 460 Rancher Cylinder displacement, cu.
TECHNICAL DATA Bar and chain combinations Bar Thickness of drive links, inch/mm Chain Length, inch Pitch, inch 13 0,325 10T 15 0,325 10T 16 0,325 18 0,325 10T 20 0,325 10T 80 13 0,325 10T 56 15 0,325 16 0,325 18 0,325 10T 20 0,325 12T 15 3/8 11T 16 3/8 18 3/8 20 3/8 0,050/1,3 Max.
FEDERAL EMISSION CONTROL WARRANTY STATEMENT YOUR WARRANTY RIGHTS AND OBLIGATIONS The EPA (The US Environmental Protection Agency), Environment Canada and Husqvarna Forest & Garden are pleased to explain the emissions control system warranty on your 2009 and later small nonroad engine. In U.S. and Canada, new small nonroad engines must be designed, built and equipped to meet the federal stringent anti-smog standards.
AMERICAN STANDARD SAFETY PRECAUTIONS Safety precautions for chain saw users (ANSI B175.1-2000 Annex C) Kickback safety precautions ! Other safety precautions ! WARNING! Do not operate a chain saw with one hand! Serious injury to the operator, helpers, bystanders or any combination of these persons may result from one-handed operation. A chain saw is intended for two-handed use.
ACLARACION DE LOS SIMBOLOS Símbolos en la máquina: ¡ATENCION! ¡Las motosierras pueden ser peligrosas! Su uso descuidado o erróneo puede provocar heridas graves o mortales al operador o terceros. Lea detenidamente el manual de instrucciones y asegúrese de entender su contenido antes de utilizar la máquina.
ACLARACION DE LOS SIMBOLOS Etiquetas que se encuentran en la motosierra: EPA III El período de cumplimiento de emisiones mencionado en la etiqueta de cumplimiento de emisiones indica el número de horas de funcionamiento en el que el motor ha demostrado cumplir con los requisitos federales en materia de emisiones.
INDICE Índice ACLARACION DE LOS SIMBOLOS Símbolos en la máquina: ...................................... Símbolos en el manual de instrucciones: ............. INDICE Índice .................................................................... INTRODUCCION Apreciado cliente: ................................................. ¿QUE ES QUE? ¿Qué es qué en la motosierra? ............................ INSTRUCCIONES GENERALES DE SEGURIDAD Medidas a tomar antes de utilizar una motosierra nueva .........................
INTRODUCCION Apreciado cliente: ¡Felicidades por haber adquirido un producto Husqvarna! La historia de Husqvarna data del año 1689, cuando el Rey Karl XI encargó la construcción de una fábrica en la ribera del río Huskvarna para la fabricación de mosquetes. La ubicación junto al río Huskvarna era lógica, dado que el río se utilizaba para generar energía hidráulica.
¿QUE ES QUE? 1 29 2 3 4 30 10 23 11 31 32 12 5 9 13 14 8 7 6 27 15 16 26 28 25 24 23 22 21 20 19 18 17 ¿Qué es qué en la motosierra? 1 Cubierta del cilindro 17 Cadena 2 Empuñadura de arranque 18 Espada 3 Bomba de combustible 19 Apoyo de corteza 4 Botón de parada (Conexión y desconexión del encendido.
INSTRUCCIONES GENERALES DE SEGURIDAD Medidas a tomar antes de utilizar una motosierra nueva • Lea detenidamente el manual de instrucciones. • Compruebe el montaje y ajuste del equipo de corte. Vea las instrucciones bajo el título Montaje. • Ponga combustible y arranque la motosierra. Vea las instrucciones en los capítulos Manipulación del combustible y Arranque y parada. • No utilice la motosierra hasta que haya llegado suficiente aceite lubricante a la cadena.
INSTRUCCIONES GENERALES DE SEGURIDAD Emplee siempre el sentido común Es imposible abarcar todas las situaciones imaginables que se pueden producir al utilizar una motosierra. Proceda con cuidado y emplee el sentido común. Evite todo uso para el cual no se sienta suficientemente calificado. Si después de leer estas instrucciones todavía se siente inseguro en cuanto al procedimiento de uso, consulte con un experto antes de proseguir.
INSTRUCCIONES GENERALES DE SEGURIDAD involuntario de usted o el entorno con la cadena de sierra en movimiento. Proceda con cuidado en la utilización de la sierra, procurando que el sector de riesgo de reculada de la espada nunca toque ningún objeto. • El freno de cadena (A) se activa bien manualmente (con la mano izquierda) o por efecto de la inercia. • La activación se produce al empujar hacia delante la protección contra reculadas (B).
INSTRUCCIONES GENERALES DE SEGURIDAD En las reculadas poco violentas, o al trabajar con el sector de riesgo de reculada cerca del usuario, el freno de cadena se activa manualmente con la mano izquierda. • En posición de tala, la mano izquierda está en una posición que permite la activación manual del freno de cadena.
INSTRUCCIONES GENERALES DE SEGURIDAD Protección de la mano derecha Botón de parada La protección de la mano derecha, además de proteger la mano cuando una cadena se suelta o se rompe, impide que las ramas perjudiquen el agarre del mango posterior. El botón de parada se utiliza para parar el motor. Silenciador Sistema amortiguador de vibraciones Su máquina incorpora un sistema amortiguador diseñado para reducir al máximo posible las vibraciones y optimizar la comodidad de uso.
INSTRUCCIONES GENERALES DE SEGURIDAD Reglas básicas • • • Equipo de corte reductor de reculadas ¡Utilice solamente el equipo de corte recomendado por nosotros! Vea las instrucciones bajo el titular Datos técnicos ¡Mantenga los dientes cortantes de la cadena bien y correctamente afilados! Siga nuestras instrucciones y utilice el calibrador de limado recomendado. Una cadena mal afilada o defectuosa aumenta el riesgo de accidentes.
INSTRUCCIONES GENERALES DE SEGURIDAD • Número de eslabones de arrastre (unidades). A cada combinación de longitud de cadena, paso de cadena y número de dientes del cabezal de rueda, le corresponde un número determinado de eslabones de arrastre. • Una sierra de cadena bien afilada atraviesa por sí sola la madera y produce virutas grandes y largas. • Ancho de la guía de la espada (pulgadas/mm). El ancho de la guía de la espada debe estar adaptado al ancho del eslabón de arrastre de la cadena.
INSTRUCCIONES GENERALES DE SEGURIDAD Afilado de dientes cortantes Ajuste de la profundidad de corte Para afilar dientes de corte se requiere una lima redonda y un calibrador de afilado. Vea las instrucciones del capítulo Datos técnicos en lo referente al diámetro de fila redonda y el calibrador de afilado recomendados para la cadena de su motosierra. • El ajuste de la profundidad de corte debe hacerse con los dientes cortantes recién afilados.
INSTRUCCIONES GENERALES DE SEGURIDAD En general, la cadena debe tensarse tanto como sea posible, aunque debe ser posible girarla fácilmente con la mano. 455e Rancher • Aflojar la manija abriéndola. • Girar la manija a izquierdas para soltar la cubierta de la espada. • Ajustar la tensión de la cadena, girando la rueda hacia abajo (+) para aumentar la tensión y hacia arriba (-) para reducirla. • Apretar el acoplamiento de la espada, girando la manija a derechas.
INSTRUCCIONES GENERALES DE SEGURIDAD Lubricación del equipo de corte Control de la lubricación de la cadena • ! ¡ATENCION! La lubricación insuficiente del equipo de corte puede ocasionar roturas de cadena, con el riesgo consiguiente de accidentes graves e incluso mortales. Controle la lubricación de la cadena cada vez que reposte. Vea las instrucciones del capítulo Lubricación del cabezal de rueda de la espada. Apunte la punta de la espada a unos 20 cm (8 pulgadas) de un objeto fijo y claro.
INSTRUCCIONES GENERALES DE SEGURIDAD Piñón de arrastre de la cadena Espada El tambor del embrague lleva uno de los siguientes piñones de arrastre de cadena: Controle a intervalos regulares: • Si se han formado rebabas en los lados de la espada. Lime si es necesario. A Piñón Spur (piñón soldado en el tambor) B Piñón Rim (cambiable) Compruebe regularmente el nivel de desgaste del piñón de arrastre de la cadena y cámbielo si presenta un desgaste anormal.
MONTAJE Montaje de la espada y la cadena ! cadena debe tensarse hasta que deje de colgar en la parte inferior de la espada. ¡ATENCION! Para manipular la cadena deben utilizarse guantes protectores. 455 Rancher, 460 Rancher Compruebe que no esté activado el freno de cadena empujando la protección contra reculadas del freno de cadena hacia el mango delantero. Desenrosque las tuercas de la espada y saque la cubierta del embrague (el freno de cadena). Saque la protección de transporte (A).
MONTAJE arrastre y la guía de la espada. Empiece con la parte superior de la cadena. Montaje del apoyo de corteza Para montar el apoyo de corteza, consulte a su taller de servicio local. Compruebe que los filos de los eslabones de corte estén orientados hacia delante en la parte superior de la espada. Monte la cubierta del embrague y ponga el vástago de tensado de cadena en el orificio de la espada.
MANIPULACION DEL COMBUSTIBLE Carburante Aclaración! La máquina tiene motor de dos tiempos, por lo que debe utilizarse siempre una mezcla de gasolina con aceite para motores de 2 tiempos. Es importante medir con precisión la cantidad de aceite que se mezcla para conseguir la proporción de mezcla adecuada. Al mezclar pequeñas cantidades de combustible, incluso los pequeños errores en la cantidad de aceite tienen una gran incidencia en la proporción de mezcla. Mezcla 1:50 (2%) para todos los motores.
MANIPULACION DEL COMBUSTIBLE • de aceite, con averías subsiguientes de las piezas de la bomba. Para la selección de aceite lubricante de cadena, consulte con su taller de servicio. • Antes de arrancar, aparte la máquina a 3 m como mínimo del lugar de repostaje. • 1 Nunca arranque la máquina: Si ha derramado sobre la máquina combustible o aceite para cadena. Seque cualquier residuo y espere a que se evaporen los restos de combustible. Si se salpicó el cuerpo o las ropas, cambie de ropas.
ARRANQUE Y PARADA Arranque y parada ! máquina, la válvula vuelve automáticamente a la posición de partida. ¡ATENCION! Antes de arrancar, observe lo siguiente: C El freno de cadena debe estar aplicado cuando se arranca la motosierra, para reducir el riesgo de contacto con la cadena en movimiento al ponerse en marcha. No ponga en marcha la motosierra sin haber montado antes la espada, la cadena y todas las cubiertas. De otro modo, el embrague puede zafar y ocasionar daños personales.
ARRANQUE Y PARADA Dado que el freno de cadena todavía está activado, se deben bajar las revoluciones del motor lo antes posible a ralentí, y esto se logra desconectando el fiador contra aceleraciones involuntarias. Para desconectarlo, acelere ligeramente el activador de aceleraciones involuntarias. De ese modo, se evita un desgaste innecesario del embrague, del tambor del embrague y de la cinta de freno. Deje funcionar la máquina en ralentí unos segundos antes de acelerar plenamente.
TECNICA DE TRABAJO Antes de utilizar la máquina: Reglas básicas de seguridad 1 Observe el entorno para: • Comprobar que no hayan personas, animales, etc., que puedan influir en su control de la máquina. • Impedir que eventuales personas o animales puedan entrar en contacto con la cadena o sean alcanzadas o lesionadas por un árbol derribado. , 1 Compruebe que el freno de cadena funcione correctamente y no esté dañado. 2 Compruebe que la protección trasera de la mano derecha no esté dañada.
TECNICA DE TRABAJO 6 Para los desplazamientos, bloquee la cadena con el freno de cadena y pare el motor. Lleve la motosierra con la espada y cadena orientadas hacia atrás. Para los desplazamientos largos y los transportes utilice siempre la protección de la espada. 7 Cuando ponga la motosierra en el suelo, bloquee la cadena de sierra con el freno de cadena y no pierda de vista la motosierra. Para el 'estacionamiento prolongado', se debe parar el motor. Controle la pieza de trabajo.
TECNICA DE TRABAJO usuario. Si la cadena de sierra se atasca, la motosierra puede ser lanzada hacia atrás contra usted. Designaciones Tronzado = denominación genérica del corte transversal de la madera. Desramado = corte de las ramas de un árbol talado. Partición = rotura del objeto que se corta antes de concluir el corte.
TECNICA DE TRABAJO Desramado Para cortar ramas gruesas deben aplicarse los mismos principios que para el tronzado. Si es posible (¿puede girarse el tronco?), termine el corte a 2/3 del diámetro del tronco. Corte las ramas difíciles por partes. 1 2 3 Tronzado ! Gire el tronco para cortar el tercio restante desde arriba. El tronco está apoyado en un extremo. Gran riesgo de partición. ¡ATENCION! No intente nunca serrar troncos apilados ni dos troncos que están muy juntos.
TECNICA DE TRABAJO Técnica de tala ¡IMPORTANTE! La tala de árboles requiere mucha experiencia. Un usuario de motosierra inexperto no debe talar árboles. ¡Evite los trabajos para los que no se considere suficientemente capacitado! Distancia de seguridad Otro factor muy importante, que no afecta a la dirección de derribo pero sí a su seguridad personal, es el control de que el árbol no tenga ramas dañadas o ”muertas” que puedan romperse por sí solas y dañarle a Ud. durante la tala.
TECNICA DE TRABAJO Tala Corte de derribo ! ¡ATENCION! ¡Desaconsejamos a los usuarios insuficientemente cualificados que talen árboles con espada de longitud más pequeña que el diámetro del tronco a cortar! El corte de derribo se hace en el lado opuesto del árbol y debe ser perfectamente horizontal. Sitúese a la izquierda del árbol y corte con cadena tirante. Sitúe el corte de derribo a unos 3-5 cm (1,5-2 pulgadas) por encima del plano horizontal del corte de indicación. La tala se hace con tres cortes.
TECNICA DE TRABAJO pequeña o se atraviesa al cortar, o si los cortes de indicación y derribo están mal situados. Tratamiento de una tala fallida Derribo de un árbol ”atascado” Es muy peligroso retirar un árbol atascado y hay un elevado riesgo de accidente. No intente nunca cortar árboles talados apoyados sobre otros. Cuando están terminados los cortes de indicación y de derribo, el árbol debe empezar a caer; bien por sí solo, o con ayuda de la cuña de derribo o de la barra desgajadora.
TECNICA DE TRABAJO Generalidades: Sitúese de modo que no haya riesgo de que sea alcanzado por el tronco/la rama cuando se suelte. La reculada sigue siempre el sentido del plano de la espada. Lo más común es que la motosierra y la espada reboten hacia atrás en sentido ascendente, hacia el usuario. También hay otros sentidos de reculada dependiendo de la posición de la motosierra en el momento en que el sector de riesgo de reculada de la espada toca un objeto.
MANTENIMIENTO Generalidades Reglaje básico y rodaje El usuario sólo puede efectuar los trabajos de mantenimiento y servicio descritos en este manual. Los trabajos de mayor envergadura debe efectuarlos un taller de servicio oficial. El reglaje básico del carburador se lleva a cabo en las pruebas que se hacen en fábrica. Se debe evitar el funcionamiento a régimen de revoluciones alto durante las 10 primeras horas.
MANTENIMIENTO Surtidor de pleno régimen H El motor se ajusta en fábrica al nivel del mar. Para trabajar a gran altitud o en otras condiciones climáticas, temperaturas o humedad del aire puede ser necesario hacer un pequeño ajuste del surtidor de régimen alto. ¡NOTA! Si se enrosca demasiado el surtidor de régimen alto hay riesgo de avería del pistón y/o el cilindro.
MANTENIMIENTO Control de la función de inercia Mantenga la motosierra, con el motor parado, sobre un tocón u otro objeto estable. Suelte la empuñadura delantera y deje caer la motosierra por su propio peso, rotando en la empuñadura trasera, contra el tocón. No suelte el mango delantero. La cadena debe detenerse inmediatamente. Fiador del acelerador • Compruebe que el acelerador esté bloqueado en la posición de ralentí cuando el fiador está en su posición inicial.
MANTENIMIENTO Captor de cadena Botón de parada Compruebe que el captor de cadena esté intacto y que esté firmemente montado al cuerpo de la motosierra. Arranque el motor y compruebe que se pare cuando se mueve el botón de parada a la posición de parada. Silenciador Protección de la mano derecha Compruebe que la protección de la mano derecha esté intacta, sin defectos visibles como, por ejemplo, grietas. Sistema amortiguador de vibraciones Nunca utilice una máquina que tenga un silenciador defectuoso.
MANTENIMIENTO silenciador sin una rejilla apagachispas o con una rejilla apagachispas defectuosa. • Afloje el tornillo del centro de la polea y saque ésta. Ponga un cordón nuevo en la polea y fíjelo. Enrolle unas 3 vueltas de cordón de arranque en la polea. Monte la polea contra el muelle de retorno de forma que el extremo del muelle enganche la polea. Ponga el tornillo en el centro la polea. Pase el cordón por el orificio del cuerpo del mecanismo de arranque y la empuñadura de arranque.
MANTENIMIENTO Montaje del mecanismo de arranque • Para montar el mecanismo de arranque, primero extraiga el cordón y después coloque el mecanismo en su sitio en el cárter. Luego, suelte despacio el cordón para que los ganchos agarren la polea. • Ponga los tornillos de fijación del mecanismo de arranque y apriételos. Bujía Los factores siguientes afectan al estado de la bujía: • Carburador mal regulado. • Mezcla de aceite inadecuada en el combustible (demasiado aceite o aceite inadecuado).
MANTENIMIENTO Lubricación del cojinete de agujas El tambor de embrague tiene un cojinete de agujas en el eje saliente. Para lubricar se desmonta el envolvente del embrague aflojando las dos tuercas de la espada. A continuación coloque la sierra con el tambor de embrague arriba. La lubricación se hace goteando aceite de motor en el centro del tambor de embrague al mismo tiempo que se gira éste.
MANTENIMIENTO Utilización en invierno Temperaturas de -5°°C (23°°F) o inferiores: Al usar la máquina en clima frío o con nieve pueden producirse perturbaciones del funcionamiento, a causa dev: • Temperatura muy baja del motor. • Formación de hielo en el filtro de aire y congelación del carburador.
MANTENIMIENTO Programa de mantenimiento A continuación incluimos una lista con los puntos de mantenimiento a efectuar en la máquina. La mayoría de los puntos se describen en el capítulo “Mantenimiento”. Mantenimiento diario Mantenimiento semanal Mantenimiento mensual Limpie la parte exterior de la máquina. En motosierras sin catalizador, controle el sistema de refrigeracón semanalmente. Compruebe si está desgastada la cinta del freno de cadena.
DATOS TECNICOS Datos técnicos 455e Rancher 455 Rancher 460 Rancher Cilindrada, pulgadas/cm3 3,38/55,5 3,38/55,5 3,68/60,3 Diámetro del cilindro, pulgadas/mm 1,85/47 1,85/47 1,93/49 Carrera, pulgadas/mm 1,26/32 1,26/32 1,26/32 Régimen de ralentí, rpm 2700 2700 2700 Potencia, kW/rpm 2,6/3,5 @ 9000 2,6/3,5 @ 9000 2,7/3,7 @ 9000 Motor Sistema de encendido Fabricante de sisterna de encendido SEM SEM SEM Tipo de sisterna de encendido CD CD CD Bujía NGK BPMR 7A/ NGK BPMR 7A/ NGK BP
DATOS TECNICOS Combinaciones de espada y cadena Espada Cadena Longitud, Paso, Anchura de ranura, pulgadas pulgadas pulgadas/mm Máximo número de Tipo dientes, cabezal de rueda Longitud, eslabones de arrastre (unidad) 13 0,325 10T 56 15 0,325 10T 16 0,325 18 0,325 10T 20 0,325 10T 80 13 0,325 10T 56 15 0,325 16 0,325 18 0,325 10T 20 0,325 12T 80 15 3/8 11T 16 3/8 18 3/8 20 3/8 Husqvarna H42, 56 Husqvarna H46, 60 Husqvarna H47, Husqvarna H48, 68 Husqvarna H80, Husqv
GARANTIA DEL SISTEMA DE CONTROL DE EMISIONES SUS DERECHOS Y OBLIGACIONES DE GARANTIA EPA (US Environmental Protection Agency), Environment Canada y Husqvarna Forest & Garden se complacen en explicar la garantía del sistema de control de emisiones de su motor pequeño de uso fuera de carretera, de 2009 y posterior. En EE.UU. y Canadá, los motores pequeños de uso fuera de carretera deben estar diseñados, construidos y equipados para cumplir las severas normas federales antiesmog.
PRECAUCIONES DE SEGURIDAD DE LA NORMA AMERICANA Precauciones de seguridad para usuarios de motosierras (ANSI B175.1-2000 Anexo C) Precauciones de seguridad en reculadas ! ATENCIÓN! La reculada se puede producir cuando la punta de la espada toca en un objeto o cuando la madera se cierra y agarra la cadena de la motosierra en el corte. En algunos casos el contacto de la punta de la espada puede causar una reacción de inversión rapidísima que hace rebotar la espada hacia arriba y atrás hacia el operador.
115 13 82-96 Rev.
115 13 82-96 Rev.
115 13 82-96 Rev.
´®z+SF=¶6*¨ ´®z+SF=¶6*¨ 115 13 82-96 Rev.
115 13 82-96 Rev.
1151382-96 ´®z+SF=¶6*¨ ´®z+SF=¶6*¨ 2009-03-26 115 13 82-96 Rev.