(26 - 50) (51 - 75)
CONTENTS Contents CONTENTS Contents . . . . . . . . . . . . . . . . . . . . . . . . 2 Note the following before starting . . . . 2 KEY TO SYMBOLS Symbols . . . . . . . . . . . . . . . . . . . . . . . . . 3 SAFETY INSTRUCTIONS Personal protective equipment . . . . . . 4 Machine’s safety equipment . . . . . . . . 4 Cutting equipment . . . . . . . . . . . . . . . . . 5 Checking, maintaining and servicing the machine’s safety equipment . . . . . 5 General safety precautions . . . . . . . . . 8 Starting . . . .
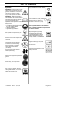
KEY TO SYMBOLS Symbols Only intended for trimmer heads. WARNING: Clearing saws, brushcutters and trimmers can be dangerous! Careless or incorrect use can result in serious or fatal injury to the operator or others. WARNING: Read the operator’s manual before use. Failure to follow instructions could result in serious injury to the operator and/or bystanders. Save operator’s manual. Use unleaded or quality leaded gasoline and two--stroke oil mixed at a ratio of 2% (1:50).
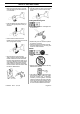
SAFETY INSTRUCTIONS Personal protective equipment WARNING: Whenever you use a clearing saw, brushcutter or trimmer you must wear personal protective equipment that is approved by the authorities. Personal protective equipment does not eliminate the risk of accidents, but it can reduce the effects of an injury in the event of an accident. Ask your dealer for help when choosing protective equipment. IMPORTANT! Listen for warning signals or shouts when you are wearing hearing protection.
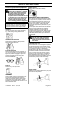
SAFETY INSTRUCTIONS Cutting attachment guard This guard is intended to prevent loose objects from being thrown towards the operator. The guard also protects the operator from accidental contact with the cutting attachment. CAUTION: Mufflers fitted with catalytic converters get very hot during use and remain so for some time after stopping. This also applies at idle speed. Contact can result in burns to the skin.
SAFETY INSTRUCTIONS Throttle lock--out S Make sure the throttle control is locked at the idle setting when the throttle lock-out is released. Stop switch S Start the engine and make sure the engine stops when you push and hold the stop switch. Cutting attachment guard S Press the throttle lock and make sure it returns to its original position when you release it. S Check that the throttle control and throttle lock--out move freely and that the return springs work properly.
SAFETY INSTRUCTIONS Cutting equipment This section describes how to choose and maintain your cutting equipment in order to: S Obtain maximum cutting performance. S Extend the life of cutting equipment. General rules: 1. Only use cutting attachments with the guards we recommend! See the section on “Technical Data”. 2. Check the cutting attachment for damage or cracks. A damaged cutting attachment should always be replaced. WARNING: Never use a machine with faulty safety equipment.
SAFETY INSTRUCTIONS General safety precautions IMPORTANT! S The machine is only designed for trimming grass. S The only accessories you can operate with this engine unit are the cutting attachments we recommend in the “Technical data” section. S Never use wire, rope, string, etc. S Never use the machine if you are tired, if you have drunk alcohol, or if you are taking medication that could affect your vision, your judgment or your coordination.
SAFETY INSTRUCTIONS S Check that the trimmer head and guard are correctly secured. S When adjusting the carburetor, make sure the lower end is supported and that no one is in the immediate vicinity. S Make sure the cutting head does not rotate when idling. S Make sure the handle and safety features are in order. Never use a machine that has parts missing or has been changed in relation to the specification. S Only use the machine for the purpose for which it was intended.
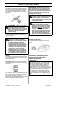
SAFETY INSTRUCTIONS S CAUTION! Do not use the machine unless you are able to call for help in the event of an accident. 2. Do not use the machine in bad weather, such as dense fog, heavy rain, strong wind, intense cold, etc. Working in bad weather is tiring and often brings added risks, such as icy ground, unpredictable felling direction, etc. 3. Make sure you can move and stand safely. Check the area around you for possible obstacles (roots, rocks, branches, ditches, etc.
SAFETY INSTRUCTIONS Sweeping S The fan effect of the rotating line can be used for quick and easy clearing up. Hold the trimmer line parallel to and above the area to be swept and move the tool to and fro. S When cutting and sweeping you should use full throttle to obtain the best results. 115374027 Rev. 5 5/15/12 WARNING: Sometimes branches or grass get caught between the guard and cutting attachment or wrapped around the shaft.
KNOW YOUR TRIMMER 1 2 3 7 19 5 6 4 9 11 10 17 8 16 14 15 18 1 20 Know your trimmer 1. Trimmer head 2. Grease filler cap 3. Bevel gear 4. Cutting attachment guard 5. Upper shaft 6. Lower shaft 7. Loop handle 8. Throttle control 9. Stop switch 10.Throttle lock--out 11. Cylinder cover 115374027 Rev. 5 5/15/12 12 12. 13. 14. 15. 16. 17. 18. 19. 20. 21. 22.
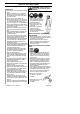
ASSEMBLY NOTE: Make sure unit is assembled correctly as shown in this manual. Fitting the loop handle S Push the attachment into the coupling until the attachment snaps into place. S Clip the loop handle onto the shaft. Note that the loop handle must be fitted between the arrows on the shaft. S Before using the unit, tighten the knob securely. ENGINE S Slide the spacer into the slot in the loop handle. S Fit the nut, knob and screw.
ASSEMBLY Fitting the trimmer guard and trimmer head S Fit the correct trimmer guard (D) for use with the trimmer head. Hook the trimmer guard/combination guard onto the fitting on the shaft and secure with the bolt (E). E F G D D S Fit the drive disc (F) on the output shaft. S Turn the shaft until one of the holes in the drive disc aligns with the corresponding hole in the gear housing. S Insert hex wrench (G) in the hole to lock the shaft.
FUEL HANDLING Fuel mixture Mixing CAUTION! The machine is equipped with a two--stroke engine and must always be run using a mixture of gasoline and two-stroke engine oil. It is important to accurately measure the amount of oil to be mixed to ensure that the correct mixture is obtained. When mixing small amounts of fuel, even small inaccuracies can drastically affect the ratio of the mixture. S Always mix the gasoline and oil in a clean container intended for fuel.
STARTING AND STOPPING Check before starting S Inspect the unit before each use. Replace damaged parts. Check for fuel leaks. Make sure all fasteners are in place and secure. Make sure the cutting attachment is properly installed and securely fastened. Use only flexible, nonmetallic line recommended by the manufacturer. Never use, for example, wire or wire rope, which can break off and become a dangerous projectile. S Check that the trimmer head and trimmer guard are not damaged or cracked.
STARTING AND STOPPING Warm engine With a warm engine, move the blue engine choke lever to the ½ position. Pull starter rope until engine runs. Move the blue engine choke lever to the opened position. Stopping Stop the engine by pushing and holding the stop switch in the STOP position until the engine stops. WARNING: When the engine is started with the choke in the closed position the cutting attachment will start to rotate immediately. 115374027 Rev.
MAINTENANCE The owner is responsible for the performance of all required maintenance as defined in the operator’s manual. Carburetor Your Husqvarna product has been designed and manufactured to specifications that reduce harmful emissions. After the engine has used 8--10 tanks of fuel, the engine will be run--in. To ensure that it continues to run at peak performance and to minimize harmful exhaust emissions after the run--in period, ask your servicing dealer to adjust your carburetor.
MAINTENANCE 0.024″ (0.6 mm) Muffler bolts Spark arrestor mesh CAUTION! Never use a machine that has a faulty or loose muffler. Ensure the muffler bolts are tight. Two--piece shaft CAUTION: Mufflers fitted with catalytic converters get very hot during use and remain so for some time after stopping. This also applies at idle speed. Contact can result in burns to the skin. Remember the risk of fire! WARNING: The inside of the muffler contain chemicals that may be carcinogenic.
MAINTENANCE Bevel gear The bevel gear is filled with the right quantity of grease at the factory. However, before using the machine you should check that the bevel gear is filled three--quarters full with grease. Use HUSQVARNA special grease. Weekly maintenance S Check the starter and starter cord. S Clean the carburetor area. S Clean the outside of the spark plug. Remove it and check the electrode gap. Adjust the gap to 0.024″ (0.6 mm), or replace the spark plug.
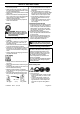
Trimmer Head Line Loading Instructions 6m 20i 3m 10i 115374027 Rev.
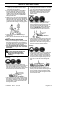
Tri Cut 1 3 6 2 5 4 7 8 115374027 Rev.
TECHNICAL DATA Technical data Engine Cylinder volume, cu.in./cm3 Cylinder bore, inch/mm Stroke, inch/mm Idle speed, rpm Recommended max. speed, rpm Speed of output shaft, rpm Max. engine output, acc.
U.S. EPA / CALIFORNIA / ENVIRONMENT CANADA EMISSION CONTROL WARRANTY STATEMENT IMPORTANT: This product is compliant with U.S. EPA Phase 3 regulations for exhaust and evaporative emissions. To ensure EPA Phase 3 compliance, we recommend using only genuine HUSQVARNA brand replacement parts. Use of noncompliant replacements parts is a violation of federal law. YOUR WARRANTY RIGHTS AND OBLIGATIONS: The U.S.
U.S. EPA / CALIFORNIA / ENVIRONMENT CANADA EMISSION CONTROL WARRANTY STATEMENT ADD--ON OR MODIFIED PARTS: The use of add--on or modified parts can be grounds for disallowing a warranty claim. HUSQVARNA is not liable to cover failures of warranted parts caused by the use of add--on or modified parts.
CONTENU Contenu CONTENU Contenu . . . . . . . . . . . . . . . . . . . . . . . . . . 26 Contrôler les points suivants avant la mise en marche . . . . . . . . . . . . . . . . . 26 EXPLICATION DES SYMBOLES Symboles . . . . . . . . . . . . . . . . . . . . . . . . . 27 INSTRUCTIONS DE SÉCURITÉ Équipement de protection personnelle . . . 28 Équipement de sécurité de la machine . . 28 Equipement de coupe . . . . . . . . . . . . . . .
EXPLICATION DES SYMBOLES Symboles AVERTISSEMENT: Les débroussailleuses et les coupe--herbes peuvent être dangereux! Une utilisation erronée ou négligente peut occasionner des blessures graves, voire mortelles pour l’utilisateur ou d’autres personnes. AVERTISSEMENT: Lisez le manuel d’instructions complètement avant d’utiliser l’appareil. Tout défaut de respecter tous les instructions peut entraîner des blessures graves aux utilisateur et/ou spectateurs. Conservez ces instructions.
INSTRUCTIONS DE SÉCURITÉ Équipement de protection personnelle AVERTISSEMENT: Un équipe- les branches. Toujours utiliser des pantalons longs et robustes. Ne pas porter de bijoux, de shorts ou de sandales, et ne pas marcher pieds--nus. Veiller à ce que les cheveux ne tombent pas sur les épaules. PREMIERS SECOURS Une trousse de premiers secours doit toujours être disponible. IMPORTANT! .Soyez toujours attentifs aux signaux d’alerte ou aux appels en portant des protège--oreilles.
INSTRUCTIONS DE SÉCURITÉ Bouton d’arrêt Mettre le moteur en marche et s’assurer qu’il s’arrête lorsque le boiuton d’arrêt est amené den position d’arrêt. Silencieux Le silencieux est conçu pour réduire au maximum le niveau sonore et détourner les gaz d’echappement loin de l’utilisateur. ATTENTION! Votre silencieux est équipé d’un pot catalytique conçu pour réduire la teneur des gaz d’échappement.
INSTRUCTIONS DE SÉCURITÉ Contrôle, maintenance, et entretien des équipements de sécurité de la machine IMPORTANT! L’entretien et la réparation de la machine exigent une formation spéciale. Ceci concerne particulièrement l’équipement de sécurité de la machine. Si les contrôles suivants ne donnent pas un résultat positif, s’adresser à un distributeur autorisé. L’achat de l’un de nos produits offre à l’acheteur la garantie d’un service et de réparations qualifiés.
INSTRUCTIONS DE SÉCURITÉ Silencieux S Ne jamais utiliser une machine dont le silencieux est défectueux. S Vérifier régulièrement la fixation du silencieux dans la machine. S Le silencieux de la machine est muni d’une grille antiflamme, il faut le nettoyer régulièrement. Une grille antiflamme bouchée entraîne une surchauffe du moteur pouvant provoquer des dommages graves. Ne jamais utiliser un silencieux avec une grille antiflamme défectueuse. Voir la section Entretien.
INSTRUCTIONS DE SÉCURITÉ AVERTISSEMENT: Toujours arrêter le moteur avant d’entamer des travaux sur l’équipement de coupe. Celui-- ci continue de tourner après qu’on a relâché l’accélérateur. S’assurer que l’équipement de coupe est complètement immobilisé et débrancher le câble de la bougie d’allumage avant de commencer l’intervention sur l’équipement de coupe. Instructions générales de sécurité IMPORTANT! S La machine est conçue uniquement pour le désherbage.
INSTRUCTIONS DE SÉCURITÉ Consignes de sécurité avant la mise en service S Inspecter la zone de travail. Enlever tout objet traînant par terre, tels que cailloux, débris de verre, clous, fil de fer, ficelle etc., pouvant être projetés ou s’enrouler autour de la lame ou dans le protecteur. S Maintenir les enfants, animaux, spectateurs et aides à 15 mètres (50 pieds) de la zone de travail. Encouragez--les à porter des protection des yeux. Stopper la machine immédiatement si quelqu’un s’approche.
INSTRUCTIONS DE SÉCURITÉ AVERTISSEMENT: Manipuler le carburant avec précaution. Penser aux risques d’incendie, d’explosion et d’inhalation. Méthodes de travail IMPORTANT! Ce section traite des consignes de sécurité de base lors du travail avec un coupe--herbe. Dans l’éventualité d’une situation rendant la suite du travail incertaine, consulter un expert. S’adresser au revendeur ou à l’atelier de réparation. Évitez les tâches pour lesquelles vous ne vous sentez pas suffisamment qualifié.
INSTRUCTIONS DE SÉCURITÉ AVERTISSEMENT: Il arrive que S Le fil s’use plus vite et doit être déroulé plus souvent au contact de cailloux, briques, béton, clôtures métalliques, etc. qu’au contact d’arbres et de clôtures en bois. Coupe des branches ou de l’herbe se coincent entre la protection et l’équipement de coupe ou s’enrouler autour de l’axe.
FAMILIARISEZ--VOUS AVEC VOTRE APPAREIL 1 2 3 7 19 5 6 4 9 11 10 12 17 8 16 14 15 18 1 20 13 21 Familiarisez--vous avec votre appareil 1. Tête de coupe 2. Ravitaillement en lubrifiant, renvoi d’angle 3. Renvoi d’angle 4. Protecteur pour l’équipement de coupe 5. Tube supérieur 6. Tube inférieur 7. Poignée anneau 8. Gâchette de l’accélération 9. Bouton d’arrêt 10.Blocage de l’accélération 11. Couvercle du cylindre 115374027 Rev. 5 5/15/12 12. Poignée de démarrage 13. Réservoir d’essence 14.
MONTAGE REMARQUE: Assurez--vous que l’appareil est assemblée correctement comme indiqué en ce manuel. S Pousser l’accessoire dans le raccord jusqu’à ce qu’il s’emboîte avec un bruit sec. Montage de la poignée en boucle S Placer la poignée en boucle sur le tube de transmission. Noter que la poignée anneau doit être montée entre les flèches indicatrices situées sur le tube de transmission. S Avant d’utiliser votre appareil, serrez fort le bouton.
MONTAGE Montage du protecteur et la tête de coupe S Monter le protecteur (D) destiné au travail avec la tête de coupe. Emboîter le protecteur dans la fixation d’axe et fixer à l’aide d’une vis (E). E F G D D S Monter un toc d’entraînement (B) sur l’axe sortant. S Faire tourner l’axe jusqu’à ce que l’un des trous du toc d’entraînement coïncide avec le trou correspondant du renvoi d’angle. S Insérer la clé hexagonale (C) dans le trou afin de bloquer l’axe.
MANIPULATION DU CARBURANT Carburant REMARQUE! La machine est équipée d’un moteur à deux temps et doit toujours être alimentée avec un mélange essence/huile. Afin d’assurer un rapport de mélange correct, il est important de mesurer avec précision la quantité d’huile à mélanger. Pour le mélange de petites quantités de carburant, même les moindres erreurs au niveau de la quantité d’huile affectent sérieusement le rapport de mélange.
MANIPULATION DU CARBURANT Remplissage de carburant AVERTISSEMENT: Les mesures de sécurité ci-- dessous réduisent le risque d’incendie: Ne jamais fumer ni placer d’objet chaud à proximité du carburant. Ne jamais faire le plein, moteur en marche. Arrêter le moteur et le laisser refroidir pendant quelques minutes avant de faire le plein. Ouvrir le bouchon du réservoir lentement pour laisser baisser la surpression pouvant régner dans le réservoir.
DÉMARRAGE ET ARRÊT Contrôles avant la mise en marche S Inspectez l’appareil avant chaque utilisation. Remplacez les pièces endommagées. Vérifiez les fuites de carburant. Assurez-vous que toutes les attaches sont en place et fixez. Assurez--vous que la tête de coupe est correctement installé et solidement attaché. Employez seulement la fil flexible et non métallique recommandée par le fabricant. N’employez jamais, par exemple, fil de fer, de corde de ficelle, etc.
DÉMARRAGE ET ARRÊT Moteur chaud Avec un moteur chaud, mettez le levier bleu de l’étrangleur du moteur à la position ½. Tirer la corde jusqu’à ce que le moteur tourne. Mettez le levier bleu de l’étrangleur du moteur à la position ouvert. Arrêt Pour arrêter le moteur, poussant bouton d’arrêt et maintenez--le dans la position «arrêt» jusqu’à ce que le moteur soit completement arrêté.
ENTRETIEN Le propriétaire est responsable d’effectuer tout l’entretien requis tel qu’indiqué dans le manuel d’instructions. Carburateur Les caractéristiques techniques de cette machine Husqvarna assurent des émissions de gaz nocifs réduites au minimum. Après 8--10 pleins, le moteur est rodé.
ENTRETIEN Ces gaz sont chauds et peuvent transporter des étincelles risquant de causer un incendie si elles entrent en contact avec un matériau sec et inflammable. Votre silencieux sont munis d’une grille pare-étincelles. La grille devrait être vérifiée et, au besoin, nettoyée par un distributeur autorisé. Si la grille est endommagée, elle devrait être remplacée. Si la grille est souvent bouchée, ceci peut être dû à un mauvais fonctionnement du pot catalytique.
ENTRETIEN S Des problèmes de démarrage S Une perte de puissance S Une usure prématurée des éléments du moteur S Une consommation anormalement élevée de carburant Nettoyer le filtre après 25 heures de service, ou plus souvent si les conditions de travail sont exceptionnellement poussiéreuses. Nettoyage du filtre à air Déposer le capot de filtre et retirer le filtre. Nettoyer le filtre avec de l’eau chaude savonneuse. Rinçage complètement. S’assurer que le filtre est sec avant de le remonter.
Remplacement du fil dans la tête de coupe 6m 20i 3m 10i 115374027 Rev.
Tri Cut 1 3 6 2 5 4 7 8 115374027 Rev.
CARACTÉRISTIQUES TECHNIQUES Caractéristiques techniques 128LDX Moteur 28 Cylindrée, cm3 Alésage, mm 35,0 Course, mm 28,7 Régime de ralenti, tr/min 2800--3200 Régime d’emballement maximal recommandé, tr/min 11000 Régime de l’axe sortant, tr/min 8000 Puissance moteur maxi selon ISO 8893, hp/kW 1,1/0,8 0,8Silencieux avec pot catalytique Oui Système d’allumage réglé en fonction du régime Oui Système d’allumage Fabricant/type de système d’allumage Walbro/CD Bougie Champion RCJ--8Y Écartement de électrodes, mm 0
DÉCLARATION DE GARANTIE DE LUTTE AN MISSIONS U.S. EPA / CALIFORNIE / ENVIRONNEMENT CANADA IMPORTANT: Ce produit est conforme à la réglementation de la Phase 3 de l’Agence de Protection de l’Environnement des États-Unis (EPA) en ce qui touche les émissions d’échappement et d’évaporation. Pour assurer la conformité à la Phase 3 de l’EPA, nous recommandons le recours à des pièces de remplacement d’origine HUSQVARNA uniquement.
DÉCLARATION DE GARANTIE DE LUTTE AN MISSIONS U.S. EPA / CALIFORNIE / ENVIRONNEMENT CANADA DOMMAGES INDIRECTS : HUSQVARNA peuvent être responsables de dommages à d’autres éléments de moteur occasionnés par la panne d’une pièce sous garantie. CE QUI N’EST PAS COUVERT : Toute panne occasionnée par un mauvais traitement, la négligence ou un mauvais entretien n’est pas couverte.
CONTENIDO Contenido CONTENIDO Contenido . . . . . . . . . . . . . . . . . . . . . . . 51 Antes de arrancar, observe lo siguiente: 51 IDENTIFICACION DE SIMBOLOS Símbolos . . . . . . . . . . . . . . . . . . . . . . . . 52 INSTRUCCIONES DE SEGURIDAD Equipo de protección personal . . . . . . 53 Equipo de seguridad de la máquina . . 53 Equipo de corte . . . . . . . . . . . . . . . . . . . 54 Control, mantenimiento y servicio del equipo del seguridad de la máquina . .
IDENTIFICACION DE SIMBOLOS Símbolos ADVERTENCIA: Las desbrozadoras, quita arbustos y recortadoras pueden ser peligrosas! Su uso descuidado o erróneo puede provocar heridas graves o mortales al usuario o terceros. Indicado únicamente para equipo de corte flexible, no metálico, es decir cabezal de corte con línea de corte. ADVERTENCIA: Lea el manual de instrucciones antes de usar. No seguir las instrucciones podía causar graves heridas tanto al operador como a otras personas.
INSTRUCCIONES DE SEGURIDAD Equipo de protección personal ADVERTENCIA: Para trabajar con la máquina debe utilizarse un equipo de protección personal homologado. El equipo de protección personal no elimina el riesgo de lesiones, pero reduce su efecto en caso de accidente. Pida a su distribuidor que le asesore en la elección del equipo. ¡IMPORTANTE! Cuando use protección auditivapreste siempre atención a las señales o llamados de advertencia.
INSTRUCCIONES DE SEGURIDAD Parada Arranque el motor y asegúrese que el se haya detenido por completo cuando usted empuja y sostenga el interruptor STOP. Silenciador El silenciador está diseñado para reducir al máximo posible el nivel sonoro y para apartar los gases de escape del usuario. PRECAUCION: El silenciador con catalizador está deseñado para reducir las sustancias nocivas en los gases de escape.
INSTRUCCIONES DE SEGURIDAD Control, mantenimiento y servicio del equipo del seguridad de la máquina ¡IMPORTANTE! Todos los trabajos de servicio y reparación de la máquina requieren una formación especial. Esto es especialmente importante para el equipo de seguridad de la máquina. Si la máquina no pasa alguno de los controles indicados a continuación, acuda a su taller de servicio local. La compra de alguno de nuestros productos le garantiza que puede recibir un mantenimiento y servicio profesional.
INSTRUCCIONES DE SEGURIDAD S Compruebe regularmente que el silenciador esté firmemente montado en la máquina. S El silenciador en este aparato incorporan una rejilla apagachispas. El rejilla debe ser comprobado y en caso de necesidad, limpiar por una distribuidor autorizado del servicio. Si el rejilla se obstruye, la máquina se recalienta y produce daños serios. No utilice nunca un silenciador con el rejilla apagachispas dañado. Vea la sección Mantenimiento. ¡IMPORTANTE! Este capítulo describe cómo Ud.
INSTRUCCIONES DE SEGURIDAD Instrucciones generales de seguridad ¡IMPORTANTE! S La máquina está destinada exclusivamente a recortar la hierba. S Los únicos accesorios que Ud. puede acoplar al motor como fuente propulsora son los equipos de corte que nosotros recomendamos en la sección de “Datos Técnicos”. S Nunca use alambre, soga, hilo, etc.
INSTRUCCIONES DE SEGURIDAD S Mantenga alejados a terceros. Los niños, animales, curiosos y ayudantes deben mantenerse fuera de la zona de seguridad de 15 metros (50 pies). Se debe exhortar a los espectadores a que usen protección para los ojos. Pare la máquina inmediatamente si alguien se acerca. S Controle toda la máquina antes de arrancar. Cambie las piezas defectuosas. Controle que no haya fuga de combustible y que todas las protecciones y tapas estén en buenas condiciones y bien fijas.
INSTRUCCIONES DE SEGURIDAD Instrucciones generales de trabajo ¡IMPORTANTE! Esta sección trata reglas de seguridad fundamentales para el trabajo con la recortadora. Cuando se vea en una situación insegura para continuar el trabajo, debe consultar a un experto. Póngase en contacto con su distribuidor autorizado del servicio. Evite todo uso para el cual no se sienta suficientemente calificado. Antes del uso, Ud.
INSTRUCCIONES DE SEGURIDAD S El hilo se desgasta más rápido y se debe alimentar más seguido al trabajar contra piedras, ladrillos, hormigón, cercas de metal, etc. que al estar en contacto con árboles y cercas de madera. Corte S La recortadora es ideal para cortar en lugares que son difícilmente accesibles para un cortacésped común. Al cortar, mantenga el hilo paralelo al suelo. Evite presionar el cabezal de corte contra el suelo para no dañar el césped ni el equipo.
CONOZCA SU APARATO 1 2 3 7 19 5 6 4 9 11 10 12 17 8 16 14 15 18 1 20 13 21 Conozca su aparato 1. Cabezal de corte 2. Recarga de lubricante, engranaje angulado 3. Engranaje angulado 4. Protector 5. Parte superior del tubo 6. Parte inferior del tubo 7. Mango cerrado 8. Acelerador 9. Interruptor stop 10.Fiador del acelerador 11. Cubierta del cilindro 115374027 Rev. 5 5/15/12 12. Mango de la cuerda de arranque 13. Depósito de combustible 14. 15. 16. 17. 18. 19. 20. 21. 22.
MONTAJE NOTA: Asegúrese de que el aparato esté montada correctamente según lo demostrado en este manual. S Empuje el accesorio al interior del acoplamiento hasta que encaje en su posición. Montaje de mango de tipo cerrado S Calzar el mango cerrado sobre el tubo. Adviértase que el mango cerrado debe montarse entre las flechas del tubo. S Antes de usar el aparato, apriete la perilla firmemente. MOTOR S Introducir el distanciador en la ranura del mango cerrado. S Monte la tuerca, la perilla y el tornillo.
MONTAJE Montaje de la protector y la cabezal de corte S Montar la protector de la recortadora (D) para trabajar con el cabezal de corte. La protección de la recortadora/protector combinada se engancha en la sujeción del tubo y se fija con un tornillo (E). E F G D D S Coloque la pieza de arrastre (F) en el eje de salida. S Gire el eje hasta que uno de los orificios de la pieza de arrastre coincida con un orificio de la caja de engranajes.
MANIPULACION DEL COMBUSTIBLE Carburante ¡NOTA! El motor de la máquina es de dos tiempos y debe funcionar con una mezcla de gasolina y aceite para motores de dos tiempos. Para obtener una mezcla con las proporciones correctas debe medirse con precisión la cantidad de aceite a mezclar. En la mezcla de pequeñas cantidades de combustible, los errores más insignificantes en la medición del aceite influyen considerablemente en las proporciones de la mezcla.
MANIPULACION DEL COMBUSTIBLE Repostaje ADVERTENCIA: Las siguientes medidas preventivas reducen el riesgo de incendio: No fume ni ponga objetos calientes cerca del combustible. No haga nunca el repostaje con el motor en marcha. Apague el motor y deje que se enfríe unos minutos antes de repostar. Para repostar, abra despacio la tapa del depósito de combustible para evacuar lentamente la eventual sobrepresión. Después de repostar, apriete bien la tapa del depósito de combustible.
ARRANQUE Y PARADA Control antes de arrancar S Inspeccione el aparato y cambie las piezas dañadas o flojas antes de cada uso. Repare toda fuga de combustible antes de usar el aparato. Asegúrese todos los fijadores se encuentren bien ajustados. Asegúrese que el equipo de corte esté correctamente instalada y esté bien fijo. Utilice siempre línea flexible, no metálico, recomendado por el fabricante. Nunca use, por ejemplo, alambre, cuerda, hilo, etc.
ARRANQUE Y PARADA Motor caliente Con un motor caliente, coloque la palanca azul del estrangulador de la motor a la posición ½. Tire del cuerda hasta que el motor arranca. Coloque la palanca azul del estrangulador de la motor a la posición abierta. Parada Para detener el motor, empuje y sostenga el interruptor stop en la posición STOP hasta que el motor se haya detenido por completo.
MANTENIMIENTO El dueño es responsable de adquirir todo el mantenimiento requerido como lo define en el manual de instrucciones. Carburador Su producto Husqvarna ha sido construido y fabricado conforme a especificaciones que reducen los gases de escape tóxicos. Cuando el motor ha consumido 8--10 depósitos de combustible, se dice que el motor ha sido rodado.
MANTENIMIENTO El silenciador incorporan una rejilla apagachispas. El rejilla debe ser comprobado y en caso de necesidad, limpiar por una distribuidor autorizado del servicio. Si el rejilla presenta daños, se debe cambiar el rejilla. Si el rejilla se obstruye con frecuencia, esto puede ser señal de que el catalizador no funciona correctamente. Consulte a su distribuidor para un inspección. Si el rejilla se obstruye, la máquina se recalienta y se dañan el cilindro y el pistón.
MANTENIMIENTO Programa de mantenimiento A continuación, se indican algunas instrucciones generales de mantenimiento. Mantenimiento diario Limpie el filtro cada 25 horas de funcionamiento o más seguido si trabaja en un entorno muy polvoriento. Limpieza del filtro de aire Desmonte la cubierta del filtro de aire y retire el filtro. Lávelo en agua jabonosa caliente. Aclare el filtro totalmente. Controle que el filtro esté seco antes de volver a montarlo.
Reemplazo de la línea en el cabezal de corte 6m 20i 3m 10i 115374027 Rev.
Tri Cut 1 3 6 2 5 4 7 8 115374027 Rev.
DATOS TECNICOS Datos técnicos Motor Cilindrada, cm3 Diámetro del cilindro, mm Carrera, mm Régimen de ralentí, r.p.m. Régimen máximo de embalamiento recomendado, rpm Velocidad en el eje de salida, rpm Potencia máxima del motor según ISO 8893, hp/kW Silenciador con catalizador Sistema de encendido conreg.
DECLARACION DE GARANTIA DE CONTROL DE EMISION DE U.S. EPA / CALIFORNIA / AGENCIA AMBIENTAL CANADIENSE IMPORTANTE: Este producto es confor- me con la normativa Fase 3 de la Agencia de Protección Ambiental de los Estados Unidos (EPA) referente a emisiones de escape y evaporación. Para asegurar la conformidad con EPA Fase 3, se recomienda utilizar sólo repuestos originales de la marca HUSQVARNA. El uso de otro tipo de repuestos incumple las leyes federales.
DECLARACION DE GARANTIA DE CONTROL DE EMISION DE U.S. EPA / CALIFORNIA / AGENCIA AMBIENTAL CANADIENSE PERIODO DE GARANTIA: Cualquier pieza garantizada que no esté programada para ser reemplazada como parte del mantenimiento requerido, o que esté programada únicamente para inspección regular para efectos de ”reparación o reemplazo si fuera necesario” deberá garantizarse por un período de dos años.