
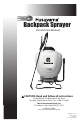
Use and Care Guide


page 6
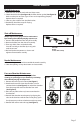
SERVICING INSTRUCTIONS
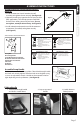
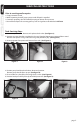
Tank Servicing Steps
1. Unscrew cap from tank. Remove and replace check valve. (See Figure 1)
2. Remove pressure chamber as outlined in Pressure Chamber Maintenance section of the manual.
Remove and replace o-ring. Lubricate o-ring with petroleum jelly. (See Figure 2)
3. Unsnap agitator from piston rod. Remove from tank. (See Figure 3)
Figure 3
Figure 2
Figure 1
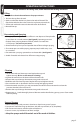
4. Position pump handle to the furthest downward position.
Remove pump handle from sprayer. (See Figure 4)
5. Disassemble carry handle by removing the (6) screws. (See Figure 5)
6. Remove hitch pin and lift pivot clip o of the piston rod. (See Figure 6)
Figure 6
Figure 4
Figure 5
Prior to servicing and/or repairs.
1. Empty contents of tank.
2. While squeezing shut-o, pump sprayer until all liquid is expelled.
3. Continue squeezing shut-o without pumping to release all air pressure.
4. You will nd all parts for servicing primary seals and gaskets to be included in KIT #32.