
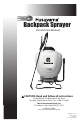
Use and Care Guide


SERVICING INSTRUCTIONS CONTINUED
page 8
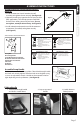
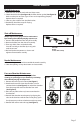
16. Attach pivot clip to piston rod and insert hitch pin. Note orientation of piston rod must match the pivot
clip. (See Figure 16)
17. Reassemble carry handle onto tank. Tighten all (6) screws. (See Figure 5)
18. To reinstall the agitator, line the notch up on the agitator with the swedge on piston rod and snap
into place. (See Figure 17)
19. Reinstall pressure chamber as outlined in the Pressure Chamber Maintenance section. (See Figure 18)
Figure 16 Figure 17 Figure 18
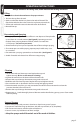
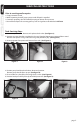
Harness Installation
1. For each side, remove the small plastic clips
from the two shoulder strap loops and thread
each loop through the slots at the top of the
carry handle. Replace the clips through the
loops and pull strap securing the two shoulder
straps in place. (See Figure 20)
2. To install lower end of the straps, remove strap
from top portion of buckles and place around
the foot stand, starting from underneath.
(See Figure 21)
3. Loop strap through the rst section of buckle.
(See Figure 22)
4. Next loop strap through other section of buckle
and tighten (See Figure 23). Adjust the
shoulder pads and strap length for a
comfortable t.
Figure 23Figure 22
Figure 21
Figure 20
Figure 19
20. Replace tank cap, lter (See FIgure 19) and pump handle (See Figure 4).