Operator′s manual 536LiHD60X 536LiHD70X Please read the operator’s manual carefully and make sure you understand the instructions before using the machine.
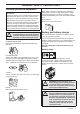
KEY TO SYMBOLS Symbols on the machine: Translation of the original Swedish operating instruction. WARNING! Incorrect or careless use of a hedge trimmer can turn it into a dangerous tool that can cause serious or even fatal injury. It is extremely important that you read and understand the contents of this operator's manual. Please read the operator’s manual carefully and make sure you understand the instructions before using the machine.
KEY TO SYMBOLS You will find the following labels on your hedge trimmer, battery and battery charger: DANGER: Keep hands away from blade. Use only Husqvarna Batterytype BLi. DANGER: No tocar la cuchilla. Utiliser uniquement des batteries Husqvarna AB Huskvarna SWEDEN Husqvarna de type BLi. PELIGRO: Garder mains à distance. Utilice únicamente baterías Husqvarna tipo BLi. EXXXXXX 581 66 30-02 S-561 82 Huskvarna, Sweden Typ QC 330 2014 Art.No. 966 73 06-01 PRI: 100V - 240V ~ 50-60Hz 330W max.
CONTENTS Contents KEY TO SYMBOLS Symbols on the machine: ...................................... Symbols on the battery and/or on the battery charger: ................................................................. Symbols in the operator’s manual: ........................ CONTENTS Contents ............................................................... Note the following before starting: ........................ INTRODUCTION Dear Customer, .....................................................
INTRODUCTION Dear Customer, Congratulations on your choice to buy a Husqvarna product! Husqvarna is based on a tradition that dates back to 1689, when the Swedish King Karl XI ordered the construction of a factory on the banks of the Husqvarna River, for production of muskets. The location was logical, since water power was harnessed from the Huskvarna River to create the waterpowered plant.
WHAT IS WHAT? 21 4 5 9 3 13 14 2 10 15 6 1 16 20 7 15 11 8 17 18 What is what? 1 Operator′s manual 12 Cord 2 Rear handle 13 Battery indicator button 3 Power trigger lockout 14 Battery status 4 Front handle 15 Warning indicator 5 Blade and blade guard 16 SavE button 6 Transport guard 17 Activate and deactivate button 7 Power trigger 18 Power on and warning indicator 8 Control panel 19 Battery release buttons 9 Hand guard 20 Lock for handle 10 Battery 11 Battery charg
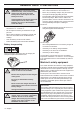
GENERAL SAFETY PRECAUTIONS General power tool safety warnings • Do not overreach. Keep proper footing and balance at all times. This enables better control of the power tool in unexpected situations. Please read the operator’s manual carefully and make sure you understand the instructions before using the machine. • Dress properly. Do not wear loose clothing or jewellery. Keep your hair, clothing and gloves away from moving parts. Loose clothes, jewellery or long hair can be caught in moving parts.
GENERAL SAFETY PRECAUTIONS Battery tool use and care • Recharge only with the charger specified by the manufacturer. A charger that is suitable for one type of battery pack may create a risk of fire when used with another battery pack. • Use power tools only with specifically designated battery packs. Use of any other battery packs may create a risk of injury and fire.
GENERAL SAFETY PRECAUTIONS Personal protective equipment IMPORTANT! Incorrect or careless use of a hedge trimmer can turn it into a dangerous tool that can cause serious or even fatal injury. It is extremely important that you read and understand the contents of this operator's manual. You must use approved personal protective equipment whenever you use the machine. Personal protective equipment cannot eliminate the risk of injury but it will reduce the degree of injury if an accident does happen.
GENERAL SAFETY PRECAUTIONS ! WARNING! Never connect the battery terminals to keys, coins, screws or other metal as this may short-circuit the battery. Never insert objects into the battery's air vents. • Regularly check that the battery charger connection wire is intact and that there are no cracks in it. • Never carry the battery charger using the cord and never pull out the plug by pulling the cord. • Keep all cables and extension leads away from water, oil and sharp edges.
GENERAL SAFETY PRECAUTIONS ! WARNING! Never use a machine with faulty safety equipment. The machine's safety equipment must be checked and maintained as described in this section. If your machine fails any of these checks contact your service agent to get it repaired. Turn on the machine. Press the power trigger lockout on the front handle. Control panel Make sure the machine is switched on or off when the activate/deactivate button (1) is pressed and held (>1 sec.).
GENERAL SAFETY PRECAUTIONS Blade and blade guard Li-ion The outer part of the blades (1) is shaped as blade guards. 1 Check that the blade guard is not damaged or distorted. Replace the cutting unit if it is bent or damaged. The term ”power tool” in the warnings refers to your mains-operated (corded) power tool or battery-operated (cordless) power tool. Fitting the end protection on the cutting deck The tip protector is used to protect the outer end of the blade.
BATTERY HANDLING Battery The display shows the battery capacity and if there are any problems with the battery. The battery capacity is displayed for 5 seconds after the machine is switched off or the battery indicator button is pressed. The warning symbol on the battery is lit when an error has occurred. See fault codes. 1 2 3 4 LED lights Battery status All LEDs are lit Fully charged (75-100%). LED 1, LED 2, LED 3 are lit. The battery is 50%-75% charged. LED 1, LED 2 are lit.
BATTERY HANDLING • Ensure the machine is cleaned and that a complete service is carried out before long-term storage. The battery is 0%-25% charged. • Transport guard must always be used for storage and transport. LED 1 is lit, LED 2 flashes. The battery is 25%-50% charged. LED 1, LED 2 are lit, LED 3 flashes. The battery is 50%-75% charged. Disposal of the battery, battery charger and machine LED 1, LED 2, LED 3 are lit, LED 4 flashes.
STARTING AND STOPPING Check before starting Starting Turn on the machine. Press and hold the start button (>1 sec.) until the green LED is lit. Li-ion • Inspect the working area. Remove any objects that could be thrown out. • Check the cutting attachment. Never use blades that are dull, cracked or damaged. • Check that the machine is in perfect working order. Check that all nuts and screws are tight. • Only use the machine for the purpose it was intended for.
WORKING TECHNIQUES General working instructions IMPORTANT! • Never use the machine in bad weather, for instance in fog, in rain, strong winds, intense cold, etc. • If any foreign object is hit or if vibrations occur stop the machine immediately. Remove the battery from the machine and check that the machine is not damaged. This section takes up the basic safety precautions for working with a hedge trimmer. If you encounter a situation where you are uncertain how to proceed you should ask an expert.
WORKING TECHNIQUES • • • • • • • Always use both hands to hold the machine. Hold the machine at the side of your body. Make sure that no clothes or parts of the body come in contact with the cutting equipment when it is activated. When the motor is switched off, keep your hands and feet away from the cutting attachment until it has stopped completely. Watch out for stumps of branches that can be thrown out during cutting. Do not cut too close to the ground.
MAINTENANCE Inspection and maintenance are always clean and dry before the battery is placed in the battery charger. Li-ion ! WARNING! Always remove the battery before any maintenance on the machine. IMPORTANT! Never clean the battery or the battery charger with water. Strong cleaning agents can damage the plastic. All servicing and repair work on the machine requires special training. This is especially true of the machine′s safety equipment.
MAINTENANCE Troubleshooting schedule Control panel Troubleshooting takes place from the keypad. LED display Possible faults Green activate LED flashing. Low battery voltage. Charge the battery. Overload. The cutting attachment is jammed. Release the cutting attachment. Error LED flashes. Possible action Temperature deviation. Allow the machine to cool down. The power trigger and the activate button are pressed at the same time. Release the power trigger and the machine is active.
MAINTENANCE Maintenance schedule ! WARNING! Always remove the battery before any maintenance on the machine. The following is a list of the maintenance steps that must be performed on the machine. Most of the items are described in the Maintenance section. The user must only carry out the maintenance and service work described in this Operator's Manual. More extensive work must be carried out by an authorized service workshop.
TECHNICAL DATA Technical data Motor 536LiHD60X 536LiHD70X Motor type PMDC (4-brush) PMDC (4-brush) Weight Weight without battery, kg 3.
TECHNICAL DATA EC Declaration of Conformity (Applies to Europe only) Husqvarna AB, SE-561 82 Huskvarna, Sweden, tel: +46-36-146500, declare under sole responsibility that the hedge trimmers Husqvarna 536LiHD60X, 536LiHD70X from 2013’s serial numbers and onwards (the year is clearly stated in plain text on the type plate with subsequent serial number), are in conformity with the standards or or other normative documents following the provisions in the COUNCIL’S DIRECTIVES: - of May 17, 2006 ”relating to mach
1155453-26 ´®z+WM@¶6o¨ ´®z+WM@¶6o¨ 2017-01-04