
Operators Manual


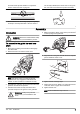
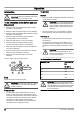
Table Of Contents
- Contents
- Introduction
- Safety
- Assembly
- Operation
- Maintenance
- Introduction
- Maintenance schedule
- Maintenance and checks of the safety devices on the product
- To do a check of the brake band
- To do a check of the front hand guard and the chain brake activation
- To do a check of the chain brake
- To do a check of the throttle trigger and throttle trigger lockout
- To do a check of the chain catcher
- To do a check of the right hand guard
- To do a check of the vibration damping system
- To do a check of the start/stop switch
- To do a check of the muffler
- _
- To replace a broken or worn starter rope
- To tighten the recoil spring
- To assemble the starter housing on the product
- To clean the air filter
- To do a check of the spark plug
- To sharpen the saw chain
- To adjust the tension of the saw chain
- To do a check of the saw chain lubrication
- To do a check of the rim sprocket
- To lubricate the needle bearing
- To examine the cutting equipment
- To do a check of the guide bar
- To do maintenance on the fuel tank and the chain oil tank
- To adjust the chain oil flow
- Air cleaning system
- To clean the cooling system
- Troubleshooting
- Transportation and storage
- Technical data
- Accessories
- EC Declaration of Conformity

and chain drive sprocket. Refer to
To adjust the
tension of the saw chain on page 28
.
• Do maintenance on the cutting equipment regularly
and keep it correctly lubricated. If the saw chain is
not correctly lubricated, the risk of wear on the guide
bar, saw chain and chain drive sprocket increases.
Assembly
Introduction
WARNING: Read and understand the safety
chapter before you assemble the product.
To assemble the guide bar and saw
chain
1. Move the front hand guard rearward to disengage
the chain brake.
2. Remove the bar nuts and the clutch cover.
Note: If the clutch cover is not easy to remove,
tighten the bar nut, engage the chain brake and
release. A click is heard if it is released correctly.
3. Assemble the guide bar onto the bar bolts. Move the
guide bar to its most rear position.
4. Install the saw chain correctly around the drive
sprocket and put it in the groove on the guide bar.
WARNING: Always use protective
gloves when you assemble the saw
chain.
5. Make sure that the edges of the cutters point forward
on the top edge of the guide bar.
6. Align the hole in the guide bar with the chain adjuster
pin and install the clutch cover.
7. Tighten the bar nuts finger tight.
8. Tighten the saw chain. Refer to
To adjust the tension
of the saw chain on page 28
for instructions.
9. Tighten the bar nuts.
Note:
Some models have only 1 bar nut.
140 - 005 - 18.09.2019 9